
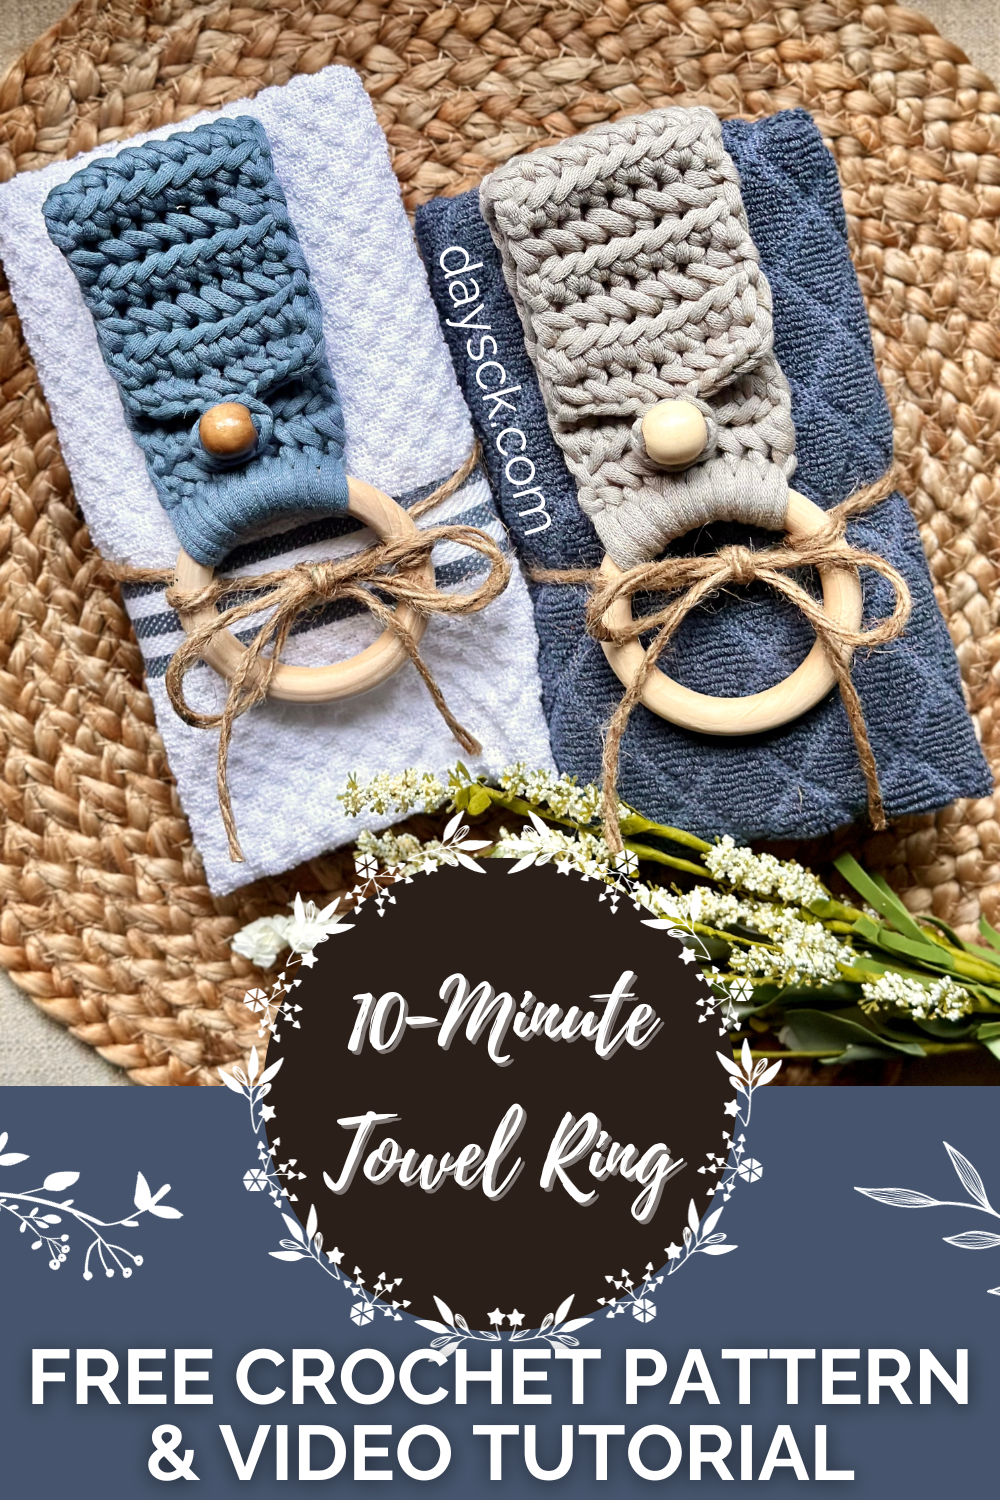
10 Minute Towel Ring | No Sew Crochet Towel Set
If you love crochet towel toppers, you are going to love this modern towel ring!
PIN it here!

PIN it here!
it’s quick & easy
I recently had my biggest market of the year, and I was very pressed for time. I was brainstorming for projects that wouldn’t take me long to make and had a higher profit margin due to the low cost of materials. That’s when I came up with what I have dubbed the “10-Minute Towel Ring”.
It’s no sew!
This towel ring really does only take me 10 minutes to make from start to finish, and uses very little yardage. Because I use a wooden bead for my button closure, it is also no sew, and I will show you how that’s possible in this tutorial.
It uses a fun new stitch pattern
I have included a YouTube video tutorial with this simple project because, not only does it use a new stitch pattern I just recently learned, I also show you my tips and tricks for how to make the entire project with only 1 end to weave in. WOOT!
It’s great for Crochet Christmas gifts
Not only does it work great for market prep, it makes a great gift. With the holidays just around the corner, I am going to show you how I package this towel ring to give it a professional look that will make it a fabulous Christmas gift. Each gift set costs less than $5 each, making it a cost-effective, useful (and pretty!) gift idea for the Christmas season.
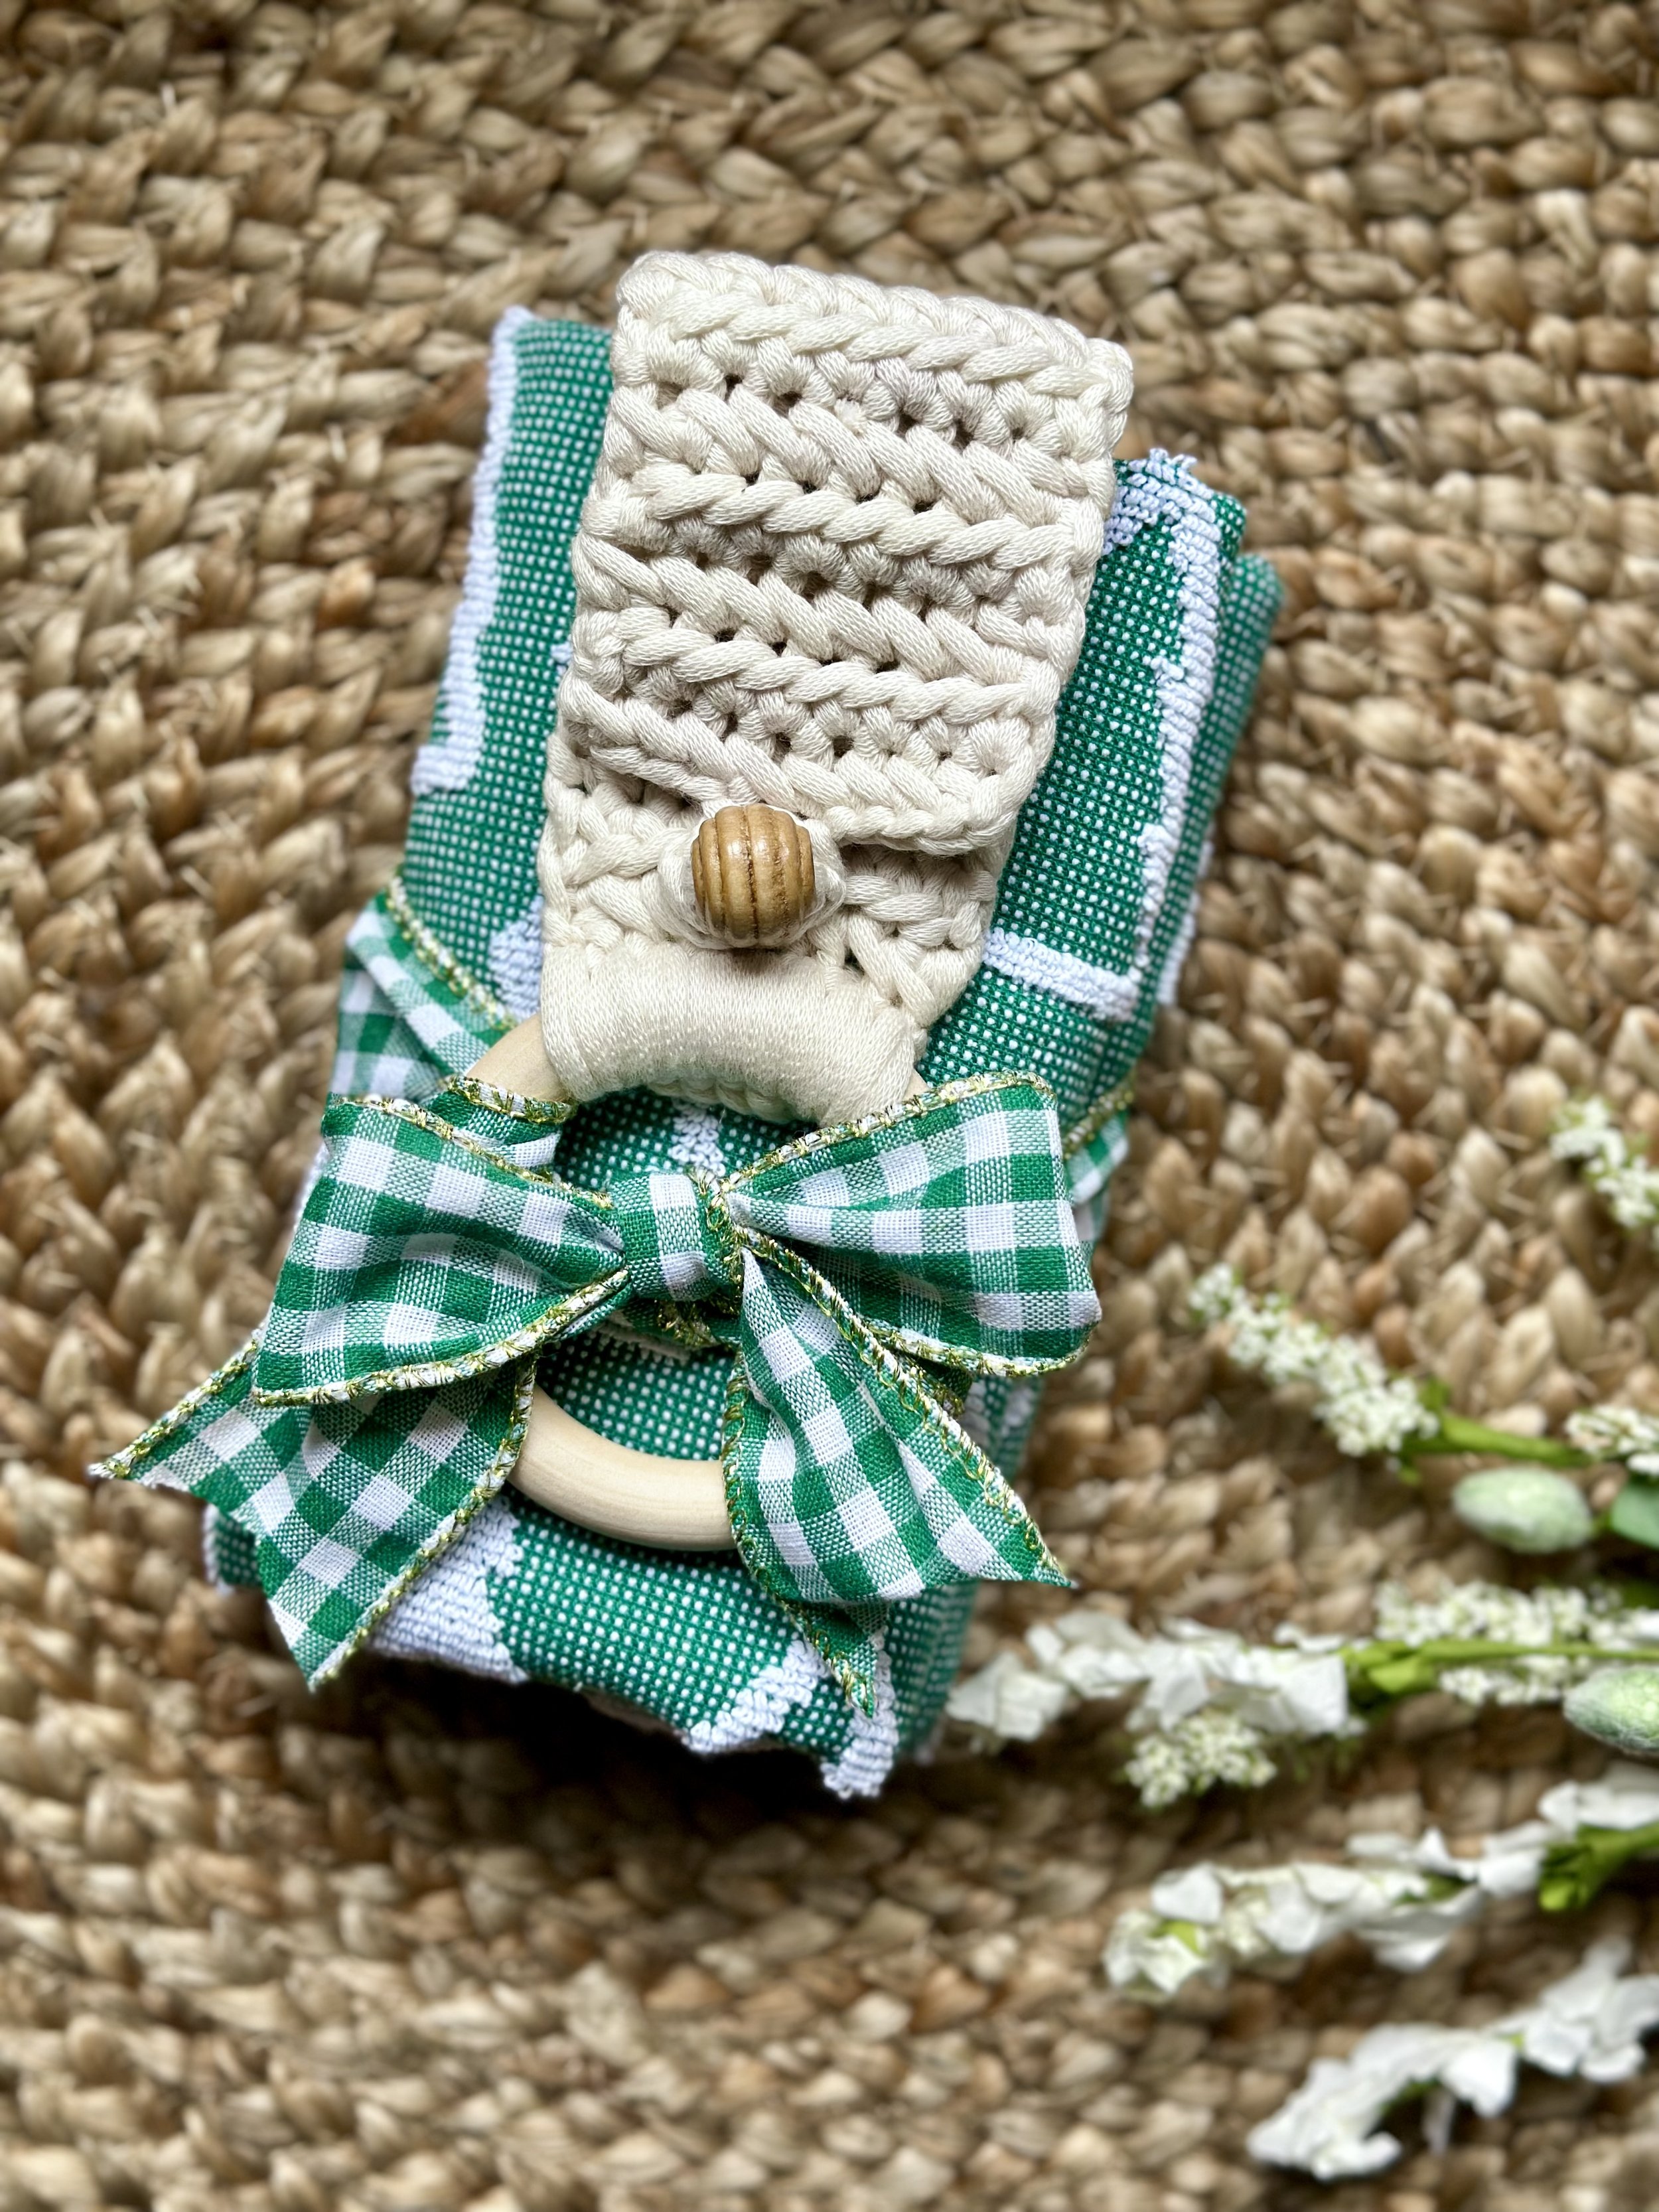
I am obsessed with how cute these are! I got the Christmas towel and matching ribbon from Dollar General.
Professional packaging allows you to sell it for more
This packaging also makes it possible for you to charge more at your markets. With this professional packaging, I went from only getting about $5 for my towel rings to being able to charge $12 when packaged with a nice towel. The towels were $5 for a pack of 3 at my local Roses’ department store, making the cost of supplies only around $4 total per towel ring + towel gift set.

I have found consistently that my customers prefer neutral towels over holiday-themed towels. They can use them year round. I sell out every year!
how to make $32 an hour with this project
I can crochet each towel ring in 10 minutes, then it takes me about 5 minutes to fold the towel and tie the ribbon or the twine around them in a nice bow. That means I can make around 4 sets an hour. If I sell them for $12, that’s $8 in profit, meaning I would make around $32 an hour with this project!
display it in use at your craft fairs
I will mention that these did not sell as well until I put one up displaying how it works. People couldn’t really tell by just looking at the towel ring sets what the towel ring actually was. After I started displaying them in use, they started selling very well. Just wanted to throw that out there in case you wanted to add them to your craft fair inventory!
craft fair display pro tip!
Pro tip: I display all of my crochet towel toppers and towel rings on a decorative wooden blanket ladder. They are the perfect size for this purpose and allows me to set the ladder on the ground in front of my booth. I put all the extras in a basket at the base of the ladder for people to rummage through. This clears up space on my tables and I don’t have to try to find a way to display them vertically on my tables or my peg boards.

You can see my blanket ladder on the left with my towels. I didn’t display the towel rings at the beginning, but did later, after I noticed people asking what they were.
let’s make it!

PIN it here!
supplies needed
20-25 yds. of Bernat Home Maker Dec yarn, or any size 4 worsted weight cotton (see pattern notes)
Size 5.0 mm hook, or size needed to obtain gauge
Size 3.75 mm hook (only if using a bead for the button; see pattern notes)
12 mm wooden bead or button
70 mm (2.75 inch) wooden ring
Scissors, yarn needle, tape measure
terms used & abbreviations
Pattern is written in US terminology.
Chain(s) - ch(s)
Half Double Crochet - hdc
Linked Half Double Crochet - LHD
Repeat - rep
Single Crochet - sc
Skip - sk
Slip stitch - sl st
Space(es) - sp(s)
Stitch(es) - st(s)
Yarn Over - YO
* - Repeat directions given from *
[ ] - Indicates the number of stitches you should have
( ) - Indicates a note
{ } - Work stitches within { } in the same stitch or space
special terminology
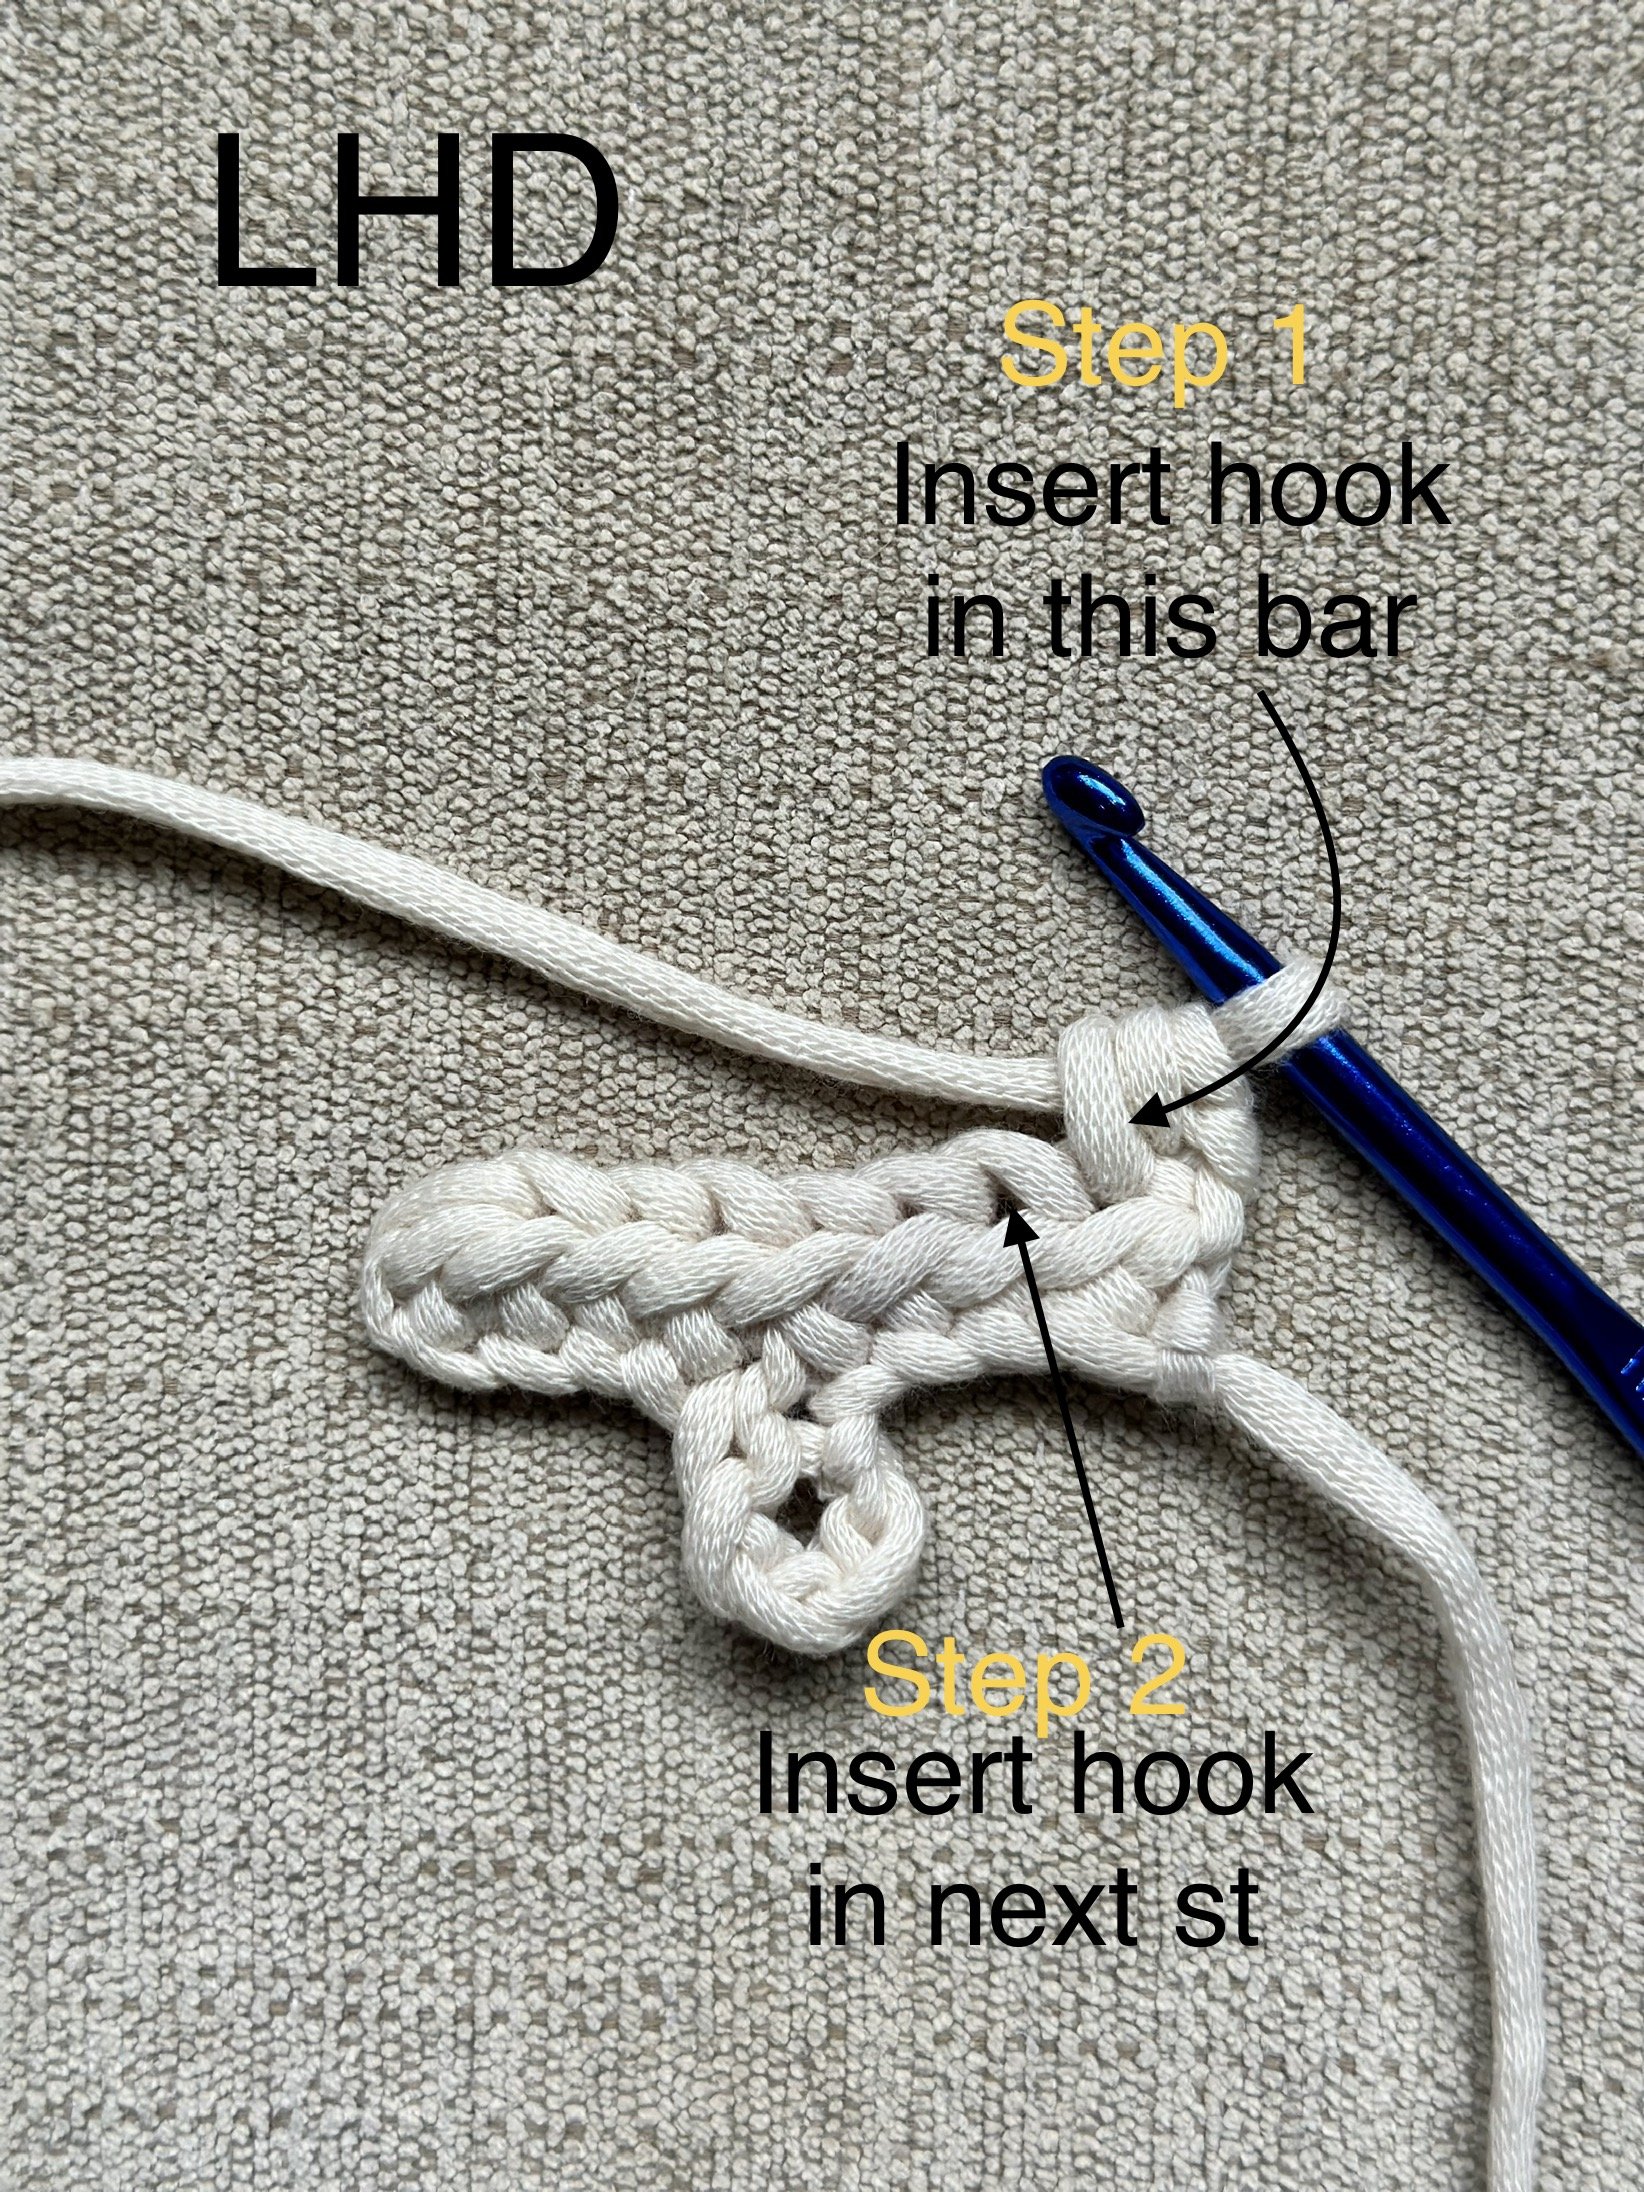
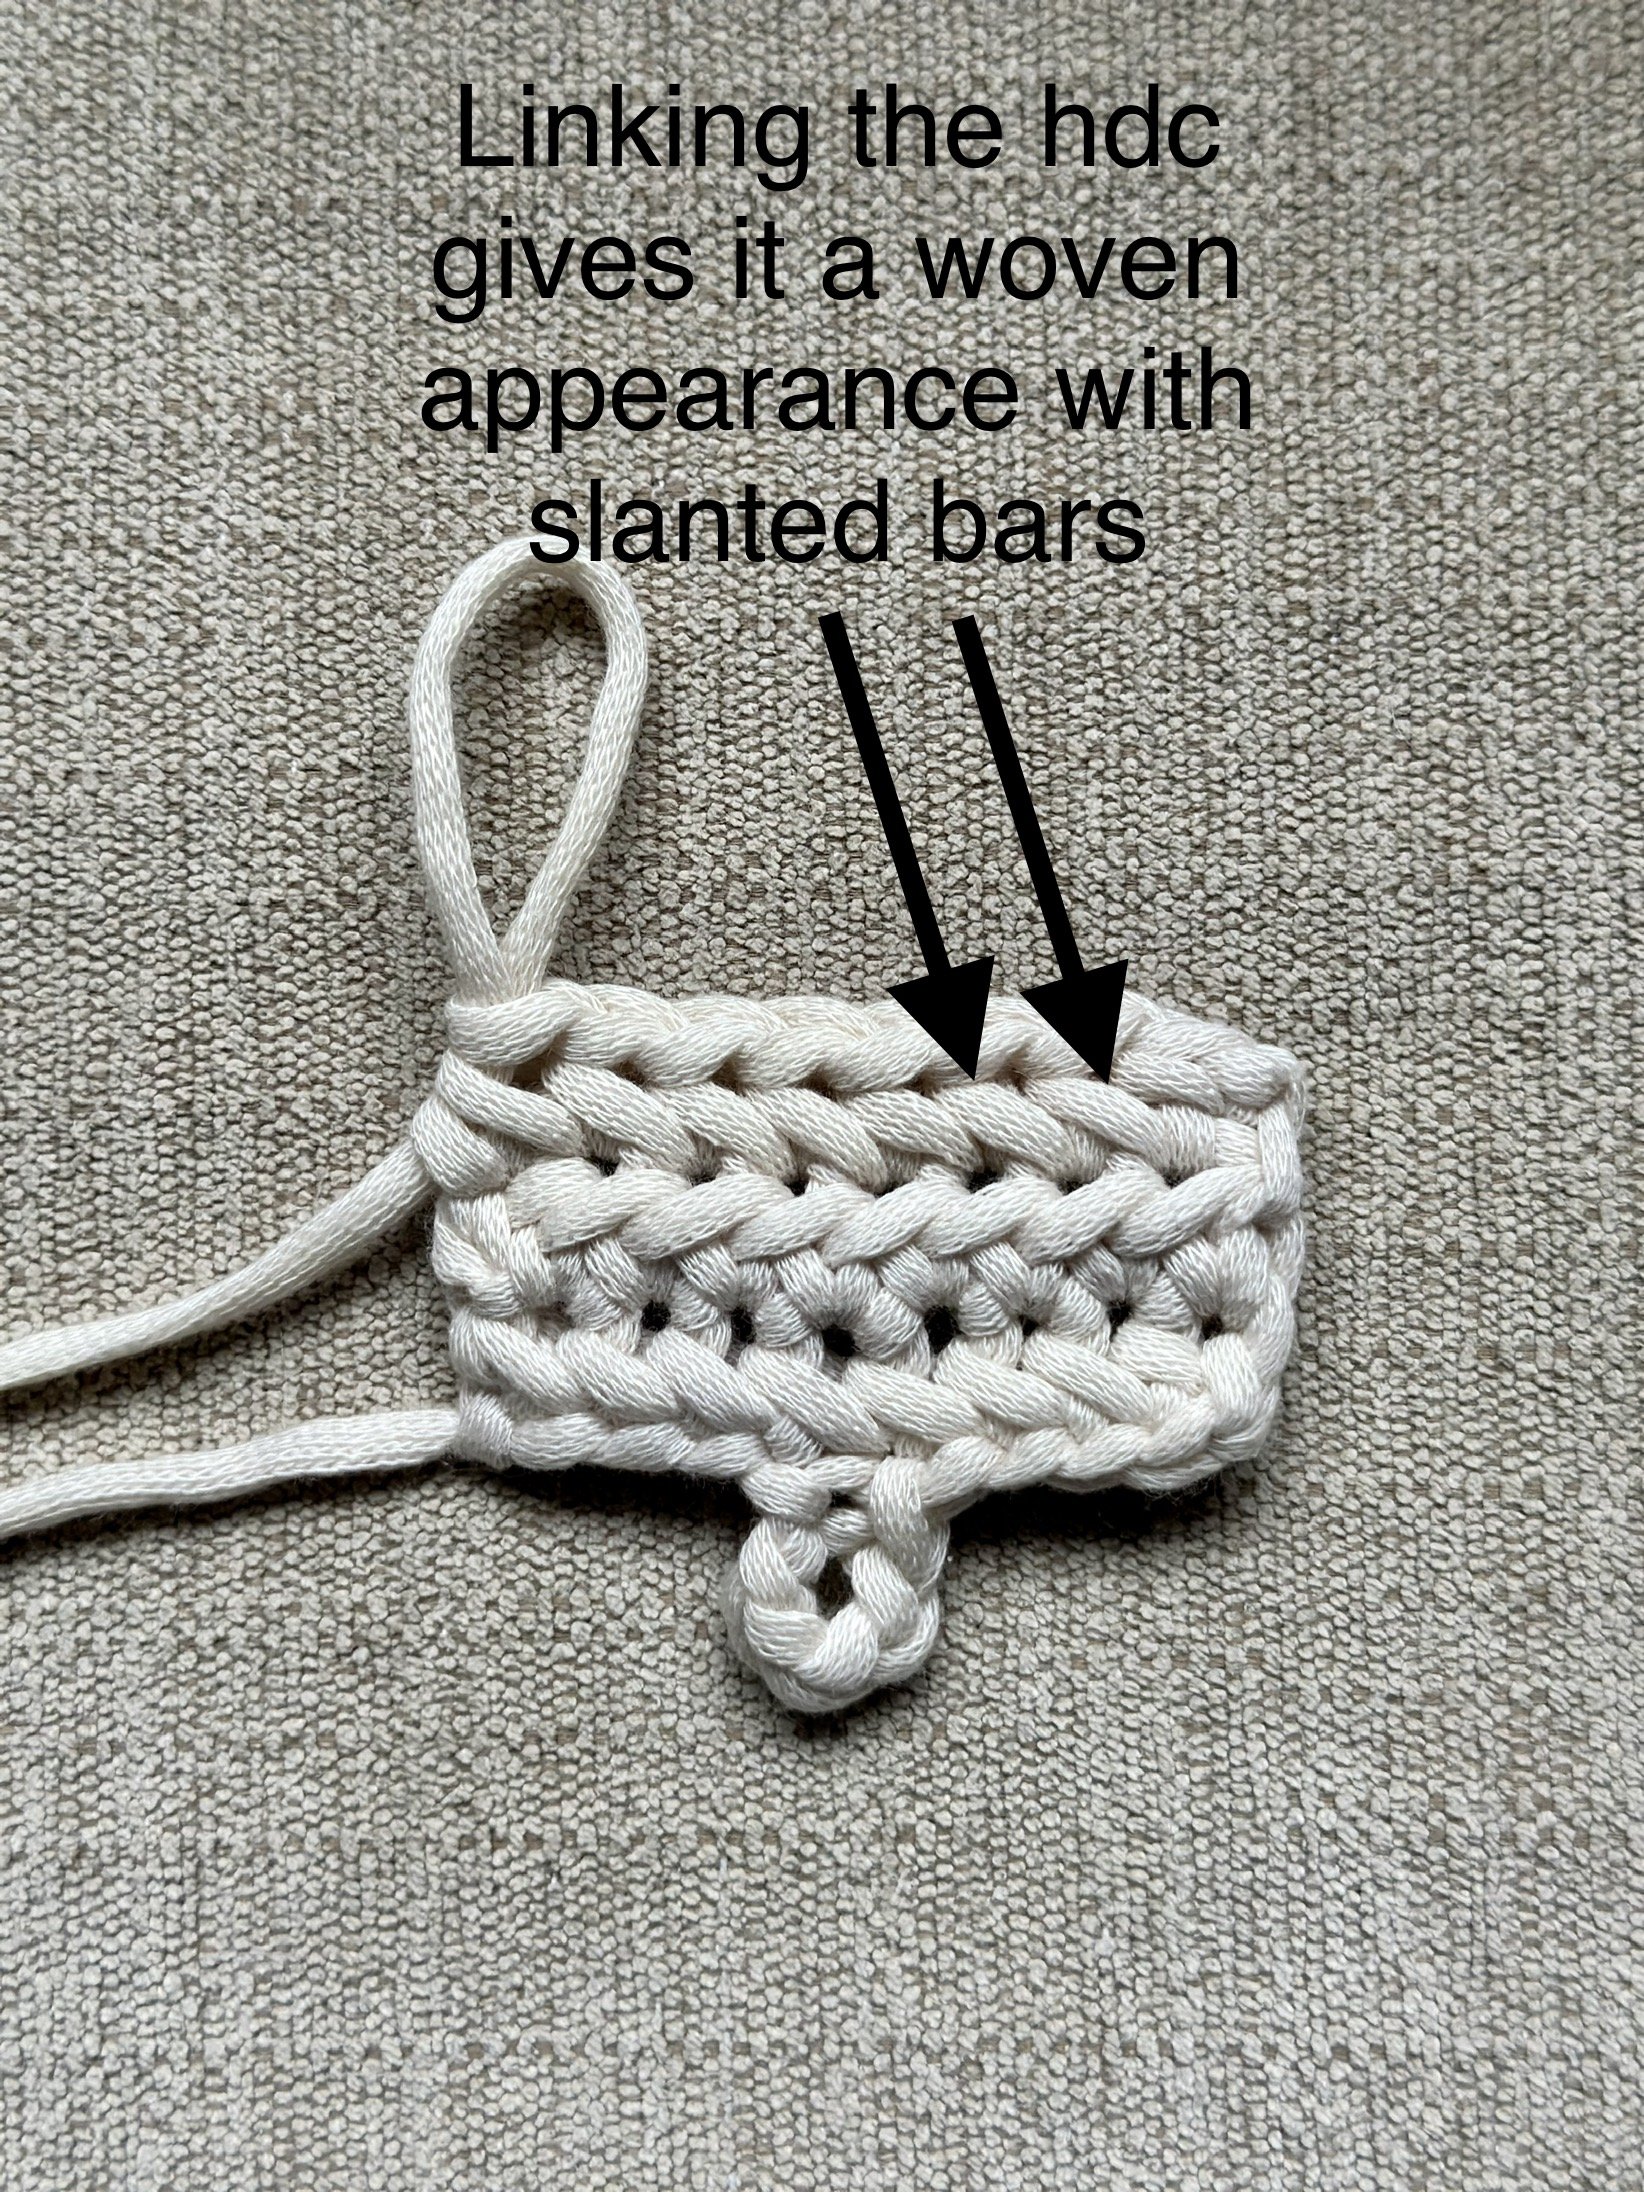
Linked Half Double Crochet (LHD) - Insert your hook into the first vertical bar of the last st, insert your hook into the next open st, YO, pull up a loop (3 loops on hook), YO, pull through all loops on hook. (NOTE: inserting your hook into the previous st before inserting your hook into the next st “links” the sts together and results in a woven appearance. This is technically a variation of the original LHD st, but I was unsure what to call this st.)
how to make a linked half double crochet
steps 1-2
Insert your hook into the first bar of your last st. Then insert your hook into the next open st.
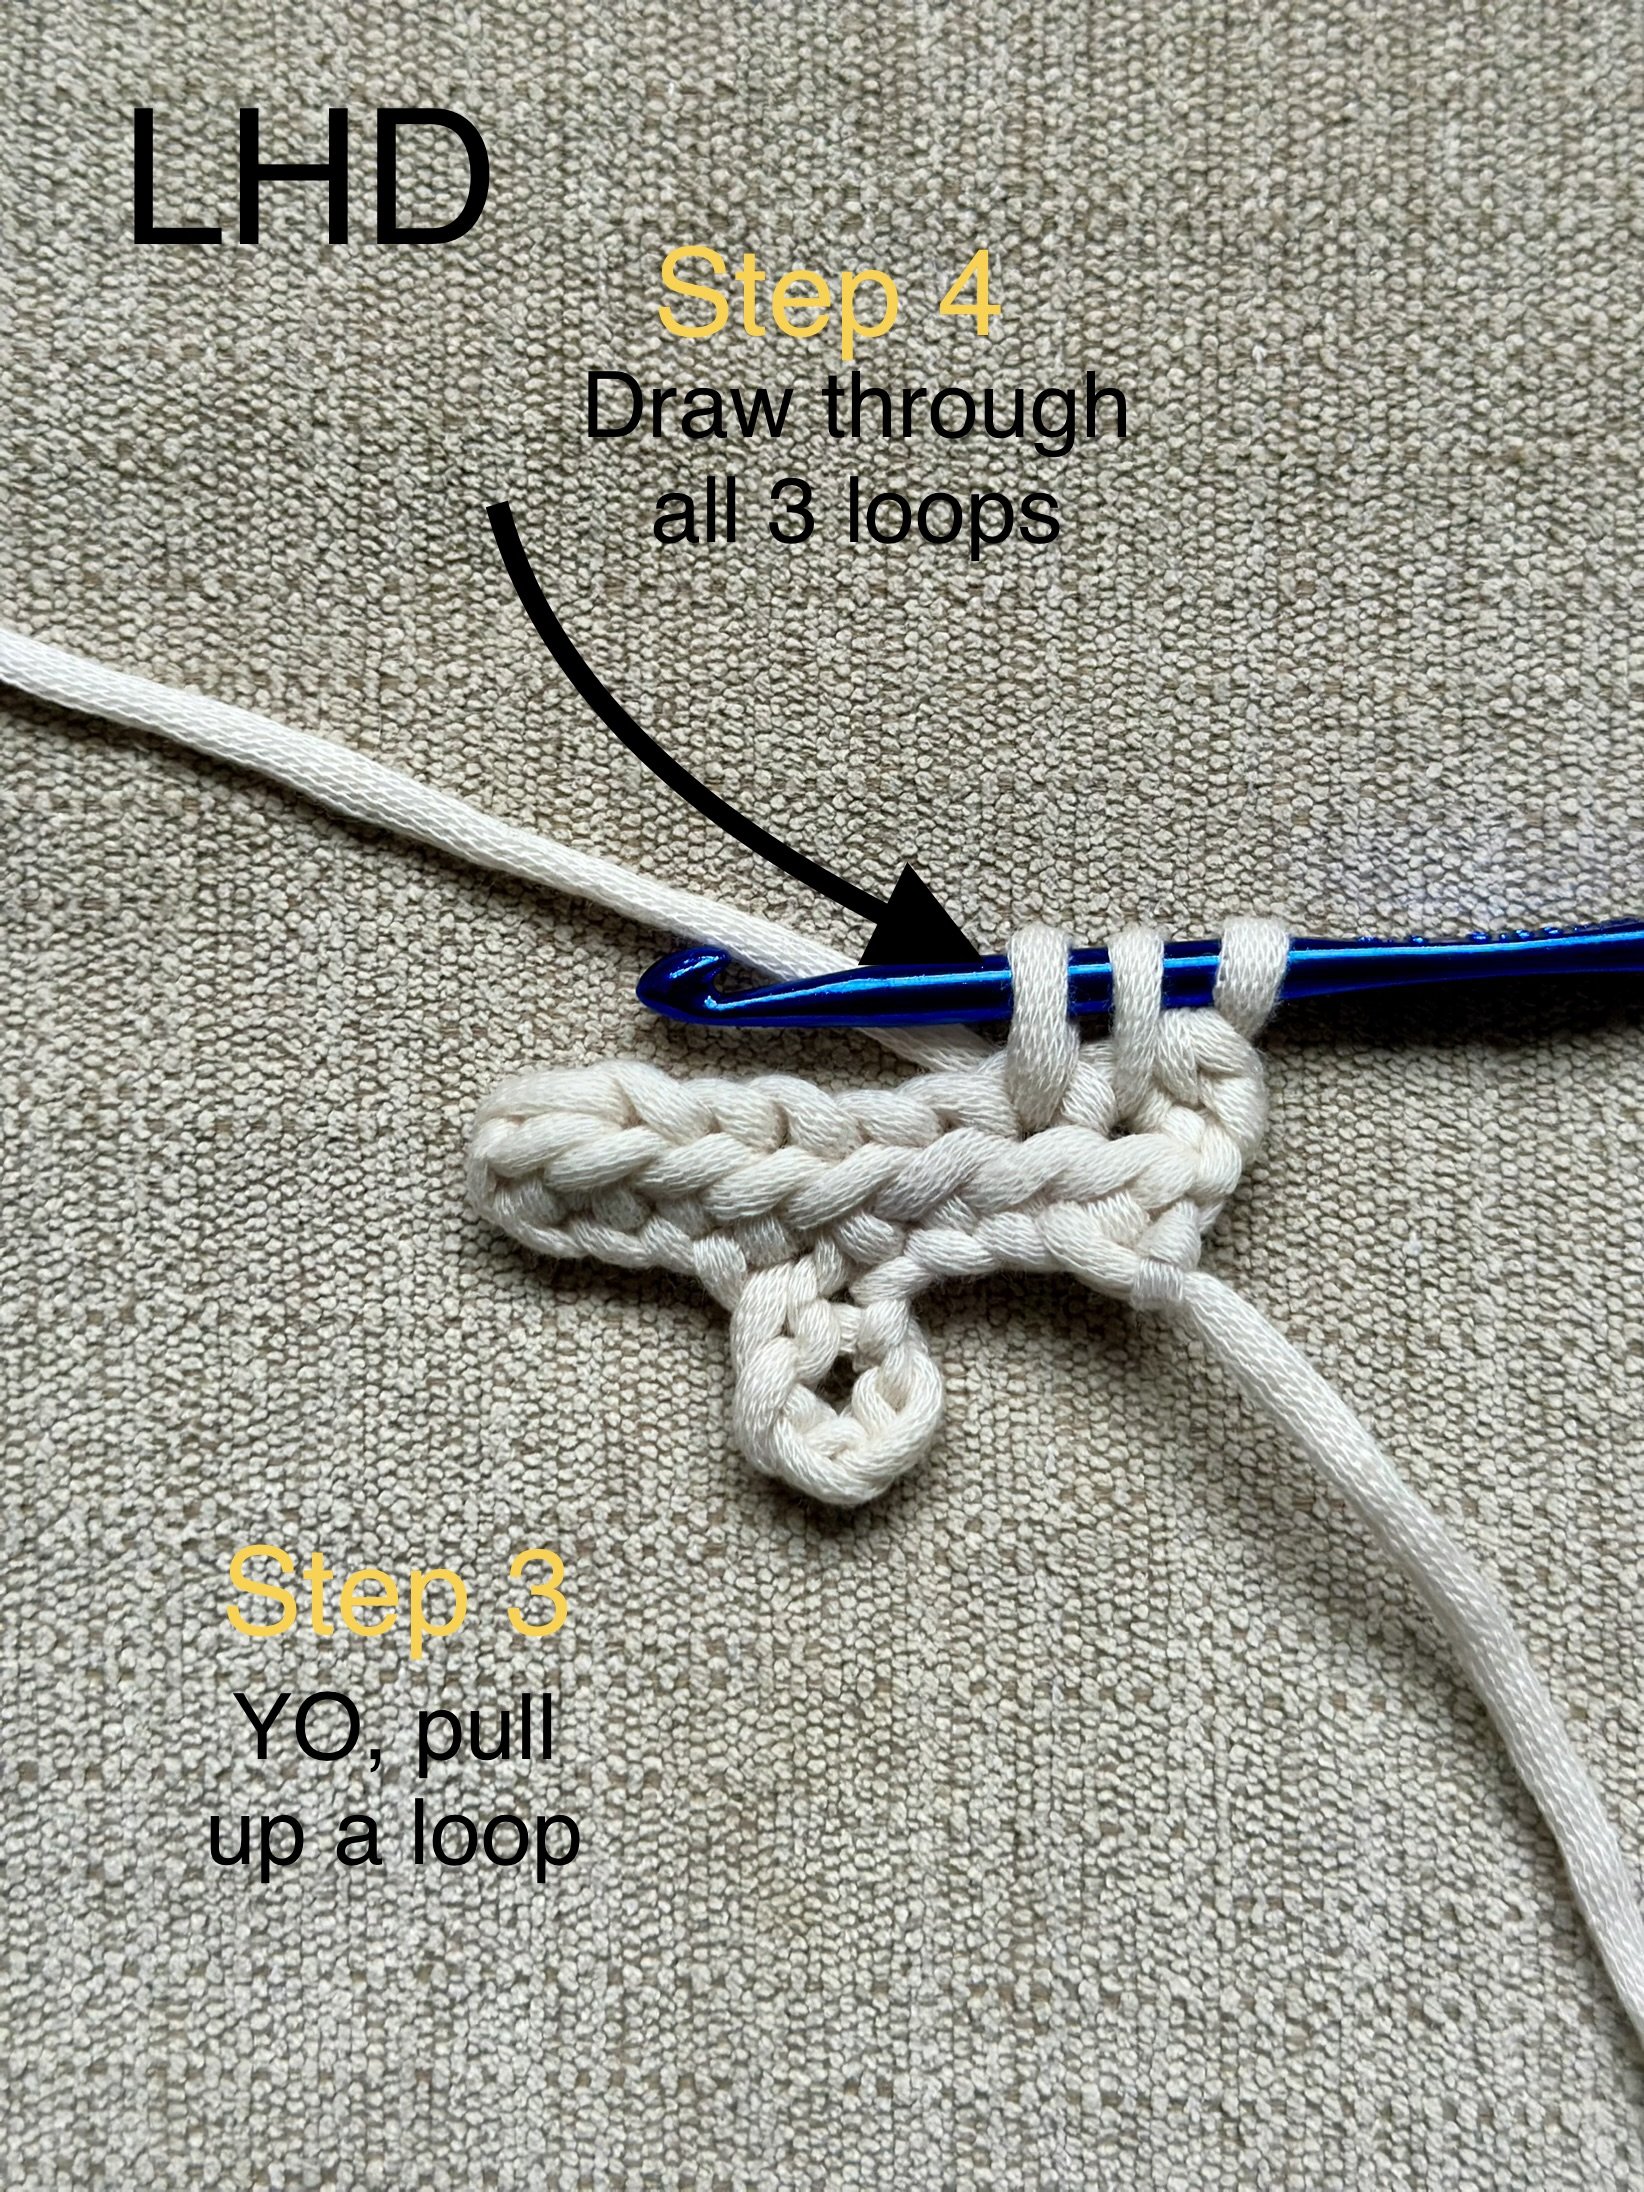
steps 3-4
YO, pull up a loop (3 loops on hook). YO, draw through all loops on hook.
linking your half double crochet gives a herringbone appearance with slanted bars
pattern notes
Beginning chs do not count as a st.
Be sure to read the LDH st definition carefully, as it is a modified version of the original LHD found in other YouTube videos.
The button loop is made in the foundation row of this pattern. If you wish to use a different size button than what is listed in the supply list, be sure to test the fit before moving on in the pattern.
If you choose to use regular worsted weight yarn (size 4) for this project, I recommend going up a hook size or using a looser tension.
You will want to use a cotton or a cotton blend for this project, like Peaches & Creme or Yarn Bee Fundamental Cotton. Acrylic tends to stretch unbecomingly over time.
If you are using a wooden bead for the button, I instruct you how to add it into your work as you go rather than sewing it on later. If you are using a button, you will need to read the note at the end of row 15 to understand how to move on.
In the YouTube video tutorial, I show you tricks for how to work your project so that it is no-sew and only 1 end to weave in. You can watch the full tutorial here:
gauge
7 sts and 5 rows of LDH = 2 inches
Exact gauge is not imperative in this pattern.
finished measurements
Finished towel ring measures approx. 7 in. long and 2.5 in. wide, not including the wooden ring or the button loop. Measurements were taken with the towel ring unbuttoned and laying flat.
instructions
Towel ring is worked in the row from the end of the button loop to the ring, adding the wooden ring in the last row.
Row 1: Ch 9, sl st into the 5th ch from hook (buttonhole made), ch 5 more, hdc in the 2nd ch from hook, LHD across, making sure you don’t twist your work. [8 sts, 1 ch-5 sp]

Rows 2-14: Ch 1, turn, hdc in first st, LHD across. [8 sts]
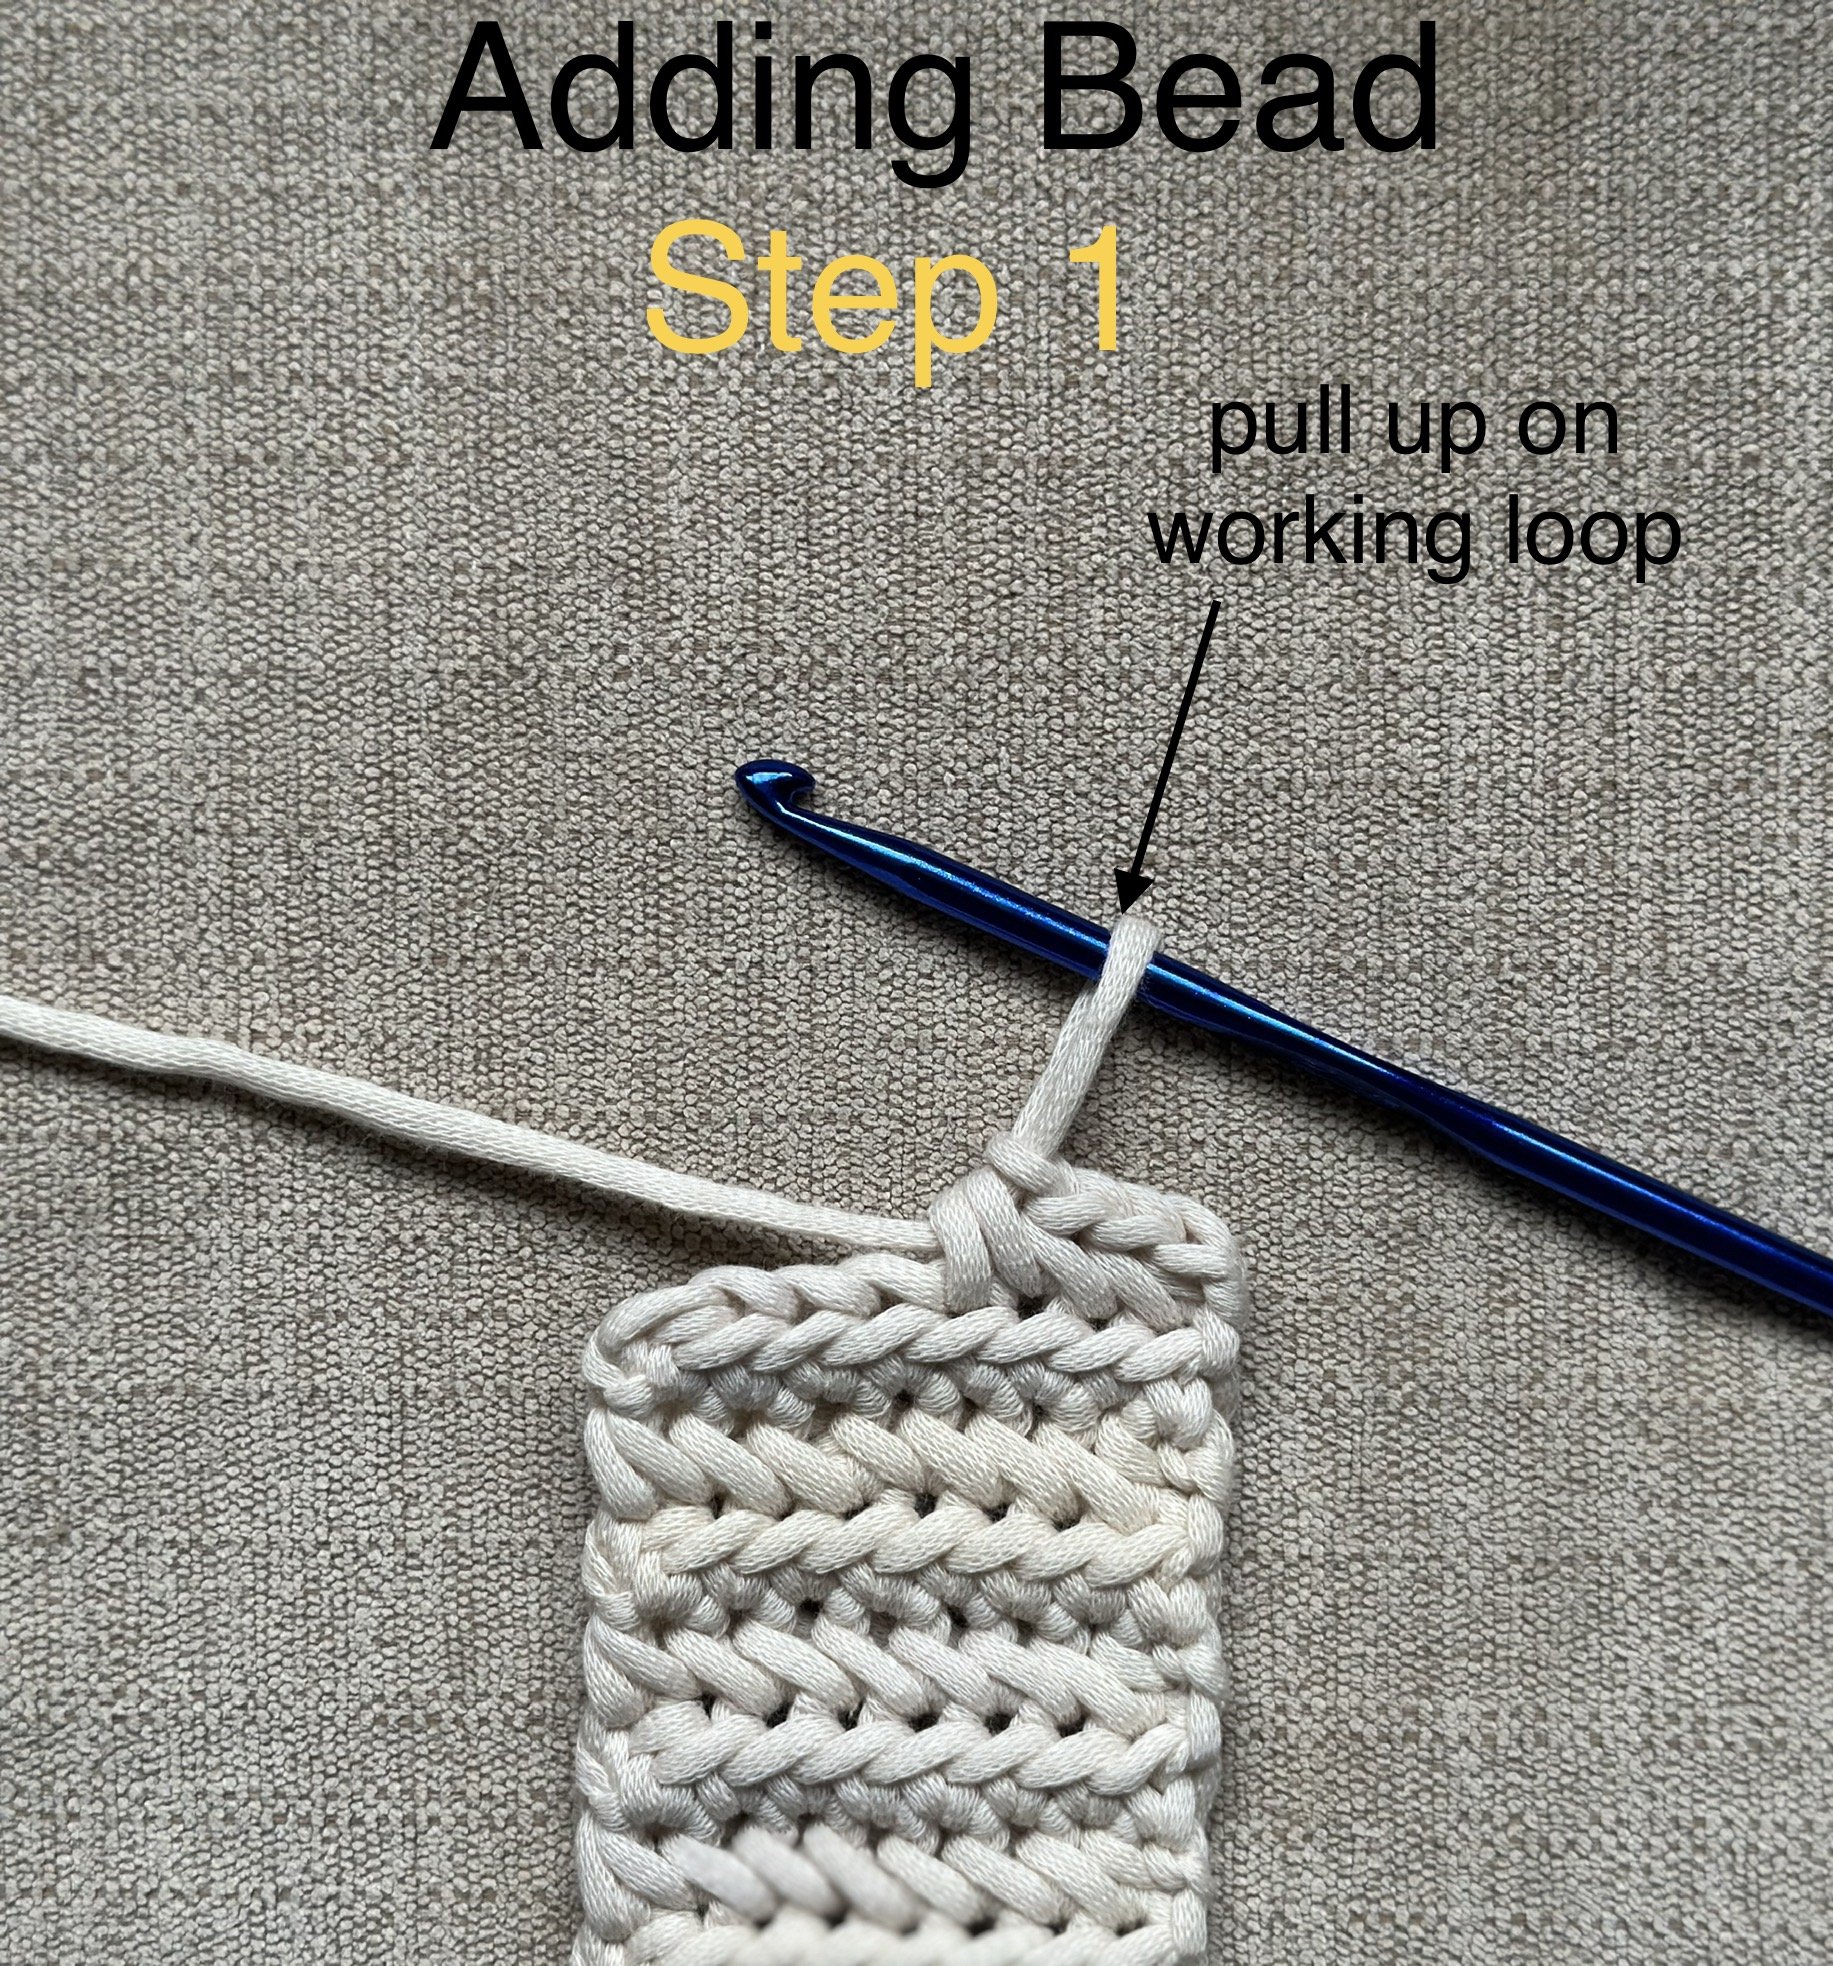
Row 15 (add bead): Ch 1, turn, hdc in first st, LHD in next 3 sts, pull working loop to make bigger, remove hook from working loop, place bead on a 3.75 mm hook and draw working loop through the bead, change back to the 5.0 mm hook and LHD to end. [8 sts] (NOTE: If you are not using a bead for a button, simply rep the last row twice more and skip to Row 17.)
add your wooden bead
step 1
Pull up on your working loop and remove your hook.
step 2
Switch to a smaller hook and place your bead on your hook. Pull your working loop through the wooden bead.

step 3
Switch back to your larger hook and continue in your linked half double crochet stitch pattern as before.

Row 16: Ch 1, turn, hdc in first st, LHD across, pushing the bead towards you and working into the indicated loops pictured as if they were the top of the st. Make sure you keep the bead pushed towards you as you work the st pattern around the bead. [8 sts]

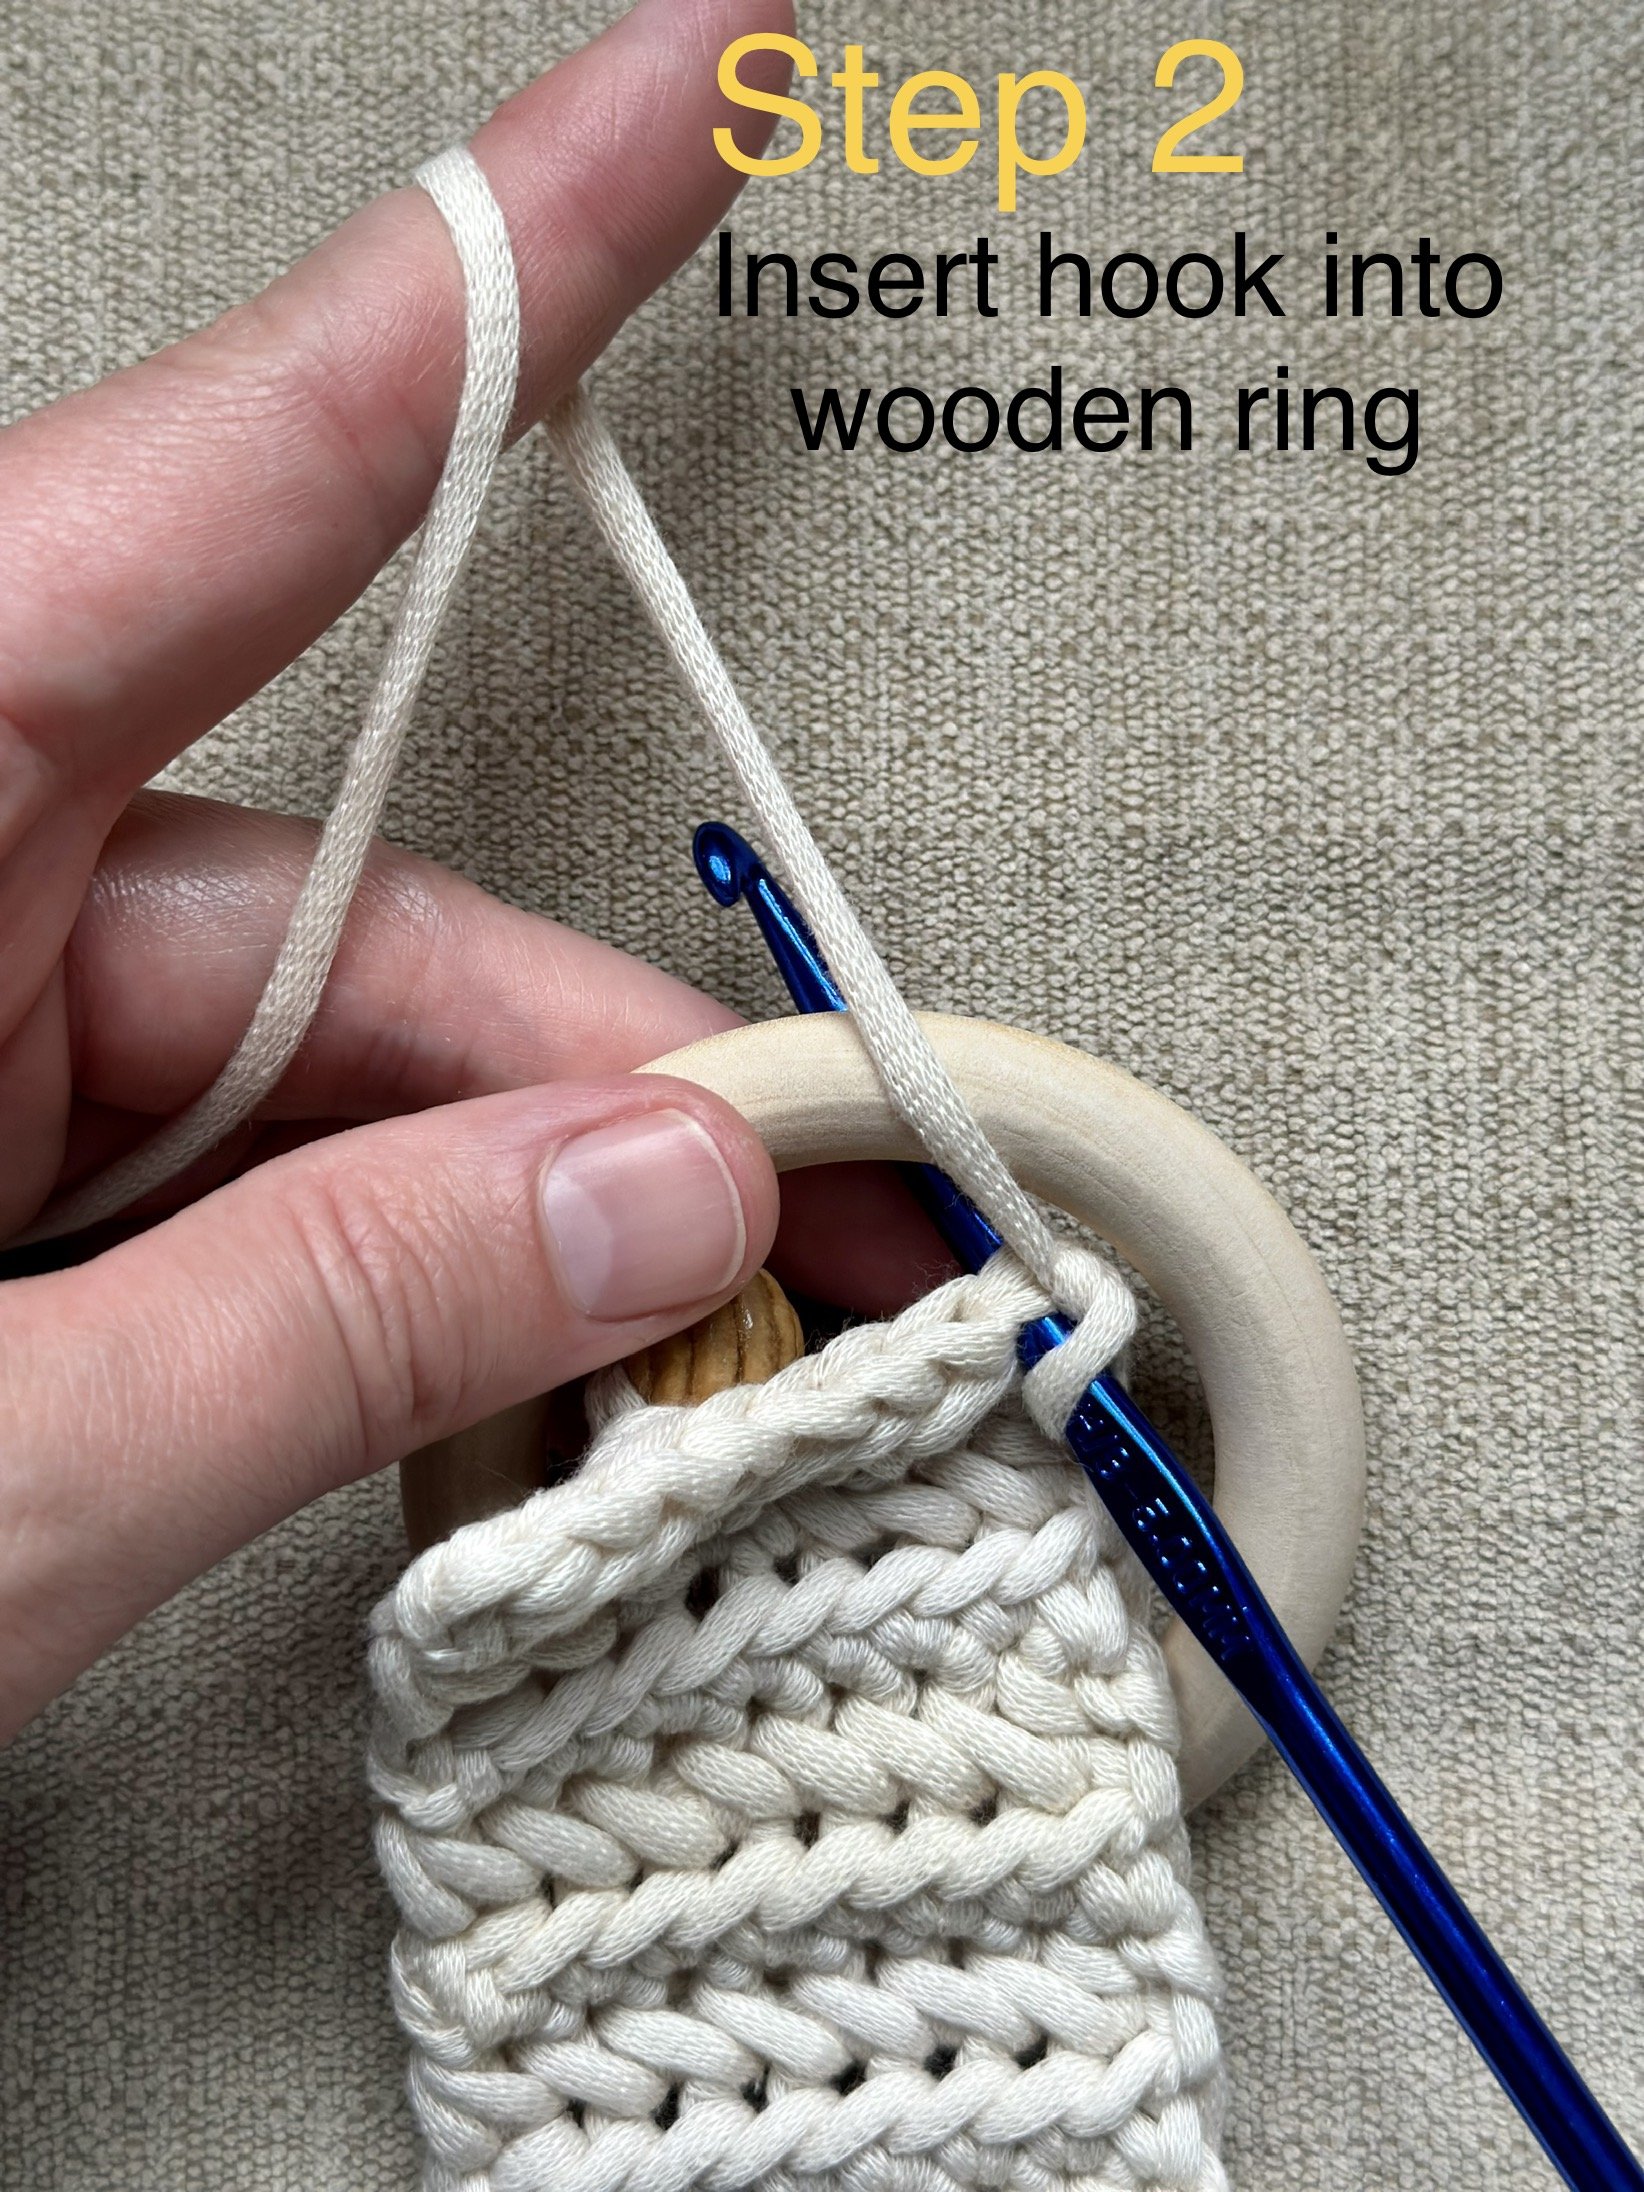
Row 17 (add wooden ring): Ch 1, turn, sc into the wooden ring in each st across by following the steps pictured below. [8 sc]
add your wooden ring
step 1
Insert your hook into the next st.

step 2
Insert your hook into the wooden ring.
step 3
YO, draw through the wooden ring and the st to pull up a loop.

step 4
YO, draw through both loops on your hook to finish your sc.

Rep Steps 1-4 until you have 8 sc inside your wooden ring.

When you are finished, weave in all of your tails. If you followed my YouTube video, you should only have the end tail to weave in! Your finished towel ring should look like this:
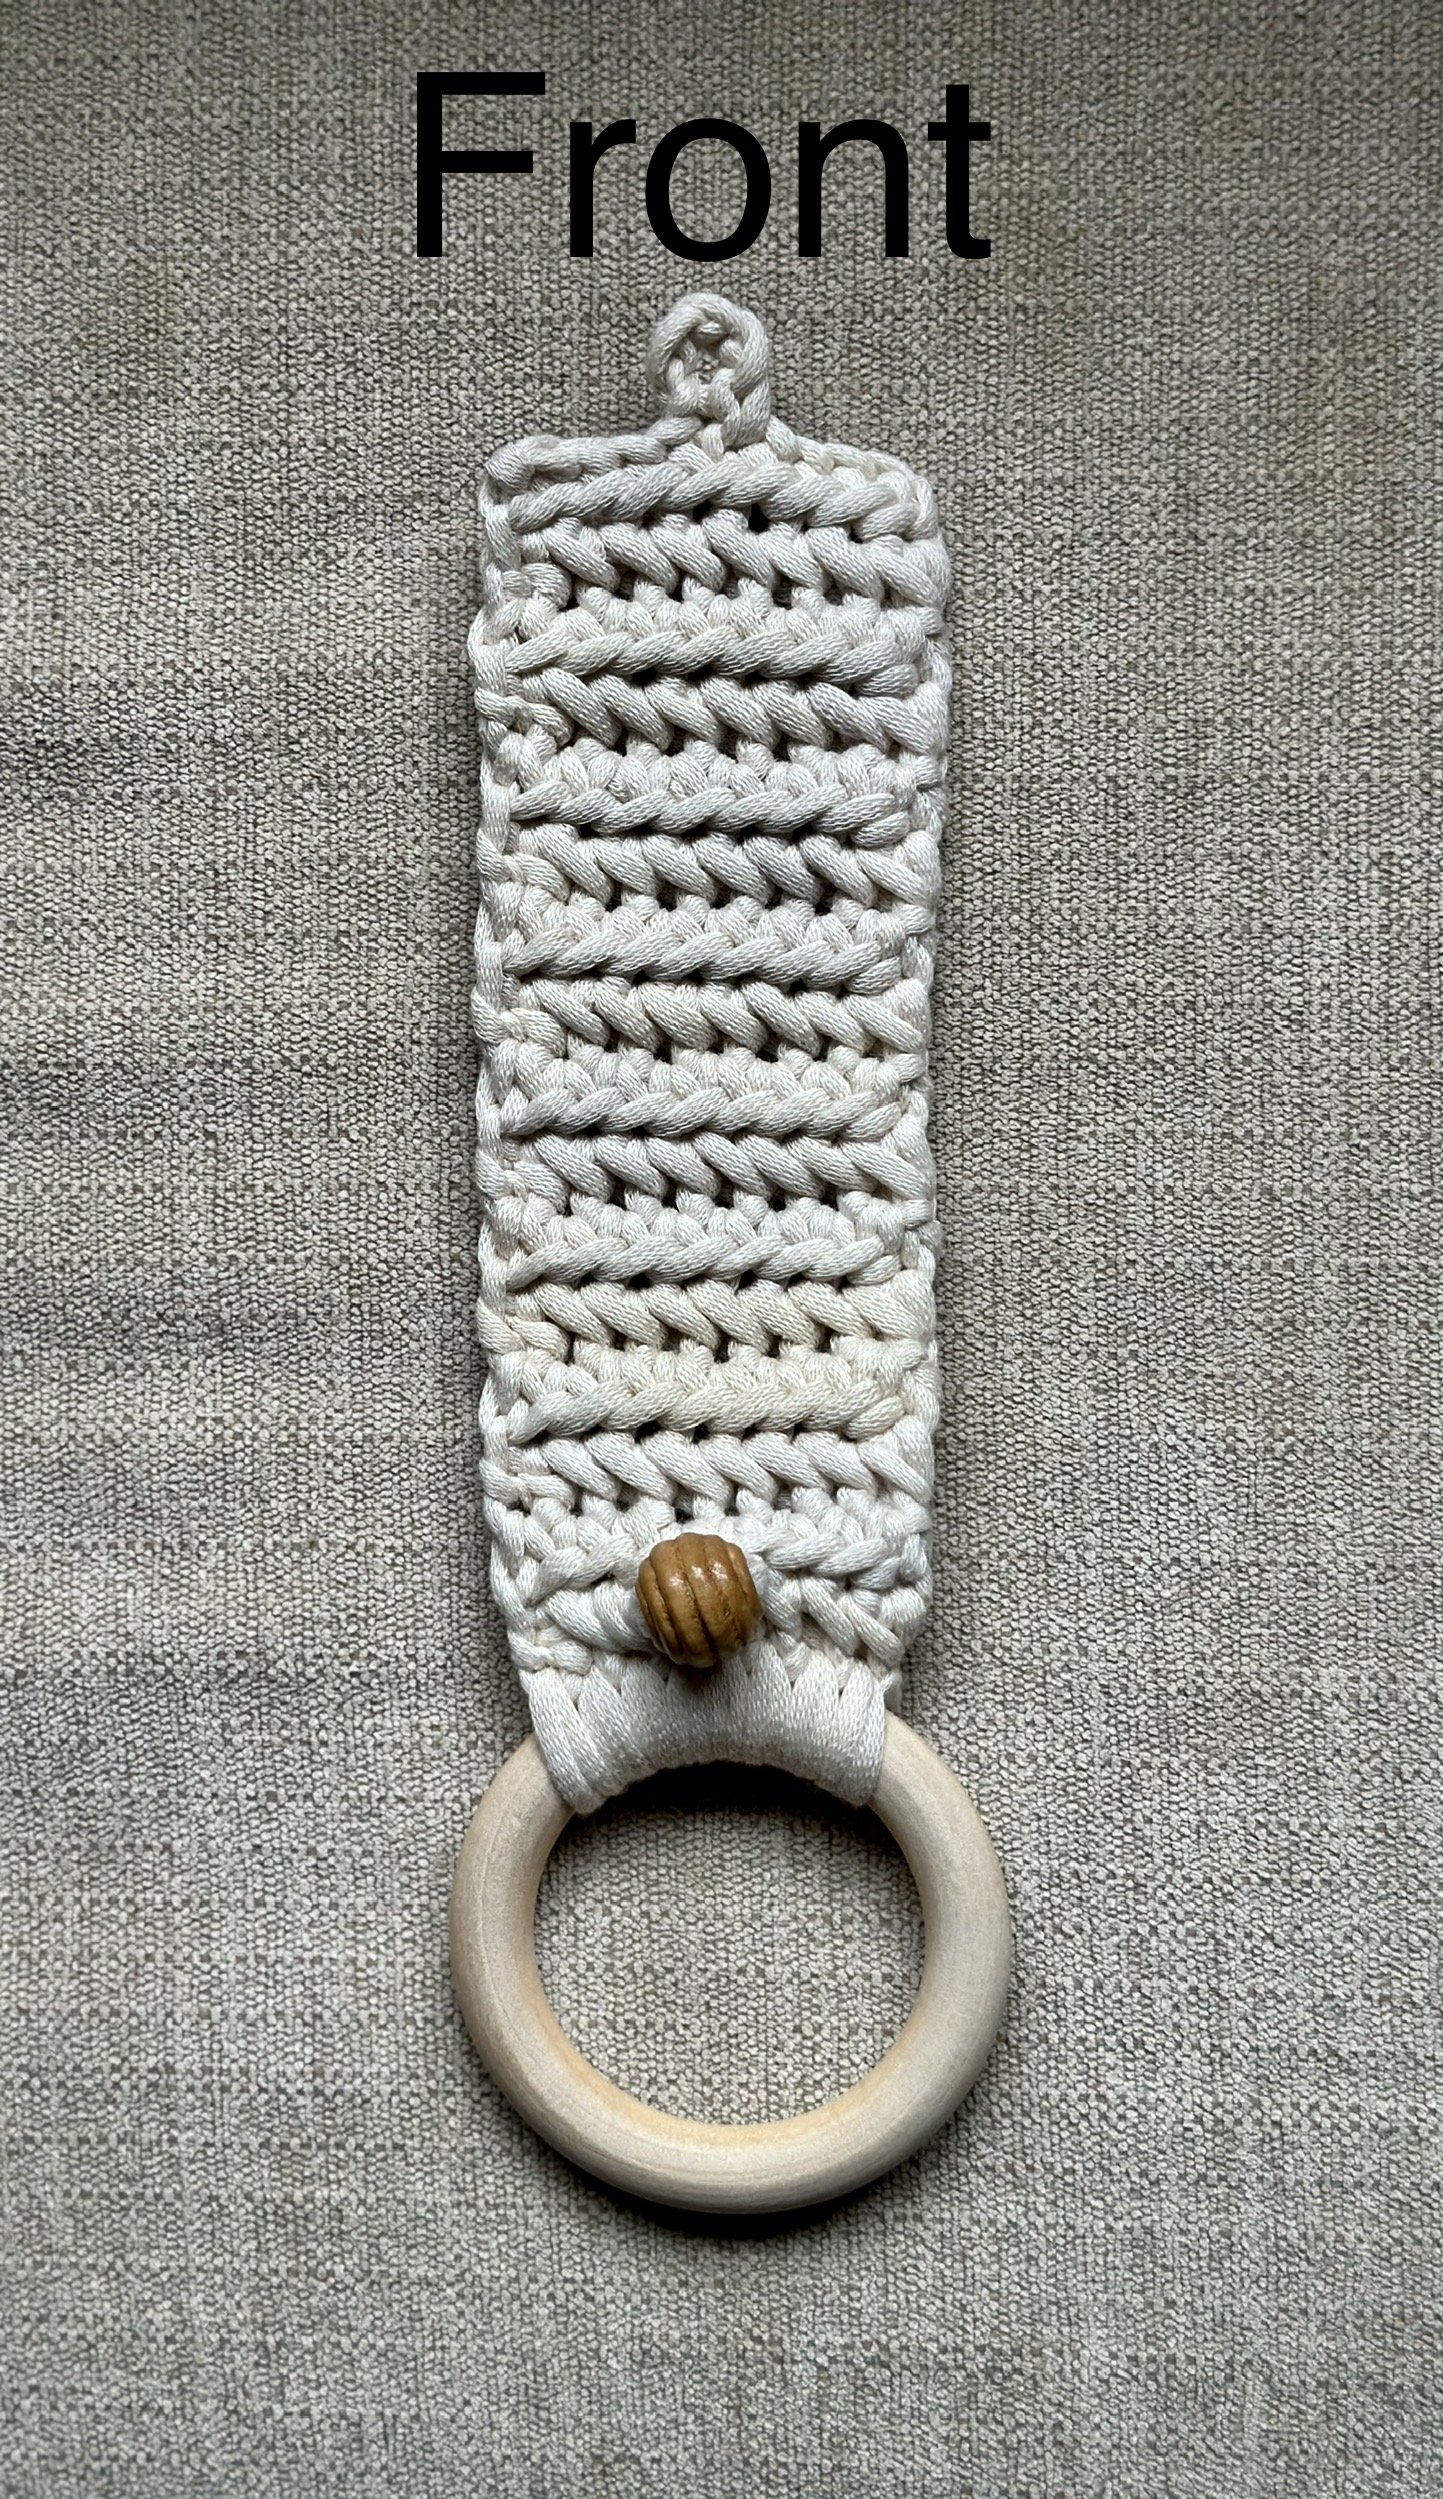
Fold the piece down until the button loop meets the bead that serves as the button. You will of course loop this portion around the appliance handle before buttoning when you go to use it.

Your project is complete! I would love to see your finished work! If you want to tag me on IG, I’m @dayscrochetnc. You could also use the hashtag #10mintowelring to follow what others are making. I can’t wait to see your projects! If you would like to see other versions that I will be making after this publication, be sure to check me out on IG!
If you wish to see how I fold my towels to package them for selling and gifting, be sure to watch my video here!

PIN it for later!
Please note that you do not have my permission to sell, share, copy, or duplicate this pattern or use my photos in any way. Please do not use this pattern for a video, blog, or class tutorial. Thank you so much for following these simple rules!
What did you think of this project? let me know in the comments!
Happy hooking!
~Dana