
Chunky Spiral Crochet Beanie + Messy Bun Version
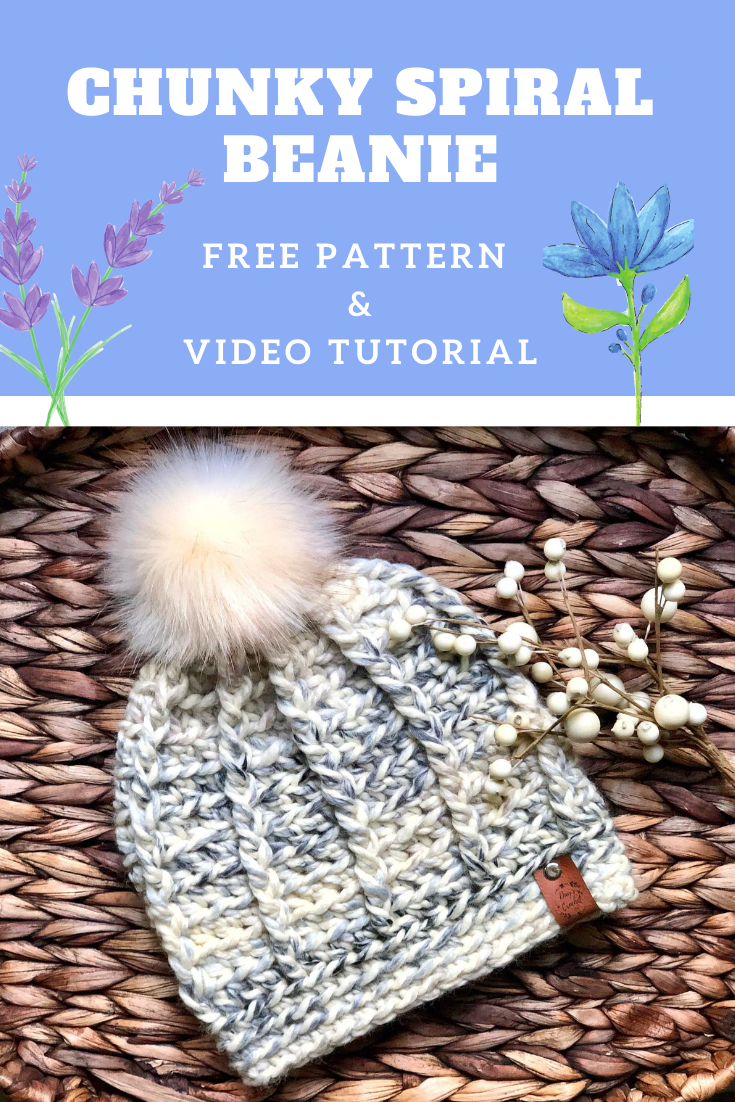
I designed this extra squishy hat especially for super bulky weight yarns. It makes a great market prep hat because it uses very little yardage and works up in under an hour. The use of stitches in the back loop only cause the hat to have a tremendous amount of stretch, making it fit a large variety of heads. It has been a best-seller for my vendor markets and I hope you have the same success!
For all my weekly content follow me below.
On Pinterest Click Here
On YouTube Click Here
On Instagram Click Here
On Facebook Click Here
Etsy shop Click Here
Ravelry shop Click Here
Come join my Facebook group Crochet for Days! We have a lot of fun in there and I often offer coupons and discounts to my members that I don't offer anywhere else! Just follow this link to answer the questions and request to join: Facebook Group
For an Ad-free printable pdf, see my Etsy shop or my Ravelry store.
Ravelry: www.ravelry.com/patterns/library/chunky-spiral-beanie
Etsy shop: www.etsy.com/listing/675271525/chunky-spiral-beanie-messy-bun-hat-pdf
Supplies needed:
-At least 81 yds of any brand size 6 super chunky yarn (I recommend using Lion Brand’s Hometown USA or Wool Ease Thick and Quick for these hats. You could also use 3 strands if worsted weight #4 yarn held together for this hat, but be sure you crochet more loosely or go up to a size 10.0 mm hook size. It tends to be a tighter fit. This technique has been great for those who wanted team colors in this hat.)
-Hair elastic (Optional. I use the thicker Goody Ouch less brand)
-Any embellishments you would like

Stitches Used and Abbreviations:
Pattern is written in US terminology.
-Back Loop Only (BLO)
-Chain (ch)
-Double Crochet (dc)
-Front Post Double Crochet (fpdc)
-Half Double Crochet (hdc)
-Magic Ring (MR)
-Place Marker (PM)
-Single Crochet (sc)
-Slip Stitch (sl st)
-Stich Marker (SM)
Gauge: Hat should measure 6” (15 cm) in diameter after completing rounds 1-3. Gauge is approximate.
Subscribe to my YouTube channel!
Finished Measurements:
Finished hat should measured approximately 21”-24” (53-61 cm) in circumference and 9” 23 cm) in length. The circumference has a wide range due to the stitches being placed in the back loops only.

Messy Bun Version
Instructions:
For the Messy Bun Version
Hat is worked from the top to the bottom.
Round 1: Begin by making a slip stitch into the hair elastic and ch 1. (If you do not have a hair elastic, simply ch 14 to make a ring and use this ring as a substitute.)
Working within the ponytail holder (or the ch-14 ring), make 18 hdc. Sl st into top of first hdc. [18 hdc]
Round 2: Ch 1 (does NOT count as a st throughout entire pattern). Place 2 hdc in first st. 1 Fpdc in next. *2hdc in next st, fpdc in next*. Repeat from *to* to end. You should end with a fpdc in every round till the brim. Sl st into BLO of first hdc made. [18 hdc, 9 fpdc]

Round 3: NOTE: You will be working all hdc sts in the BLO for the remainder of the pattern. Ch 1. *2 hdc in first st. 1 hdc in next. 1 Fpdc around the fpdc of previous round.* Repeat from * to* to end. Sl st in BLO of 1st hdc. [27 hdc, 9fpdc].

Rounds 4-10: Ch 1. Hdc in BLO of each hdc and 1 fpdc around fpdc of previous round to end. Sl st in BLO of beginning hdc. [27 hdc, 9 fpdc].
Gauge Check
At this point, you will need to check your hat’s length. It needs to measure at least 7.5-8” in length. If it does not, complete more repeating rounds before moving onto the brim.
Brim
Round 11: Ch 1. Sc in the BLO of first st. PM in st just made. Sc in BLO of every hdc and fpdc around to st marker. Do not sl st to join. [36 sc in BLO]
Rounds 12-13: Working in continuous rounds, place 1 sc in the BLO of every st around, moving the SM as you go. [36 sc in BLO]
Using an invisible join, FO and weave in tails.
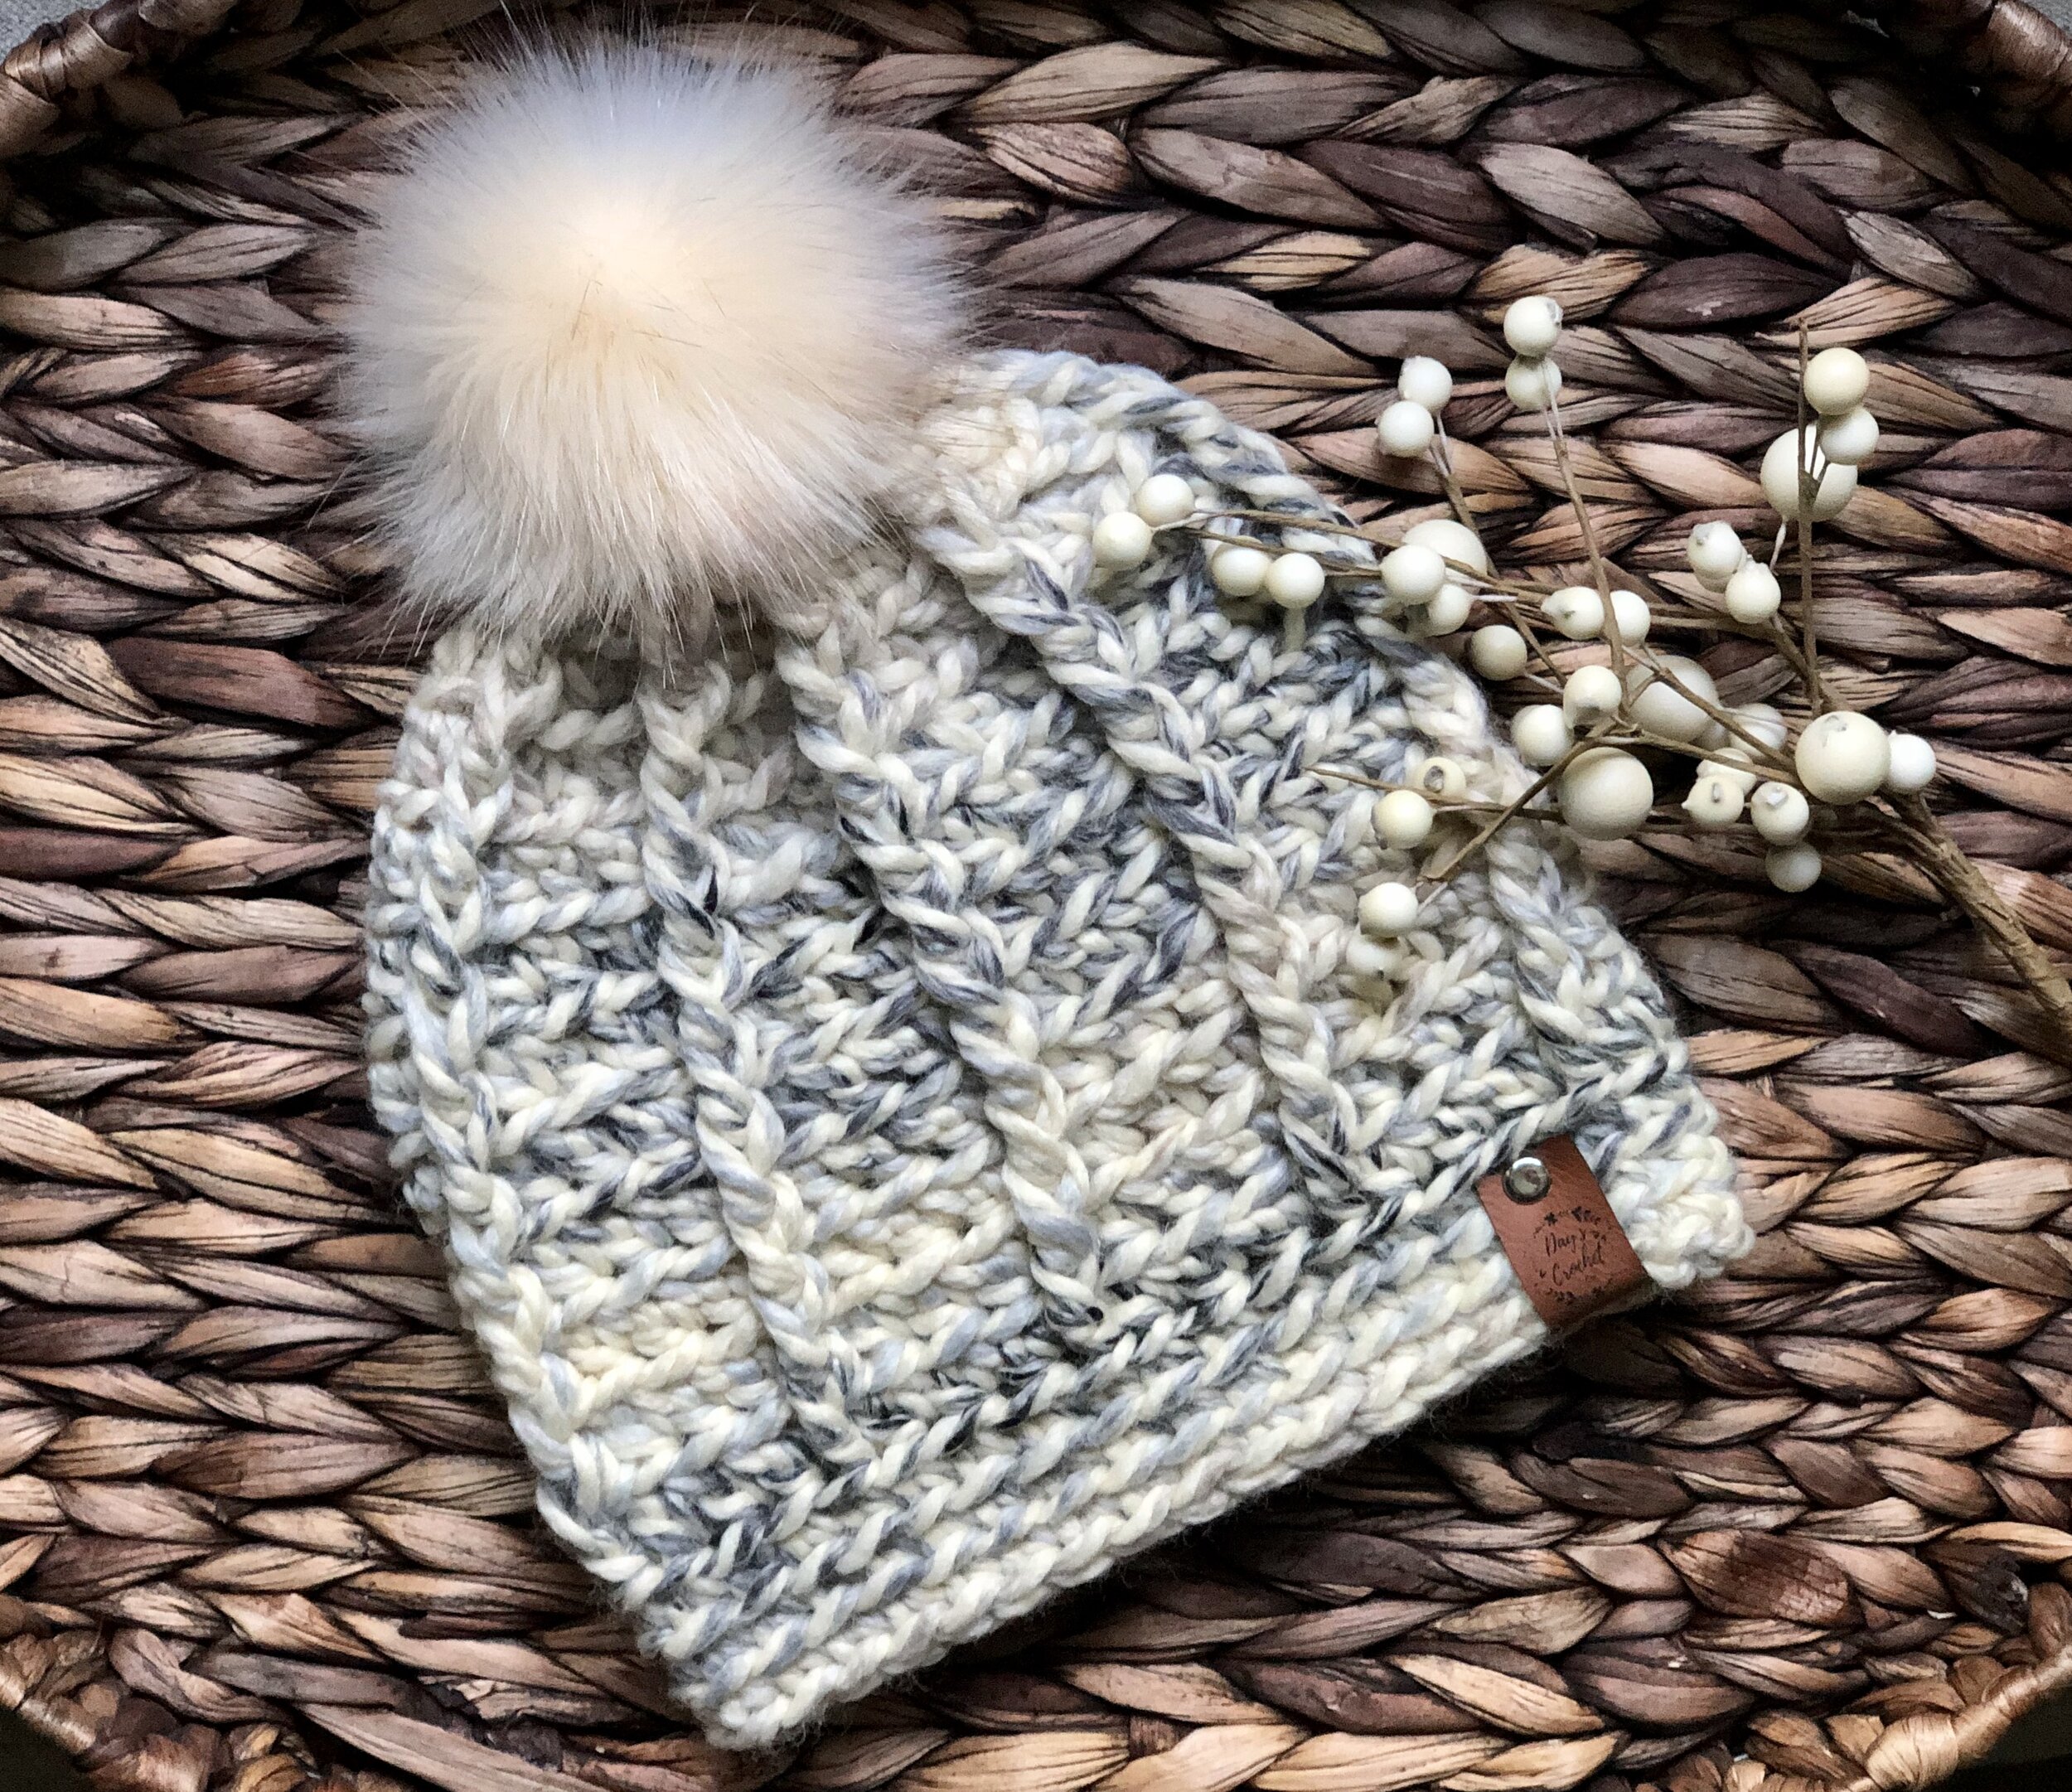
Pictured is Lion Brand Thick N Quick in the color Moonlight
Beanie Version
Round 1: Make a MR. Ch 2 (does not count as a st). Place 18 dc in ring. Join with a sl st in top of first dc. [18 dc]
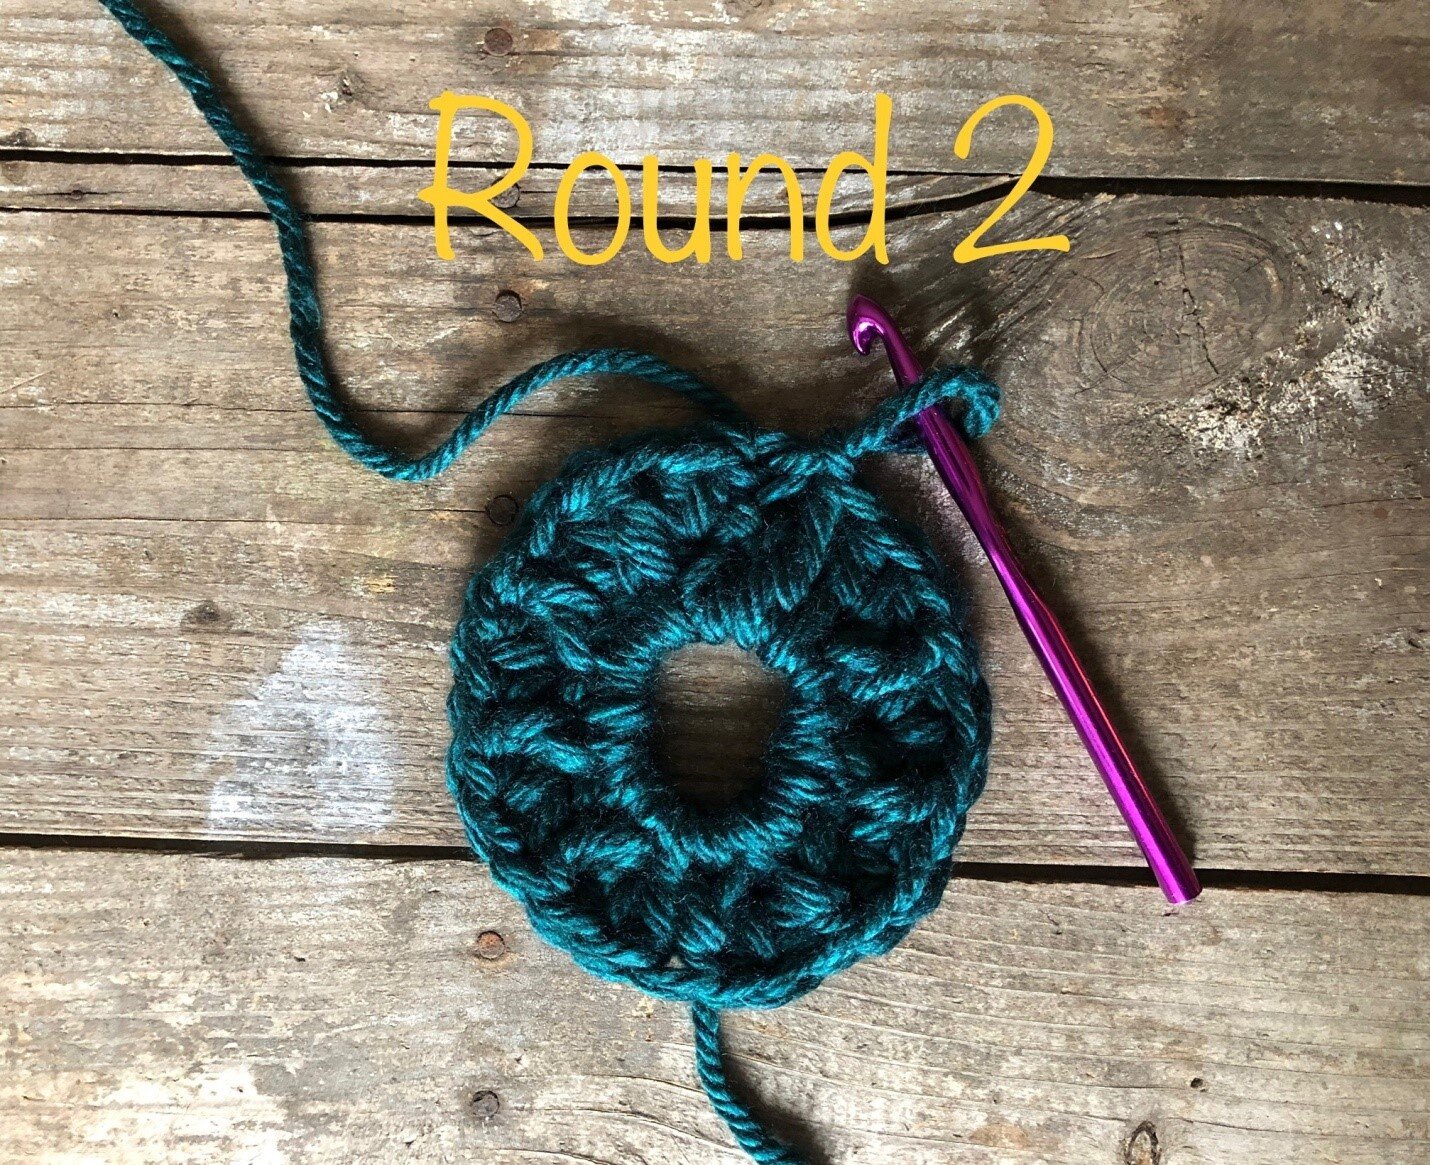
Round 2: Ch 1 (does NOT count as a st throughout entire pattern). Place 2 hdc in first st. 1 Fpdc in next. *2hdc in next st, fpdc in next*. Repeat from *to* to end. You should end with a fpdc in every round till the brim. Sl st into BLO of first hdc made. [18 hdc, 9 fpdc]
Round 3: NOTE: You will be working all hdc sts in the BLO for the remainder of the pattern. Ch 1. *2 hdc in first st. 1 hdc in next. 1 Fpdc around the fpdc of previous round.* Repeat from * to* to end. Sl st in BLO of 1st hdc. [27 hdc, 9fpdc].
Rounds 4-10: Ch 1. Hdc in BLO of each hdc and 1 fpdc around fpdc of previous round to end. Sl st in BLO of beginning hdc. [27 hdc, 9 fpdc].

Check out my mini boho wall hanging!
Gauge Check
At this point, you will need to check your hat’s length. It needs to measure at least 7.5-8” in length. If it does not, complete more repeating rounds before moving onto the brim.
Brim
Round 11: Ch 1. Sc in the BLO of first st. PM in st just made. Sc in BLO of every hdc and fpdc around to st marker. Do not sl st to join. [36 sc in BLO]
Rounds 12-13: Working in continuous rounds, place 1 sc in the BLO of every st around, moving the SM as you go. [36 sc in BLO]
Using an invisible join, FO and weave in tails.
NOTE: If the hole in round 1 is still large, you will need to take your beginning tail and weave it around the base of round 1 and cinch it tighter to make the hole smaller.
Your Chunky Spiral Beanie is complete! I would love to see your finished work! If you want to tag me on IG, I’m @dayscrochetnc. You could also use the tags #chunkyspiralbeanie, #chunkycrochethat, #crochetmarkethat––you get the idea! I can’t wait to see your projects! If you would like to see other versions that I will be making after this publication, be sure to check me out on IG!
If you liked my pattern please let me know in the comments!
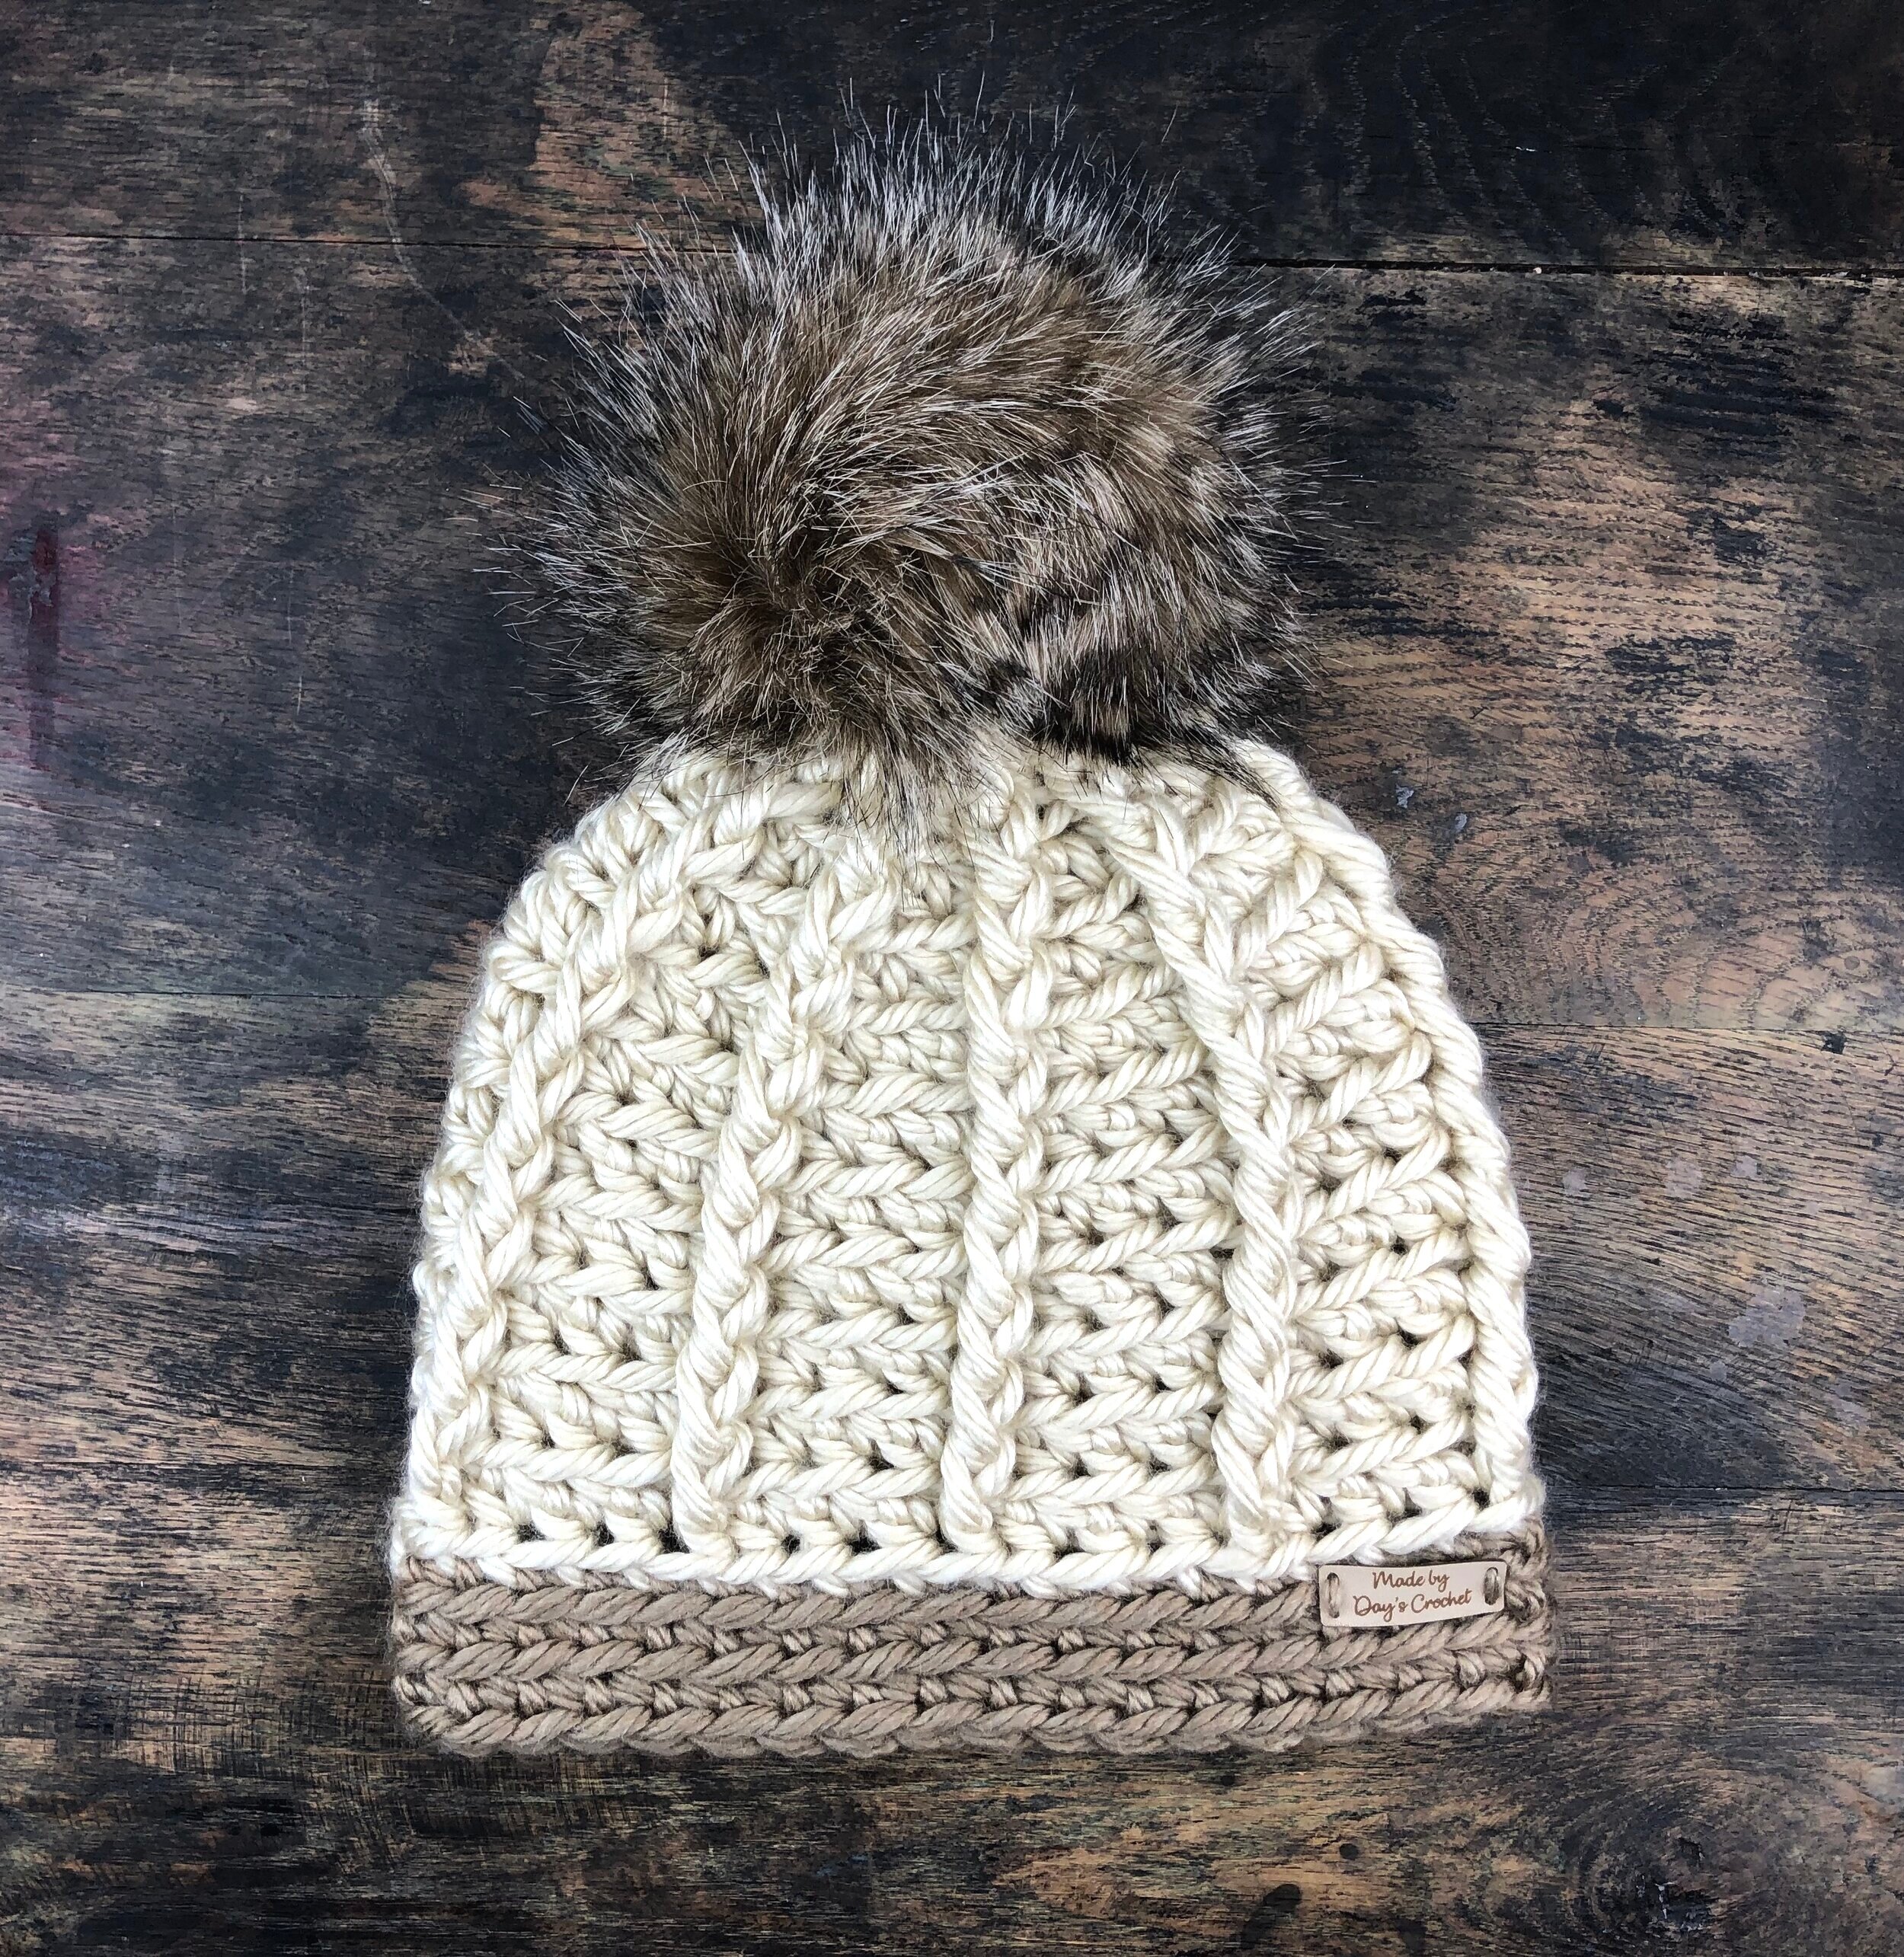
Pictured is Lion Brand Hometown USA in the colors LA Tan and Hoboken Honey.
Please note that you do not have my permission to sell, share, copy, or duplicate this pattern or my photos in any way. Please do not use this pattern for a video, blog, or class tutorial. Thank you so much for following these simple rules!