
Macrochet Tissue Pouch

PIN it here!
I’m just getting over an illness that has lingered for over a month.
While sick, I used more tissues than ever. I have had to carry those mini packs of Kleenex in my purse while on the mend, and it occurred to me that a tissue pouch would be fun and functional. I set out to design something dainty and pretty, and this is what I came up with.
This post may contain affiliate links that help me to continue to post free content. To skip the ads and have a printable pdf of this pattern, you can find it for relatively little cost in my Etsy and Ravelry shops.
This adorable little tissue pouch requires very little by way of supplies and works up extremely quickly. I designed it to hold the Kleenex On the Go Ultra brand of mini tissues, but I feel positive you could use other brands as well. Not only is it handy to have in your purse, it makes a great gift for a friend or family member. I think it would be cute to even add a swivel clasp or a keychain ring to the top so you could add it to a backpack or the like to keep handy.
The stitch pattern is the easy peasy Linen Stitch and the little detail at the front fold is simple enough for a beginner. It only takes me about 15-20 minutes to make one from start to finish, making it perfect for vendor market prep for your spring and summer vendor markets.
Enough of my rambling! Let’s make this thing!
Supplies Needed
-Approx. 70-80 yds. of any worsted weight (size 4) yarn, preferably cotton
-Size H 5.0 mm hook, or size needed to obtain gauge
-Pack of mini tissues (I used the Kleenex On the Go Ultra brand for this design)
Terms Used and Abbreviations
Pattern is written in US terminology.
Beginning - beg
Chain(s) - ch(s)
Fasten Off - FO
Repeat - rep
Single Crochet - sc
Skip - sk
Slip Stitch - sl st
Space(s) - sp(s)
Stitch(es) - st(s)
Wrong Side - WS
Yarn Over - YO
Gauge
Piece should measure 4" x 4" (10 x 10 cm) after completing rows 1-16 of the pattern. If yours measures differently, adjust hook size accordingly and start over.
Finished Measurements
Finished pouch measures approx. 7.5" x 5" (19 x 13 cm) when measured flat prior to assembly.
Pattern Notes
-The turning chs at the beg of each row will count as a st. You will need to make your turning chs loosely because you will be working into them later.
-There is a full YouTube video tutorial for this project; however, there are slight discrepancies between the written pattern and the video in the Finishing Rounds. I changed the written pattern to reflect what I felt was easier to understand.
Instructions
Pouch is made as a flat panel in both the row and the round and then sewn together in such a way as to hold the mini tissues.
Row 1: Ch 20, sc in 2nd ch from hook, * ch 1, sk 1, sc in next st; rep from * to end. [10 sc, 10 ch-1]
Row 2: Ch 1 loosely, turn, sk 1st sc, sc in next ch-1 sp, * ch 1, sk 1, sc in next ch-1 sp; rep from * to last st, place last sc in the turning ch below (be sure you are NOT putting your last sc in the top of the sc st below). [10 sc, 10 ch-1]
Rows 3-26: Rep row 2.
Your piece should now measure approx. 6.5" x 4" (16.5 x 10 cm)


Finishing Rounds
Now we will complete 2 rounds around the entire piece. The beg chs will not count as a st from here on out.
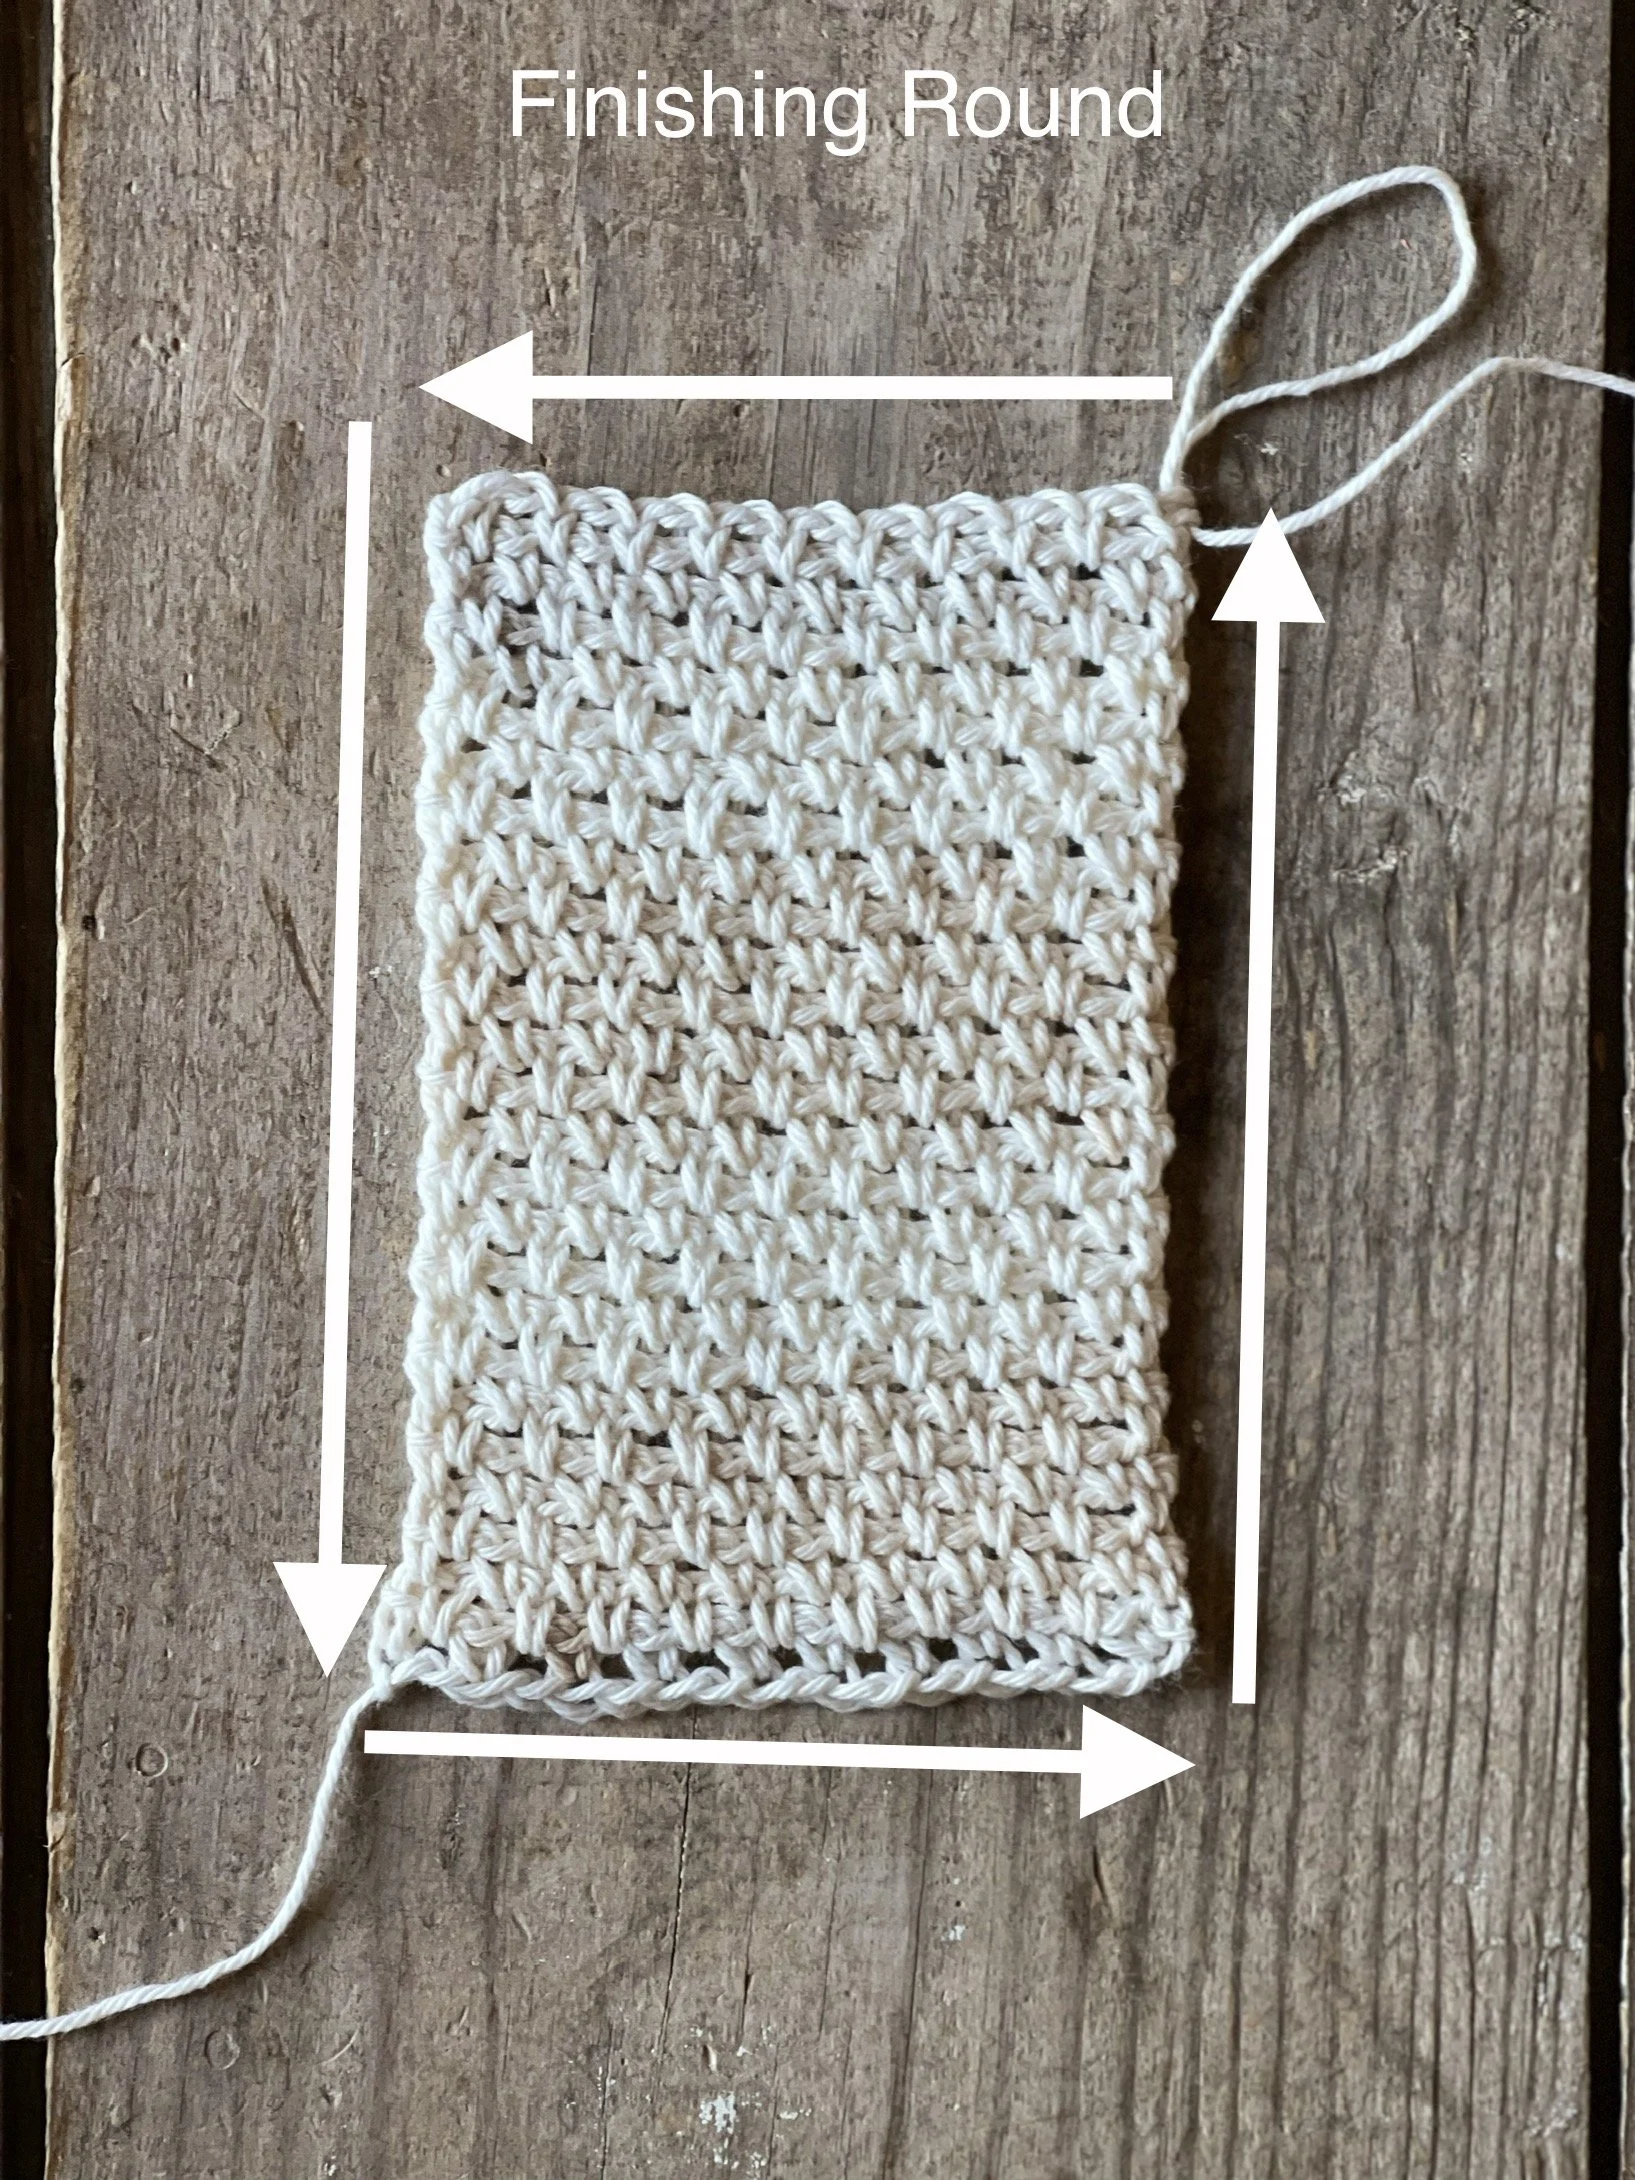
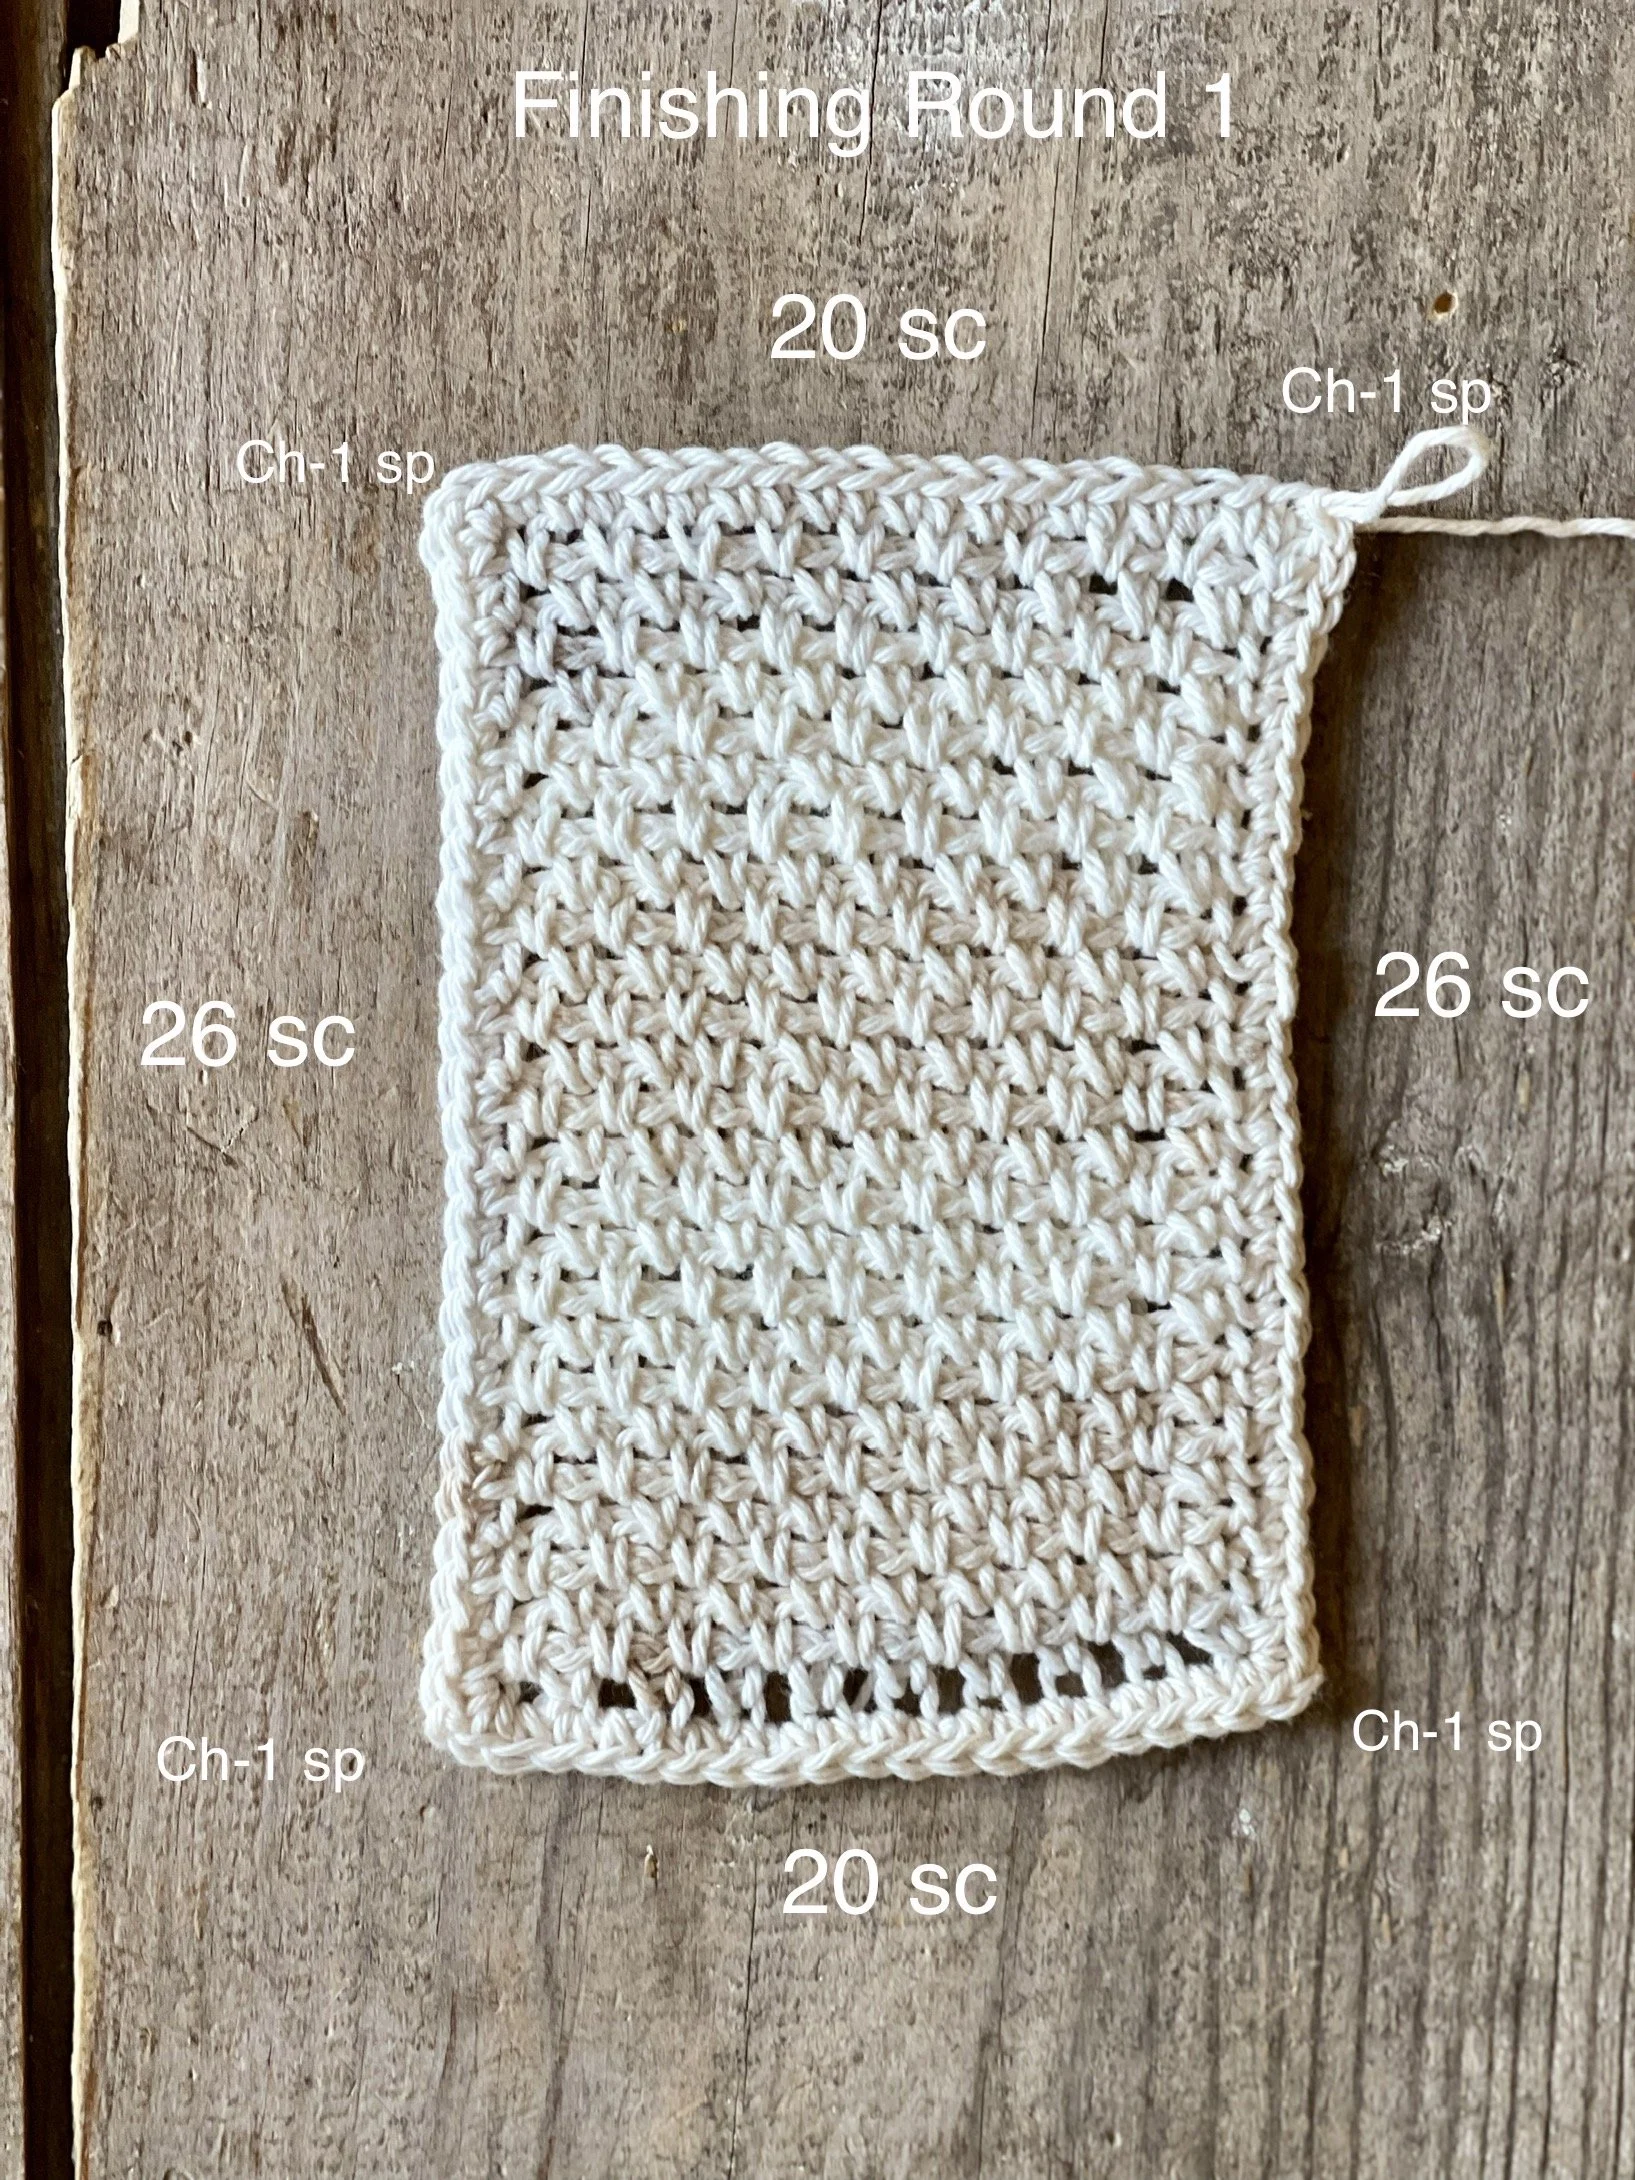
Round 1: Ch 1, turn, sc in each st and sp across (20 sc); ch 1, turn so you are working along the side of rows and sc in each row across (26 sc); ch 1, turn so you are working along the foundation row sts and sc in each st and sp across (20 sc); ch 1, turn so you are working along the other side of the rows and sc in each row across (26 sc). [92 sc total, + a ch-1 sp at each corner]
Round 2: Ch 1, * Tr, sc; rep from * across top border; {sc, ch 1, sc} complete brackets in ch-1 sp of corner, sc in each st to ch-1 sp of next corner, {sc, ch 1, sc} complete brackets in ch-1 sp of next corner, ** Tr, sc; rep from ** across bottom border; {sc, ch 1, sc} complete brackets in ch-1 sp of next corner, sc in each st across to last ch-1 sp, {sc, ch 1, sc} complete brackets in last ch-1 sp, sl st in first Tr to join. FO, leaving a long tail for sewing purposes later. [80 sc, 20 Tr, 4 ch-1 sps] NOTE: This round is slightly different from my video tutorial.
Assembly
This part is somewhat easier if you have a pack of mini tissues to fold your piece around.
1) With WS facing, fold each short end towards the center of the piece so that the top and bottom ends meet over your pack of tissues.
Take corner A and fold it over corner B so that there is about 1.5" overlap. Using leftover tail, sew through all layers across twice. Knot off and weave in tail. (See photo below)

1) Take corner D and fold it over corner C until there is about 1.5" overlap. Cut a length if yarn and sew across all layers twice. Knot off and weave in tail. (See photo above)
You can leave your tissue pouch as-is, or you can add a keychain/swivel clasp to one end and attach it to your bag.
Your Macrochet Tissue Pouch is complete! I would love to see your finished work! If you want to tag me on IG, I’m @dayscrochetnc. You could also follow the hashtag #macrochettissuepouch to follow what others are making. I can’t wait to see your projects! If you would like to see other versions that I will be making after this publication, be sure to check me out on IG!

Please note that you do not have my permission to sell, illegally share, copy, translate or duplicate this pattern or my photos in any way. Please do not use this pattern for a video, blog, or class tutorial. Thank you so much for following these simple rules! Please message me on Facebook or send me an email at dayscrochetnc@gmail.com with any questions.
Come join my Facebook group, Crochet for Days! We have a lot of fun and I often offer discounts and coupon codes to my members that I don’t offer anywhere else! Request to join and answer the questions by following this link.
Did you enjoy this project? Let me know in the comments!
Happy Hooking!
~Dana