
The Herringbone Hipster Bag
PIN it here!
You would think by now that I would have this stitch out of my system….
But you would be wrong! I can’t get enough of this half double herringbone stitch! I also can’t get enough of this gorgeous Big Twist Textile yarn from Joann’s. This stitch combo with that yarn is perfection! I made several of these for my vendor market over July 4th weekend and they were a big hit!
This post may contain affiliate links that help me to continue to post free content. To skip the ads and have a printable pdf, you can find this pattern for relatively little cost in both my Etsy and Ravelry shops.
The stitch pattern makes such a dense fabric that lining the bag is not necessary. Plus it’s worked all in one piece, so you just can’t go wrong with this bag when it comes to market prep. It’s a great size for carrying the necessities and the strap works up super fast and is easily adjustable to the length you desire.
My testers have also had great luck in selling their bags. I really love the creativity that shines through their bags! Some have used beautiful buttons and put beads on the fringe at the bottom. Just check out these cute bags by my testers Joni Joyner and Vickie Winter:
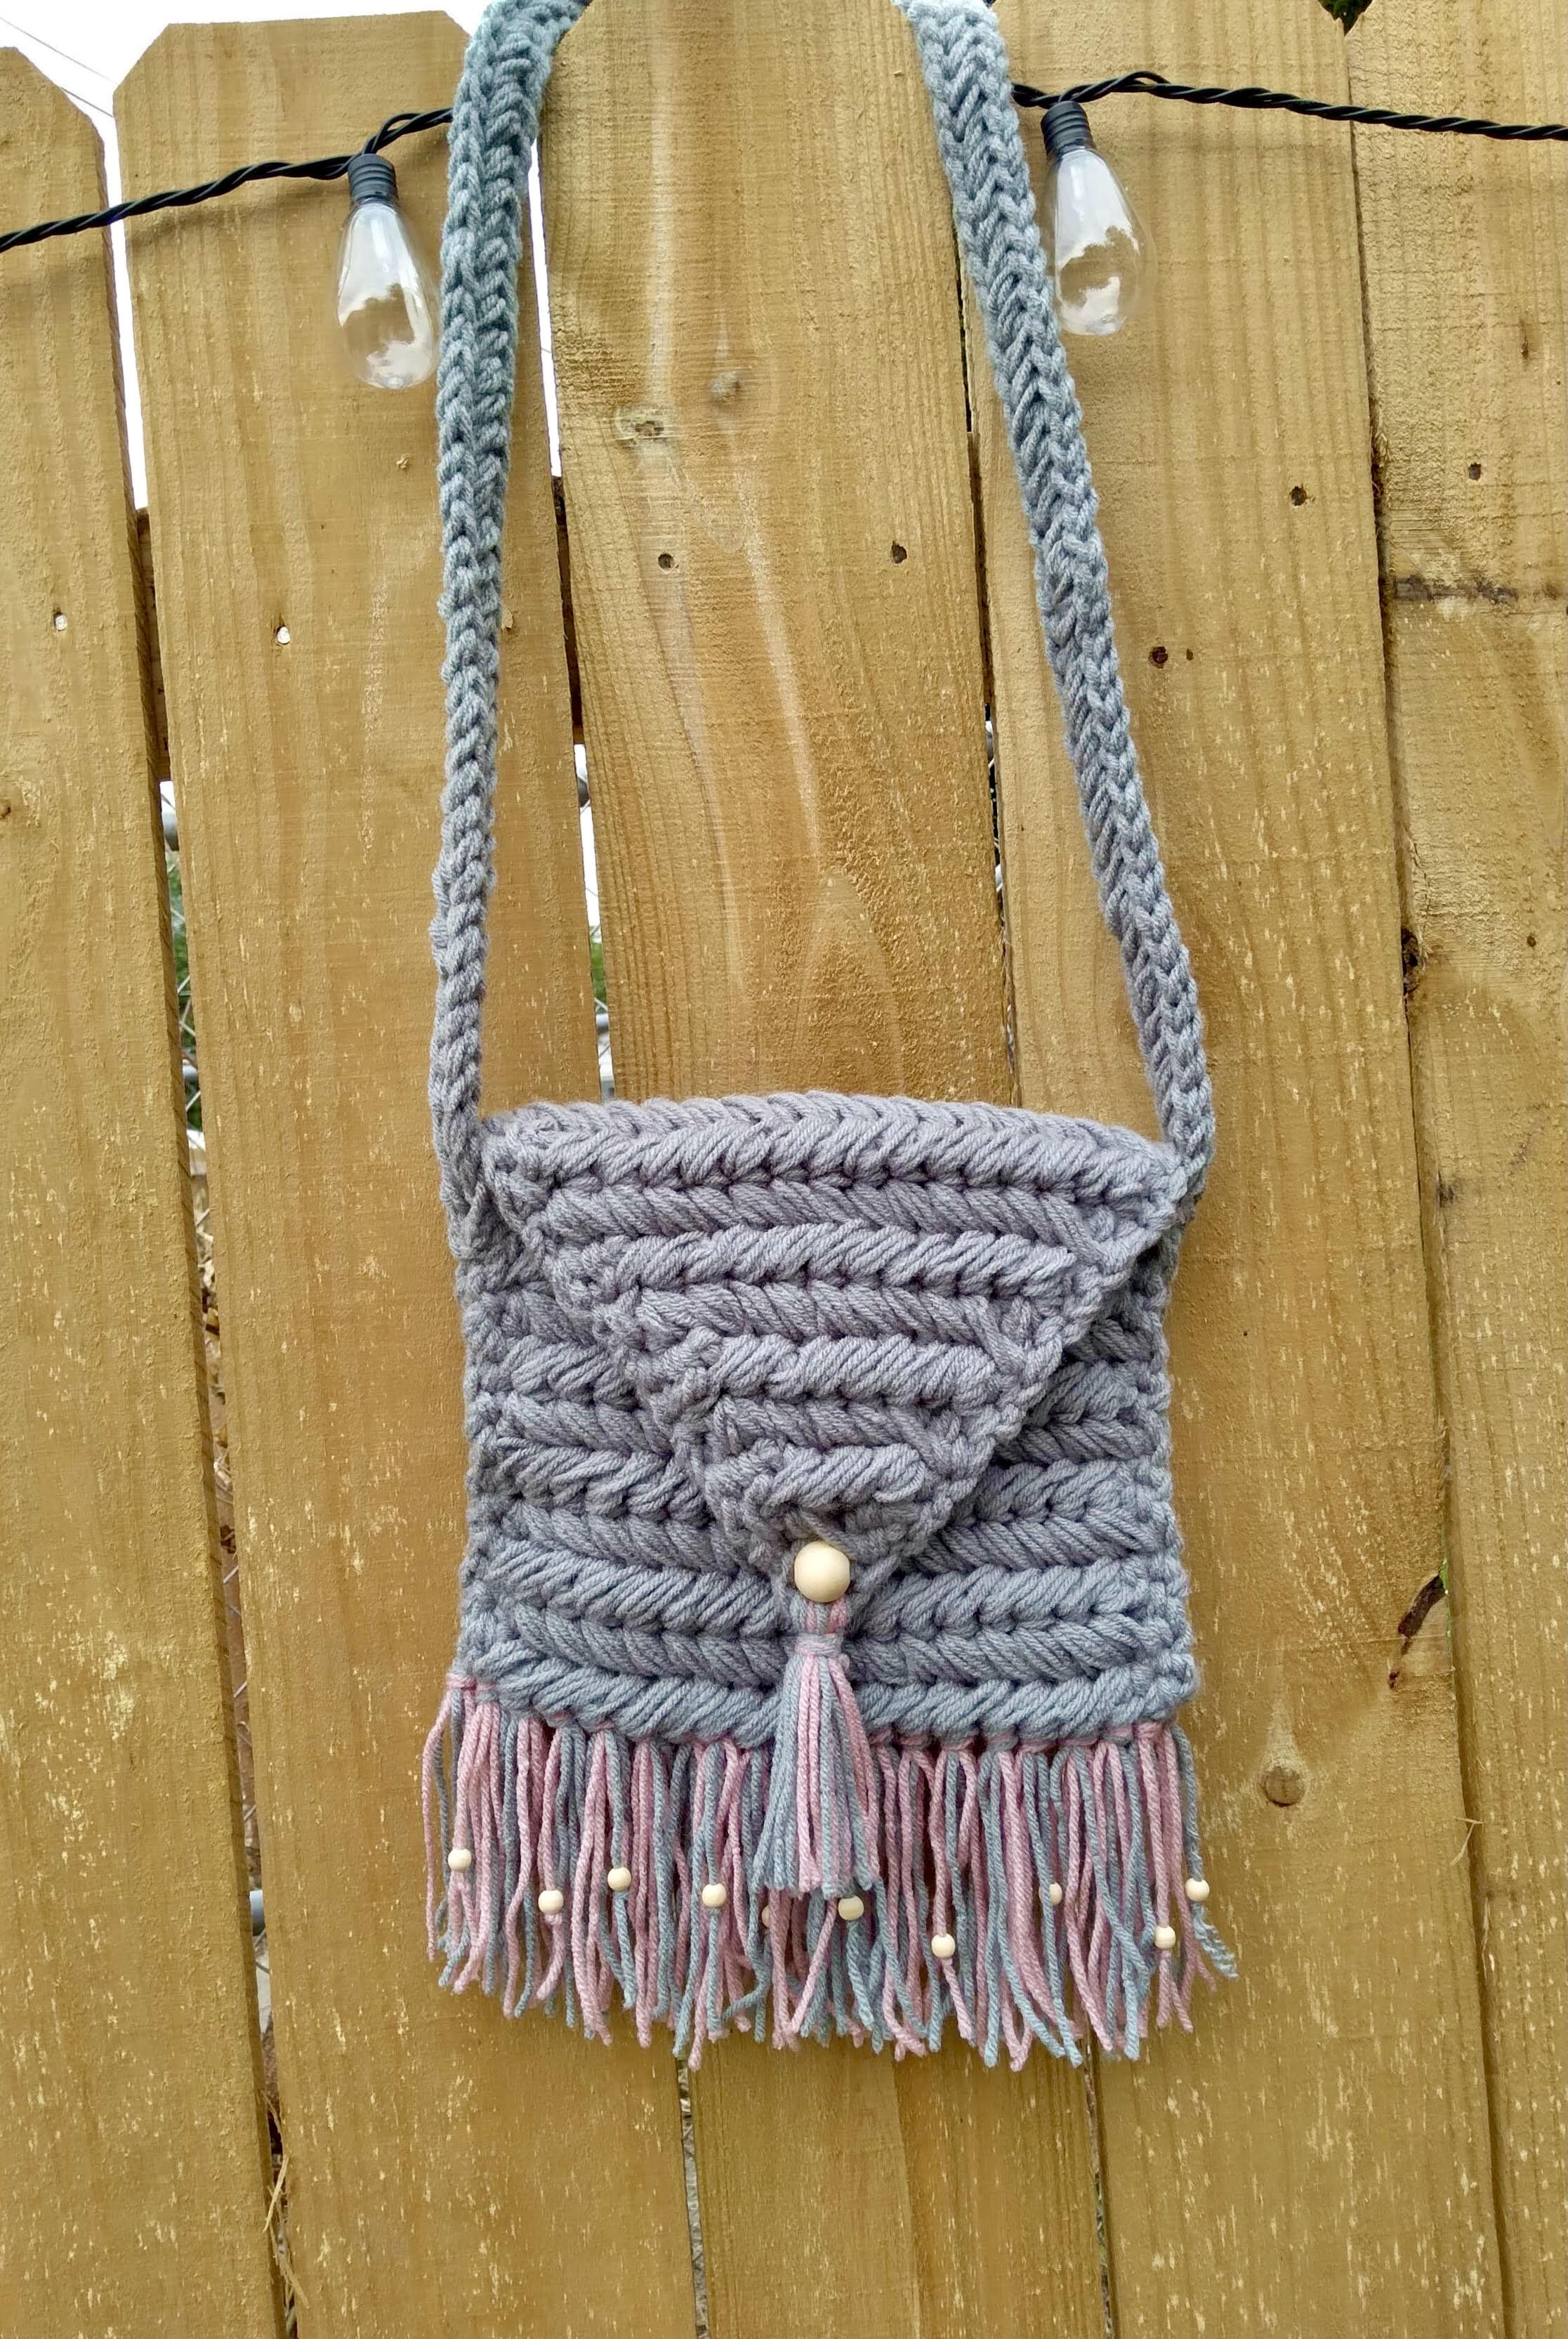
Photo credit: Joni Joyner

Photo credit: Vickie Winter
Apart from this being great for market prep, they also make great gifts. It’s hard to believe that Christmas is less than 5 months away (EEEEEK!!!!) but this bag works up quickly enough that you could very easily whip some out for a nice handmade gift for any trendy, boho-loving friend in your life. I know I had a hard time not keeping one of these for myself!
Let’s make it!
Supplies Needed:
- 200-216 yds of Big Twist Textile yarn or a super bulky size 6 weight yarn
- L 8.0 mm hook or size needed to obtain gauge
- 2 pieces of cardboard 5" wide and 3" wide
-1 large 25 mm bead or button of your choice
- Scissors, measuring tape
Terminology and Abbreviations Used:
Pattern is written in US terminology.
Begin(ning) - beg
Chain – ch
Decrease - dec
Fasten Off - FO
Half Double Crochet – hdc
Half Double Crochet 2 Together - hdc2tog
Repeat – rep
Right Side - RS
Skip - sk
Slip Stitch - sl st
Stitch(es) - st(s)
Wrong Side - WS
Yarn Over – YO
Special Stitches:
Half Double Herringbone - HDH
Each row of HDH begins with 2 regular hdc sts before you can begin the actual st pattern. Once you have 2 hdc, you will:
1) Count backwards 2 sts (counting the st you made last) and insert your hook, YO, pull up a loop.
2) YO, move forward to the next open st, insert your hook, YO, pull up a loop, YO, pull through all 4 loops on your hook.
You will rep steps 1-2 all the way across until you reach the last st of the row. To see this st in full detail, see my YouTube video.
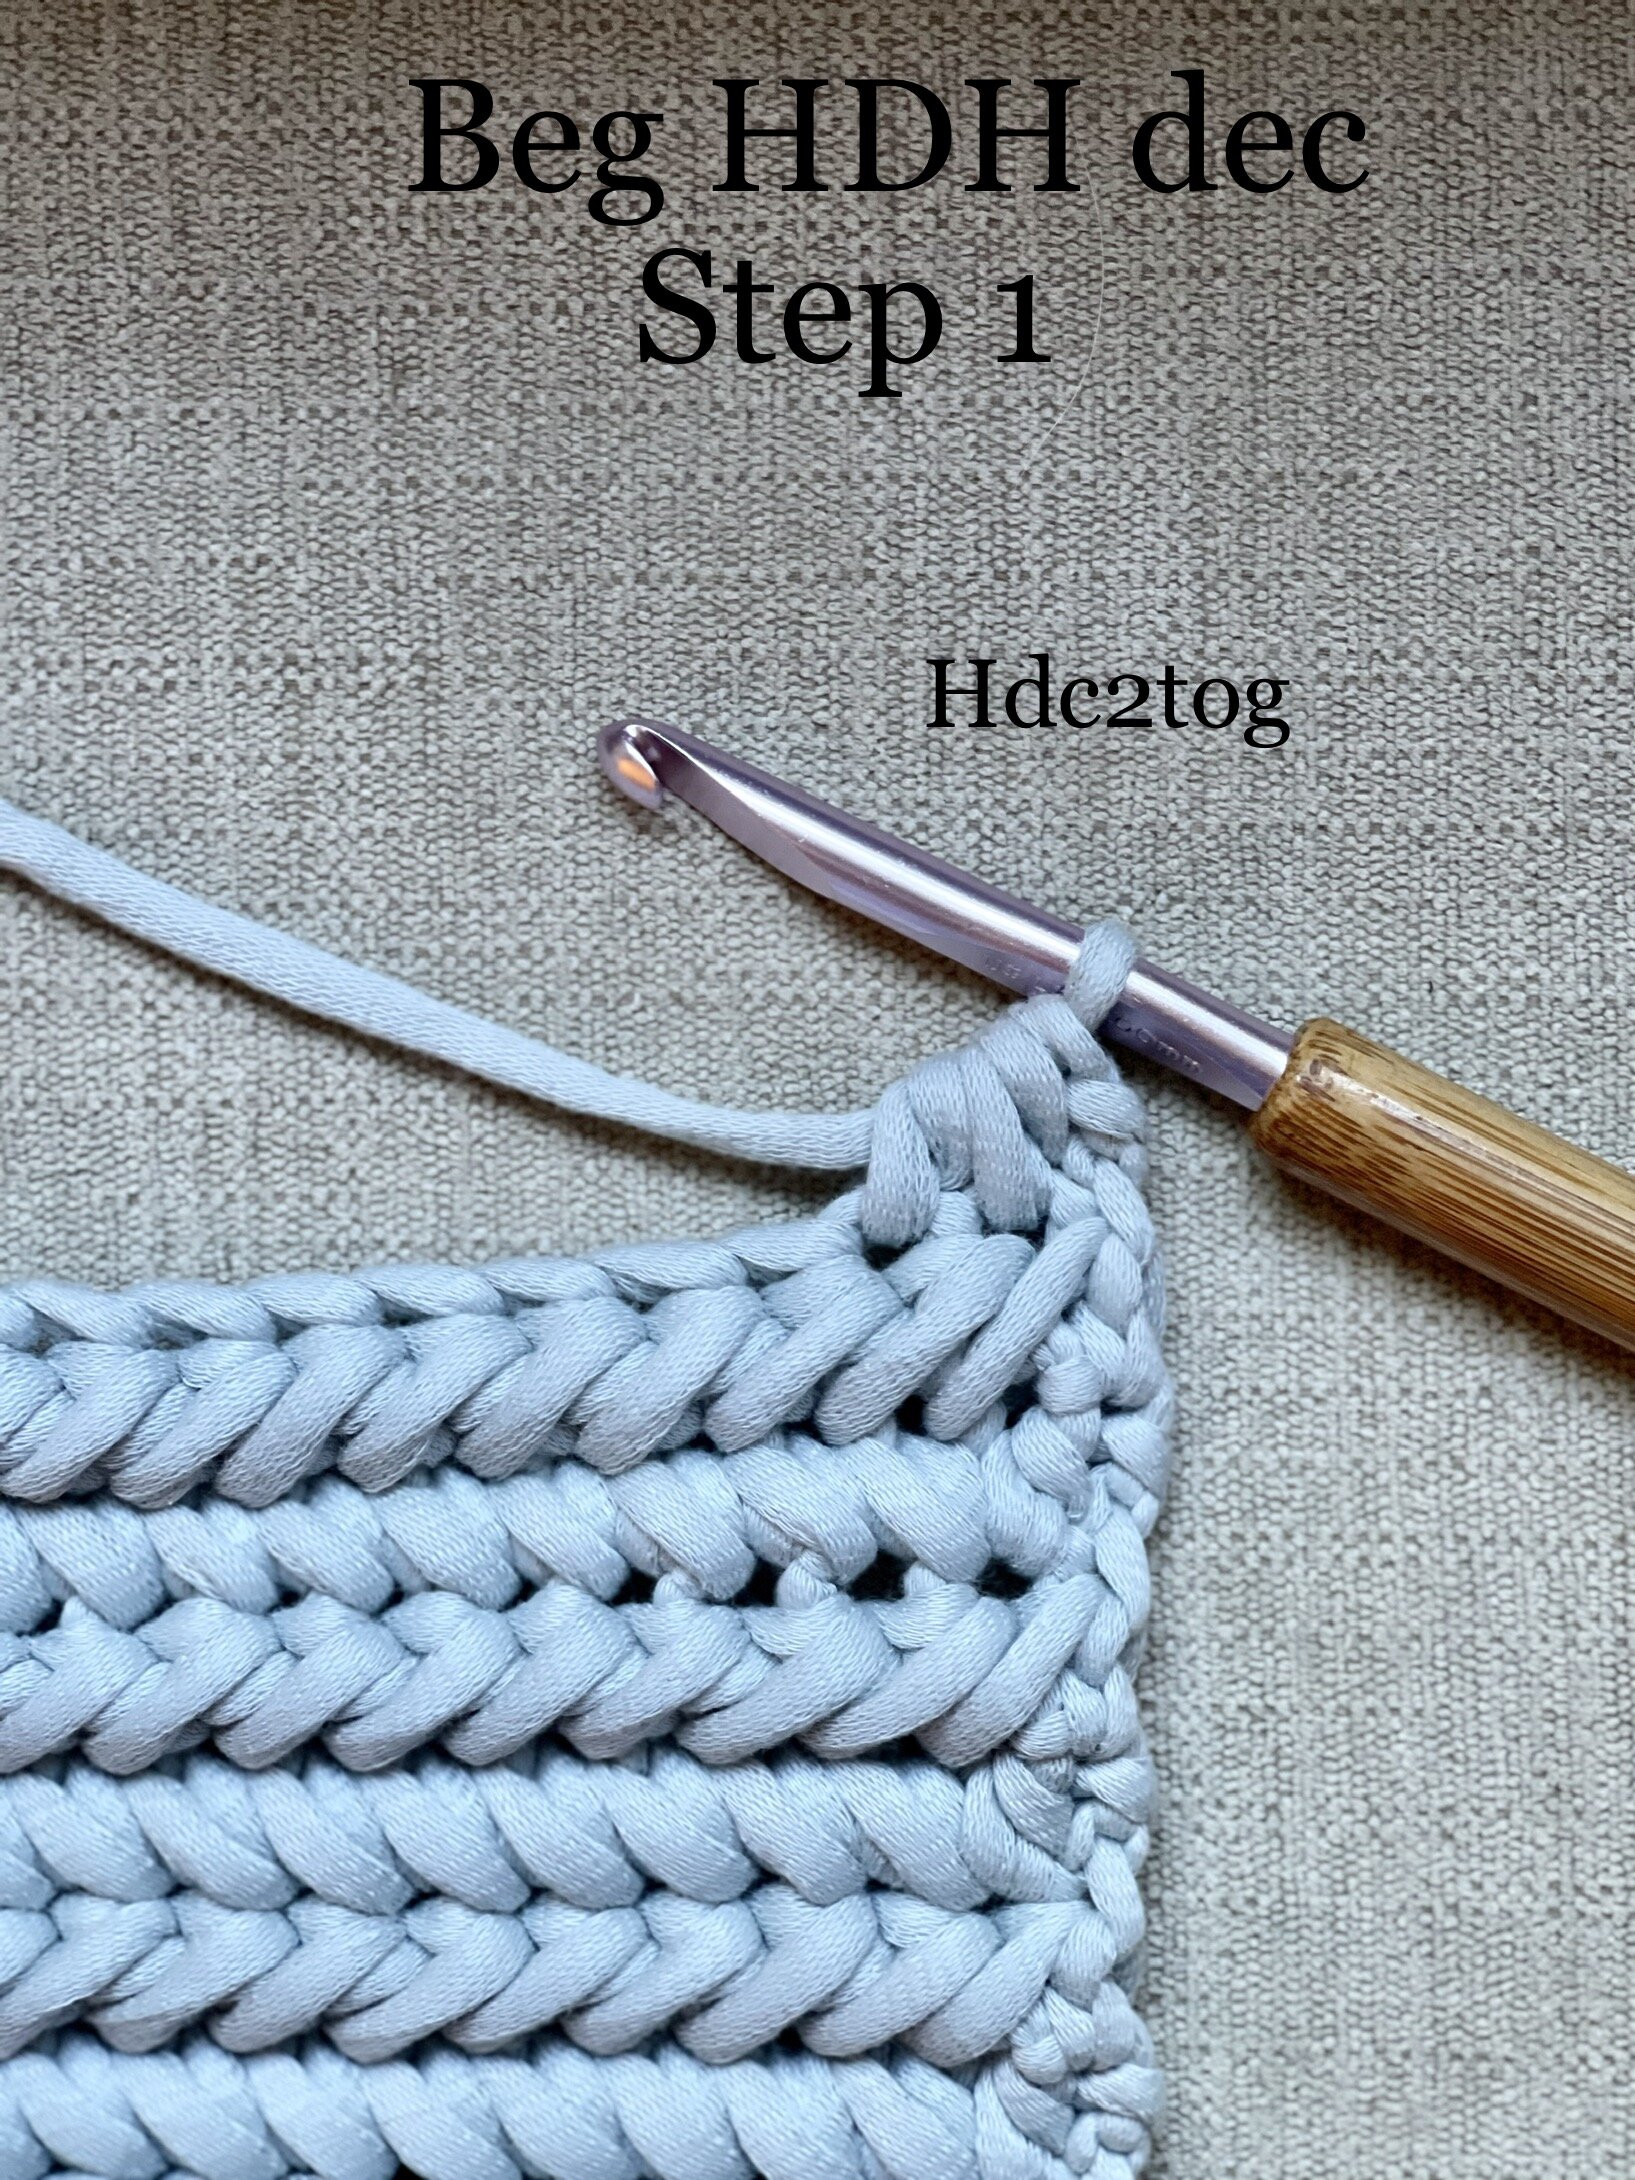
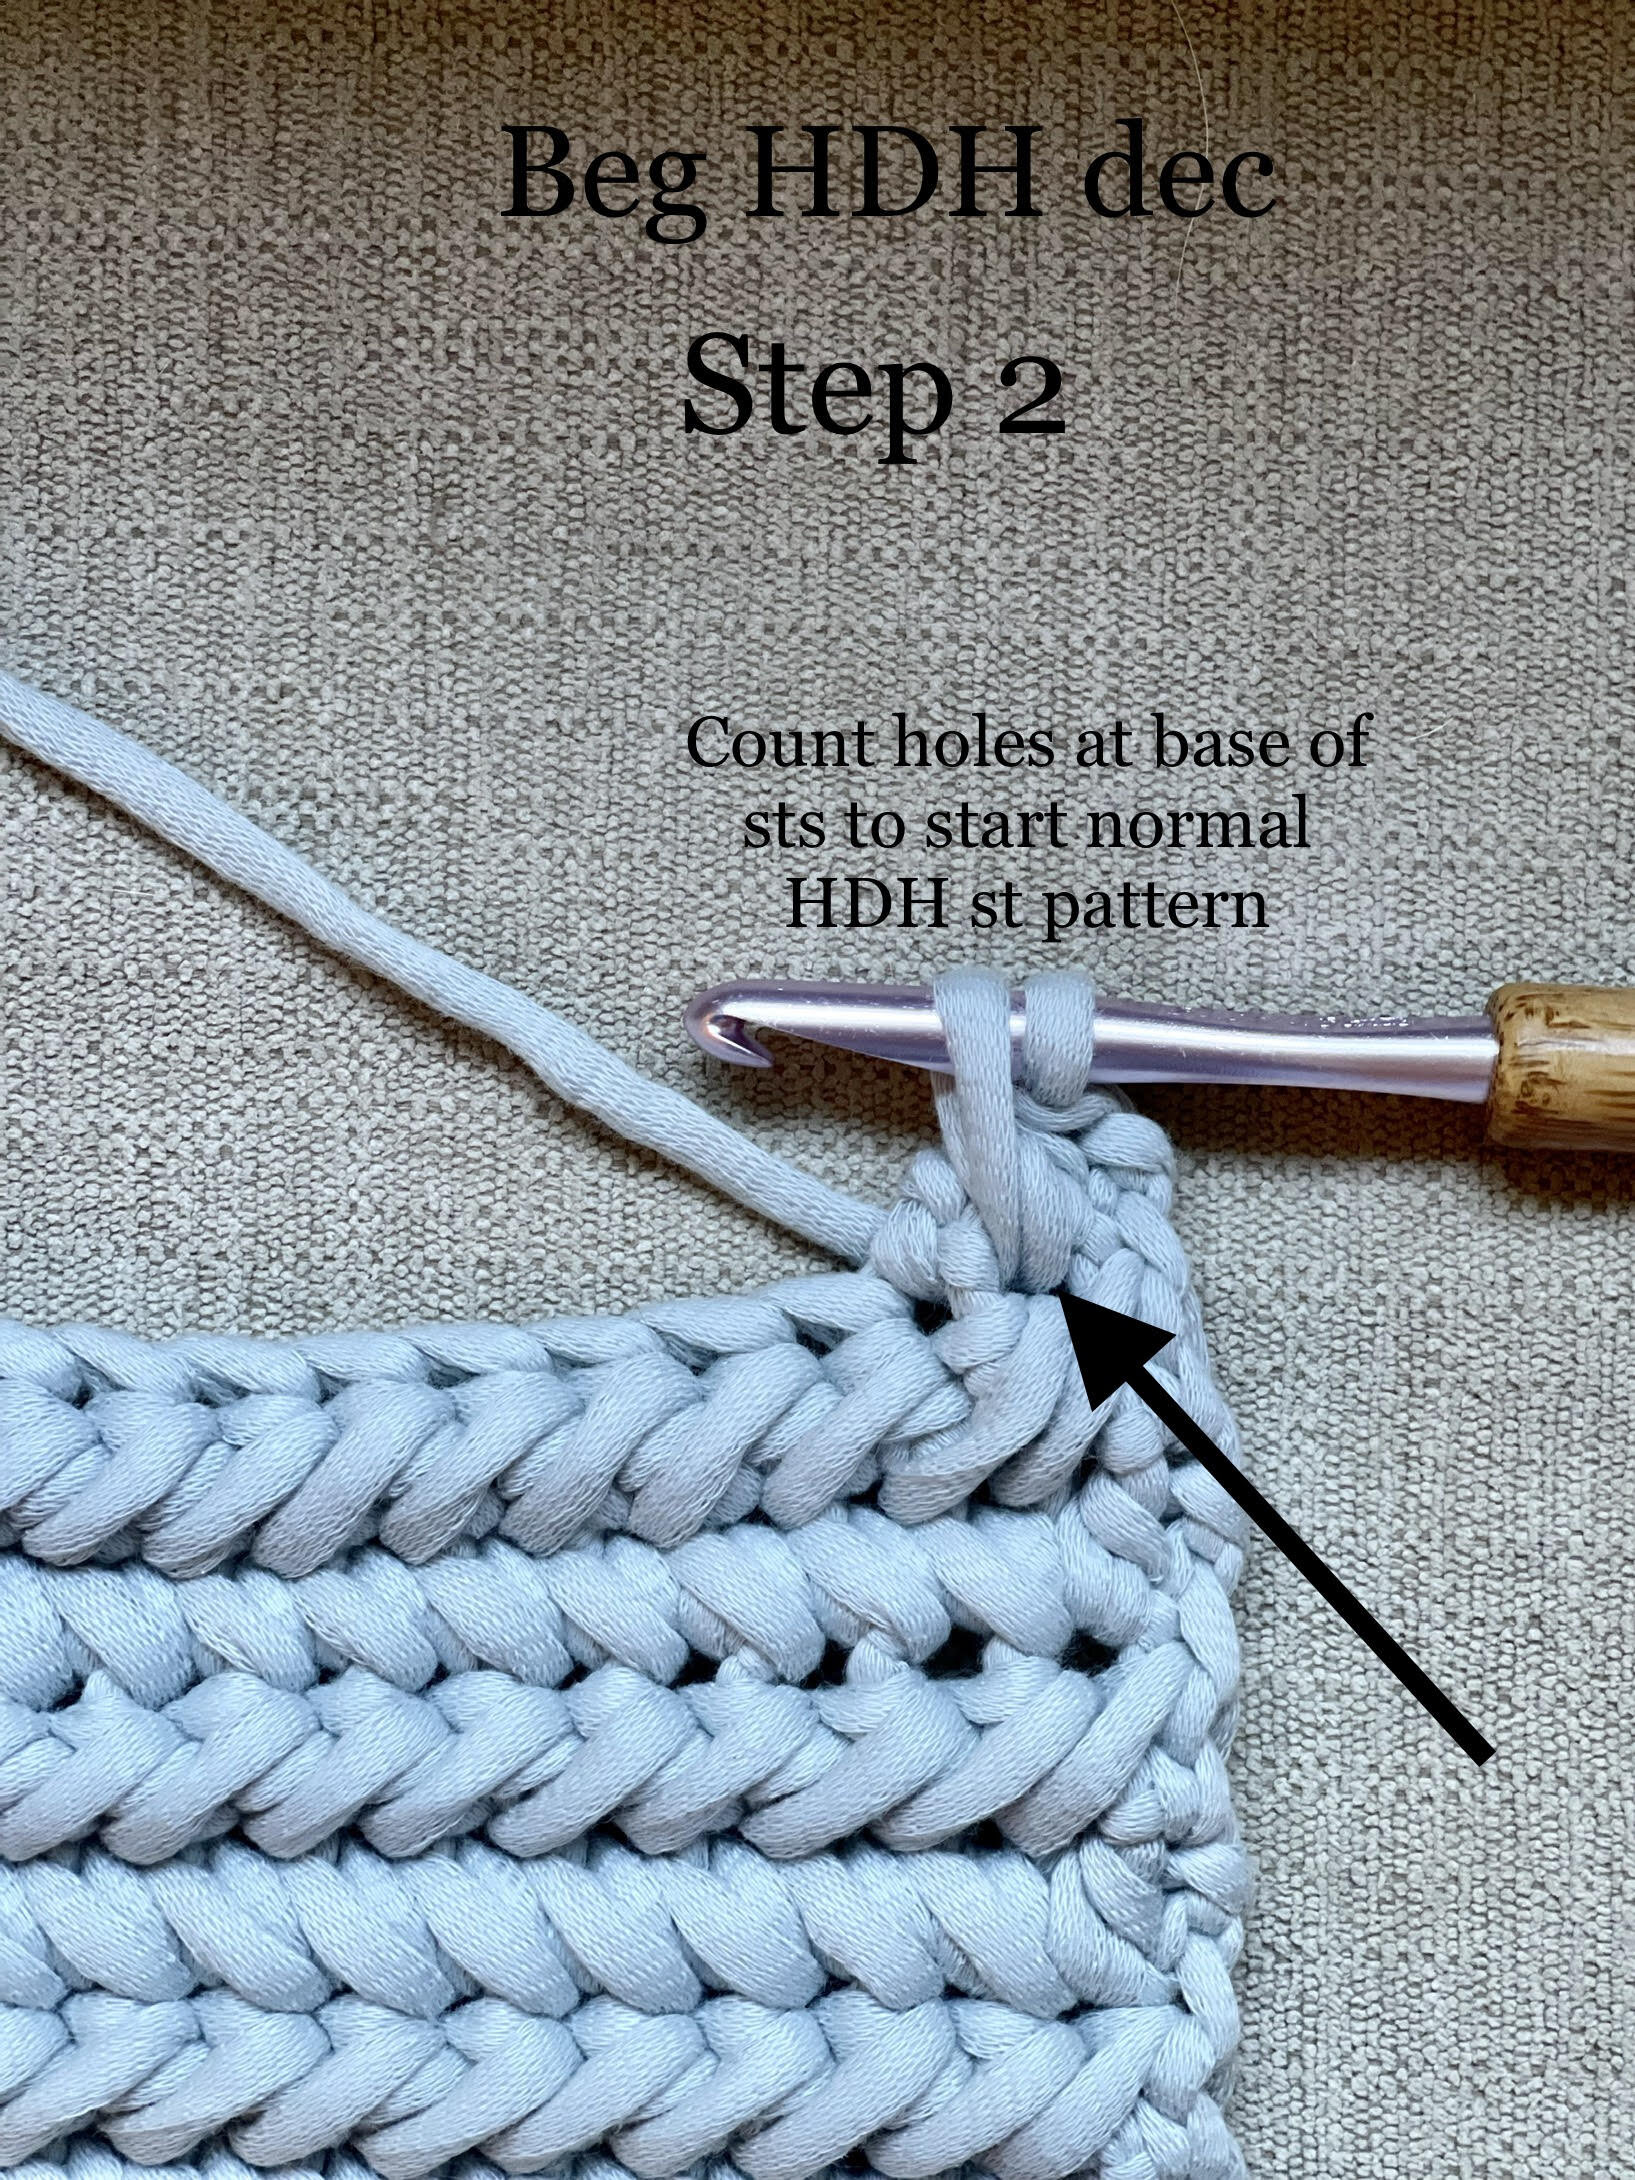
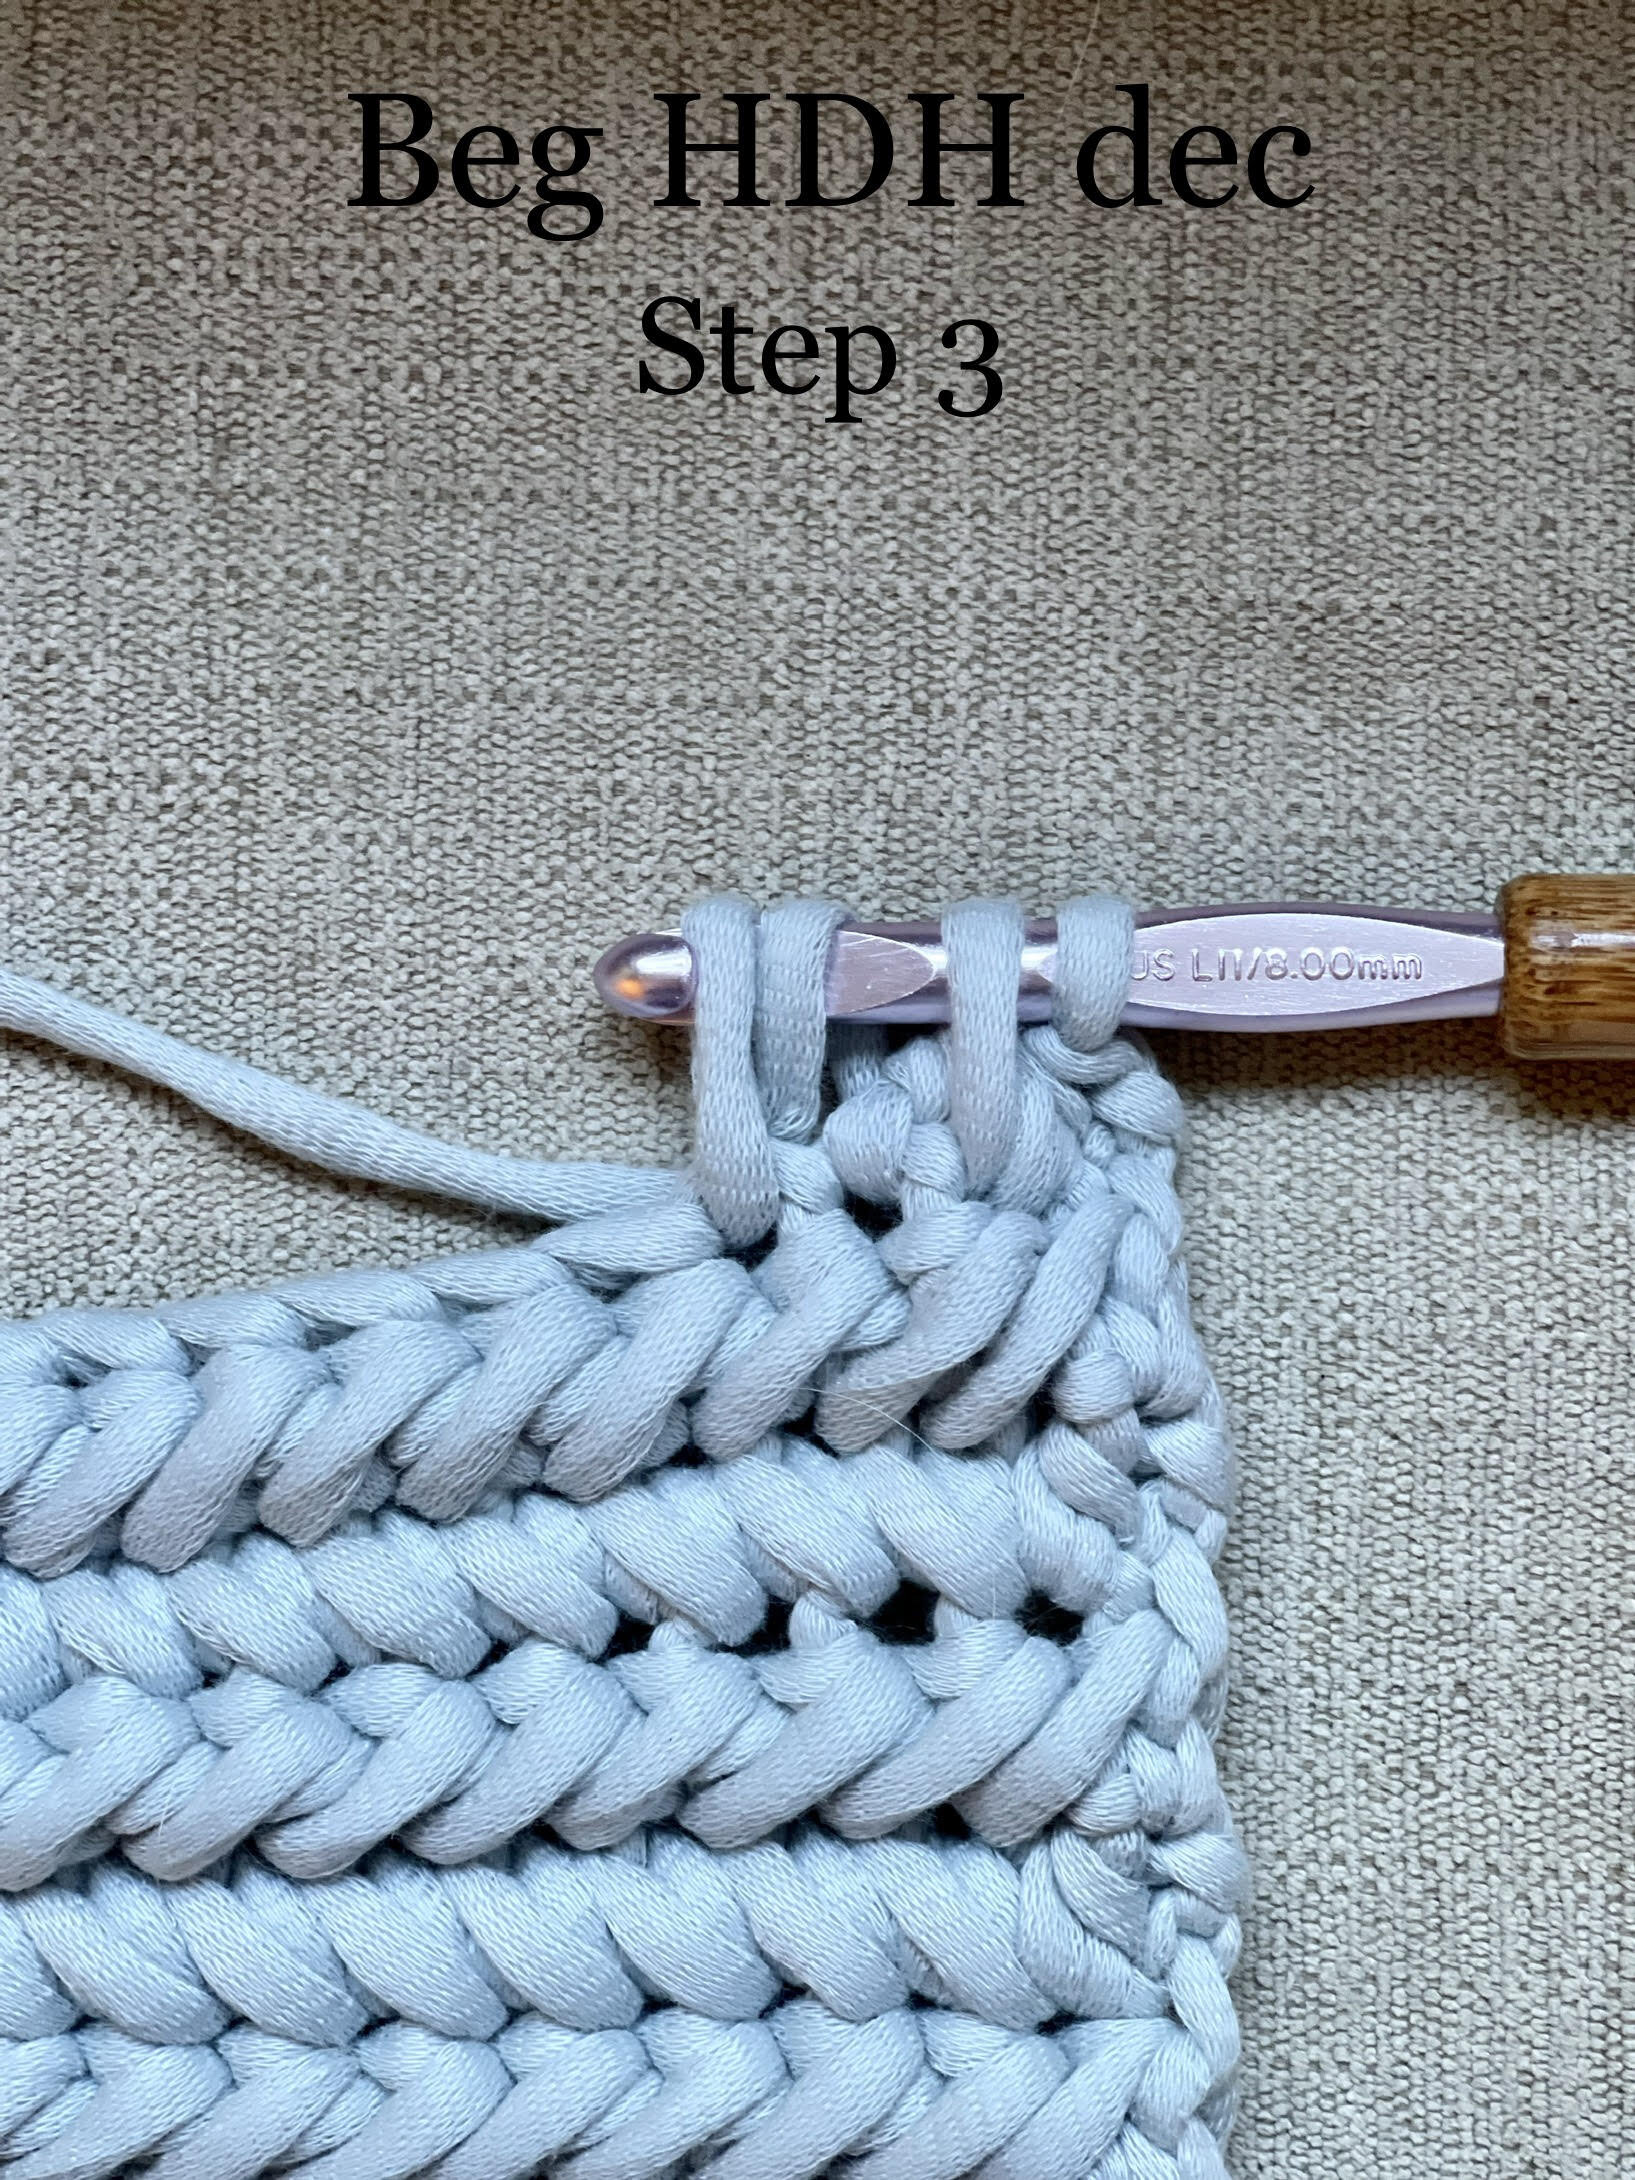
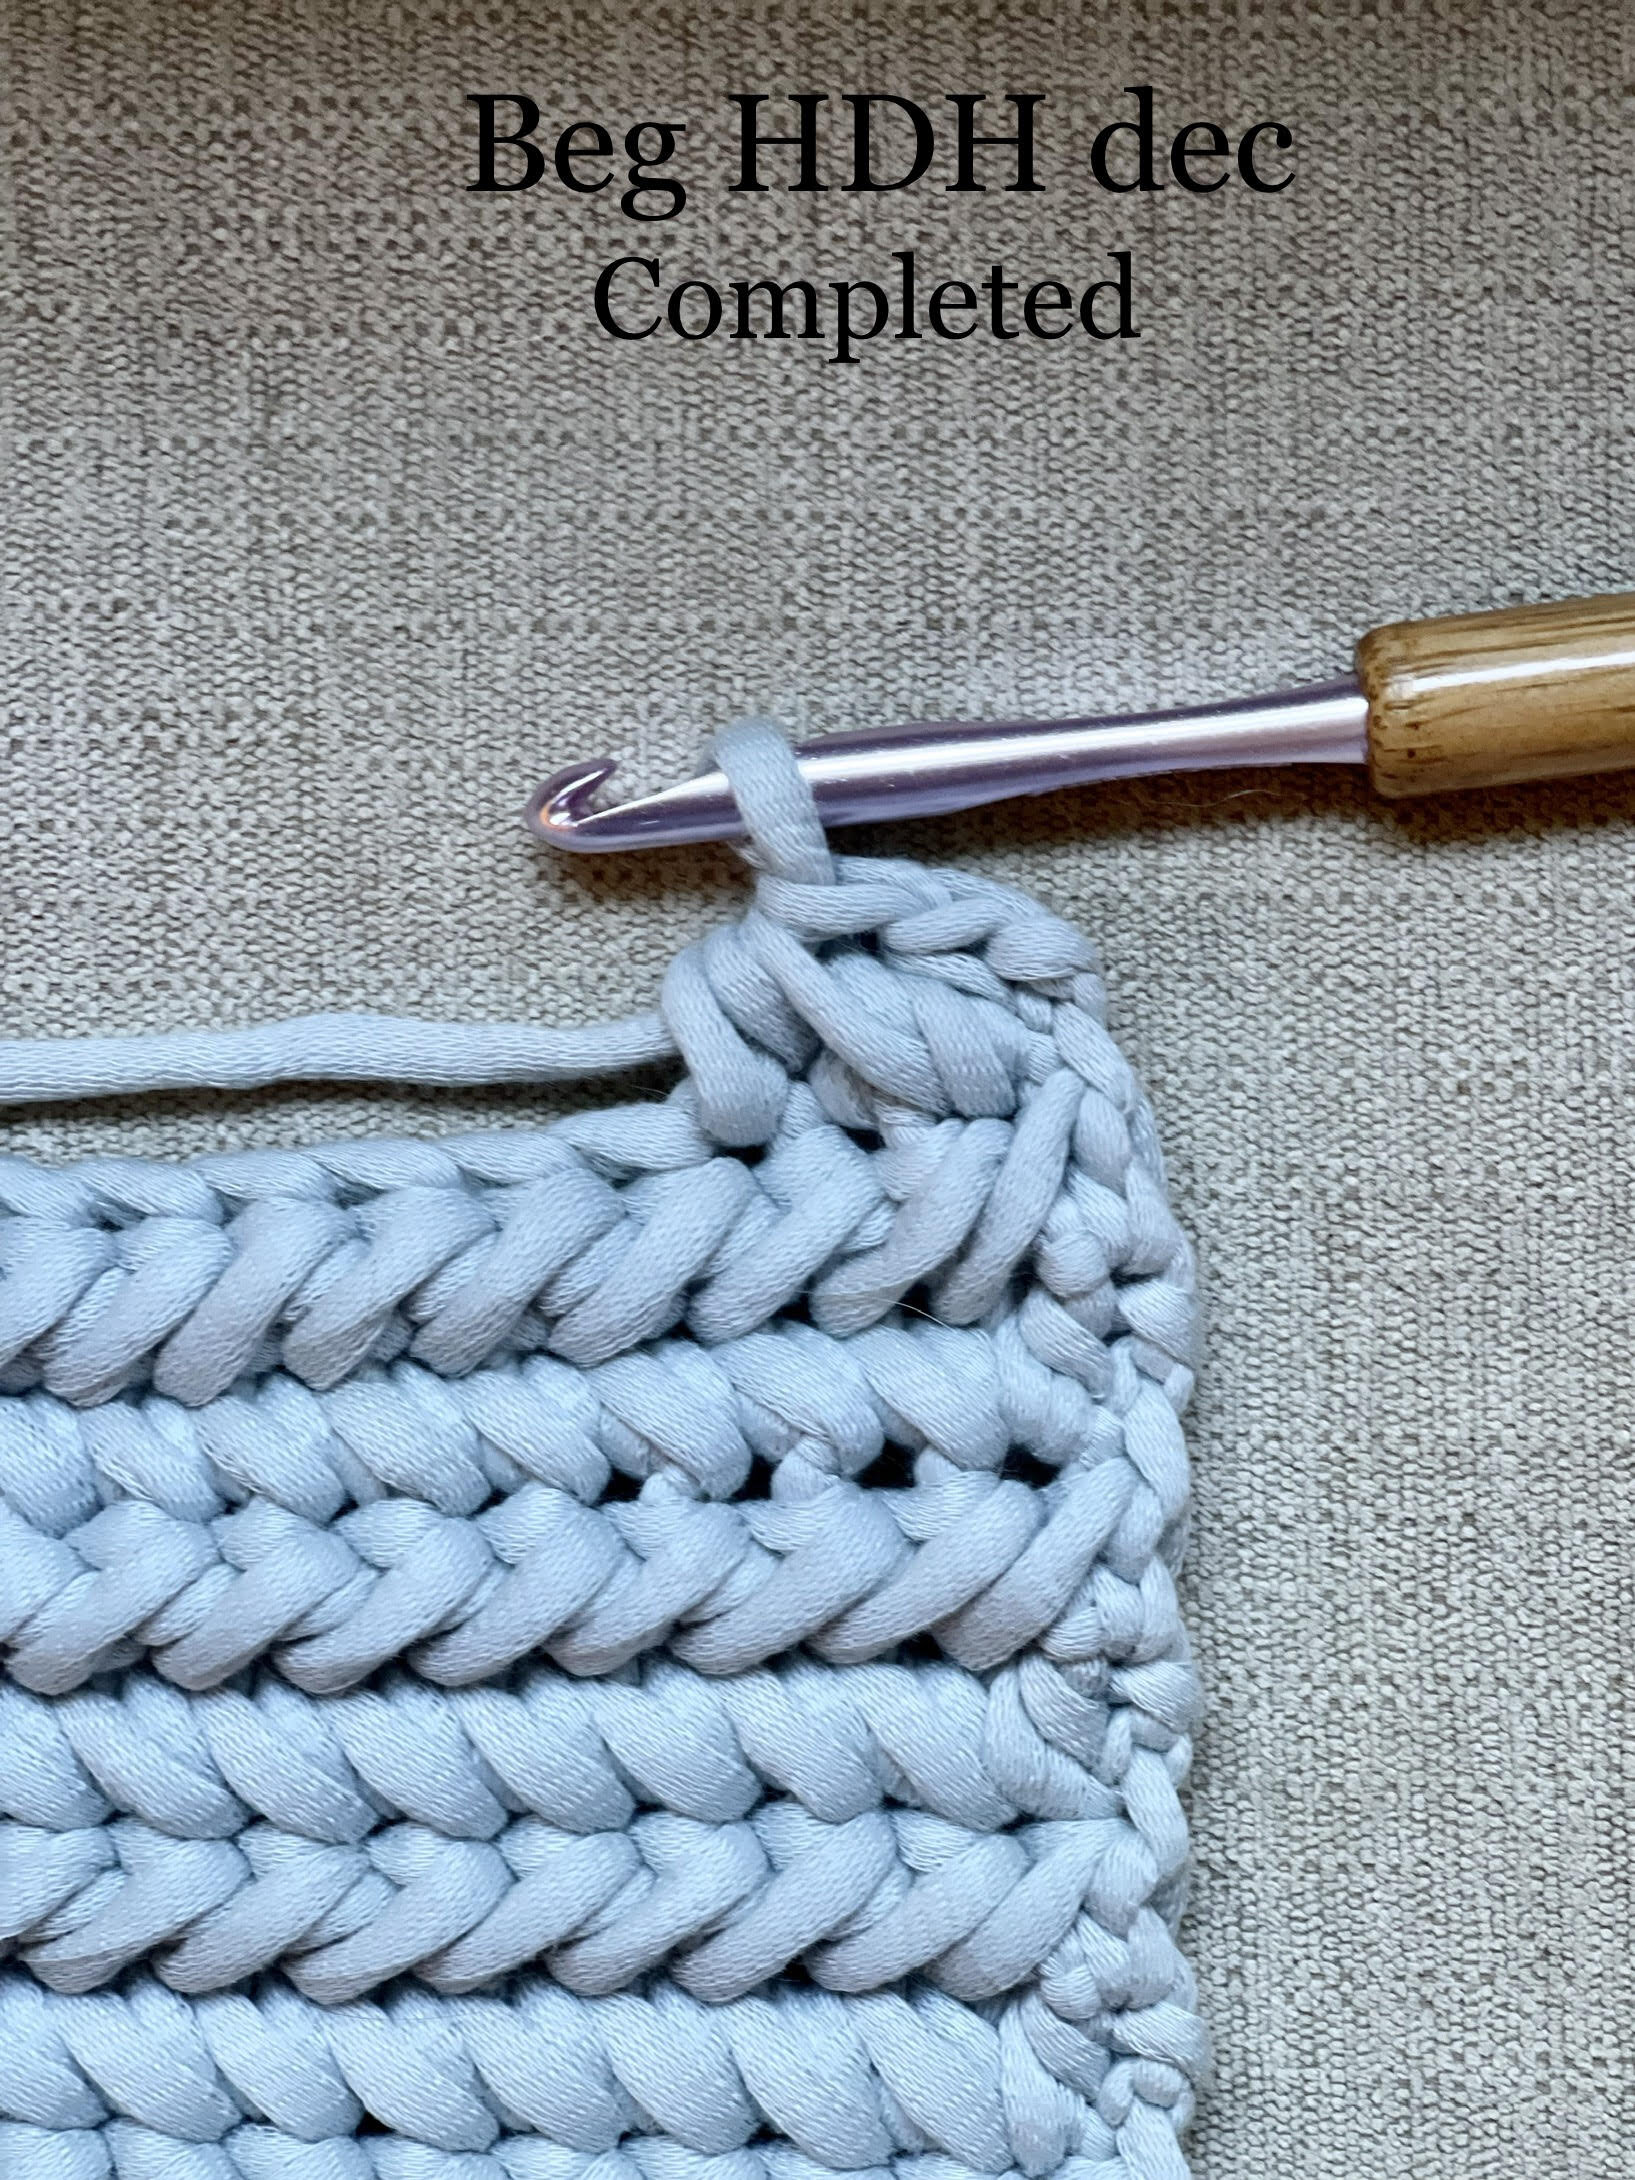
Beg HDH dec: Hdc2tog over first 2 sts, then counting the holes at the base of the hdc2tog st, beg HDH st pattern as if there were 2 sts instead of 1, moving backwards and forwards.
To visualize this stitch, see my YouTube video.
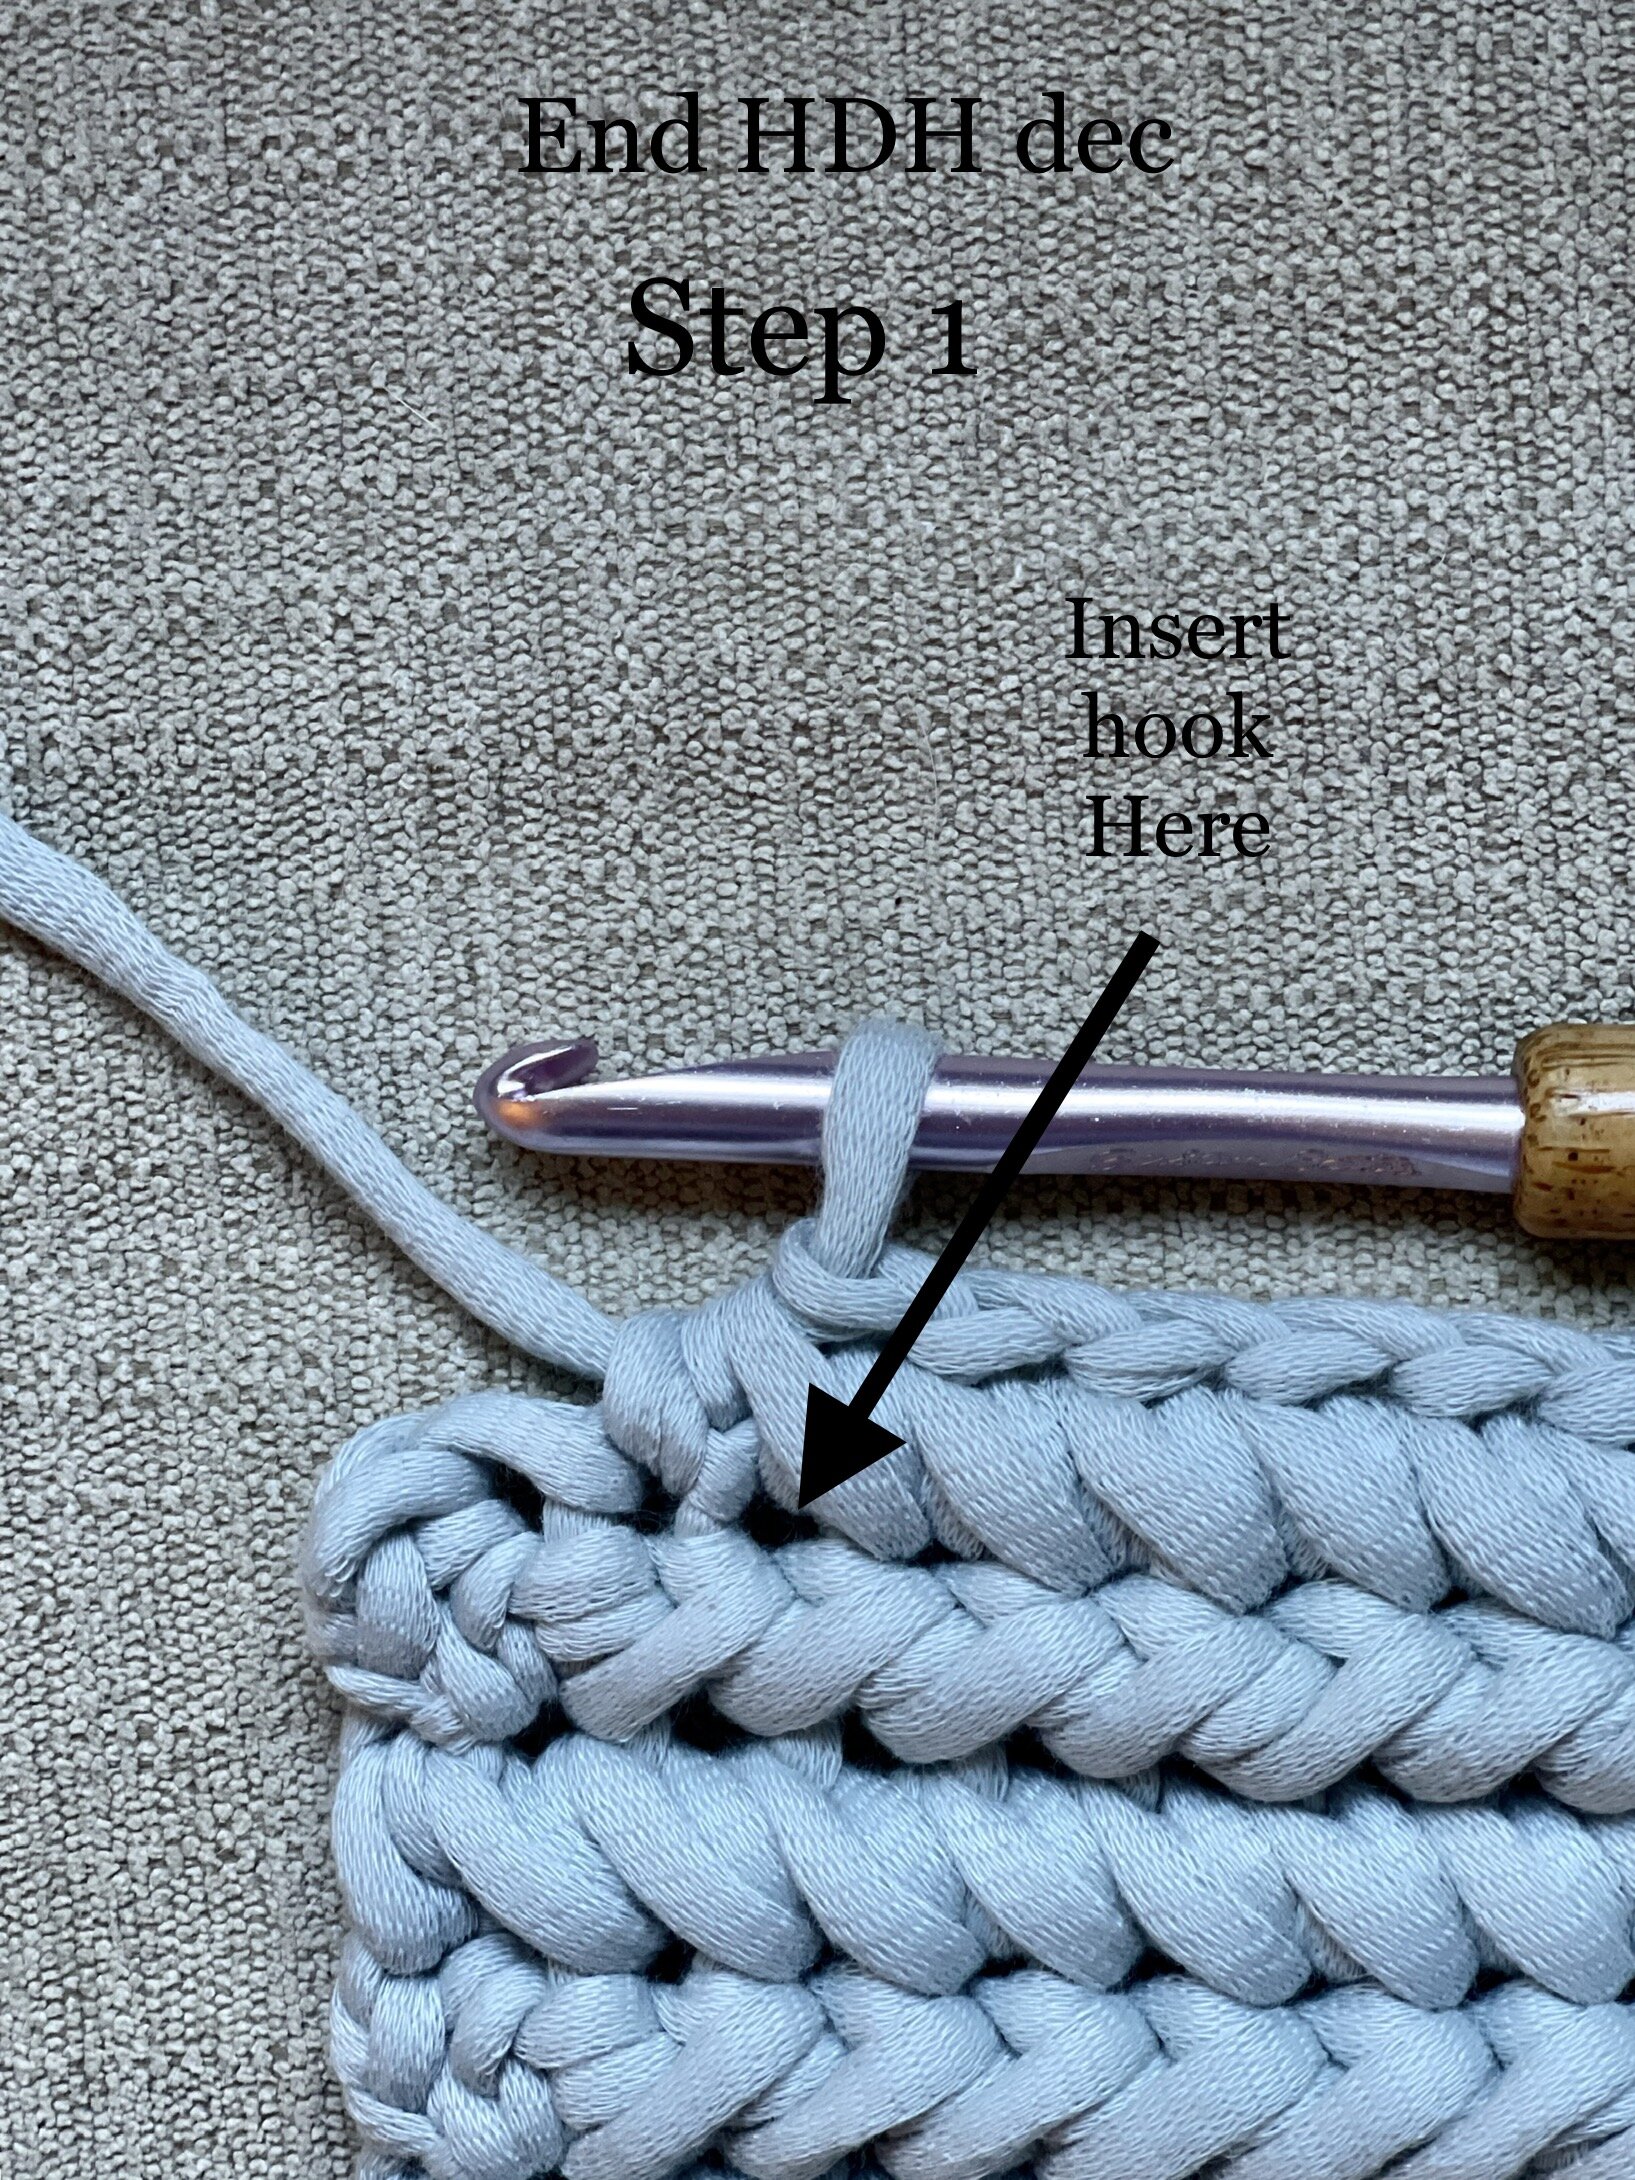
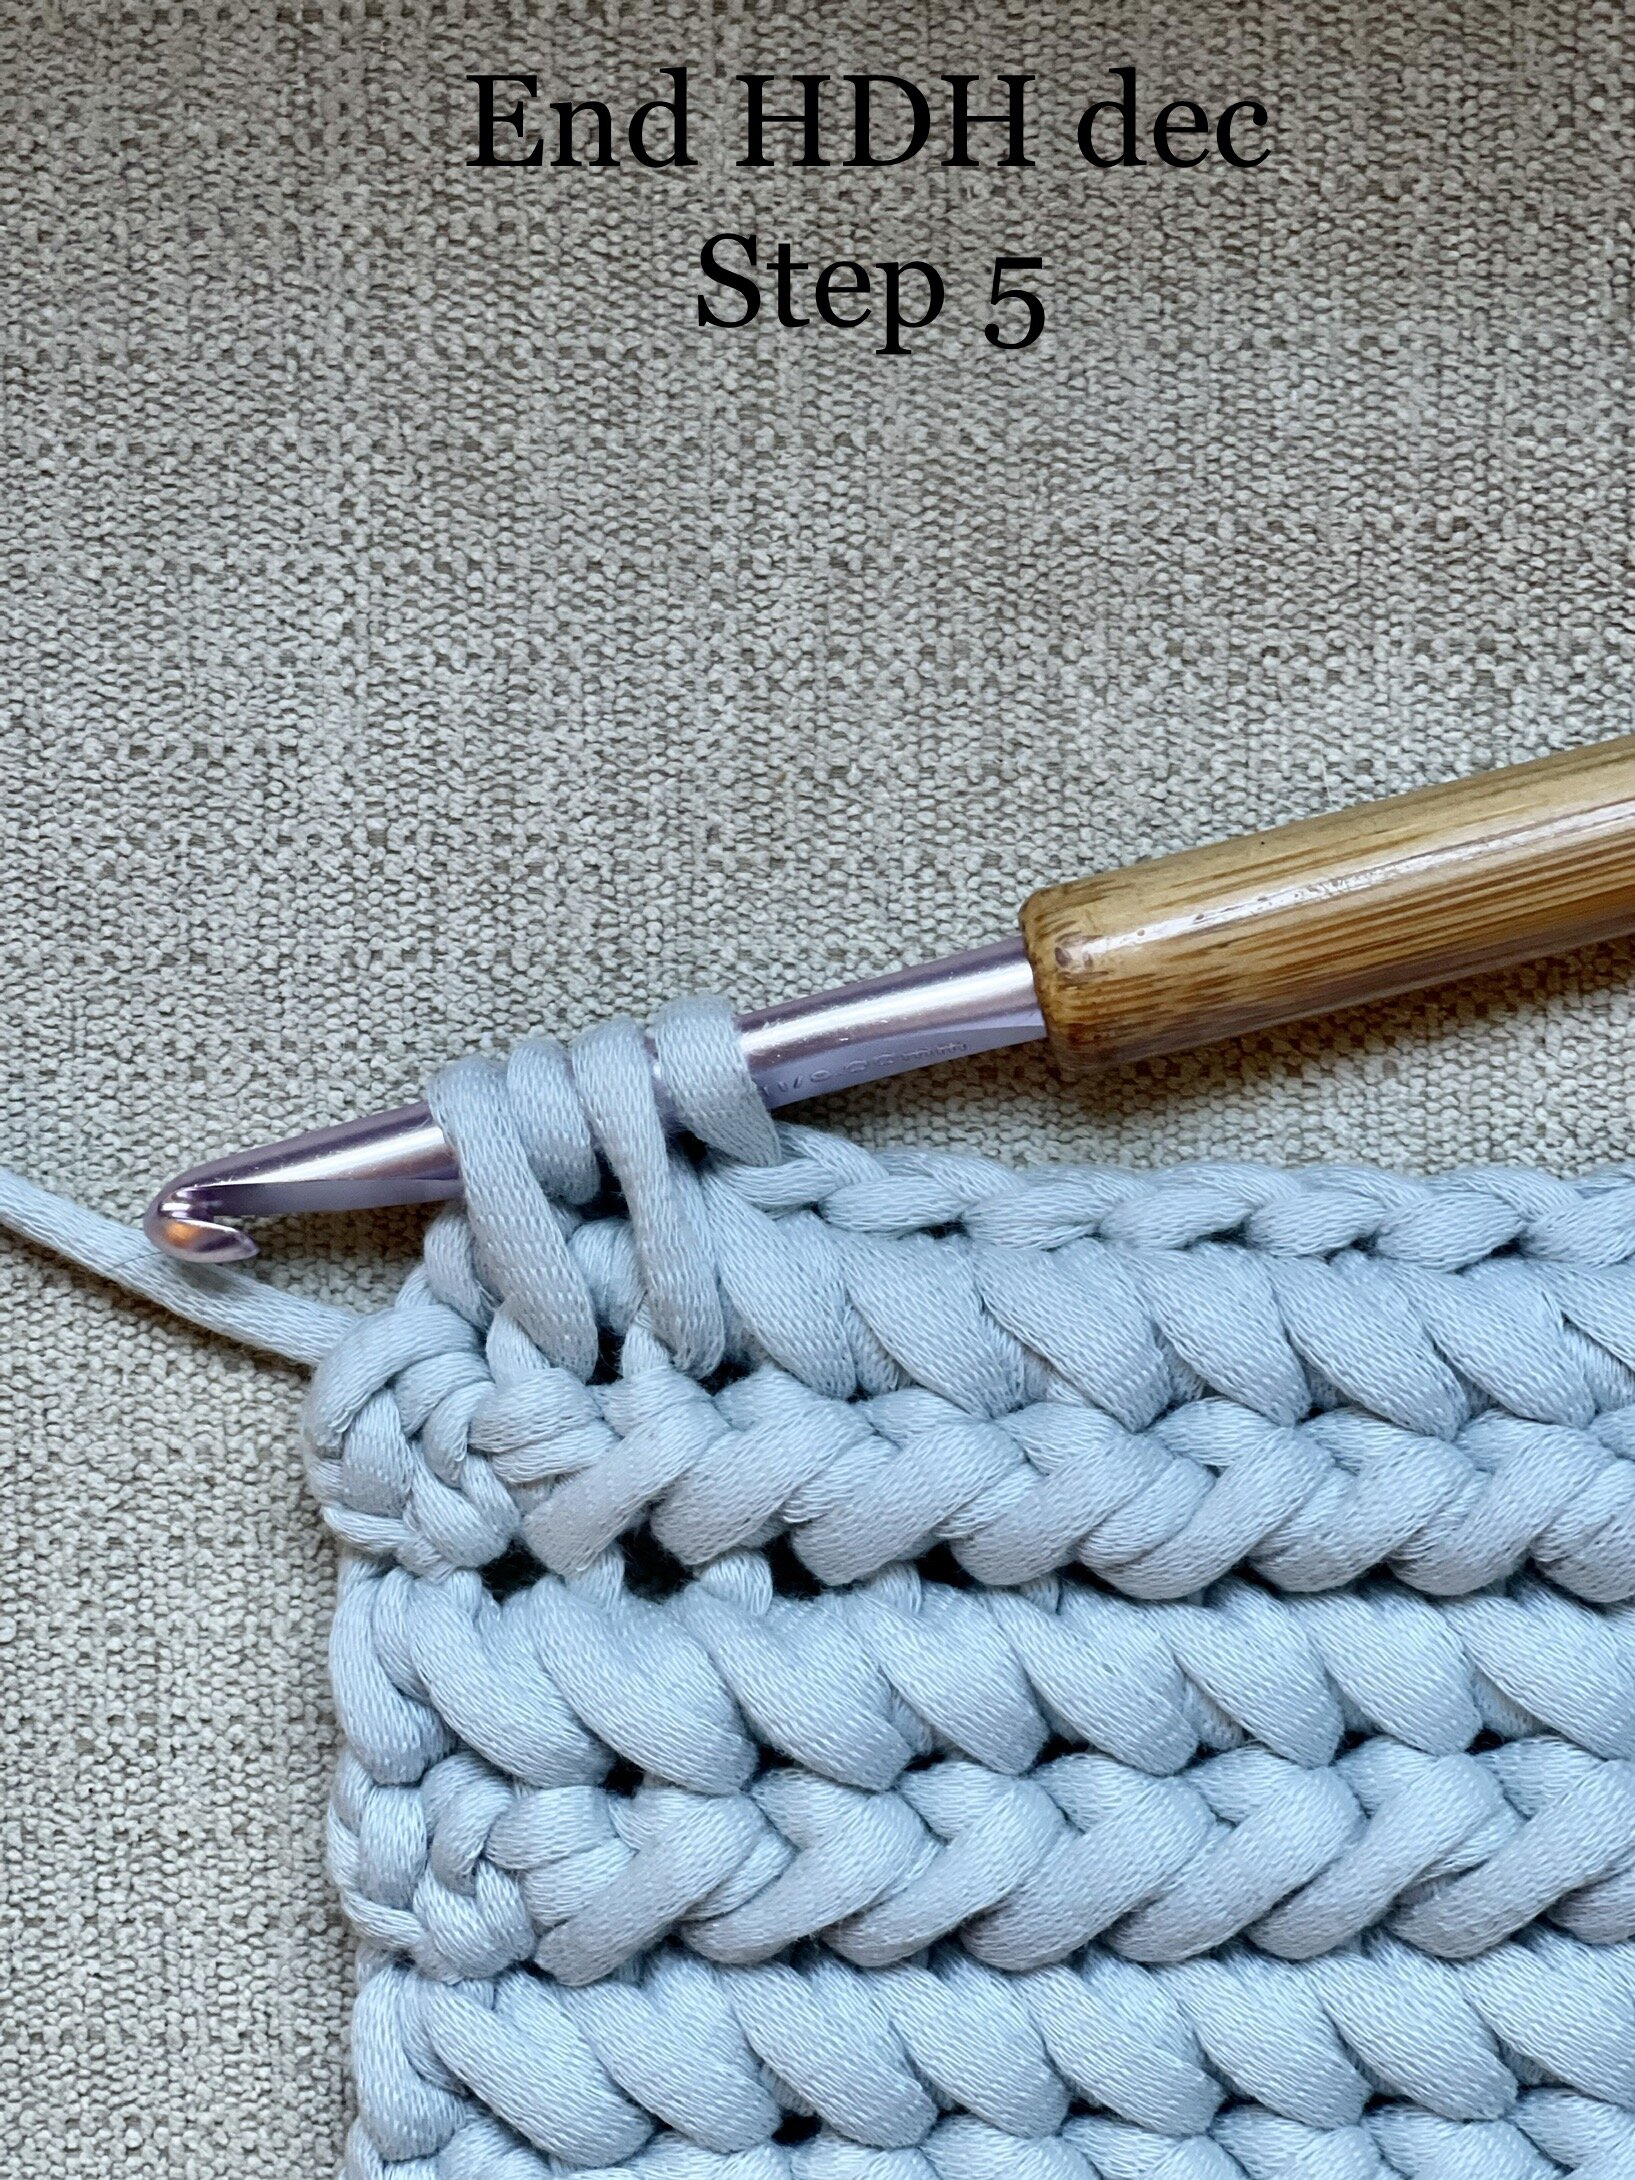
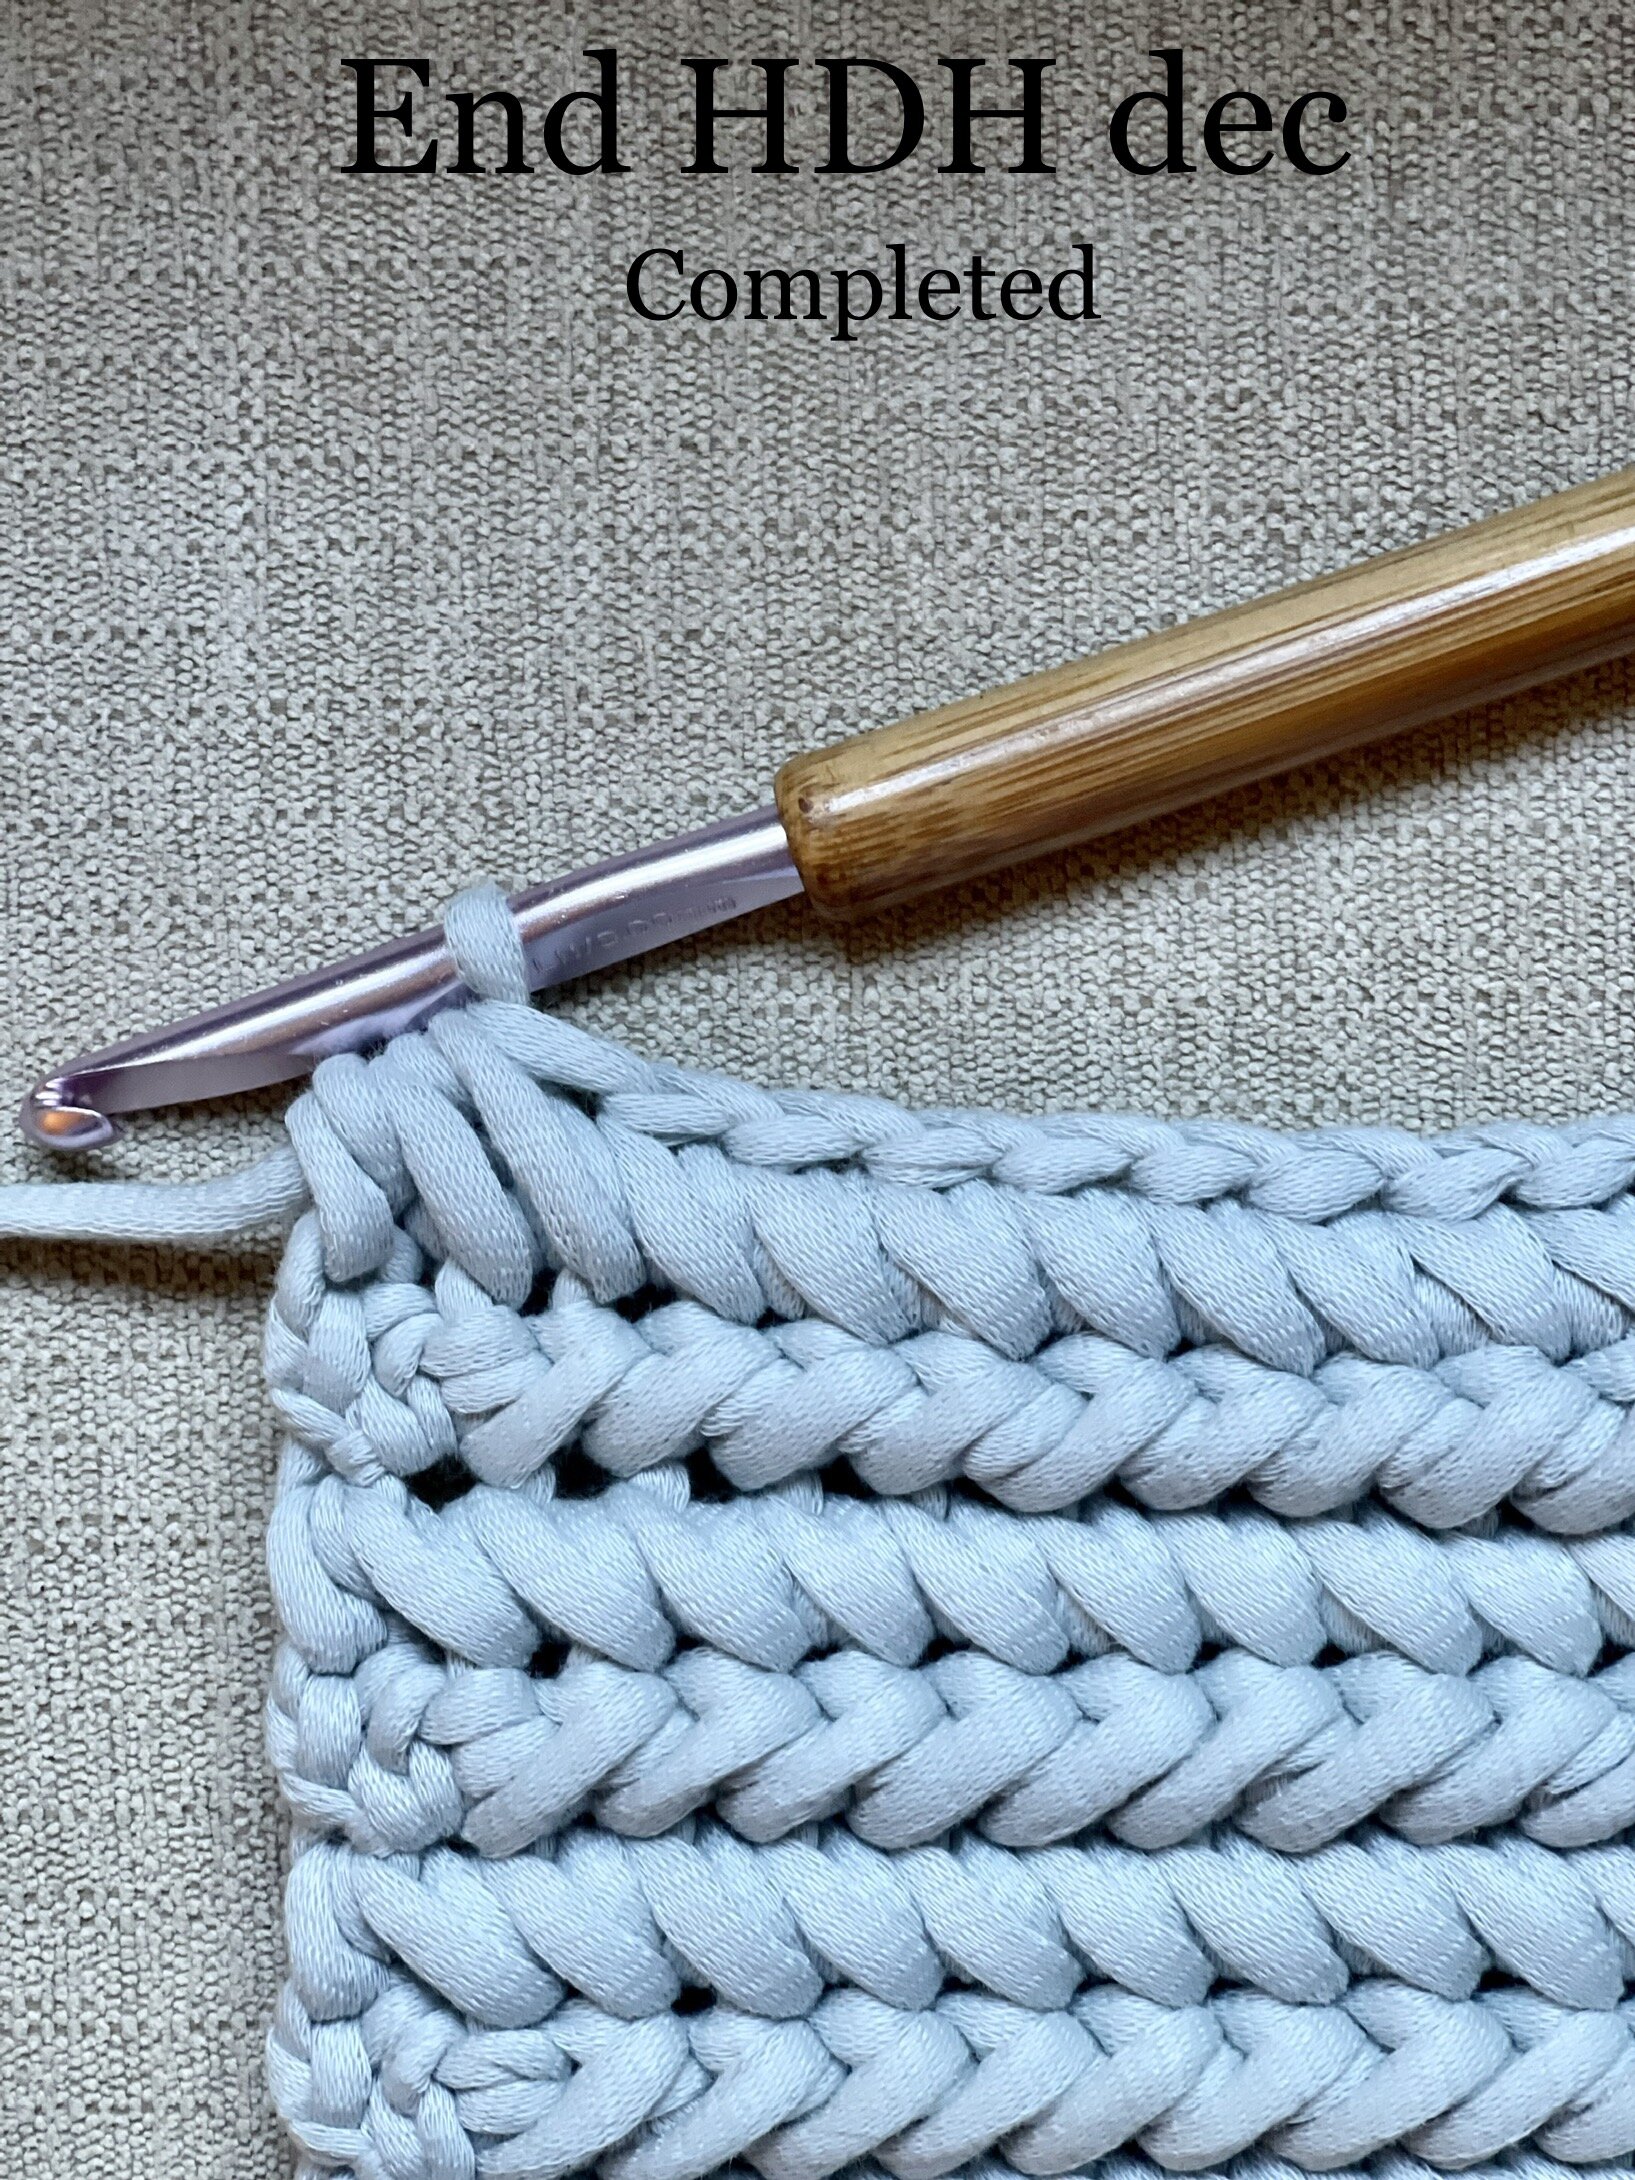
End HDC dec: When you reach the last 2 sts of the row, you will:
1) Count backwards 2 sts (counting the st you made last) and insert your hook, YO, pull up a loop.
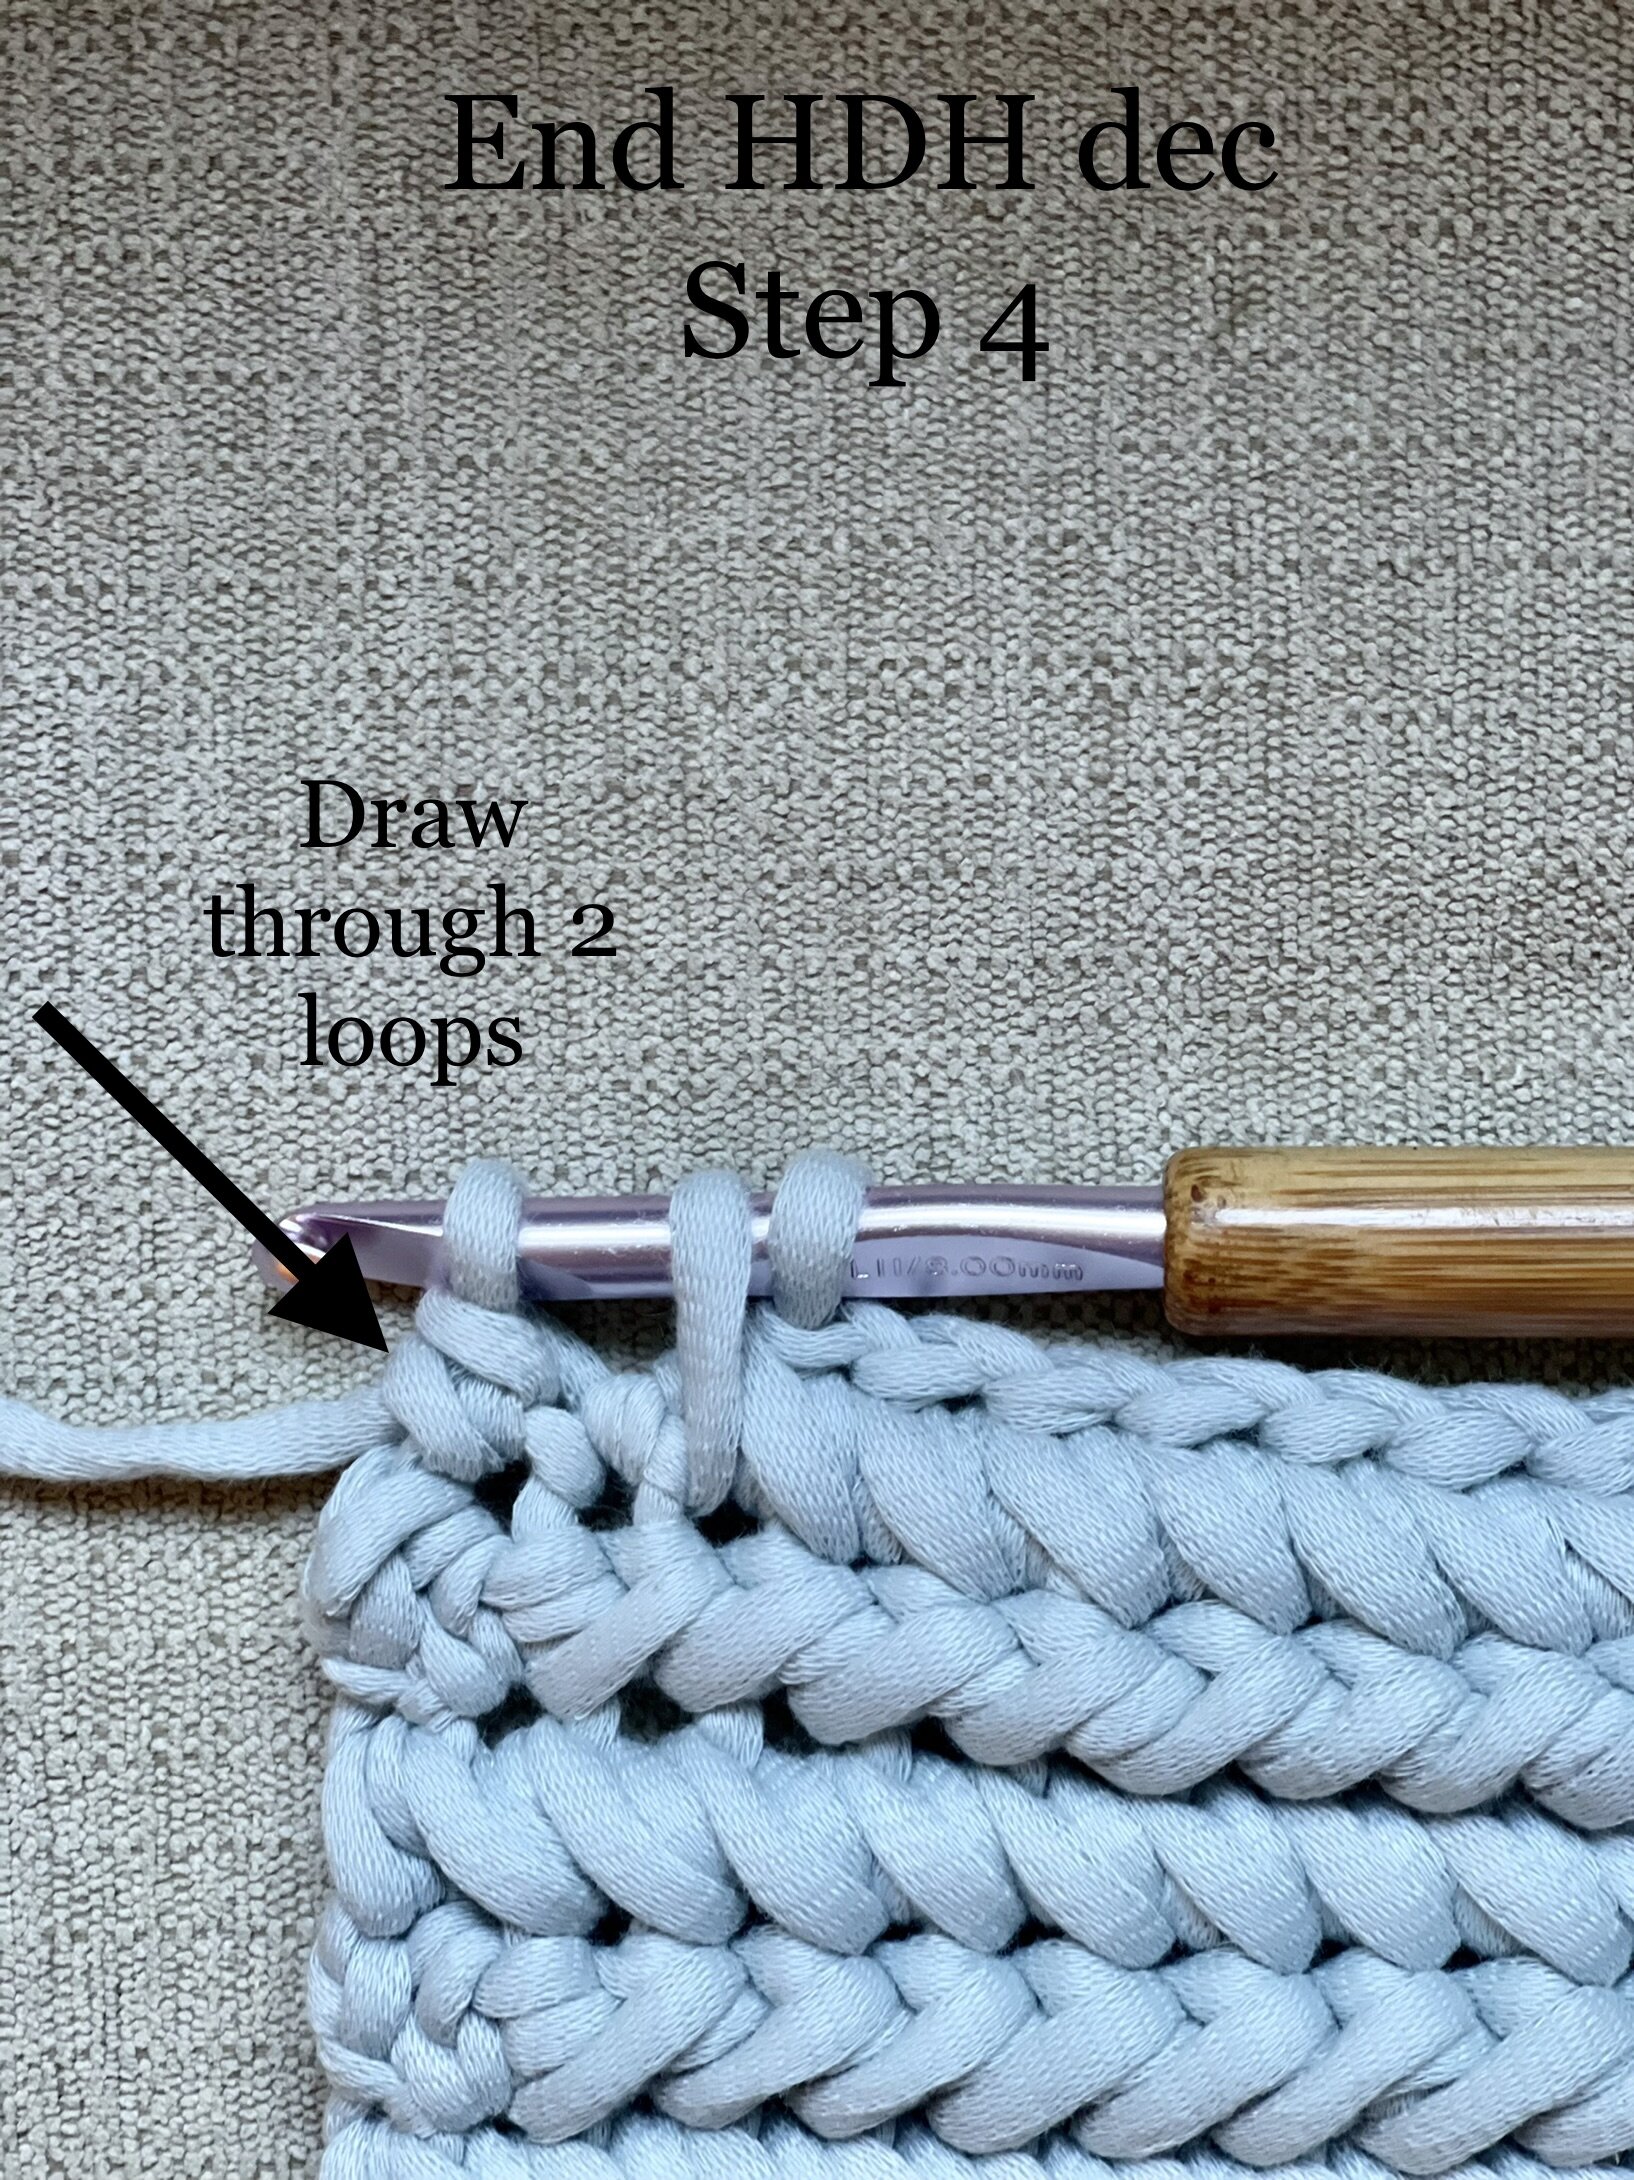
2) YO, move forward to the next open st, insert your hook, YO, pull up a loop (4 loops on hook), YO, pull through 2 loops on your hook.
3) Place hook 1 st back and draw up a loop (4 loops on hook).
4) YO, insert hook into last st of row, YO and draw up a loop (6 loops on hook), YO, draw through all loops on hook.
To visualize this stitch, see my YouTube video.


Gauge:
10 sts and 7 rows of HDH = 4" (10 cm)
Finished Measurements:
Measures approx. 9 x 7” laying flat and the flap buttoned closed.
Instructions:
Bag is worked as a flat panel in the row, then joined together at the sides with the fringe and button added last.
Row 1: Leaving a long tail for sewing purposes later, ch 20, hdc in 3rd ch from hook, hdc in next st, beg HDH across. [18 sts]
Row 2: Ch 2 (beg ch 2 does not count as a st from here on out), turn, HDH across. [18 sts]
Rows 3-23: Ch 2, turn, HDH across. [18 sts]
Gauge check: By now your piece should measure approx. 13.5” in length and 9” in width (34 x 23 cm)
Row 24: Ch 2, turn, Beg HDH dec over first 2 sts, HDH across to last 2 sts, End HDH dec over last 2 sts. [16 sts]
Rows 25-30: Rep Row 24.
Row 31: Beg HDH dec over first 2 sts, End HDH dec over last 2 sts. [2 sts]
Finishing Round: Turn, ch 4, sk 1 st, sl st in last st (buttonhole made), working up the side of your piece make 3 sl sts for every 2 rows; ch 1, turn so you are working along the foundation row make 1 sl st per st; ch 1, turn so you are working up the other side of the piece making 3 sl sts for every 2 rows until you reach your ch-4 sp. Join with seamless join to base of ch-4 buttonhole and FO, weaving in tail. (See photo below). To visualize this round, see my video.

Join bottom row with Row 22, making sure the RS of your piece is facing out. Using long beg tail, whip st under sl sts to sew side seam shut. Cut a length of yarn and rep to other side seam. Weave in all tails. Add large bead or button to middle front of bag, between rows 3 and 4 from the bottom.
NOTE: I give tips on how to weave in fewer tails in your bag if you watch my video.
Make buttonhole tassel
Wrap a piece of cardboard (or your fingers) approx. 3.5” wide 7 times and bring one end of tails through buttonhole. Cut a length of yarn approx. 5” long and use the Gathering knot to tie tassel tails together and secure to buttonhole loop. Trim ends evenly.
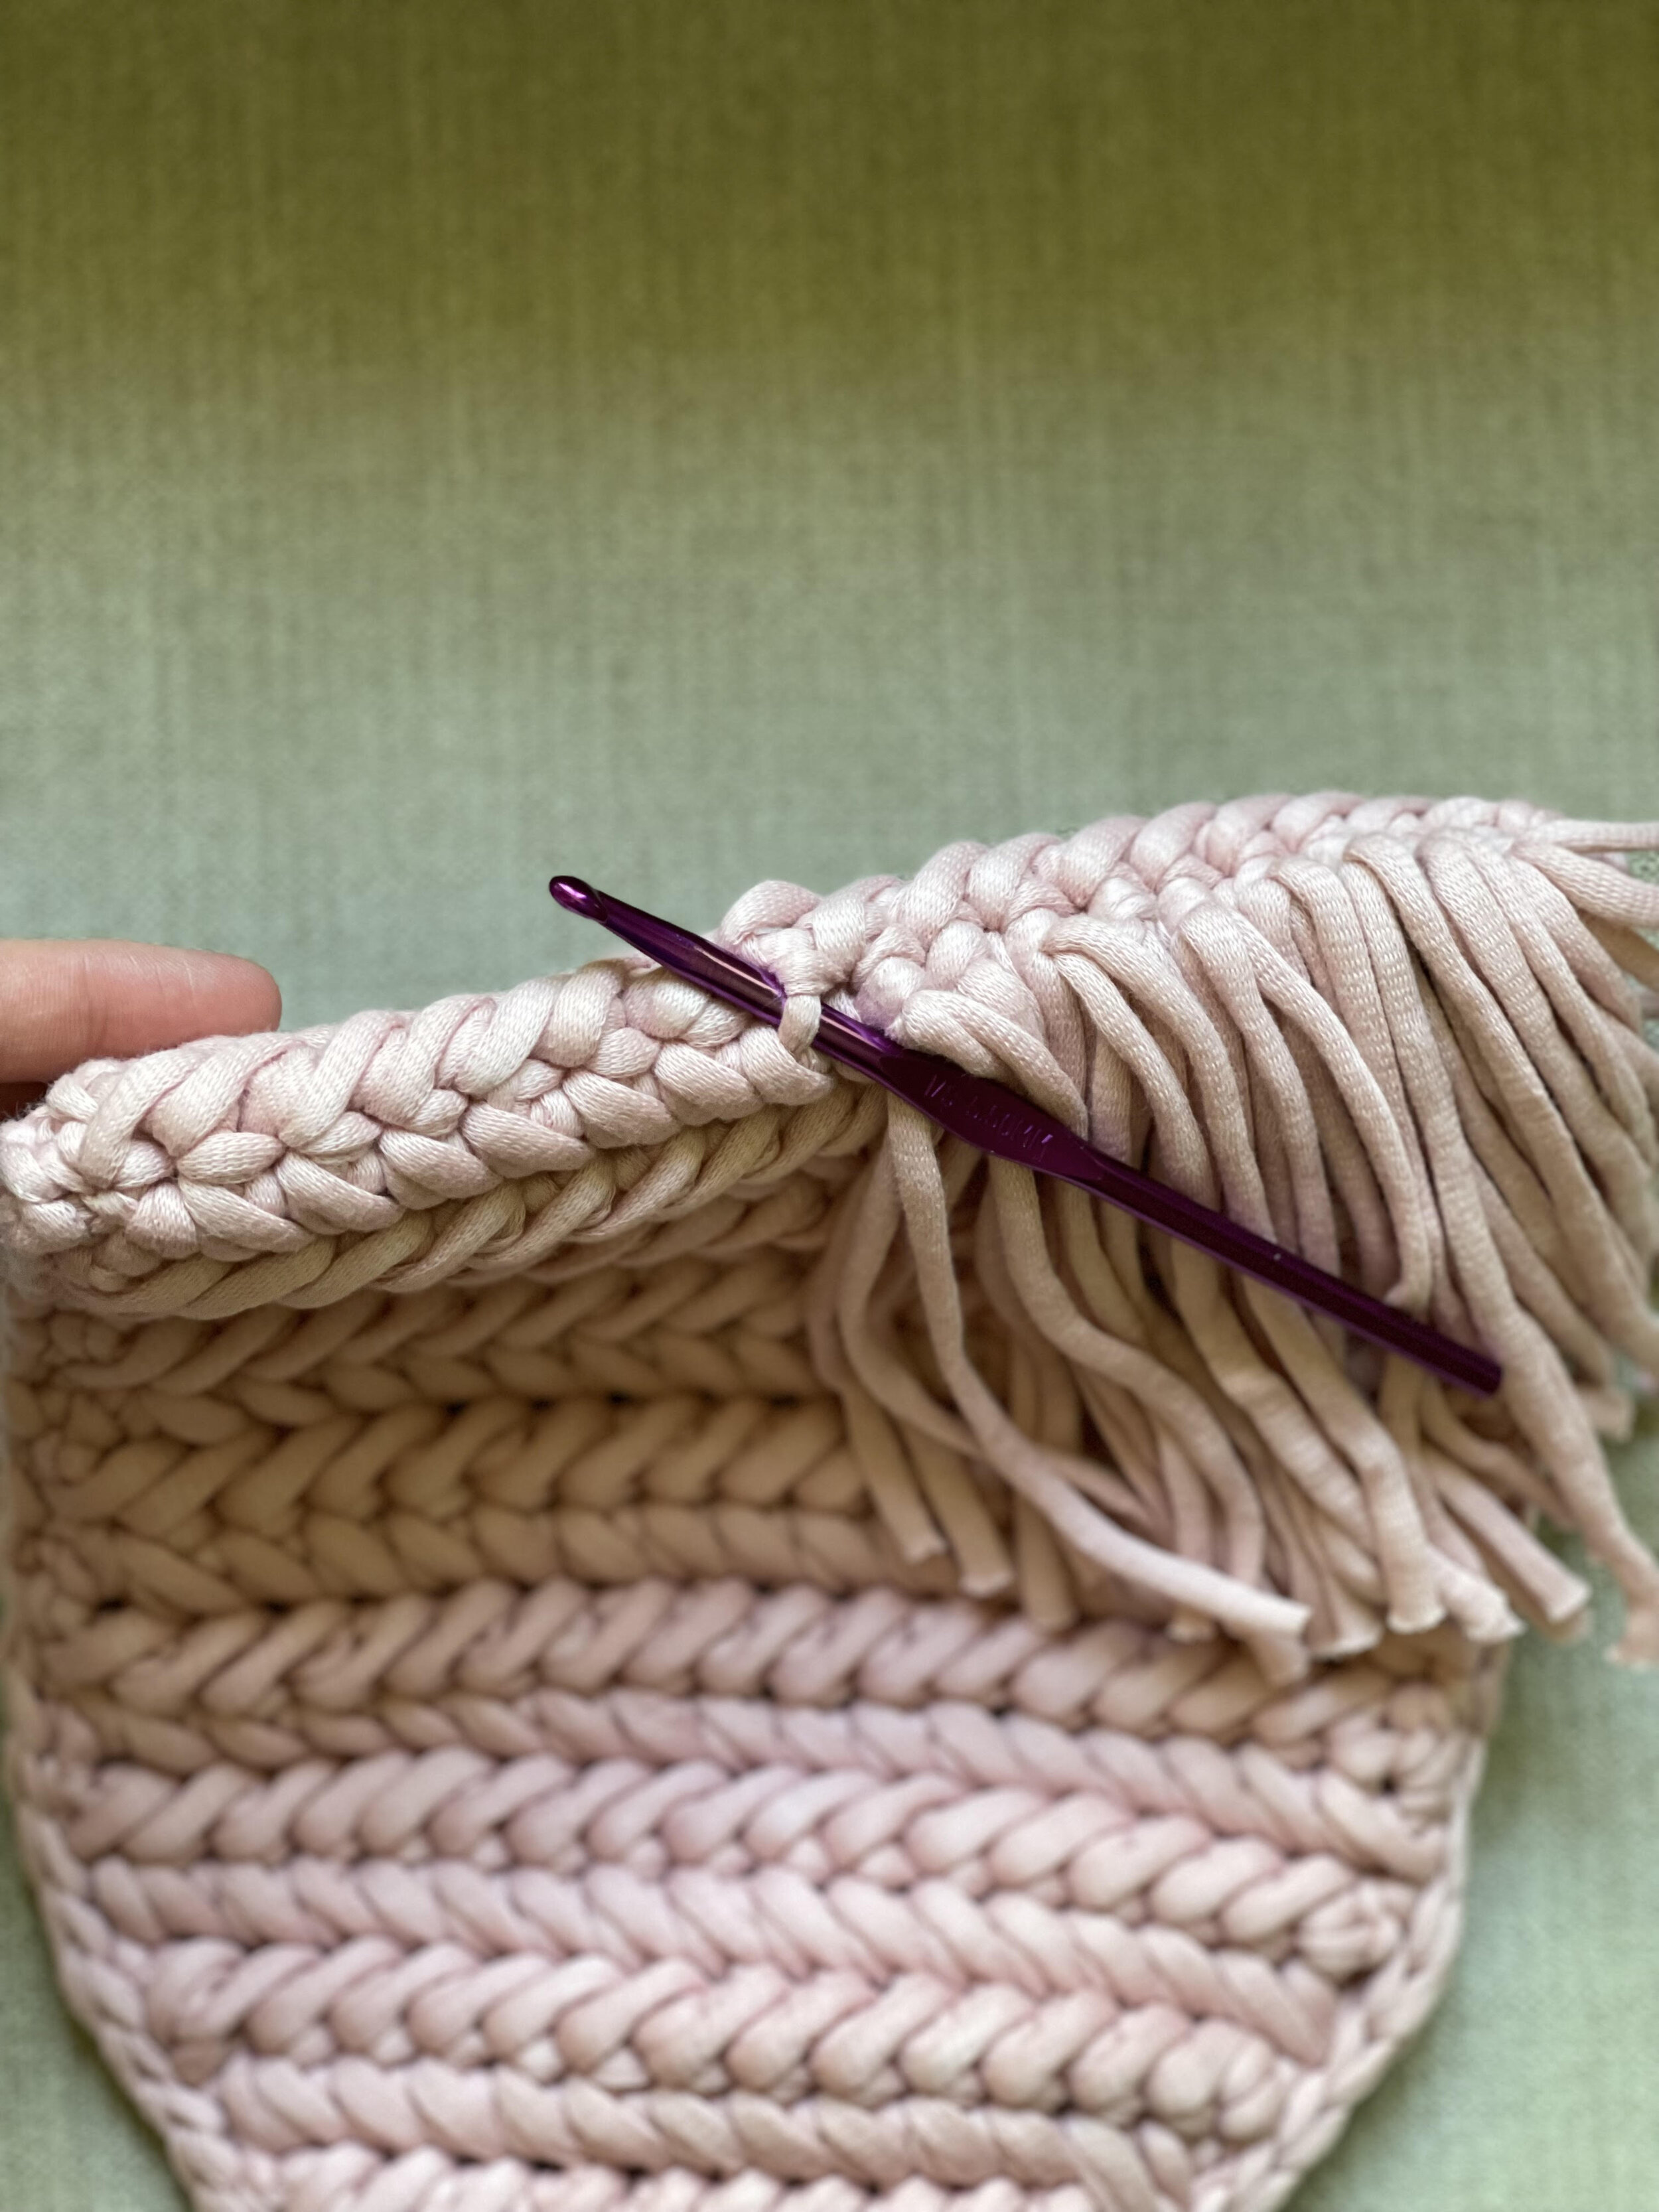
Make bottom fringe
Wrap a piece of cardboard approx. 5” wide 40 times and cut bottoms to create tassel tails. Using 2 strands per st at base of bag (including sl sts on each end), attach to bag using the Larks knot. Trim bottoms to be even. (See photo below for fringe placement). To visualize this process, see my video.
Make a matching strap
To visualize this process, see my video below (ignore the directions for the D rings at the beg of the video).
Make a ch in the desired length of your strap (I made a ch of 102)
Row 1: Working through the BLO of the ch sts, beg HDH st pattern in the 3rd ch from your hook and in each st across.
Row 2: Ch 1, turn, sl st in each st across.
Row 3: Ch 2, turn so that you are working on the bottom of your sts in the foundation ch again. Sl st in each st across to end. FO and whip st each end to both corners of the bag.

Pictured is Big Twist Textile yarn in the color Tan.
Your Herringbone Hipster Bag is complete! I would love to see your finished work! If you want to tag me on IG, I’m @dayscrochetnc. You could also follow the hashtag #herringbonehipsterbag to follow what others are making. I can’t wait to see your projects! If you would like to see other versions that I will be making after this publication, be sure to check me out on IG!
Please note that you do not have my permission to sell, share, copy, or duplicate this pattern or my photos in any way. Please do not use this pattern for a video, blog, or class tutorial. Thank you so much for following these simple rules! Please message me on Facebook or send me an email at dayscrochetnc@gmail.com with any questions.
Come join my Facebook group, Crochet for Days! We have a lot of fun and I often offer discounts and coupon codes to my members that I don’t offer anywhere else! Request to join and answer the questions by following this link.
Did you enjoy making this project? Let me know in the comments!
Happy hooking!
~Dana