
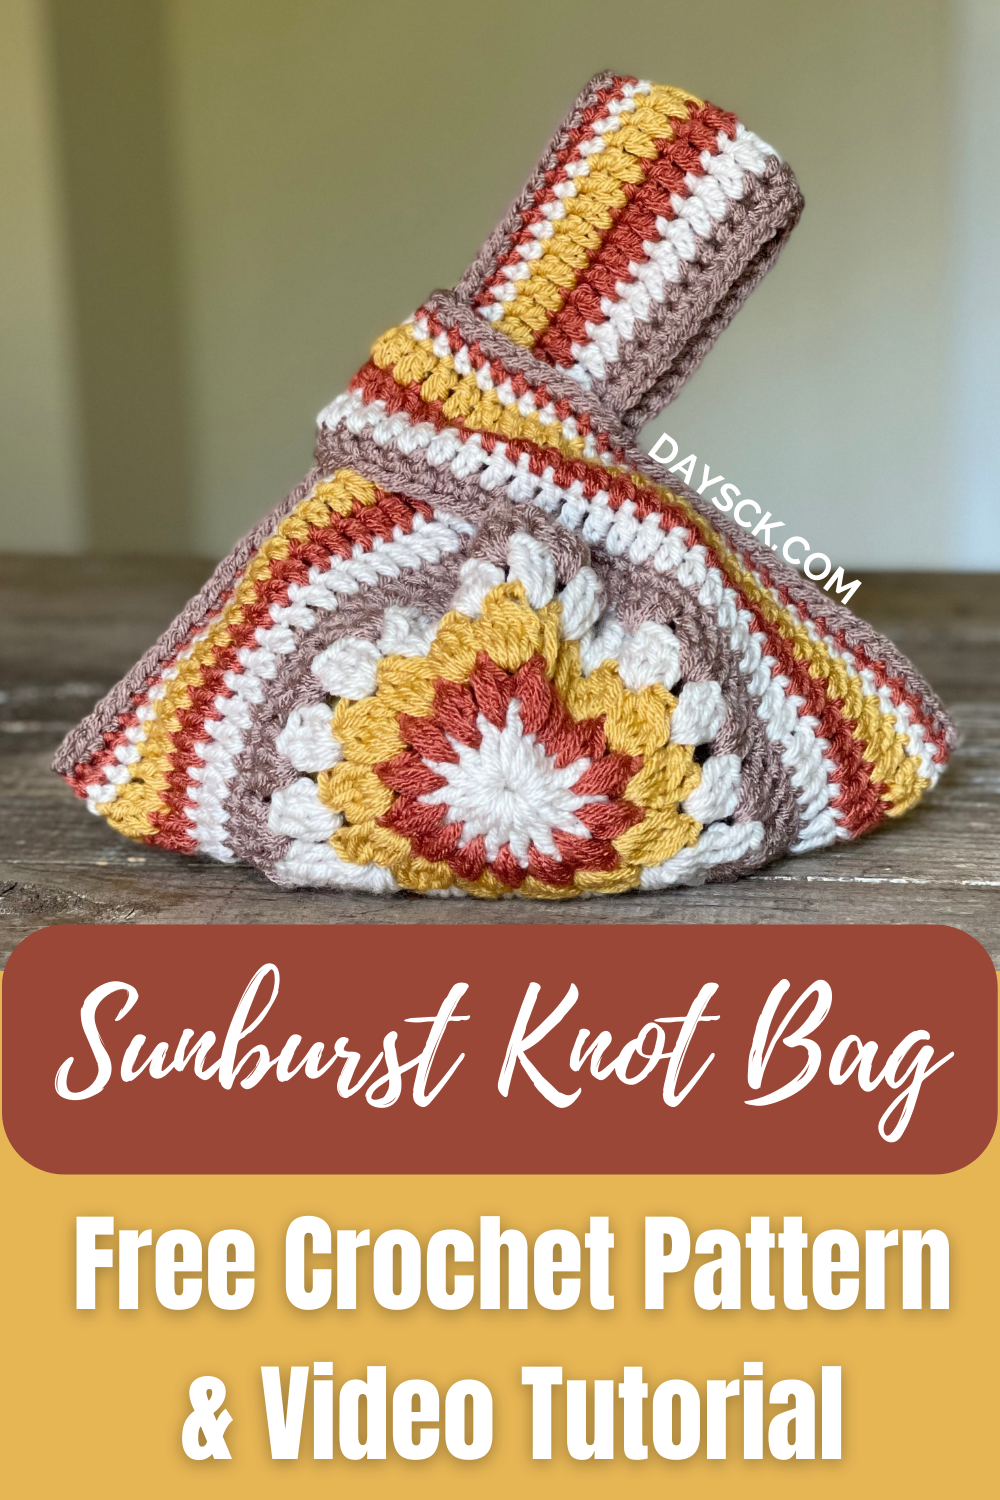
Crochet Sunburst Motif Knot Bag
PIN it here!
This fun crochet knot bag is super quick & easy to make!
Whip up 2 sunburst motifs, add some handles of differing lengths, and you got yourself an adorable boho crochet bag!
This post may contain affiliate links that help me to continue to post high-quality free content. To skip the ads and have a printable pdf of this pattern, you can find it for relatively little cost in both my Etsy and Ravelry shops.
This sunburst crochet knot bag is just the right size for all of your essentials and comfortable to wear. It works up quickly and requires very little by way of supplies, making it a great vendor market and craft fair prep item.
I actually designed this bag last year, but I didn’t release the pattern until now because I was afraid everyone was getting sick of the sunburst motif. I actually had several people reach out to me wanting the pattern, so I decided to release it.
If you are sick of all the sunburst themed patterns, I am sorry! I went through a phase last year, but I have moved on to different things, so don’t leave me just yet. I promise there will be new and fresh designs on the horizon!
One thing I want to mention before I jump into the pattern is that this design is actually fairly versatile. I had quite a few of my customers tell me they preferred my old style with lots of neutrals and so I am steadily reversing off the bright color train a bit to give my customers what they want.
While this pattern is quite colorful, I have successfully created a neutral version using all one color and adding some boho accents, and I gotta say…I absolutely LOVE IT! Because it is slightly different from the original pattern, I will include the pattern notes at the bottom of this post for how I modified the colorful version to get this neutral one.

I made this one using Berat Home Maker Dec yarn in the color Cream. I have included the notes for how I slightly changed this pattern to make this version further down in the post.
So without further ado, let’s make it!
supplies needed
Worsted weight yarn in 4 colors, approx. 20-25 yds of each color
5.5 mm hook, or size needed to obtain gauge
Scissors, yarn needle, tape measure
Small amount of fabric with matching thread for lining bag (optional)
Terms used & abbreviations
Pattern is written in US terminology.
Begin(ning) - beg
Chain - ch
Cluster - Cl
Double Crochet - dc
Fasten Off - FO
Foundation Single Crochet - fsc
Granny Cluster - GC
Puff Stitch - PS
Repeat - rep
Right Side - RS
Single Crochet - sc
Skip(ped) - sk
Slip stitch - sl st
Space(es) - sp(s)
Stitch(es) - st(s)
Treble Crochet - Tr
Yarn Over -YO
* - Repeat directions given from *
[ ] - Indicates the number of stitches you should have
( ) - Work stitches within ( ) in the same stitch or space
{ } - Indicates a group of repeating instructions
special terminology
Beginning Cluster (Beg Cl): Ch 2 (counts as a dc), {YO, insert hook into indicated st or sp, pull up a loop, YO, draw through 2 loops on your hook} complete brackets a total of 3 times, YO, draw through all 4 loops on your hook.
Cluster (Cl): {YO, insert hook into indicated st or sp, pull up a loop, YO, draw through 2 loops on your hook} complete brackets a total of 4 times, YO, draw through all 5 loops on your hook.
Granny Cluster (GC): 3 dc in same st or sp. Puff (PS): {YO, insert hook into indicated st or sp, draw up a loop} complete brackets a total of 3 times, YO, draw through all 7 loops on hook, ch
Foundation Single Crochet (fsc): To visualize this, see my video.
Ch 1, insert your hook between the posts of the last sc made on the side of your motif.
YO and pull up one loop.
YO and pull the yarn through the first loop on your hook. (The yarn you just pulled through is actually a ch st.)
YO and pull through both of the loops on your hook to make a sc.
Insert your crochet hook into the chain (that you made in step 4).
YO and pull up a loop. YO and pull the yarn through the first loop on your hook. (You’ve just made your next ch st.)
To finish the second FSC, yarn over and pull through both loops on the hook.
Rep steps 6 through 8 until you have the number of sts you need.
gauge
Motif diameter should measure approx 4.5" after completing rounds 1-3. Gauge is not essential for this project.
finished measurements
Each motif should measure close to 7" after completing rounds 1-5. Finished bag should measure approx. 11 x 7.25 inches when empty and laying flat. Handles should measure approx. 6 inches and 3 inches in length.
instructions
Bag is worked by creating 2 motifs that are sewn together in a specific fashion and adding two handles of differing lengths to create the knot look.
motif (make 2)
Round 1: Ch 4, join with a sl st in 4th ch from hook to create a ring, ch 3 (counts as a dc), 15 dc in ring. Join with a sl st in 3rd ch of beg ch. [16 dc] Cut yarn and change colors.
Round 2: Join in any sp between dc, ch 1, PS, PS in each sp between dc around. Join with a sl st in first PS. [16 PS] Cut yarn and change colors.
Round 3: Join in any sp between PS, Beg Cl, ch 2, {Cl, ch 2} complete brackets in sp between each PS around. Join with a sl st in first Cl. [16 Cl, 16 ch-2 sps] Cut yarn and change colors.
Round 4: Join in any ch-2 sp, ch 5 (counts as a Tr + ch-1), 3 Tr in same sp, GC in next 3 ch-2 sps, * {3 Tr, ch 1, 3 Tr} complete brackets in next ch-2 sp, GC in next 3 ch-2 sps; rep from * twice more, 2 more Tr in beg ch sp. Join with a sl st in 4th ch of beg ch. Cut yarn and change colors. [24 Tr, 36 dc, 4 ch-1 sps]
Round 5: Join in any ch sp of corner, ch 4 (counts as a dc + ch-1), GC in same sp, GC in sp between next 4 GC below, * {GC, ch 1, GC} in ch-1 sp of next corner, GC in sp between next 4 GC below; rep from * around, 2 more dc in ch-sp where you joined, join with a sl st in 3rd ch of beg ch. [72 dc, 4 ch-1 sps]
Join your motifs
Once you have finished your 2 motifs, you will whip stitch them together along one edge only. I recommend sewing with the RS of the motifs facing each other and going through the outer loops only; however you are welcome to go through both loops. Weave in all tails before moving on.

Create longer handle
With the RS facing, join with same color as Round 5 in the ch-sp to the left of the seam where you stitched your motifs together. NOTE: I actually join slightly different in my video because I think the seam stays more hidden when I do it the way I did it in the video.

Round 1: Ch 1, 2 sc in ch-sp, sc in every st along side to next ch-sp, 2 sc in ch-sp, fsc 40; being careful not to twist your fsc, begin working down the top side towards where you began and rep bolded instructions once more. Join with a sl st in first sc. [84 sc] To visualize this process, see my video.


From here on out you will join with a new color every round at the fold in bottom of bag (this will help hide the seam). You can go in any order you like.
Rounds 2-4: Ch 2 (will not count as a st), dc in same st and in every st around. Join with a sl st in first dc. [84 dc]
Rounds 5-7: Ch 1, sc in every st around. Join with a sl st in first sc. [84 sc] Leave a long tail for sewing up the side seam when you finish Round 7.
Create shorter handle
With the RS of your piece facing, join in a like manner on the opposite side. You will make this handle in the same exact way you made the other handle; however you will only fsc 20 instead of 40. Your st counts should be 64 at the end of each round.
Sew your side seams
Fold your piece in half at the level of your motif seam you sewed at the bottom. Line up your sts on the sides of your handles and sew up 20 sts on each side to close the side seams of your bag.

Finishing Round
This round will be worked along the inner portion of the handles and mouth of bag. To visualize this round, see my video.
With the RS of your bag facing, join with the same color as Round 5 of your motif at the top right of your bag mouth. Sc in same sp as joining, * sk next st, sc; rep from * across until you reach the handle, sc in every st across handle, sc in first st across mouth of bag, rep from * once more, sc in every st across the opposite handle. Join with a sl st in first sc. [84 sc] Fasten off and weave in all tails.

Line your bag
Lining your bag is completely optional, but makes it more functional. I like to use jersey knit fabric, as the added stretch makes the lining more forgiving. I then fold it in half and lay my bag on top, cutting around the bag body shape, leaving myself about 1/4 to 1/2- inch seam allowance. I then hot glue the lining to my bag. To visualize this entire process, see my video.
Neutral version
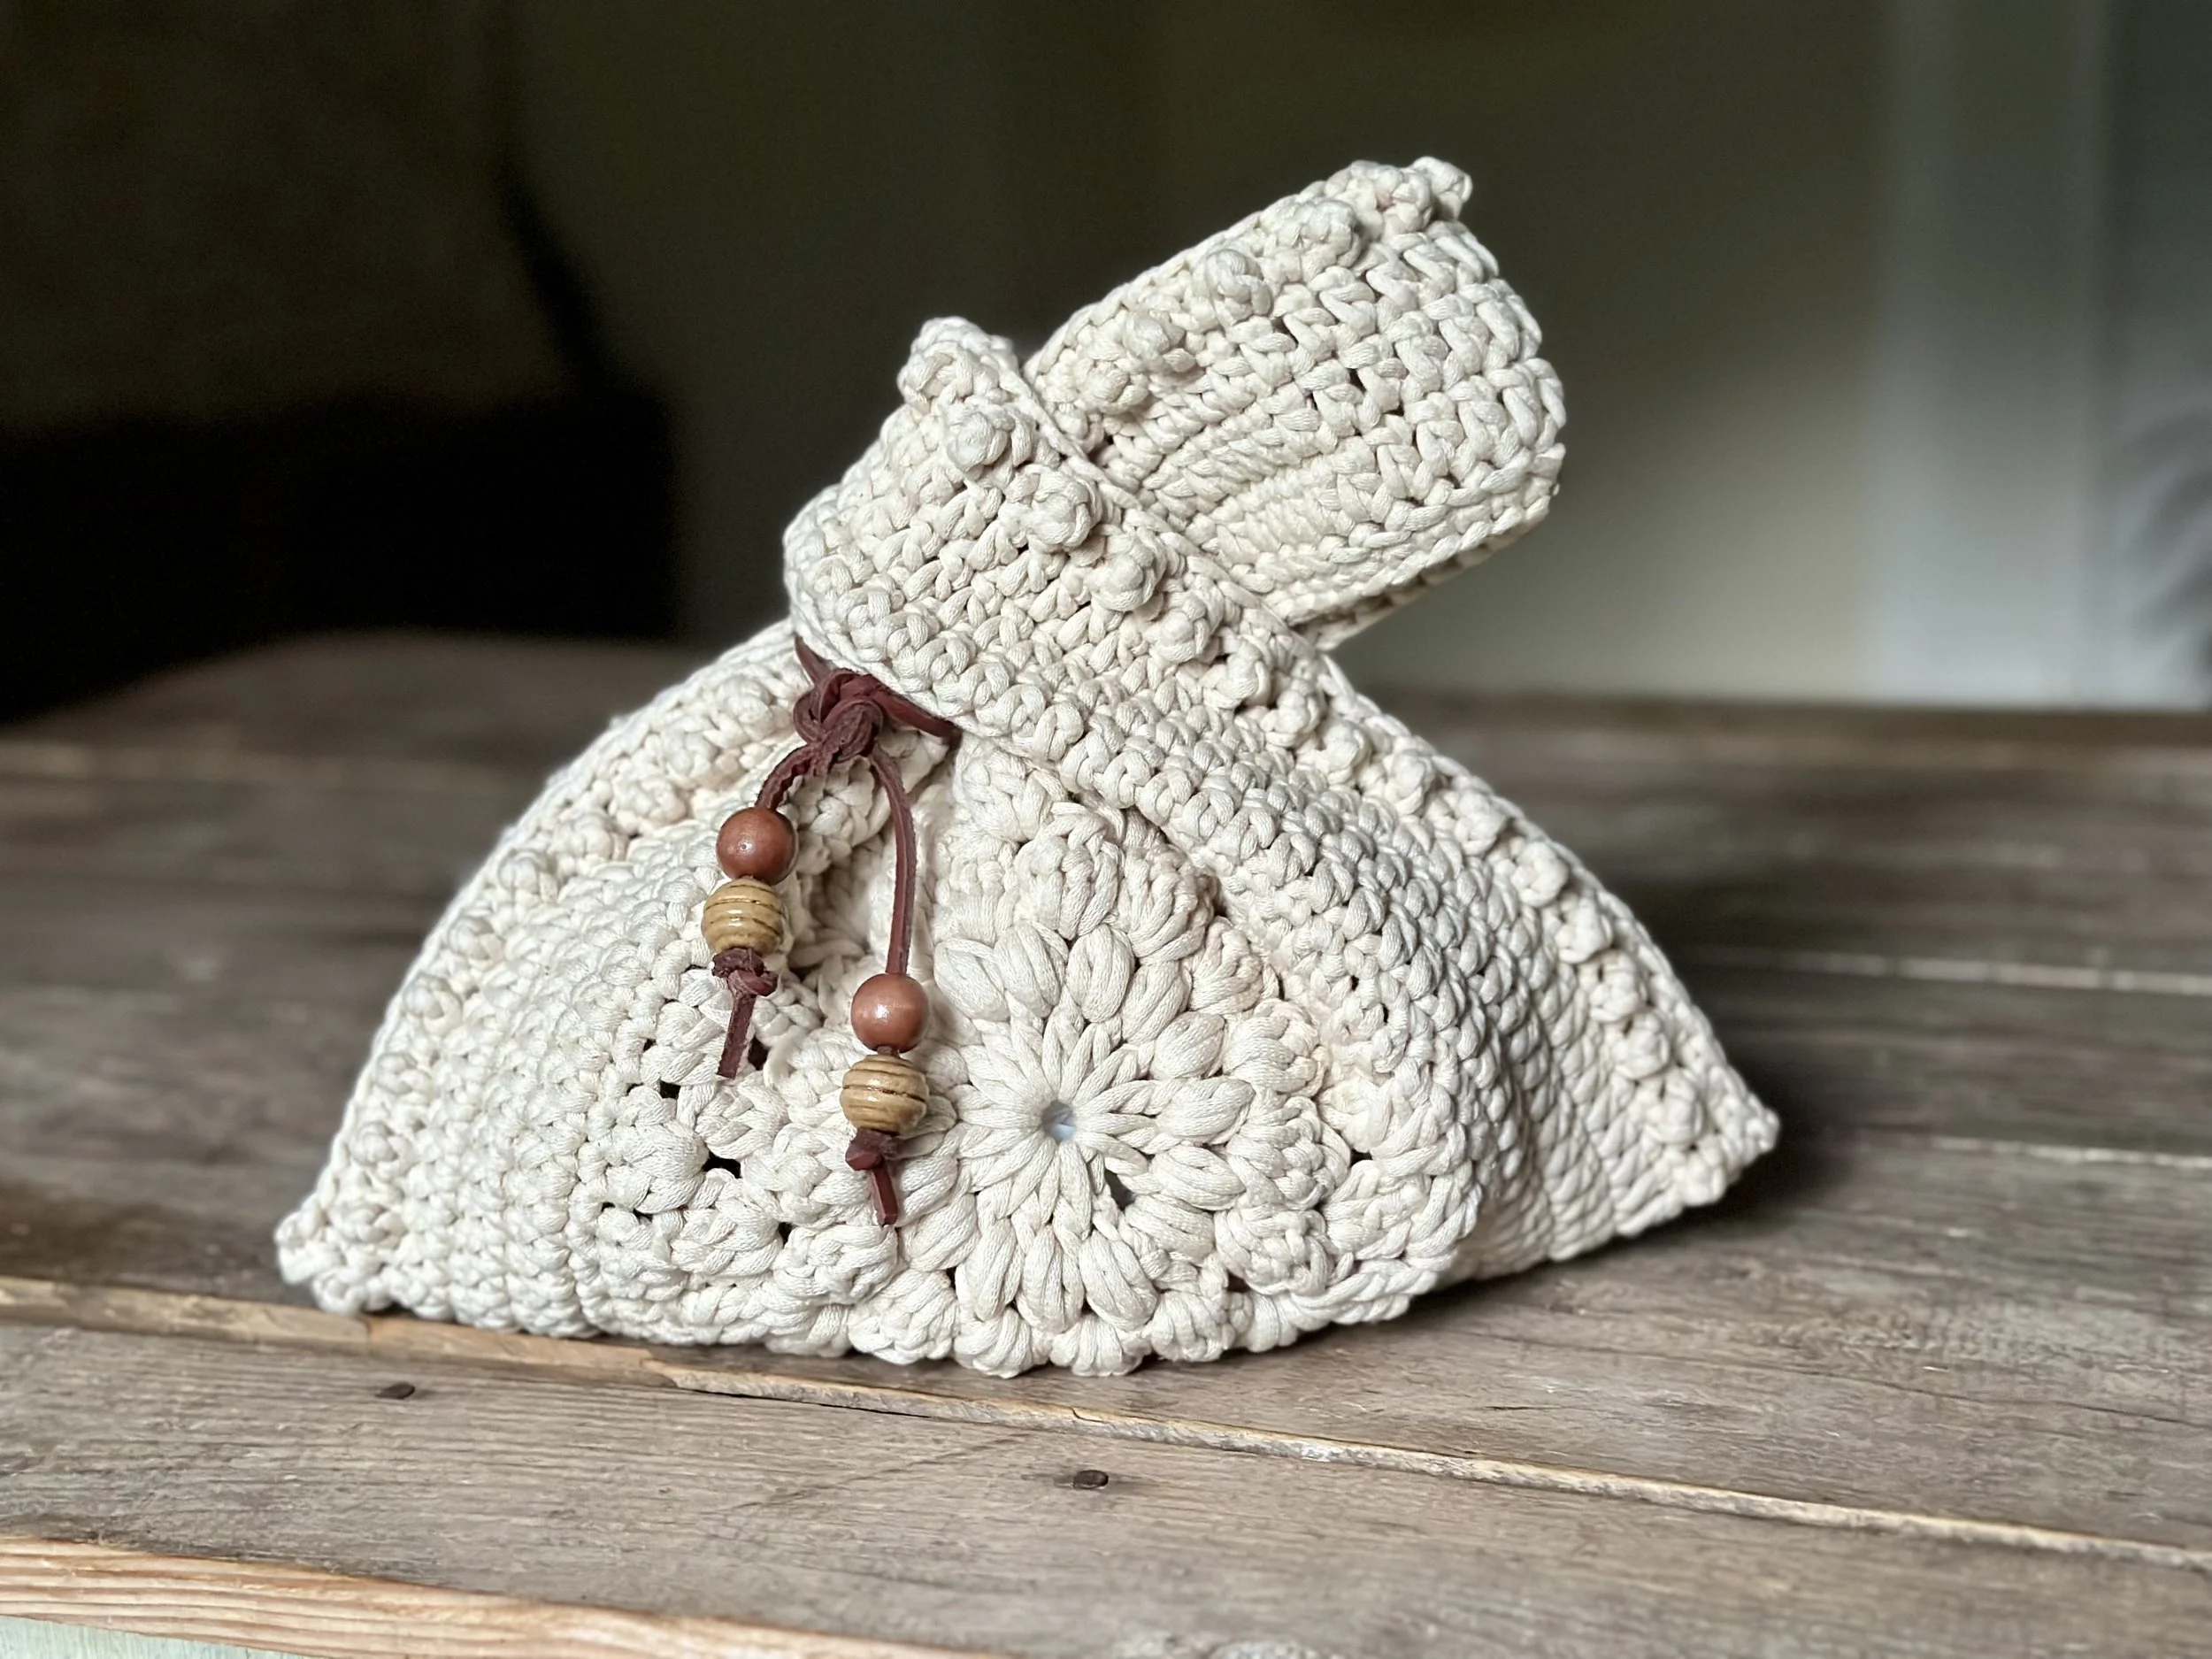
I changed the pattern slightly for this bag. I used Bernat Home Maker Dec in the color Cream and a 6.0 mm hook, and I followed the pattern until I got to round 5 in the handles. While making the motifs, I simply turned after every round instead of fastening off and re-joining like I did when I changed colors.
Once you finish Round 4 of the handles, you will start Round 5 differently.
Modified Round 5: Ch 2 (does not count as a st), TURN, {Tr, sc} around. Join with a sl st in first Tr and Fasten off. Sew side seams and complete Finishing Round as written.
I did 2 macrame square knots to secure the leather embellishment to the longer handle, and added 4 15 mm wooden beads to the bottom, knotting off the ends at differing lengths and cutting off the excess. I got the leather strand in a bulk package at Hobby Lobby and the wooden beads in a bead assortment bucket from Walmart.
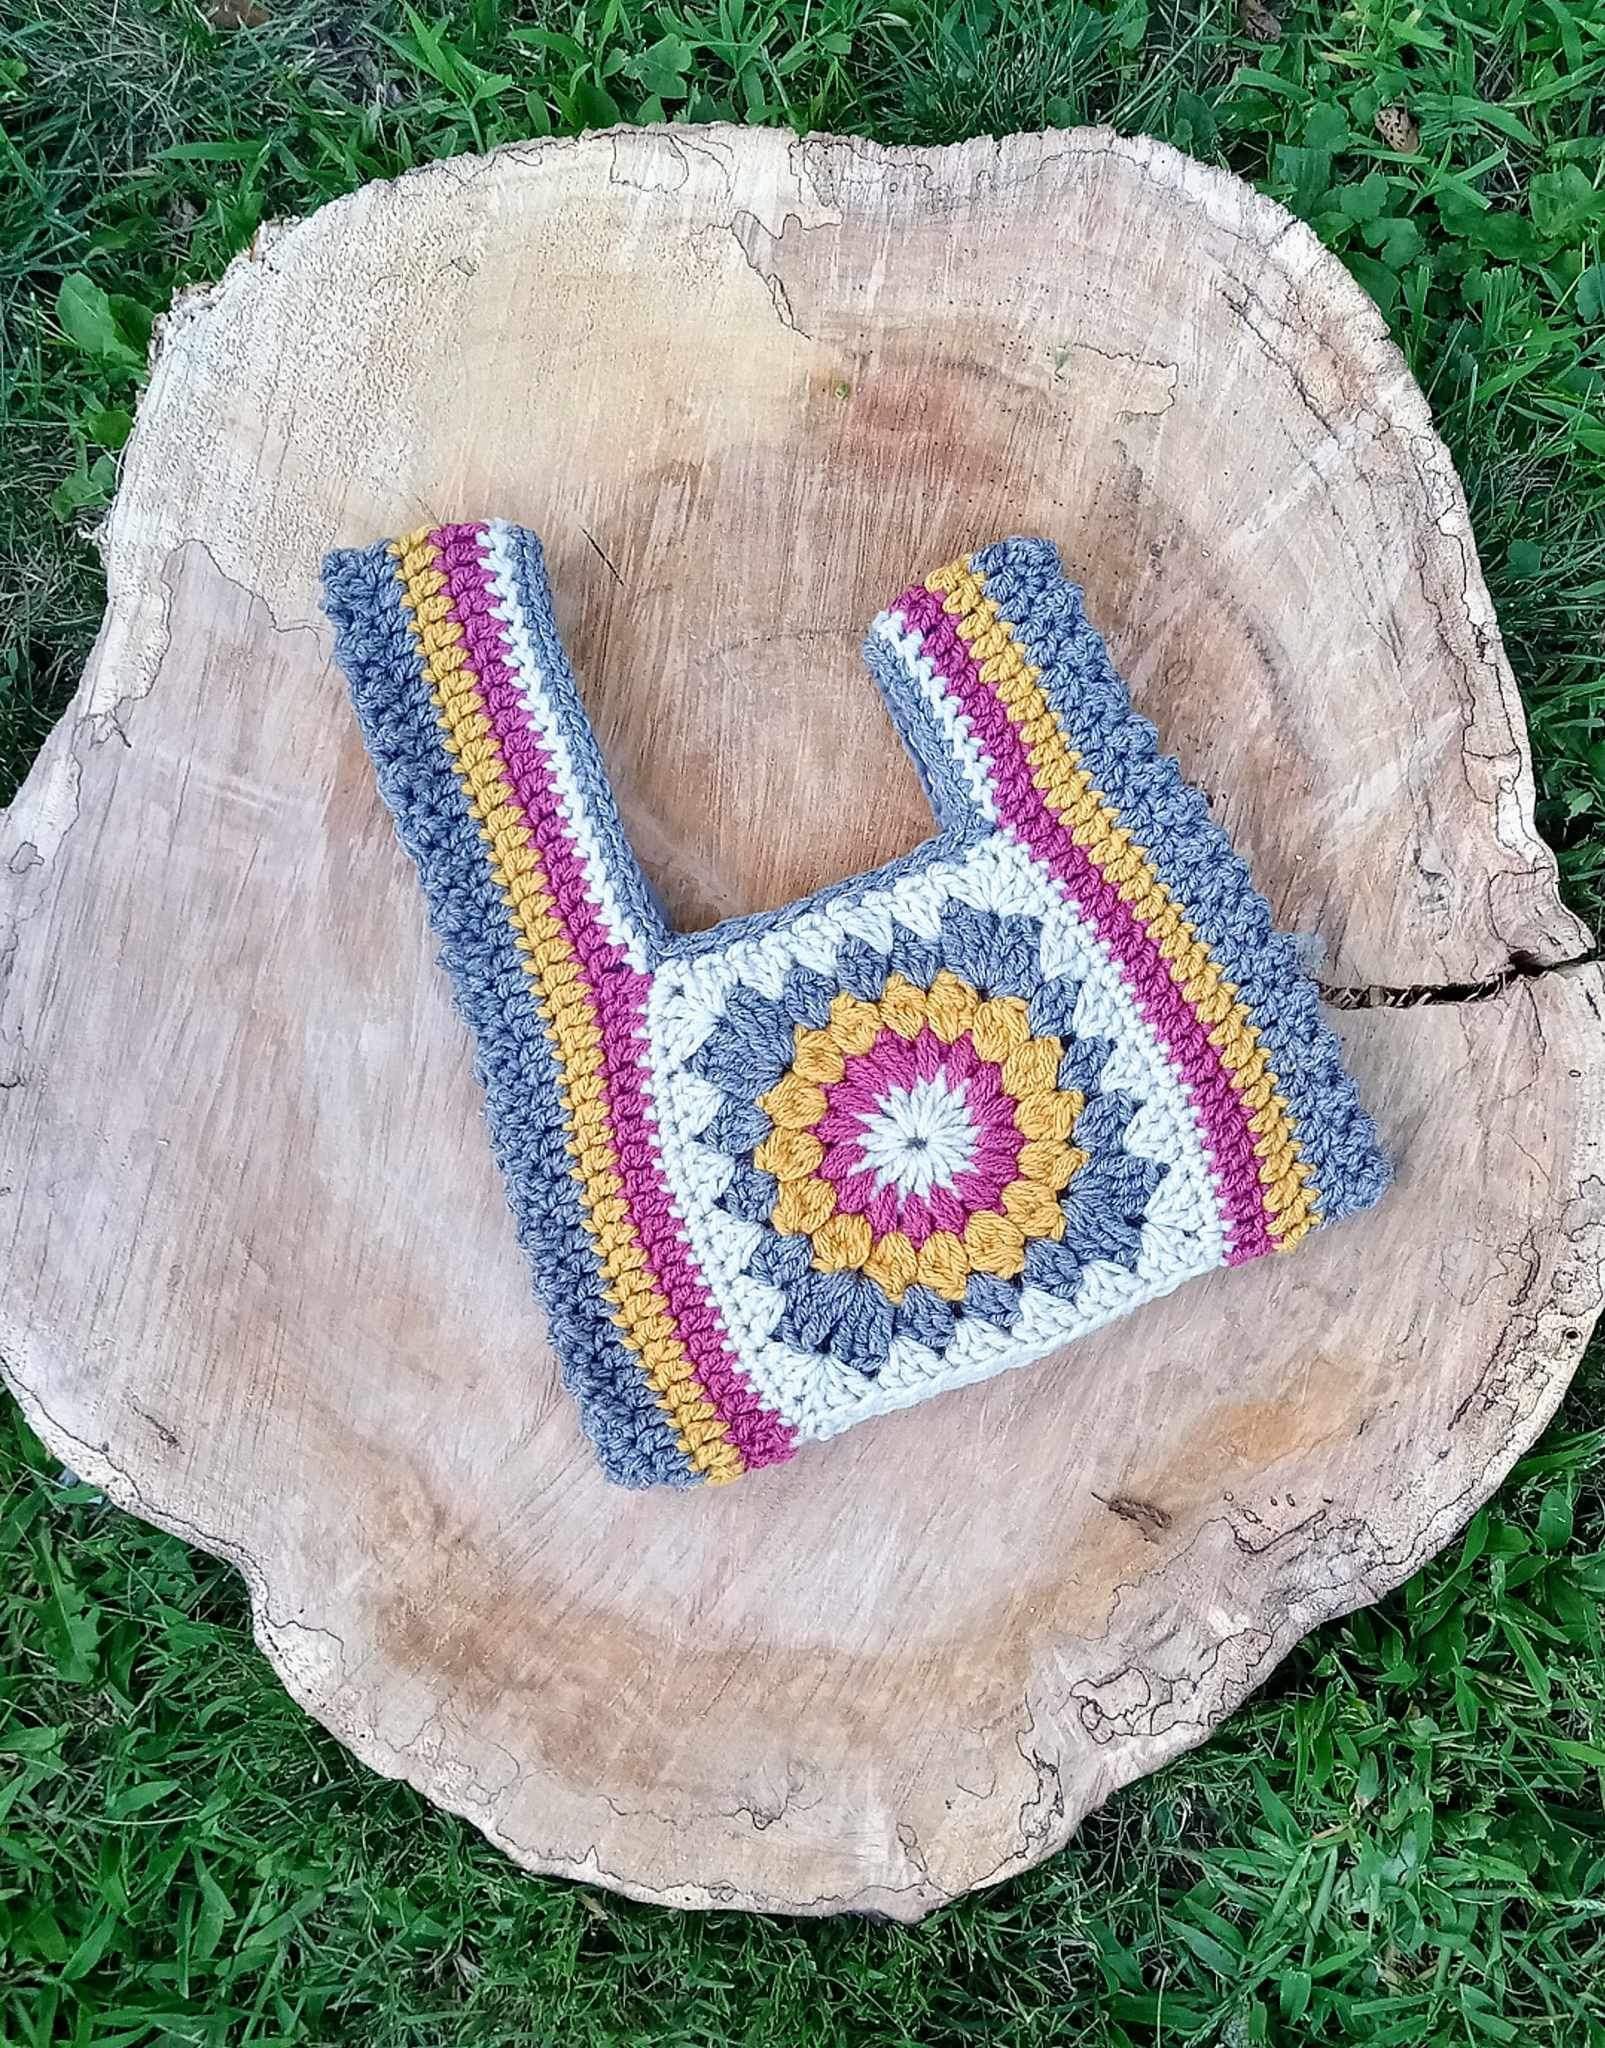
Check out this gorgeous Sunburst Knot Bag done by my tester Joni over at Cuppaknots! She added the modified round 5 to her handles on her multi-colored bag and I absolutely LOVE how pretty it is!
Your project is complete! I would love to see your finished work! If you want to tag me on IG, I’m @dayscrochetnc. You could also use the hashtag #sunburstknotbag to follow what others are making. I can’t wait to see your projects! If you would like to see other versions that I will be making after this publication, be sure to check me out on IG!

Pictured is one I did using Yarn Bee’s Soft & Sleek in the colors Mustard, Brownie, and Mauve, with I Love This Yarn in the color Cream.
Come join my Facebook group, Crochet for Days! We have a lot of fun and I often offer discounts and coupon codes to my members that I don’t offer anywhere else! Request to join and answer the questions by following this link: https://www.facebook.com/groups/647129172748788/
Please note that you do not have my permission to sell, share, copy, or duplicate this pattern or use my photos in any way. Please do not use this pattern for a video, blog, or class tutorial. Thank you so much for following these simple rules!
What did you think of this project?
Let me know in the comments!
Happy Hooking,
~Dana