
Easy Blanket Stitch Beanie
PIN it here!
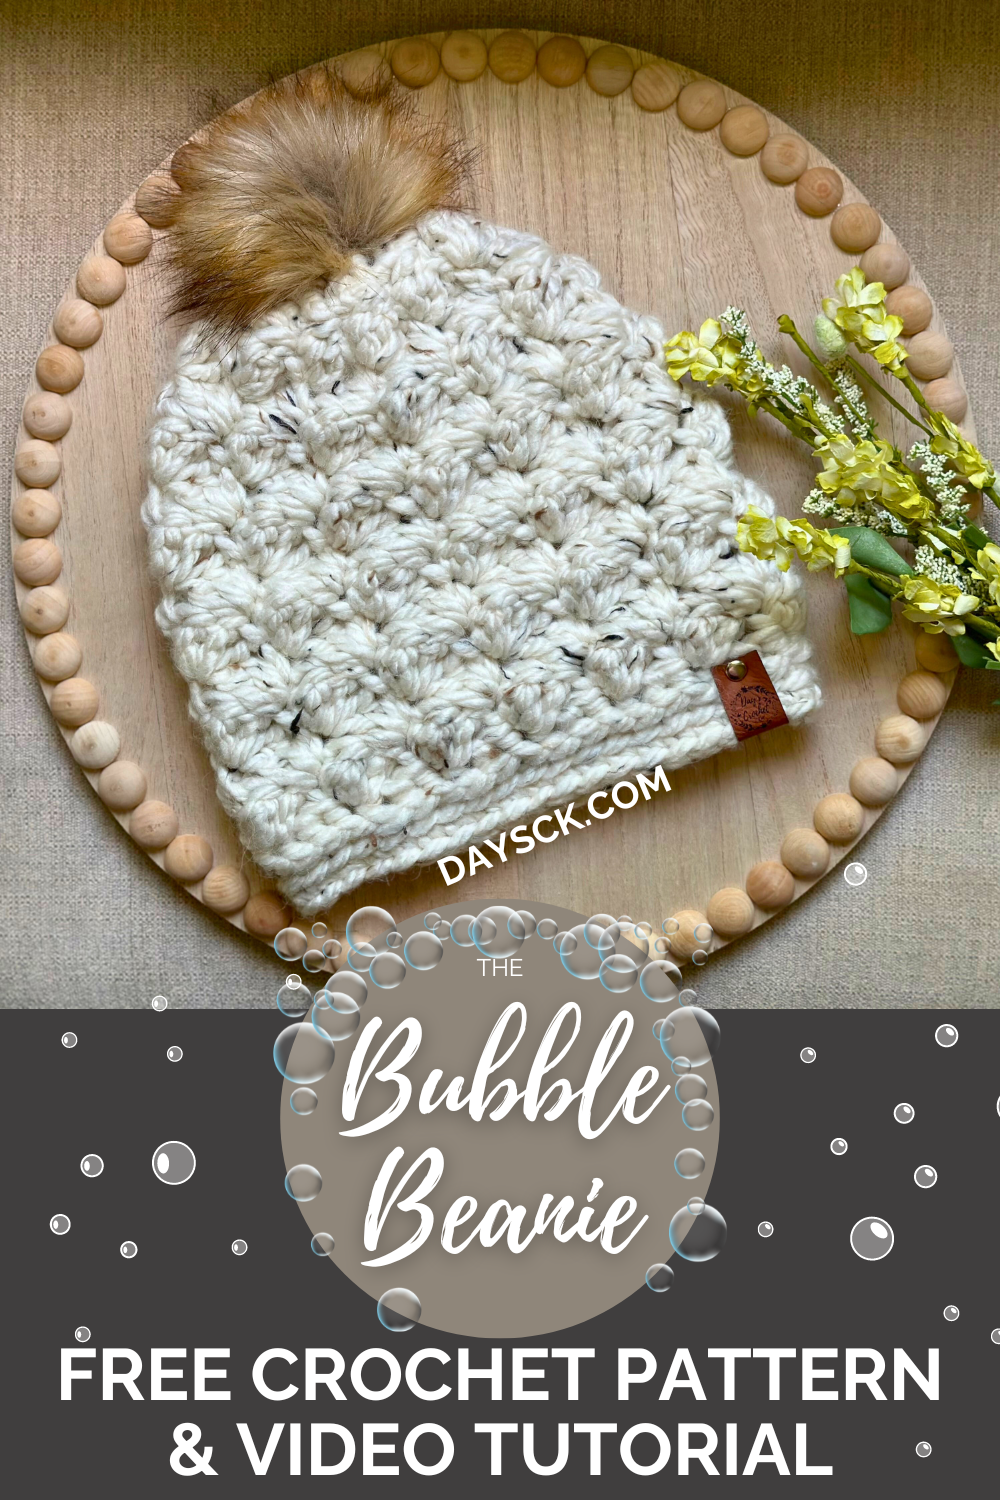
The gorgeous texture of this hat is made using the simplest of stitches and works up in less than an hour!
This post may contain affiliate links that help me be able to continue to post free content. To skip the ads and have a printable pdf of this pattern, you can find it for relatively little cost in both my Etsy and Ravelry shops.
It’s perfect for market prep
If you work in markets, you know that the upcoming cooler months are our most lucrative times to sell. Every year I try to come up with new designs that offer my customers a fresh array of items while giving them what I know they want—stuff they can wear and stuff they can gift for Christmas.
It’s a best seller
One of my best-selling items has always been winter hats. My customers come looking for me especially to get a new hat for the winter and I am not about to disappoint them!
It’s a classic stitch pattern
The Bubble Beanie design came to me when I was browsing through some vintage classic patterns. I loved the bubble-looking stitch pattern in a sweater and decided to see if I could figure out a way to use it in a hat.
You are probably already familiar with it and may even know the stitch pattern as the Blanket Stitch. I have never used it before, but I absolutely love the texture it creates.
Beauty without the bulk!
One of the biggest challenges I face with my love for super bulky weight yarn is the tendency to create too much bulk when adding textured stitches. This stitch pattern actually creates a really beautiful texture but is not bulky at all!
It uses very little in supplies
It also doesn’t eat up much yarn, so it takes very little to create a whole hat, meaning more money in your pocket if you sell them. The Bubble Beanie is now a part of my “One Skein Wonders, done in an hour or under” designs, and I hope you love making it as much as I do!
Let’s make it!
Supplies needed
80-90 yds. of any super bulky weight (size 6) yarn
9.0 mm hook and 8.0 mm hook, or size needed to obtain gauge
Scissors, yarn needle, tape measure
terms used & abbreviations
Pattern is written in US terminology.
Back Loop Only - BLO
Chain(s) - ch(s)
Cluster - Cl
Double Crochet - dc
Foundation Single Crochet - fsc
Front Loop Only - FLO
Half Double Crochet - hdc
Repeat - rep
Single Crochet - sc
Single Crochet 2 Together - sc2tog
Skip - sk
Slip stitch - sl st
Space - sp
Stitch(es) - st(s)
* - Repeat directions given from *
[ ] - Indicates the number of stitches you should have
( ) - Indicates a note
{ } - Work stitches within { } in the same stitch or space
special terminology
Cluster (Cl) - {YO, insert hook into indicated st or sp, pull up a loop, YO, draw through 2 loops on your hook} complete brackets a total of 2 times, YO, draw through all 3 loops on your hook.
Foundation Single Crochet (fsc) -
1. Begin with a slip knot on your crochet hook, then ch 2.
2. Insert your hook into 2nd ch from hook.
3. YO and pull up one loop.
4. YO and pull the yarn through the first loop on your hook. (The yarn you just pulled through is actually a ch st.)
5. YO and pull through both of the loops on your hook to make a sc.
6. Insert your crochet hook into the chain (that you made in step 4).
7. YO and pull up a loop. YO and pull the yarn through the first loop on your hook. (You’ve just made your next ch st.)
8. To finish the second FSC, yarn over and pull through both loops on the hook.
9. Rep steps 6 through 8 until you have the number of sts you need.
To visualize this process, see my video.
Invisible Sl St - Remove hook from working loop. Take working yarn tail to back of work. Insert hook from back to front in first st of round and hook working loop onto your hook. Draw working loop to back of work and continue as usual. To visualize this st, see my video.
Invisible Join - Complete your last st of the round as usual. Leaving a longer tail, cut your working yarn. Pull that tail all the way through your last st (without doing the usual ch 1). Thread tail onto a yarn needle. Going under both loops of the first st of the round, take the yarn needle from front to back. Insert your needle from top to bottom of the BLO of your last st of the round. Weave in this tail extremely well since you are not making a knot of any kind to secure. To visualize this process, see my video.
gauge
9 hdc and 6 rows = 4.5 inches using the 9.0 mm hook and super bulky weight yarn.
To make a gauge swatch, simply make a ch of 15, turn and hdc in 2nd ch from hook and in each st across. Ch 1, turn and hdc in each st across. Rep last row until you have at least 6 rows. Take a tape measure and make sure you have 9 sts within a 4.5 inch measurement. Then measure the number of rows to see if 6 rows = 4.5 inches. Gauge is very important for this pattern.
finished Measurements
Designed to fit an adult head, measuring approx. 21- 23" in circumference and 8.5-9" in length.
I’ve included a YouTube video tutorial for this pattern to help with the most difficult portions. You can check it out by clicking the video link below:
instructions
Hat is worked from the bottom up, adding rounds to the band last.
Round 1: With the 9.0 mm hook, fsc 39, join with a sl st in first sc to make a ring. [39 fsc]
Round 2: ch 1, {sc, 2 dc} in same st as joining, sk 2 sts, * {sc, 2dc} in next st, sk 2 sts; rep from * to end, join with a sl st in first sc. [39 sts]
Round 3: Ch 1, TURN, {sc, 2 dc} in same st as joining, sk 2 sts, * {sc, 2 dc} in next st, sk 2 sts; rep from * to end. Join with a sl st in first sc. [39 sts]
Rounds 4-11: Rep Round 3.
Size Check: At this point, your hat should measure approx. 7.5 inches in length.
Round 12: Ch 1, TURN, {sc, Cl} in same st as joining, sk 2 sts, * {sc, Cl}, sk 2 sts; rep from * to end. Join with a sl st in first sc. [26 sts]
Round 13: Ch 1, TURN, sc2tog, * sc, sc2tog; rep from * to end. Join with a sl st in first sc. [17 sc] (NOTE: Stop here for a messy bun hat and skip to band instructions.)
Round 14: Ch 1, sk first st, * sc, sk next st; rep from * to end. Join with a sl st in first sc. [8 sc]
Fasten off, leaving a long tail for sewing purposes. Thread tail onto yarn needle. Whip st through FLO of every sc of last round and cinch to close. Take tail inside and knot off. Sew pom button on if desired, or weave in tail.
Thread beginning tail onto yarn needle and sew gap closed between first and last sc of foundation round. Weave in tails. (NOTE: Since the stitch pattern is reversible, make sure you the first round of the stitch pattern is pointing outward to the front of the hat before moving on.)
Band
Switch to the 8.0 mm hook join to first round of FSC in the inner loop (see video here).
Round 1: Ch 1, sc in inner loop of each fsc around. Join with Invisible sl st. [39 sc]
Round 2: Ch 1, sc BLO of each st around. Join with Invisible Join and weave in tails. [39 sc BLO]

Pictured is Yarn Bee Dream Supreme in the color Linen. This is actually one of my all-time favorite bulky weight yarns because it is as soft as a dream!
Your project is complete! I would love to see your finished work! If you want to tag me on IG, I’m @dayscrochetnc. You could also use the hashtag #bubblebeanie to follow what others are making. I can’t wait to see your projects! If you would like to see other versions that I will be making after this publication, be sure to check me out on IG!

Pictured is Lion Brand WET&Q in the color Coney Island.
This pattern is the intellectual property of Dana Hogan of Day’s Crochet and is protected by US and international copyright laws. Please note that you do not have my permission to sell, illegally share, copy, or duplicate this pattern or use my photos in any way. Do not use this pattern for a video, blog, or class tutorial.
Come join my Facebook group, Crochet for Days! We have a lot of fun and I often offer discounts and coupon codes to my members that I don’t offer anywhere else! Request to join and answer the questions by following this link.

What did you think of this pattern?
Let me know in the comments!
Happy Hooking!
~Dana