
The Gemini Poncho

PIN it here!!
I have been struggling with the idea of how soon Fall really is because I love Summer. …
As I was taking my son to school this morning I got a whiff of someone using a wood burning stove. It was rather cold this morning and it finally got me in the mood for Fall. I decided that it was time to release my latest design to celebrate!
This post may contain affiliate links that help me to continue to post free content. To skip the ads and have a printable pdf of this pattern, you can find it for relatively little cost in my Etsy and Ravelry shops.
This is the first full-fledged wearable I have ever designed and I am super excited to be sharing it with you! I originally designed it to look more like a cropped shawl. (See photo below)

Pictured is Caron Cakes in the color White Truffle.
I was placing it on my mannequin for photos and I turned it 90° and BAM! I realized that this could actually be worn 2 ways!
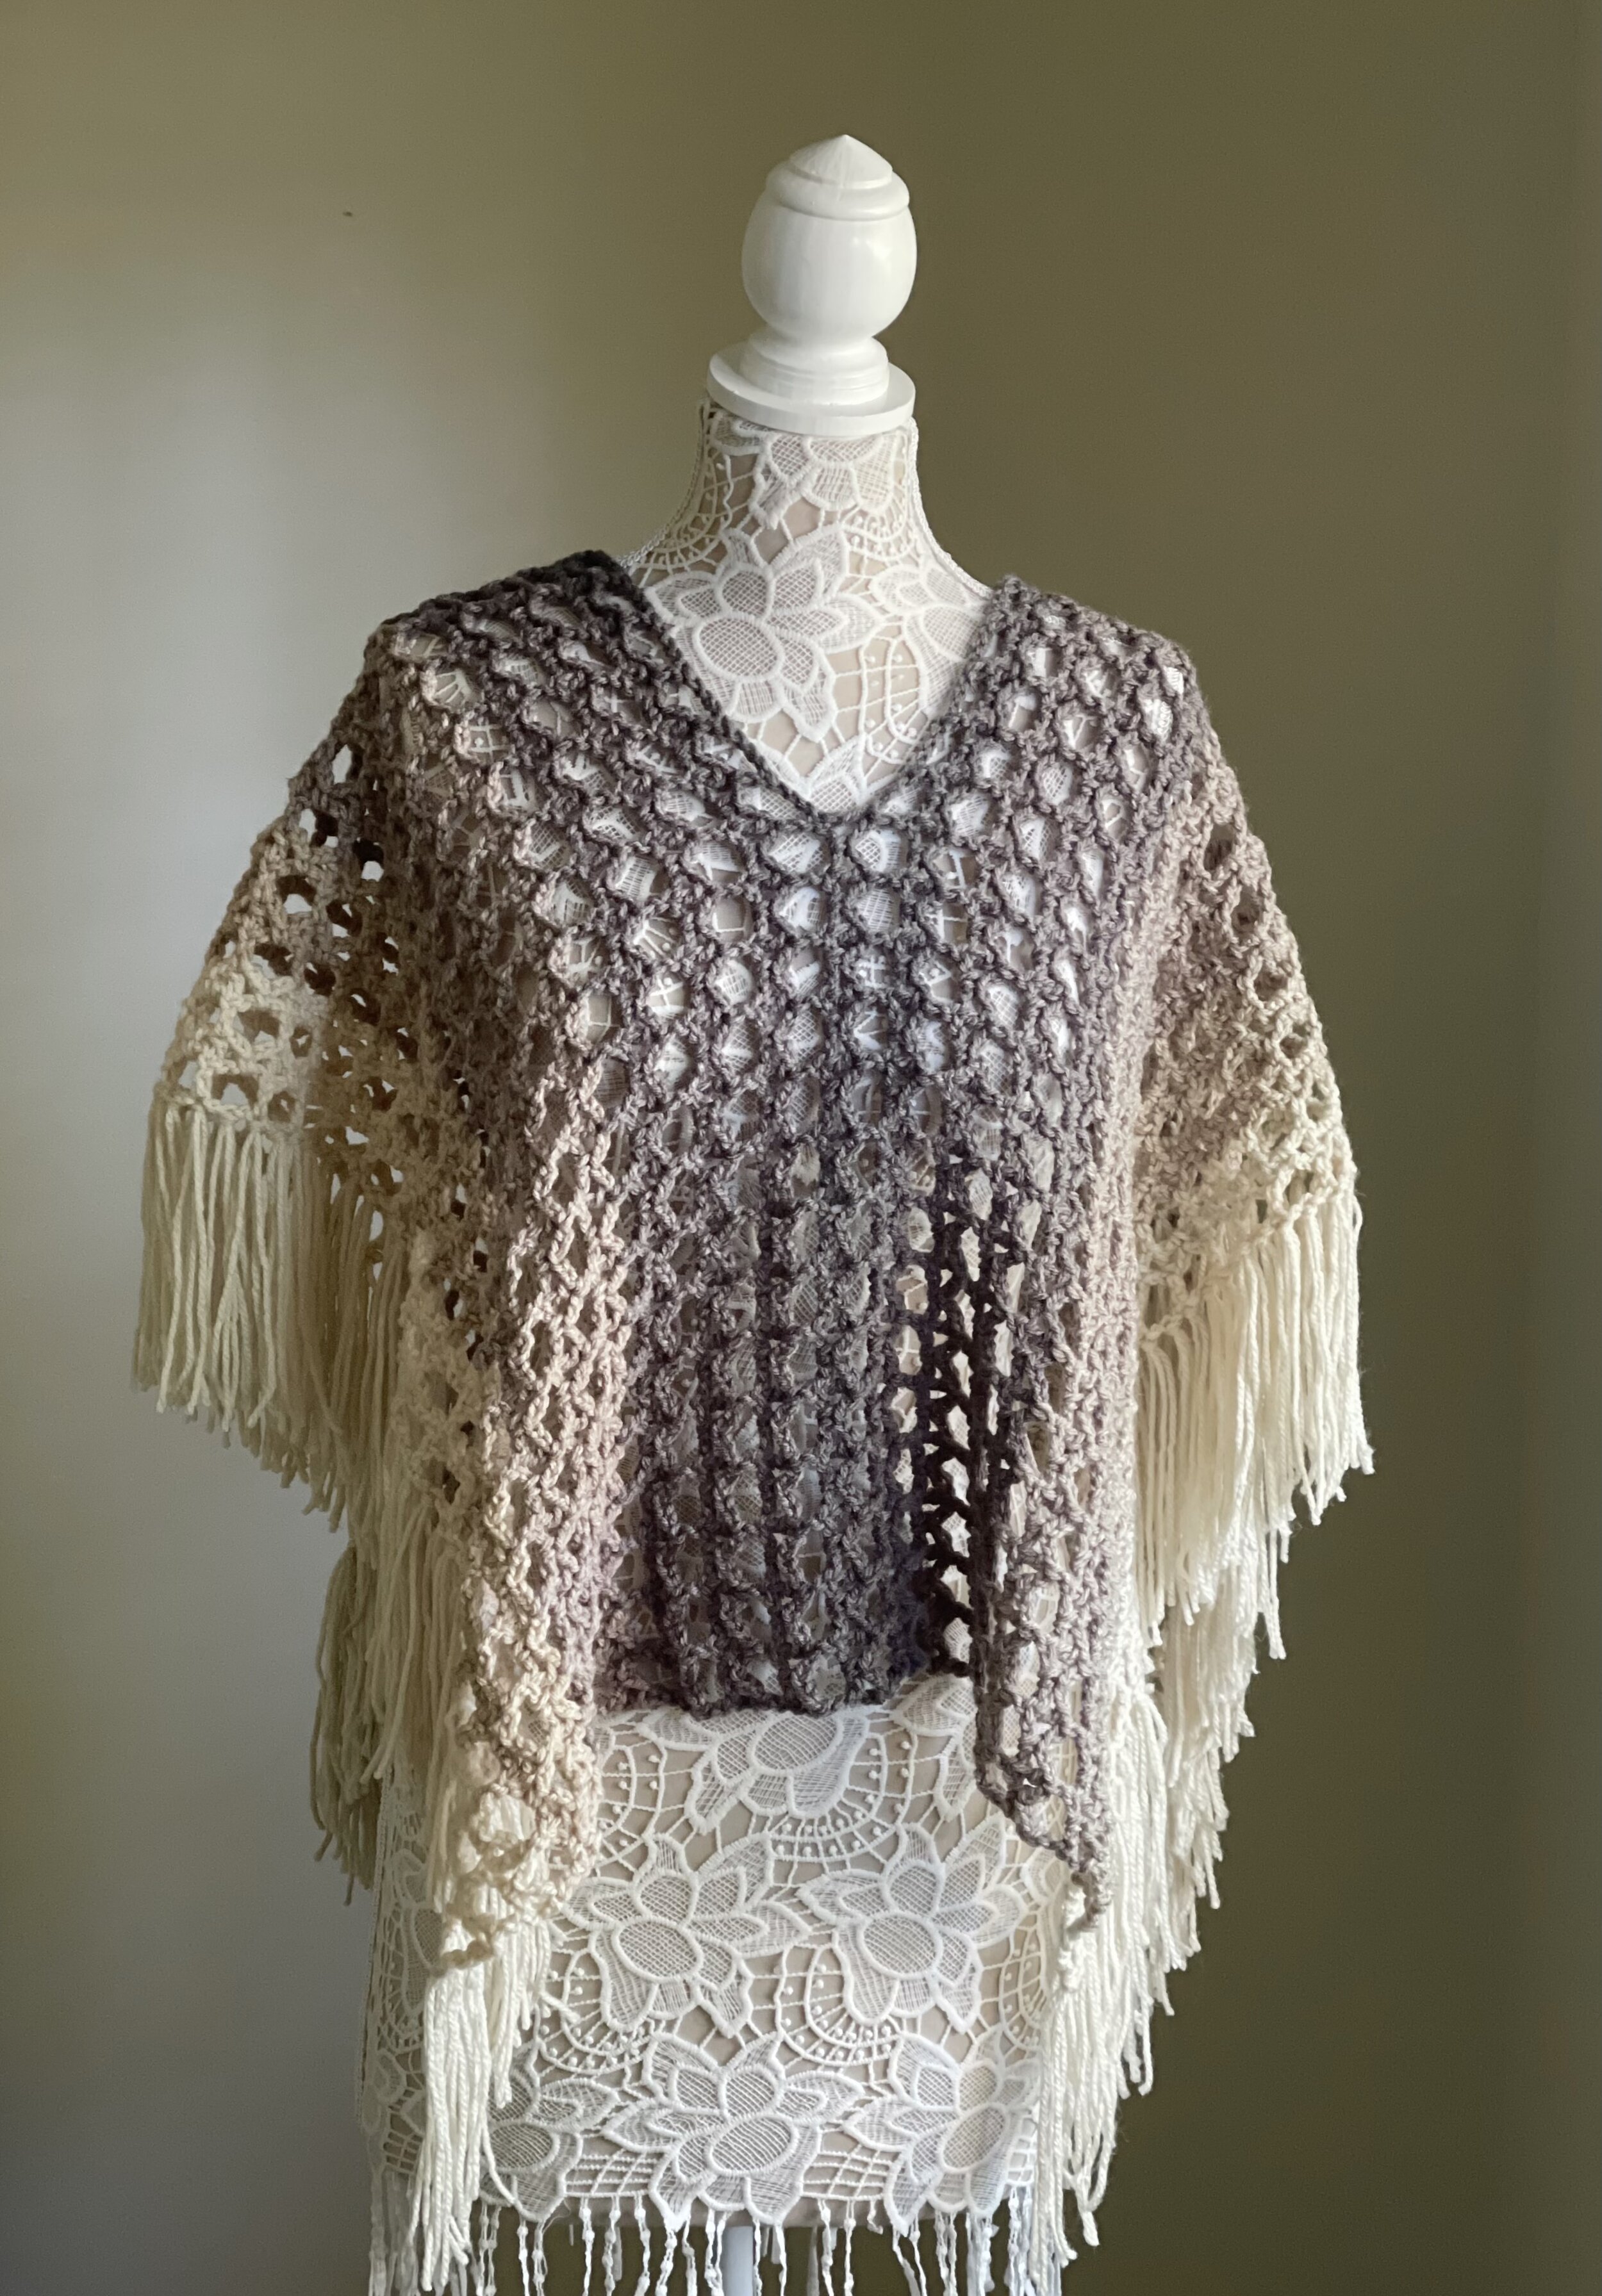
You can imagine my excitement because if you know me at all, you know I absolutely LOVE when something is fashionable, functional, AND versatile! I decided to dub it the Gemini Poncho because it is versatile. The most trouble you may have once you’ve made this is deciding which way you want to wear it!
I started off making this in simple solids that I thought gave a boho vibe and could be worn with several outfits. But then I started branching out into striping yarns and OH. MY. GOSH. I was totally blown away at how much more beautiful and interesting they became!

Pictured is Yarn Bee Wildstreak in the color Hope Chest.
I also will tell you that I originally was blocking my poncho prior to adding the fringe. It seemed to cause the front and back to curl a bit unbecomingly. I accidentally found out that this poncho actually looks better when you don’t block it! If that doesn’t convince you to make this, nothing will! (Raise your hand if you hate blocking projects LOL)
I will also tell you that this poncho is made all in ONE PIECE, meaning you don’t have to sew anything together—WOOT!!! Without further ado…
Let’s make this thing!
Supplies Needed:
-640-740 yds of any size 4 ww yarn (acrylic/wool is great for the cooler months, 100% cotton is best for the warmer months)
-Size I 5.5 mm hook, or size needed to obtain gauge
-2 stitch markers
-Scissors, tape measure
Terms Used and Abbreviations:
Pattern is written in US terminology.
Beginning - beg
Chain - ch
Double Crochet - dc
Fasten Off – FO
Repeat - rep
Right Side – RS
Single Crochet - sc
Slip Stitch(es) - sl st(s)
Stitch(es) - st(s)
Stitch Marker - SM
Space(s) - sp(s)
Wrong Side – WS
Gauge:
Pattern for gauge
Row 1: Ch 22, dc in 10th st from hook (beg ch counts as a dc + ch-3 sp), * ch 3, sk 3, dc in next st; rep from * across. [5 dc, 4 ch-3 sps]
Row 2: Ch 5 (beg ch counts as a dc + ch-2 sp), turn, sc in next ch sp, ch 2, dc in next dc, * ch 2, sc in next ch sp, ch 2, dc in next dc; rep from * across. [5 dc, 4 sc, 8 ch-2 sps]
Row 3: Ch 6 (beg ch counts as a dc + ch-3 sp), turn, dc in next dc, * ch 3, dc in next dc; rep from * across. [5 dc, 4 ch-3 sps]
Rows 4-8: Rep rows 2-3.
Gauge piece = 4.5” x 4” (11.4 x 10 cm). See photos below.


Finished Measurements:
Measurements are taken of body (not including fringe) of poncho laying open and flat: 41" x 22" (104 x 56 cm) when made as written with correct gauge.
Instructions:
Poncho body is worked in the row in one piece, adding the fringe detail last. I recommend reading through this entire pattern before beginning, as I have given several options for different looks.
Make a foundation ch of 166. NOTE: If you wish to improvise this pattern, you need to make it in multiples of 4 + 2). Your foundation row will be the length of the entire piece.
Row 1: Dc in the 10th st from your hook (beg ch will count as a dc + ch-3 sp), * ch 3, sk 3, dc in next st; rep from * to end. [41 dc, 40 ch-3 sps]
Row 2: Ch 5 (beg ch will count as a dc + ch-2 sp), turn, sc in next ch sp, ch 2, dc in next dc, * ch 2, sc in next ch sp, ch 2, dc in next dc; rep from * across. [41 dc, 40 sc, 80 ch-2 sps]
Row 3: Ch 6 (beg ch will count as a dc + ch-3 sp), turn, dc in next dc, * ch 3, dc in next dc; rep from * across. [41 dc, 40 ch-3 sps]
Rows 4-21: Rep rows 2-3, ending on a row 3 rep.
Create neck hole
Grab your 2 SM and mark the 15th dc from each end of row 21.
Row 22: Rep row 2 st pattern like you normally would until you reach the SM, make a dc into marked st, ch 47 (neck hole created), sk to next SM, dc in marked st, continue in row 2 st pattern to end. [30 dc, 28 sc, 56 ch-2 sps, 1 ch-47 sp] See photo below.

If you look closely you will see I actually marked the 14th dc instead of the 15th. I later changed it to how it is written now because this was too large of a neck hole.
Row 23: Ch 6 (beg ch will count as a dc + ch-3 sp), turn, dc in next dc, {ch 3, dc in next dc} rep brackets a total of 13 times, ch 3, sk 3 ch sts, {dc in next st, ch 3, sk next 3 sts} rep brackets a total of 11 times, dc in next dc, * ch 3, dc in next dc; rep from * to end. [40 ch-3 sps, 41 dc]
Rows 24-43: Rep rows 2-3, being sure to end on a row 3 rep. FO and weave in tails. (NOTE: This design actually looks better when you do not block your piece. I have found that my piece curls unbecomingly when I block it.)

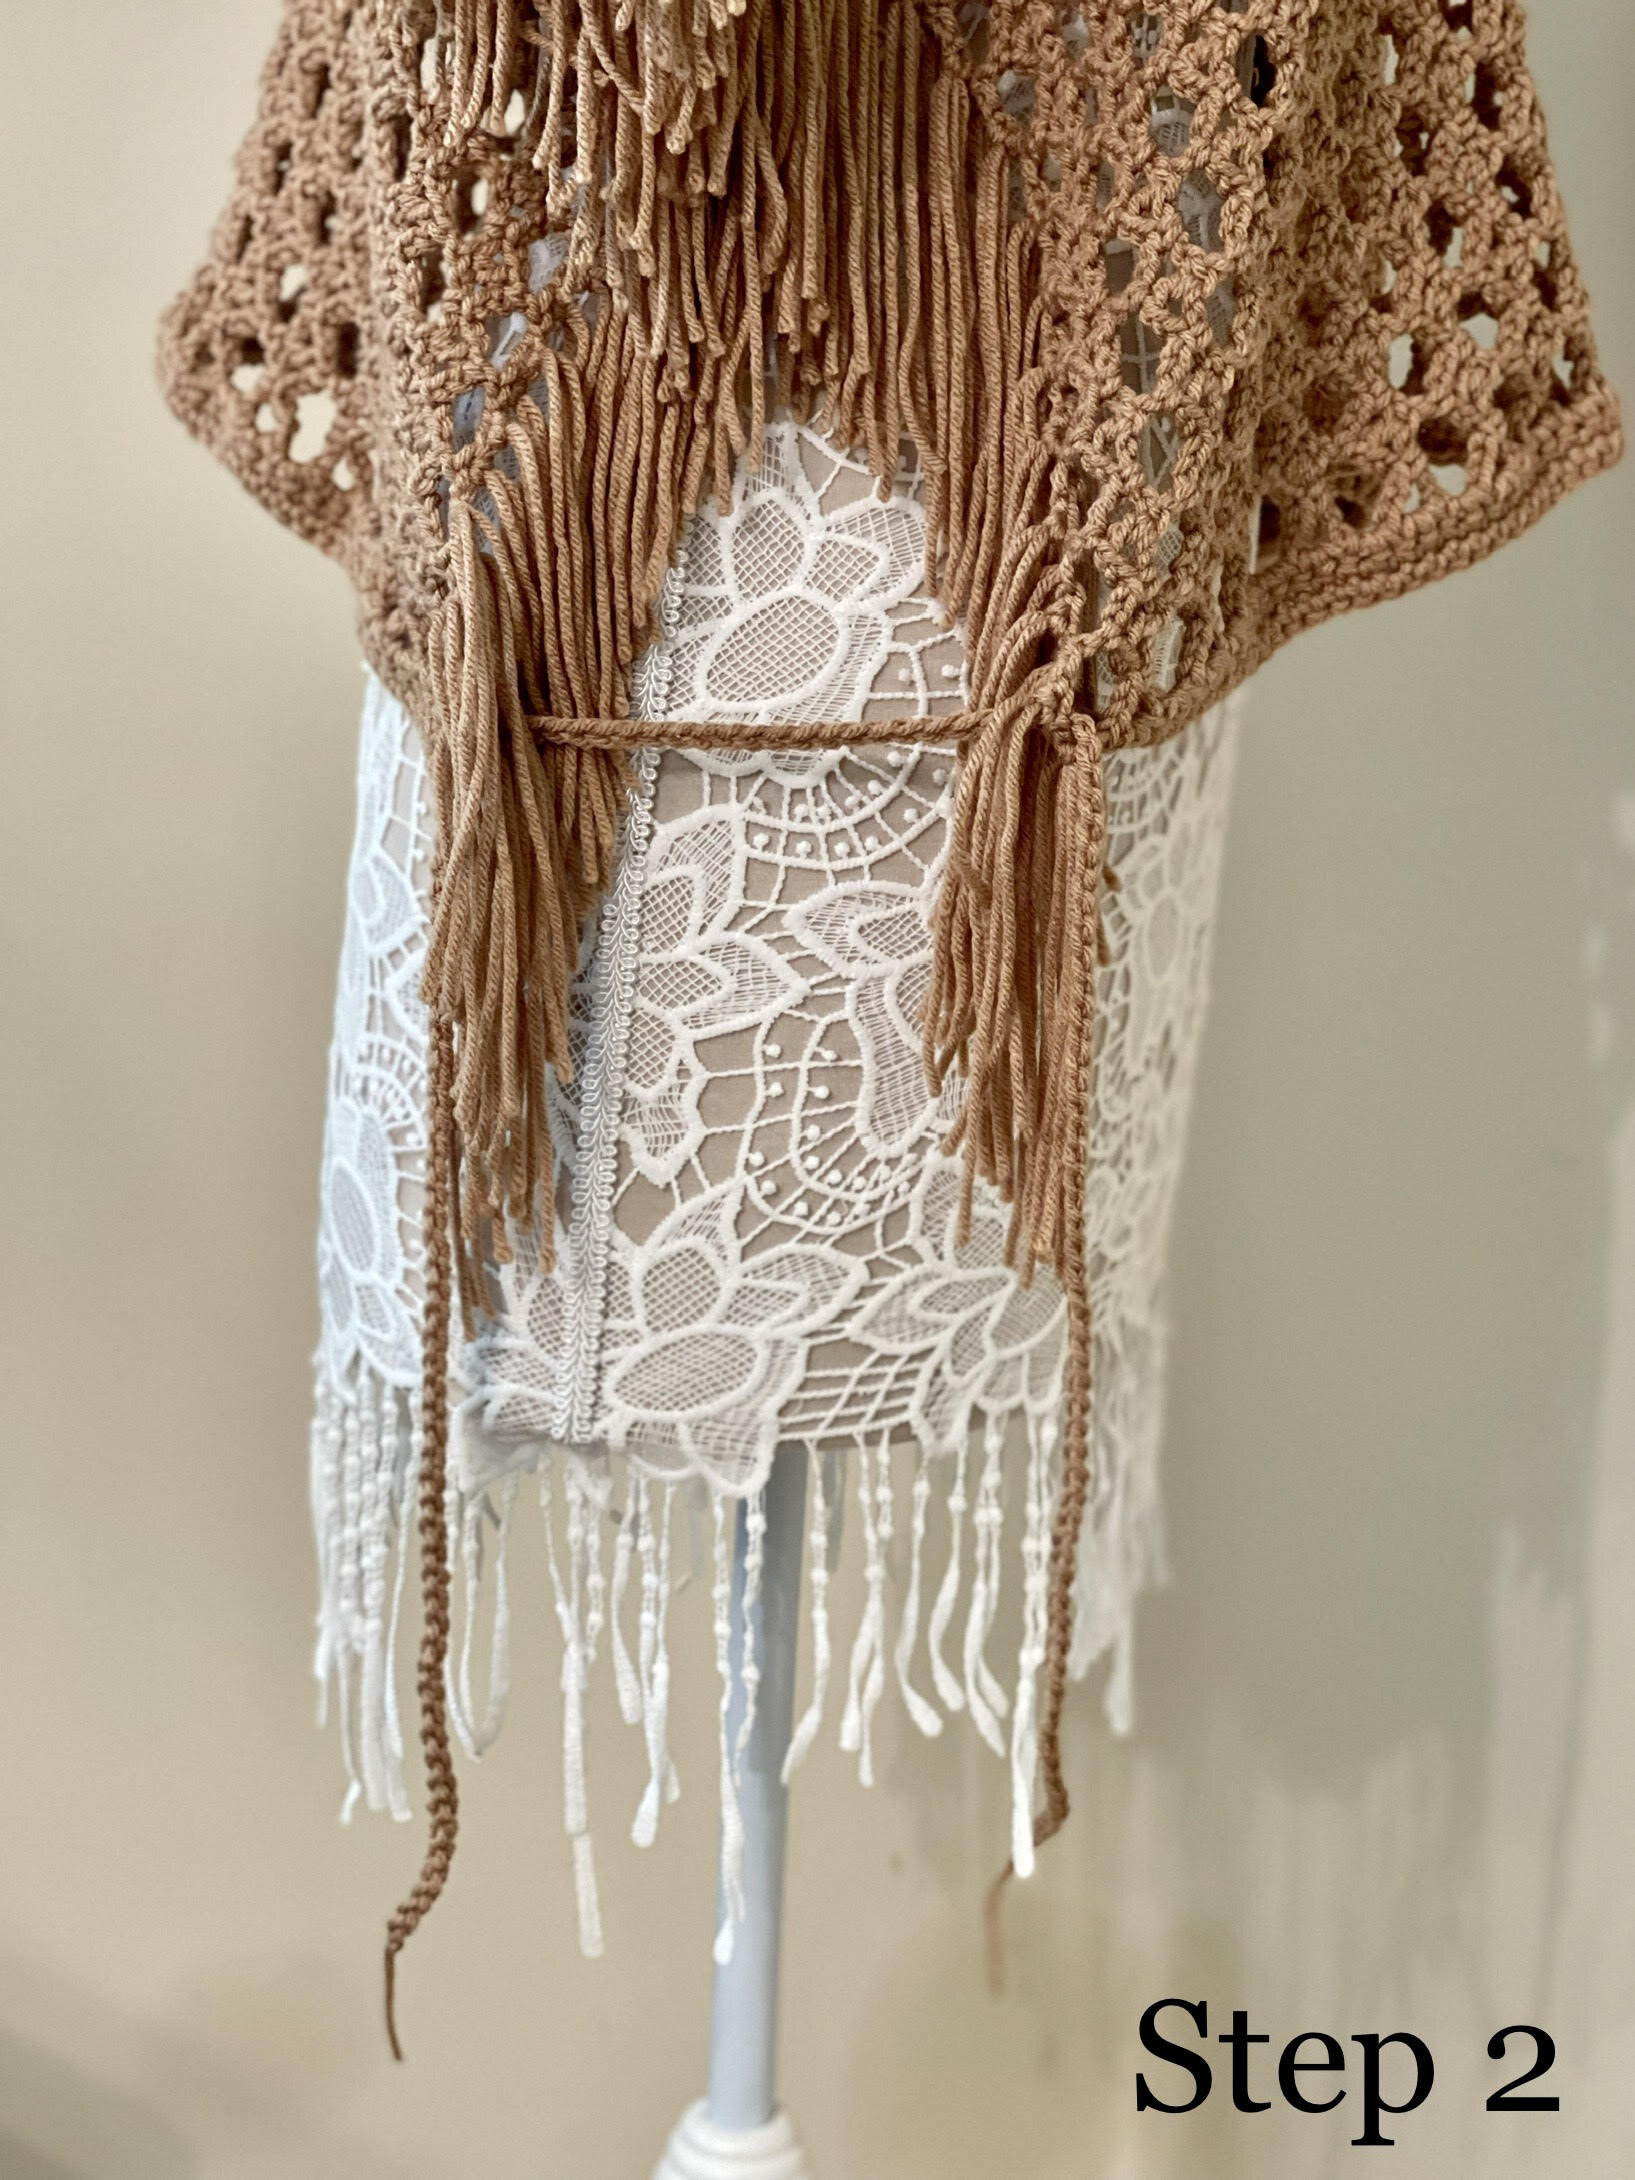
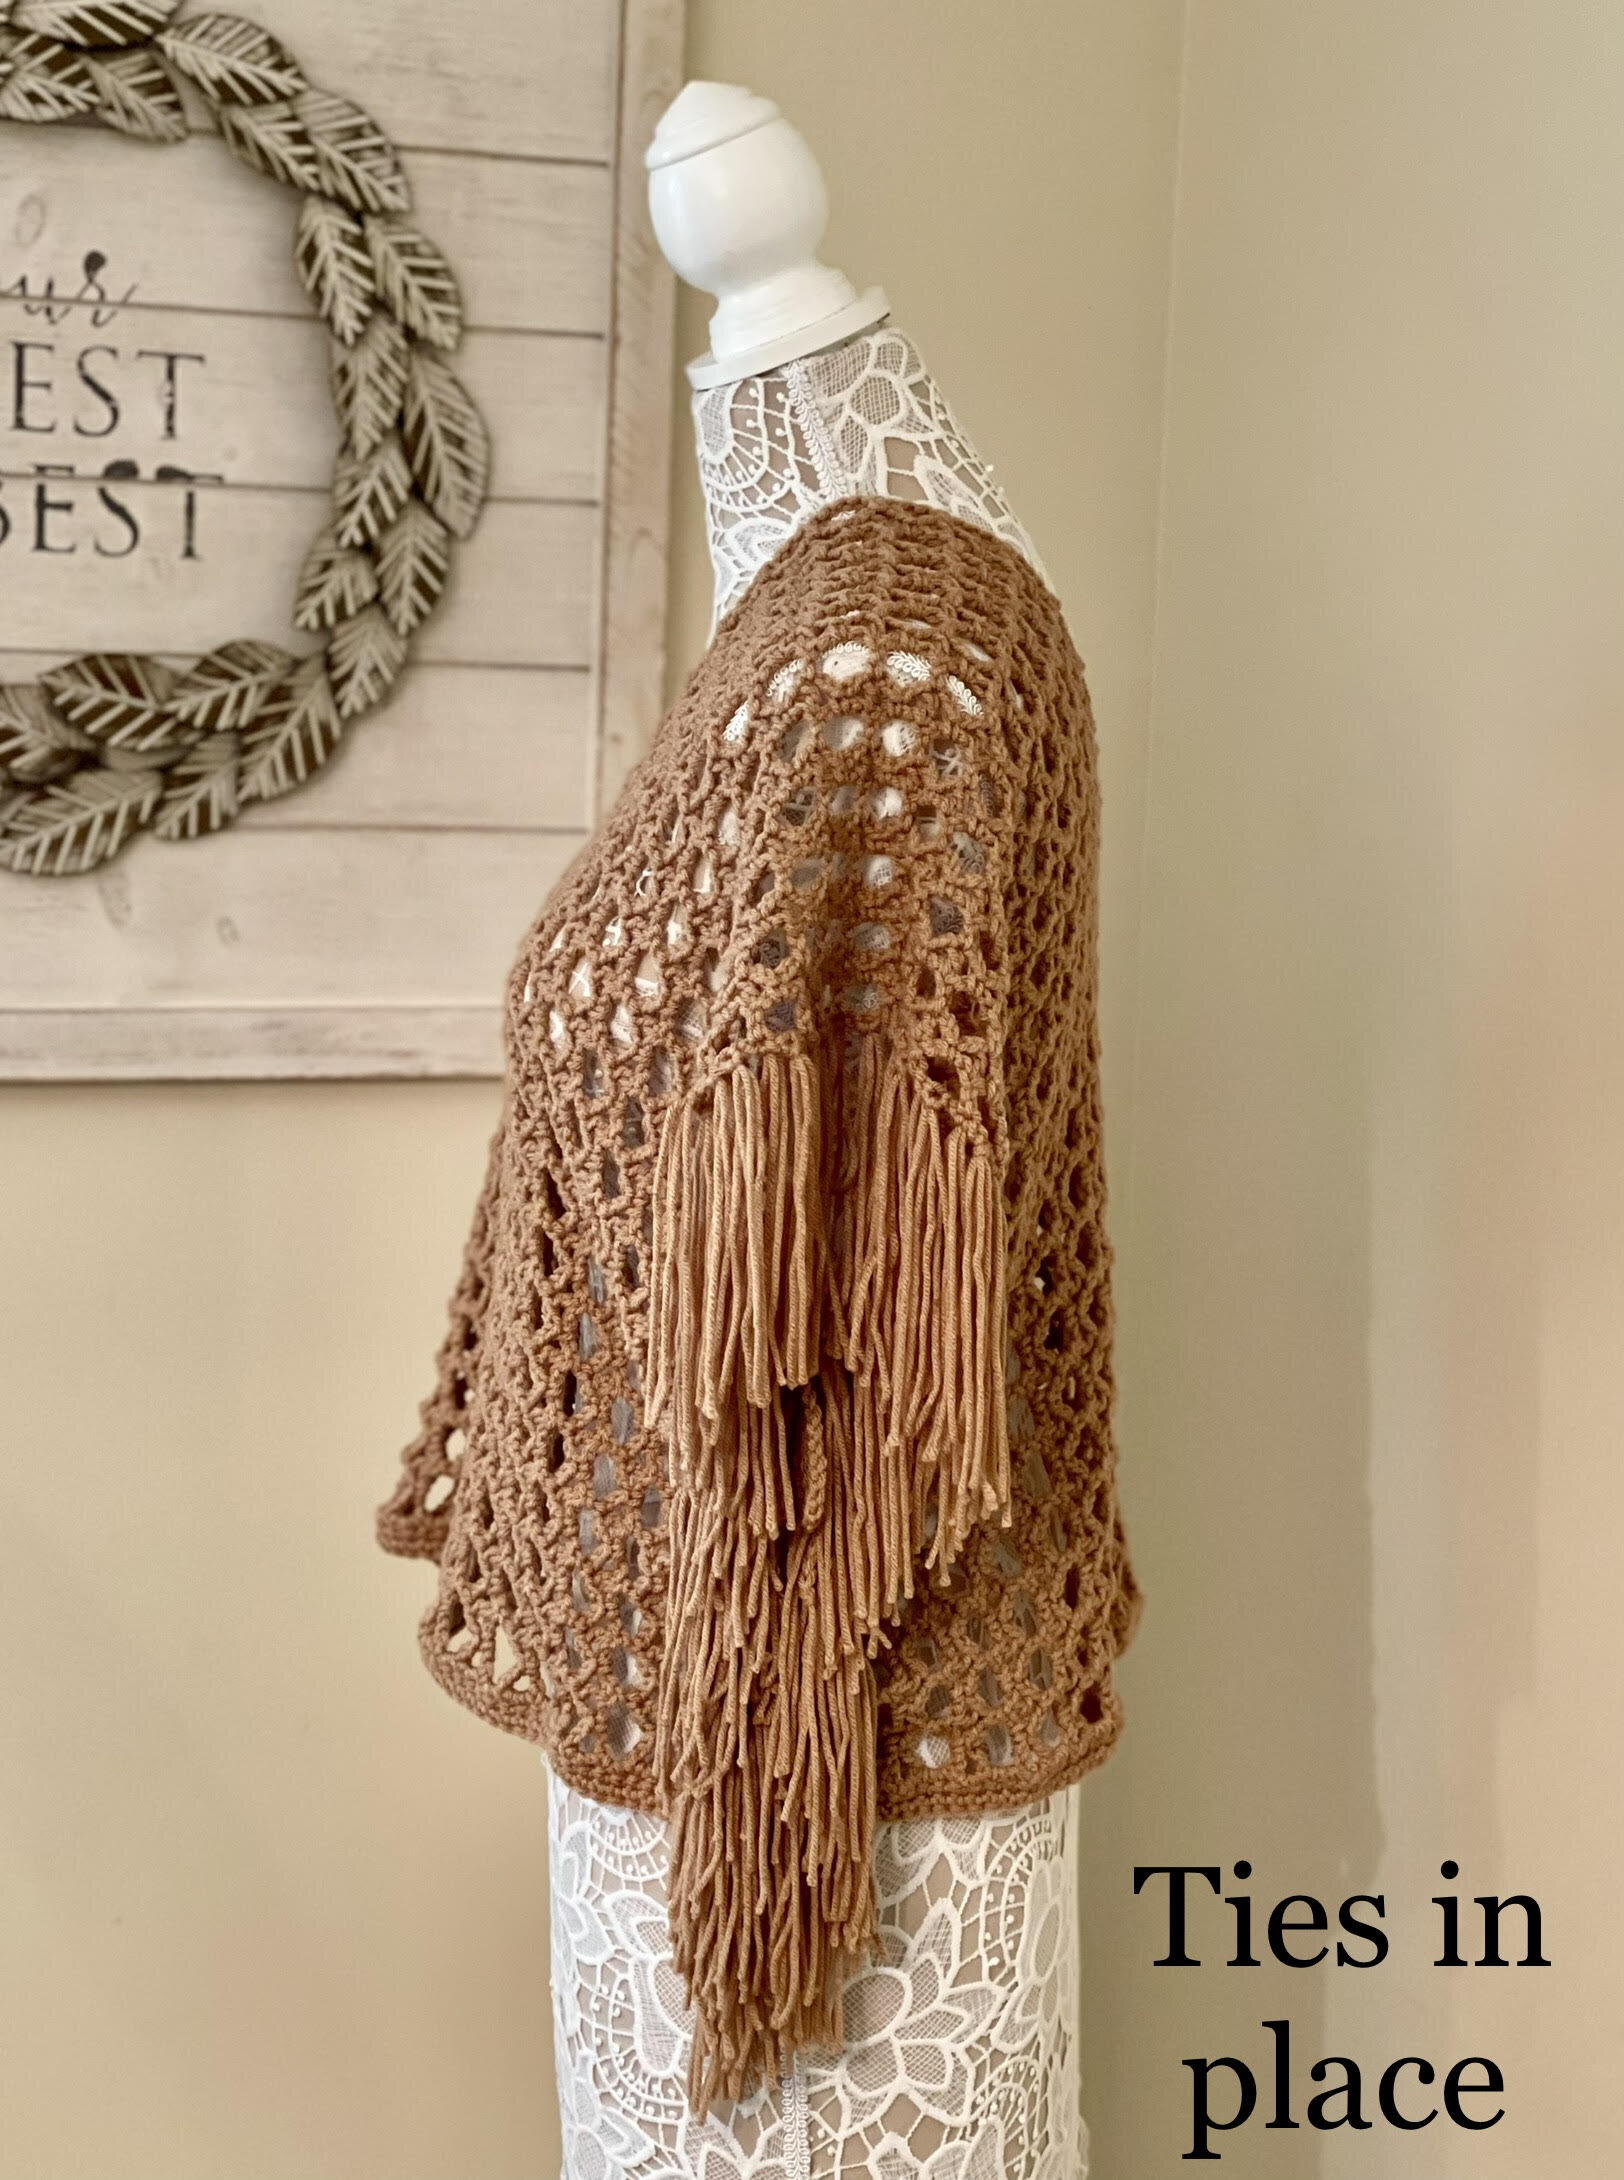
Add side ties
You may find that the front and back pooches out a bit (See left photo above). To combat this, I recommend making ties for under each arm that you can weave in like shoelaces to keep it from pooching out (see right photo above). This is completely optional, but I wanted to include this in the pattern in case you didn’t like the way it hung on your frame.
1) Make a ch of 130 and FO.
2) Weave each end from back to front in the bottom-most ch-3 sp on the side seam.
3) Moving vertically on one side, weave the end upwards until the end comes out of the 11th ch-3 sp above.
4) Rep step 3 with opposite tail on opposite side.
5) Making sure all fringe is facing outside the piece, pull on both ends like a shoelace and tie into a bow
(NOTE: I also played around with adding a sc border to the shorter sides of my poncho. If you wish to do this, you will need to add 2 sc sts per dc post going up the shorter sides of the rows.)
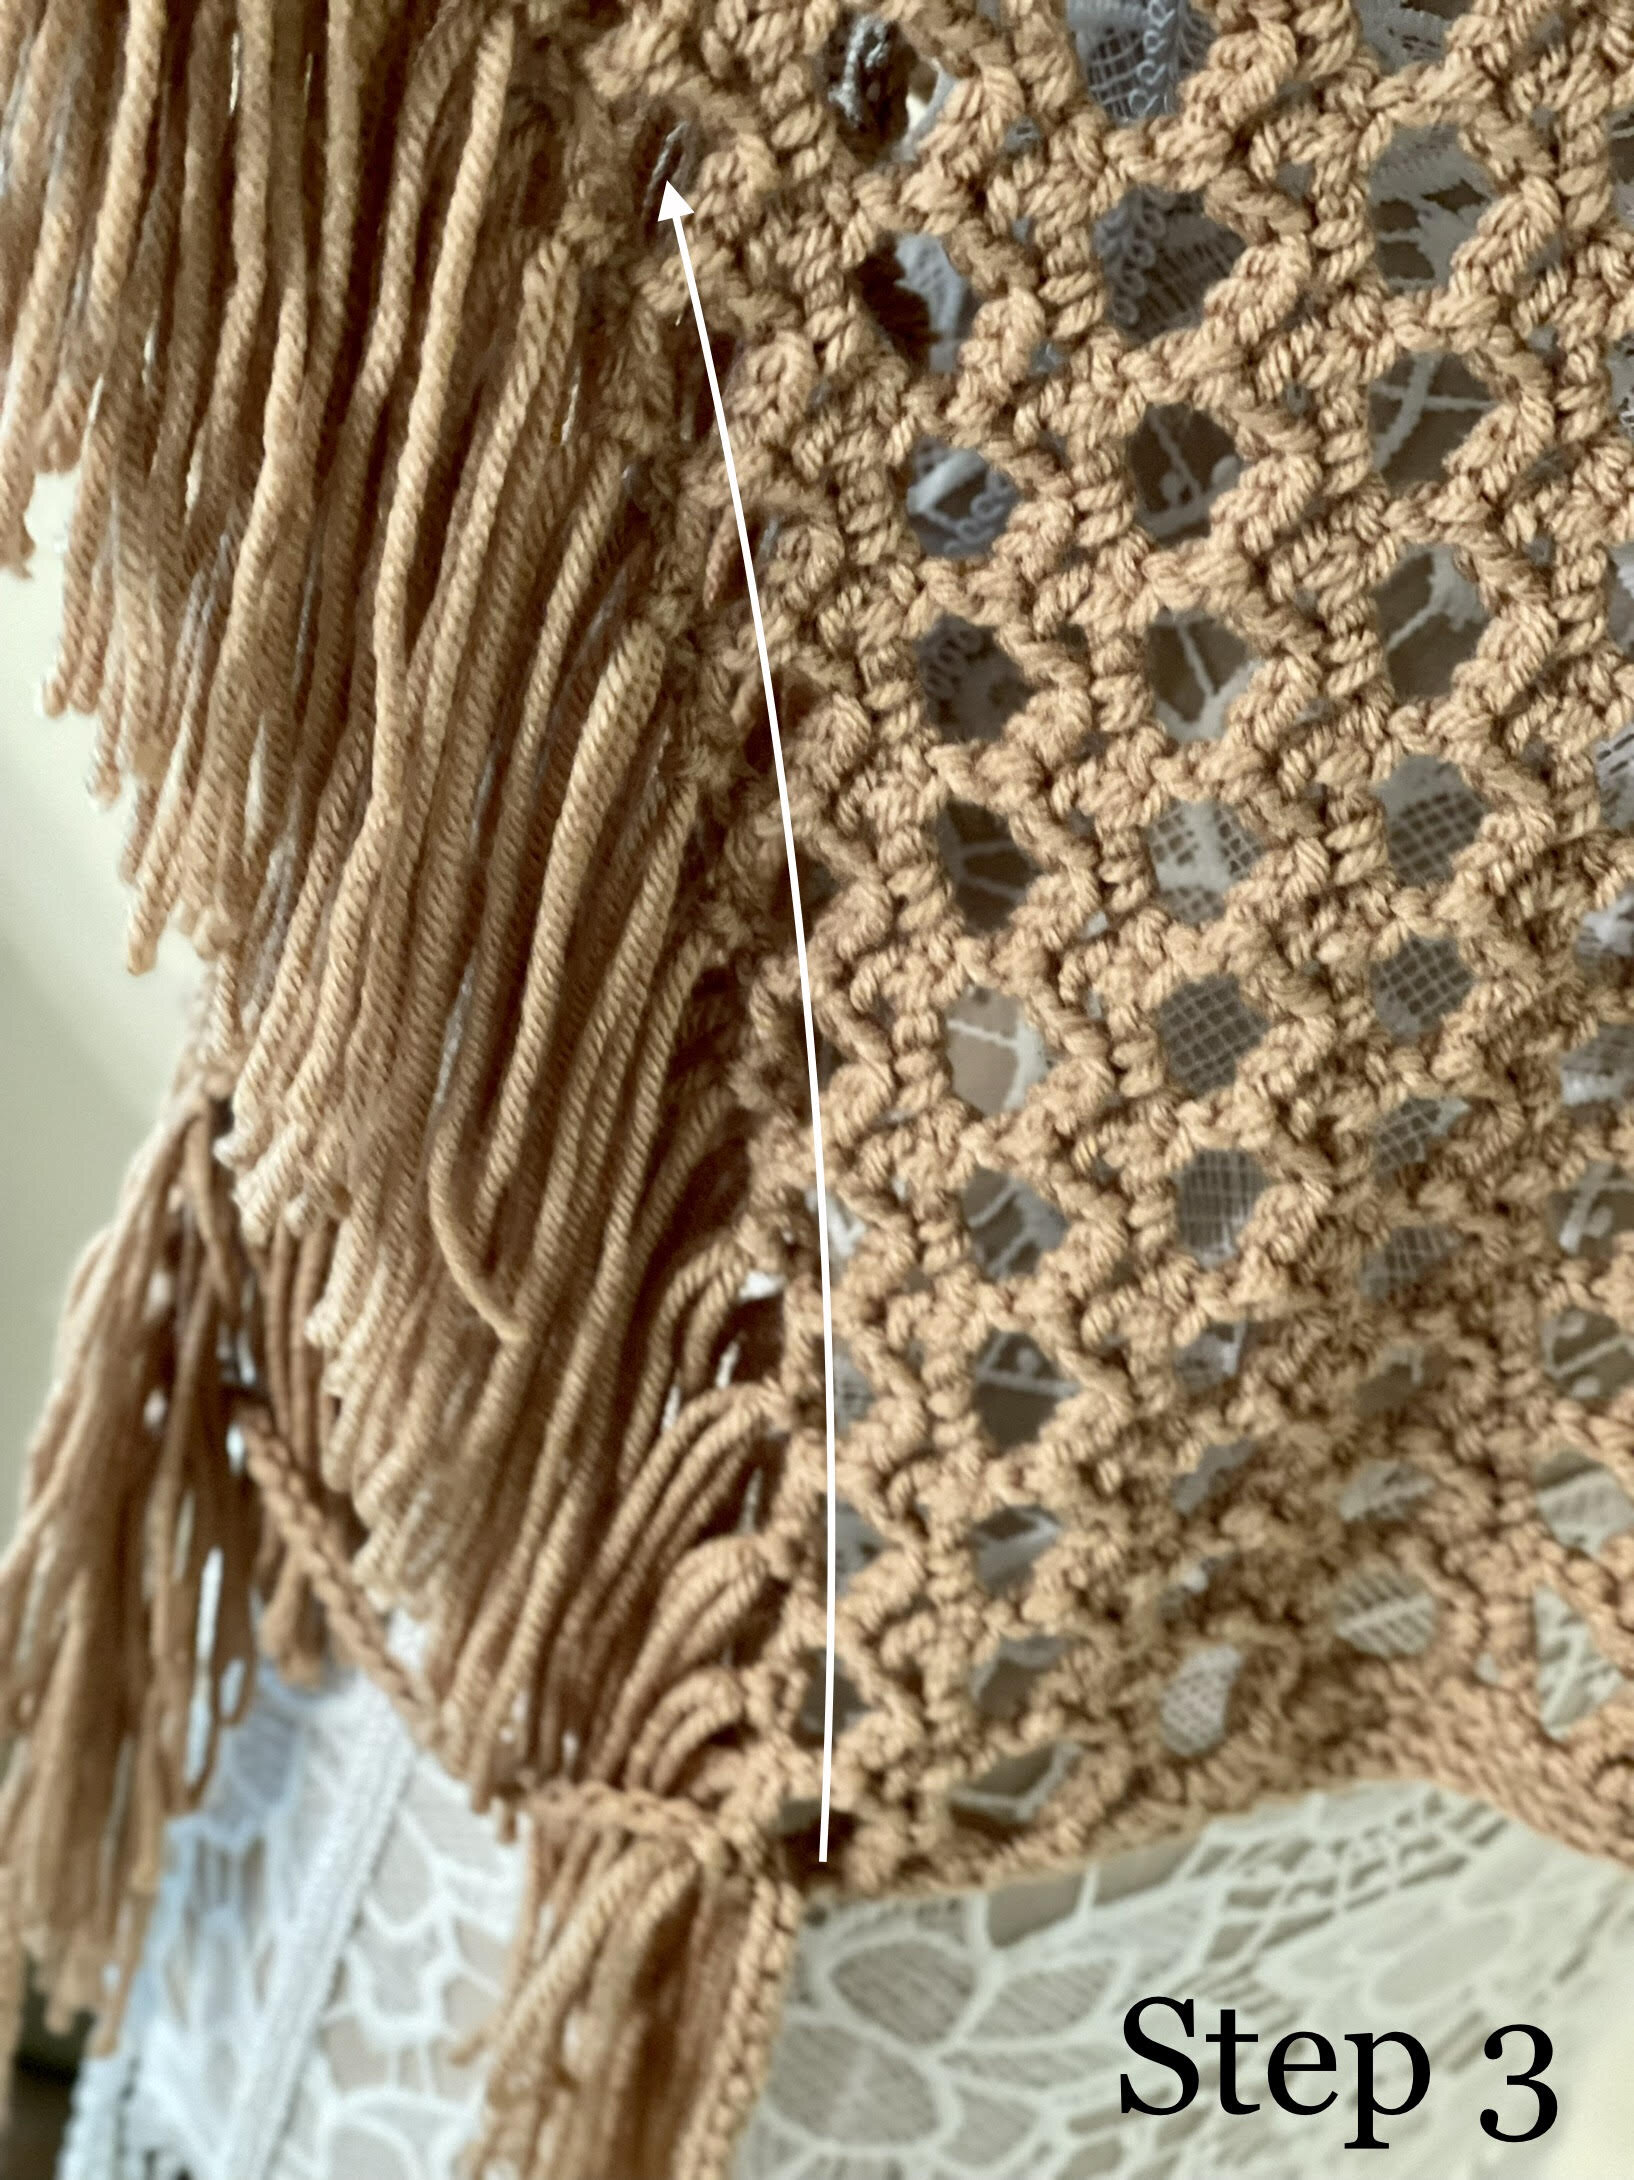
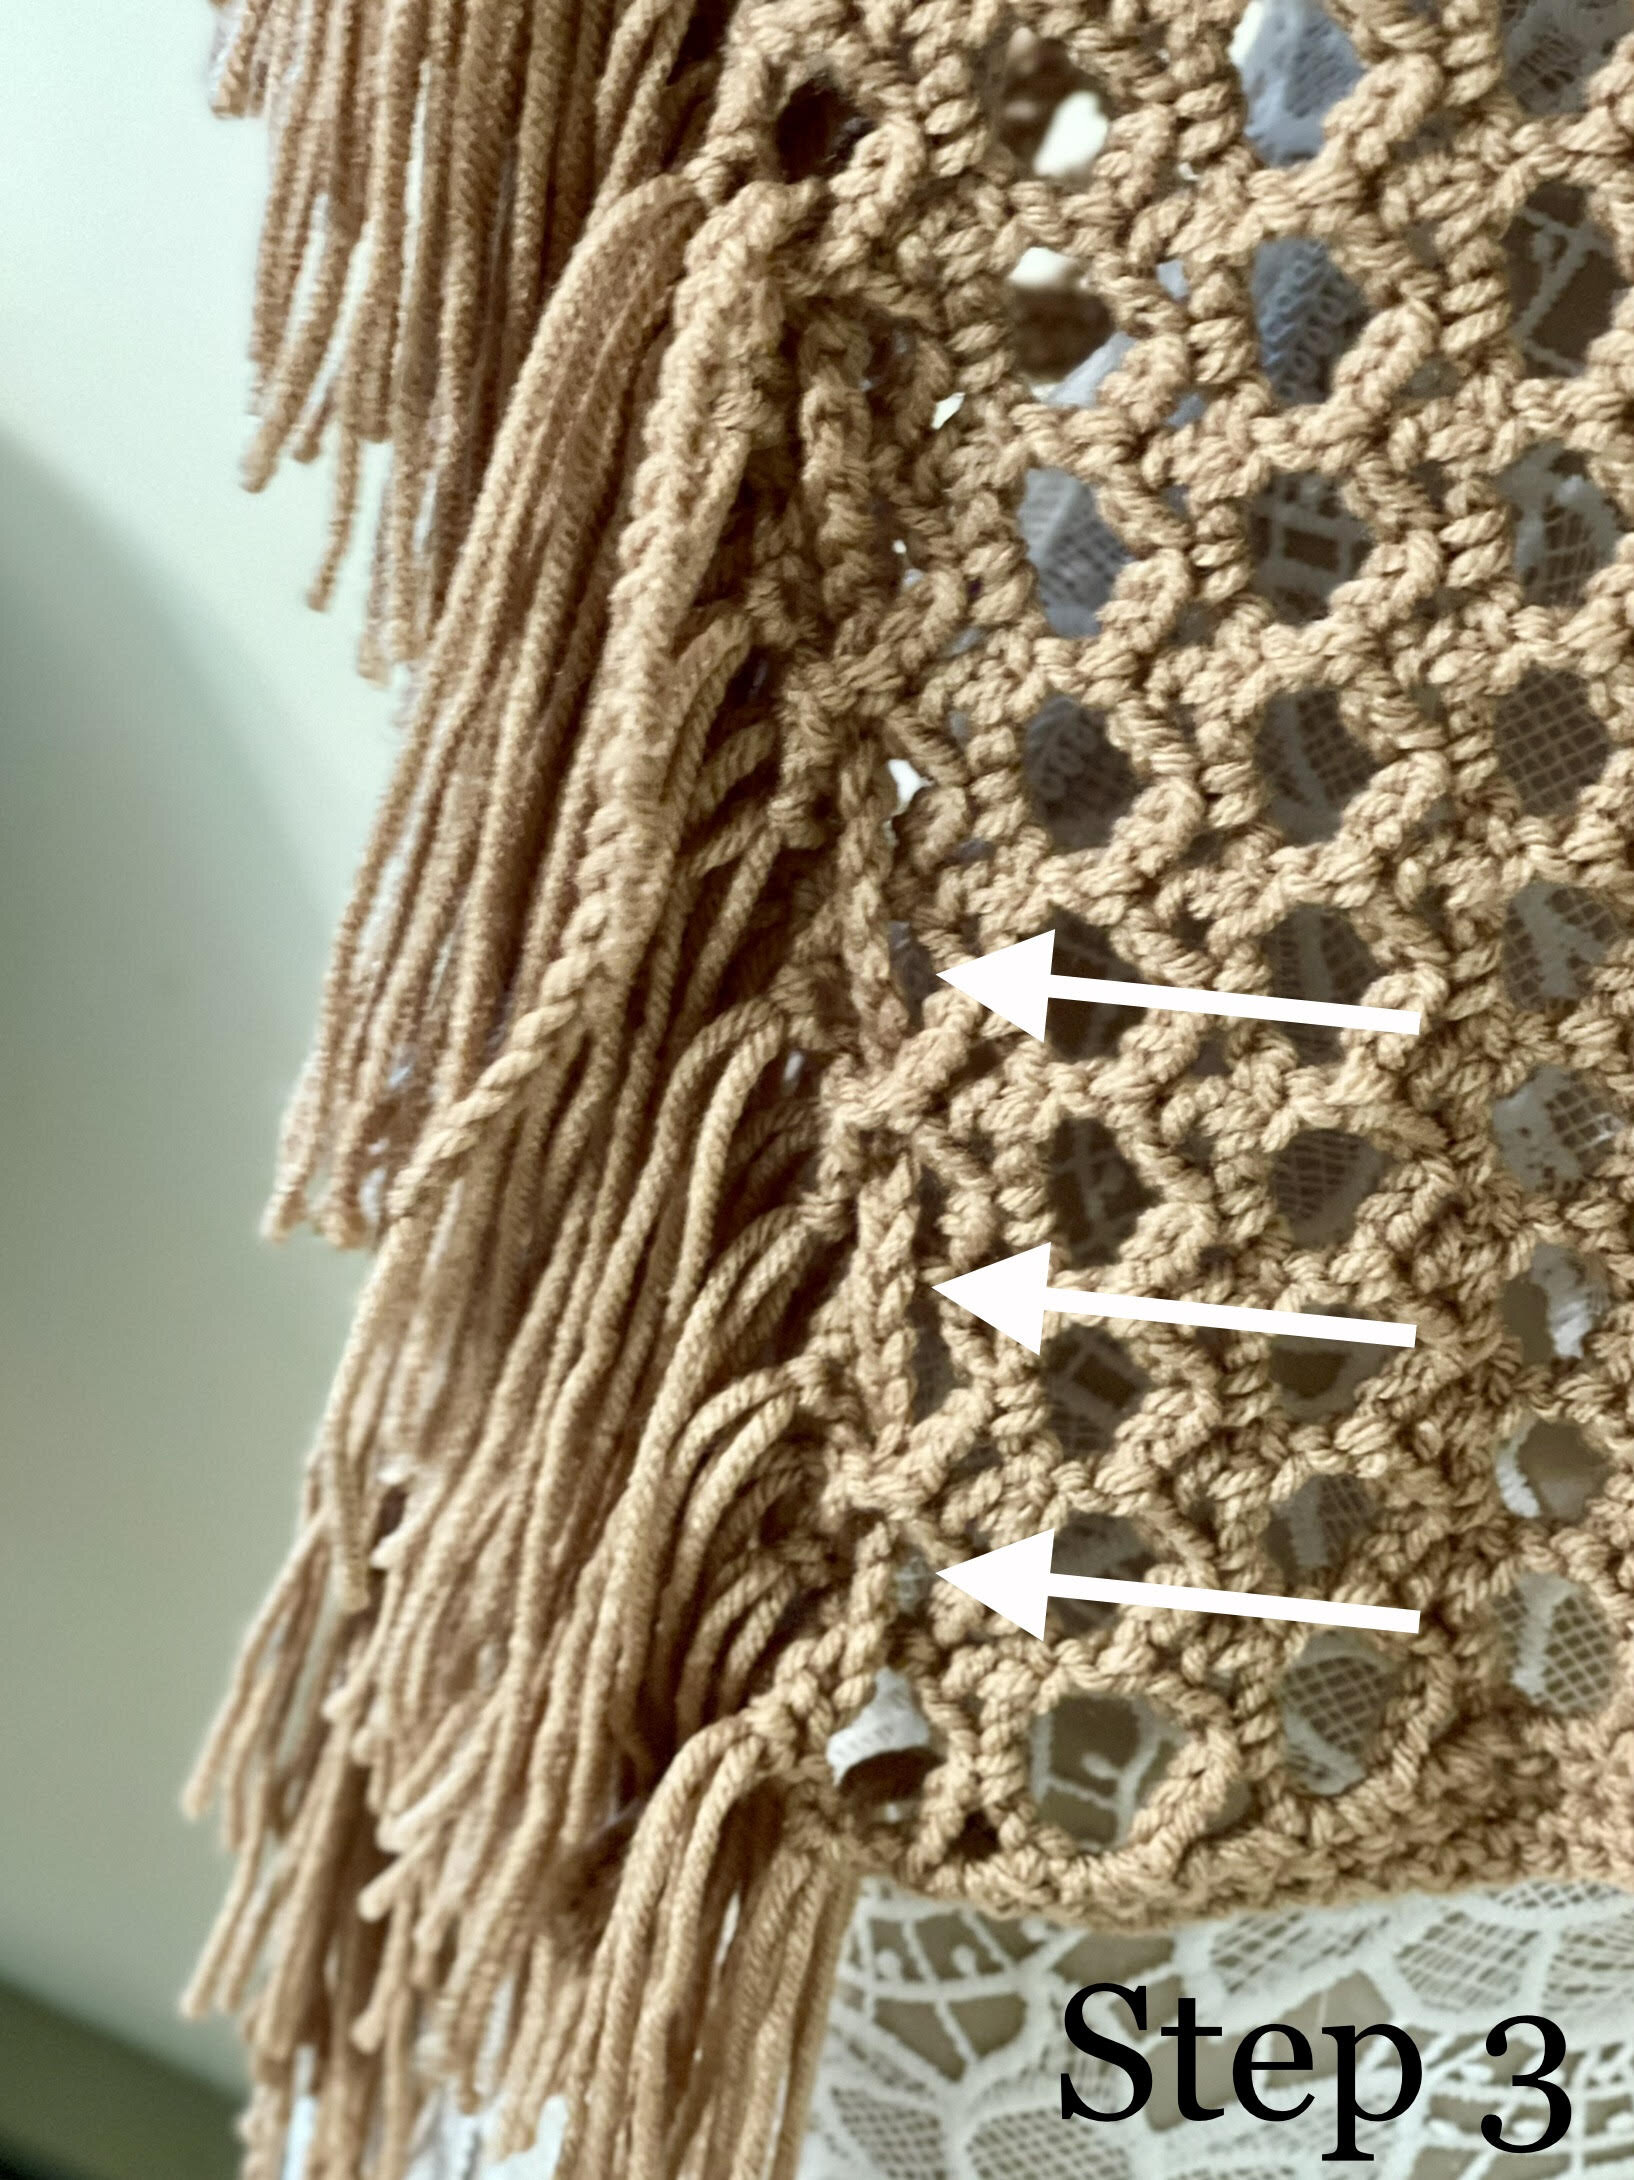
Add your fringe
Using a 6" piece of cardboard, wrap cardboard 320 times and cut bottoms to create fringe pieces. Grab 2 strands and going from the WS of your piece to the RS of your piece, use the Larks Knot to attach the fringe to the long edges of your poncho. Space them so that there is 1 fringe group per dc and ch-3 sp. NOTE: the RS of your piece is determined by the ch-2 sps of the row 2 rep. See photo below.

If you want to change up the look by adding fringe all the way around your piece, space your fringe so that there are 2 fringe groups per row. Just note that you will need to cut more fringe than what I instructed above (approx. 172). See photo below.

Your Gemini Poncho is complete! I would love to see your finished work! If you want to tag me on IG, I’m @dayscrochetnc. You could also follow the hashtag #geminiponcho to follow what others are making. I can’t wait to see your projects! If you would like to see other versions that I will be making after this publication, be sure to check me out on IG!
Please note that you do not have my permission to sell, share, copy, translate, or duplicate this pattern or my photos in any way. Please do not use this pattern for a video, blog, or class tutorial. Thank you so much for following these simple rules! Please message me on Facebook or send me an email at dayscrochetnc@gmail.com with any questions.
Come join my Facebook group, Crochet for Days! We have a lot of fun and I often offer discounts and coupon codes to my members that I don’t offer anywhere else! Request to join and answer the questions by following this link.
Did you enjoy making this poncho? Let me know in the comments!
Happy Hooking!
~Dana