
Crochet Rainbow Sandals

PIN it here!!
These adorable crochet rainbow slippers are super quick and easy to make!
This post may contain affiliate links that allow me to continue to post free content. Using these links will give me a very small percentage of the sale at no additional cost to you.
I have been wanting to try crochet shoes for quite some time, but I thought I would ease into it by starting with some simple sandals like these. These slides are perfect for lounging around the house or throwing on when you are running errands. They would even be cute to wear to the beach with your swimsuit or a beach dress.
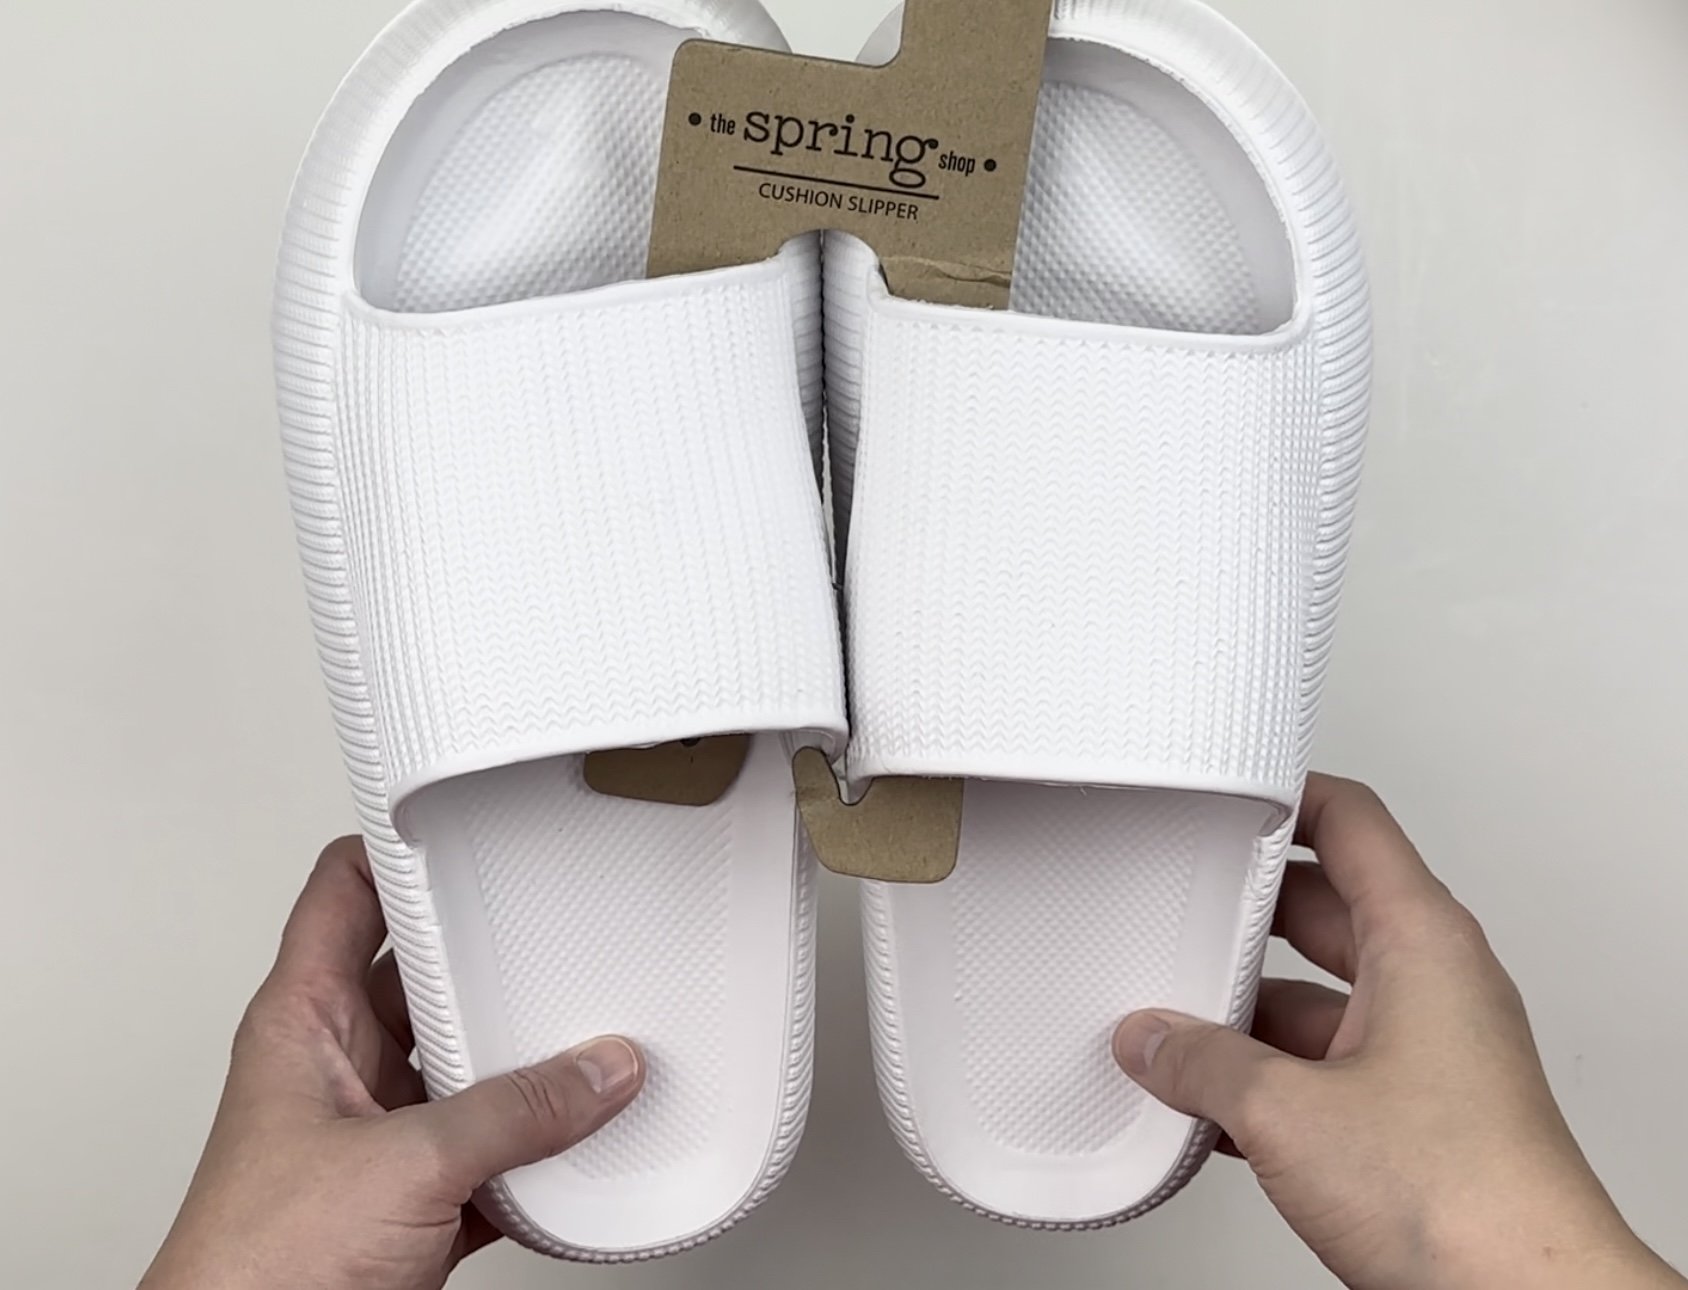
Not only are they super cute, they use very little yarn and add a fun statement to otherwise boring slide-on sandals. I saw these plain white rubber slides on sale at Hobby Lobby last week for only $5.44, so I decided to grab a pair.
The slides are currently in the Spring Shop section at Hobby Lobby, but I have found literally dozens (if not hundreds) of options for the same kind of shoe on Temu. I have even found this exact same slipper for under $4 on Temu. You can check it out here.
This design uses more of a concept in order to be adjustable to different size. I feel like explaining the concept first will help you visualize how it works and make it easier for you to make this project according to your size.
I definitely recommend reading this portion prior to starting your project!
Essentially you begin with the rainbow motif in the center and make rows of your motif until you only have ¼ of an inch left on both the top and bottom before the motif touches. Regardless of your shoe size, you simply make rows in your rainbow until it reaches that height. (see photo below)

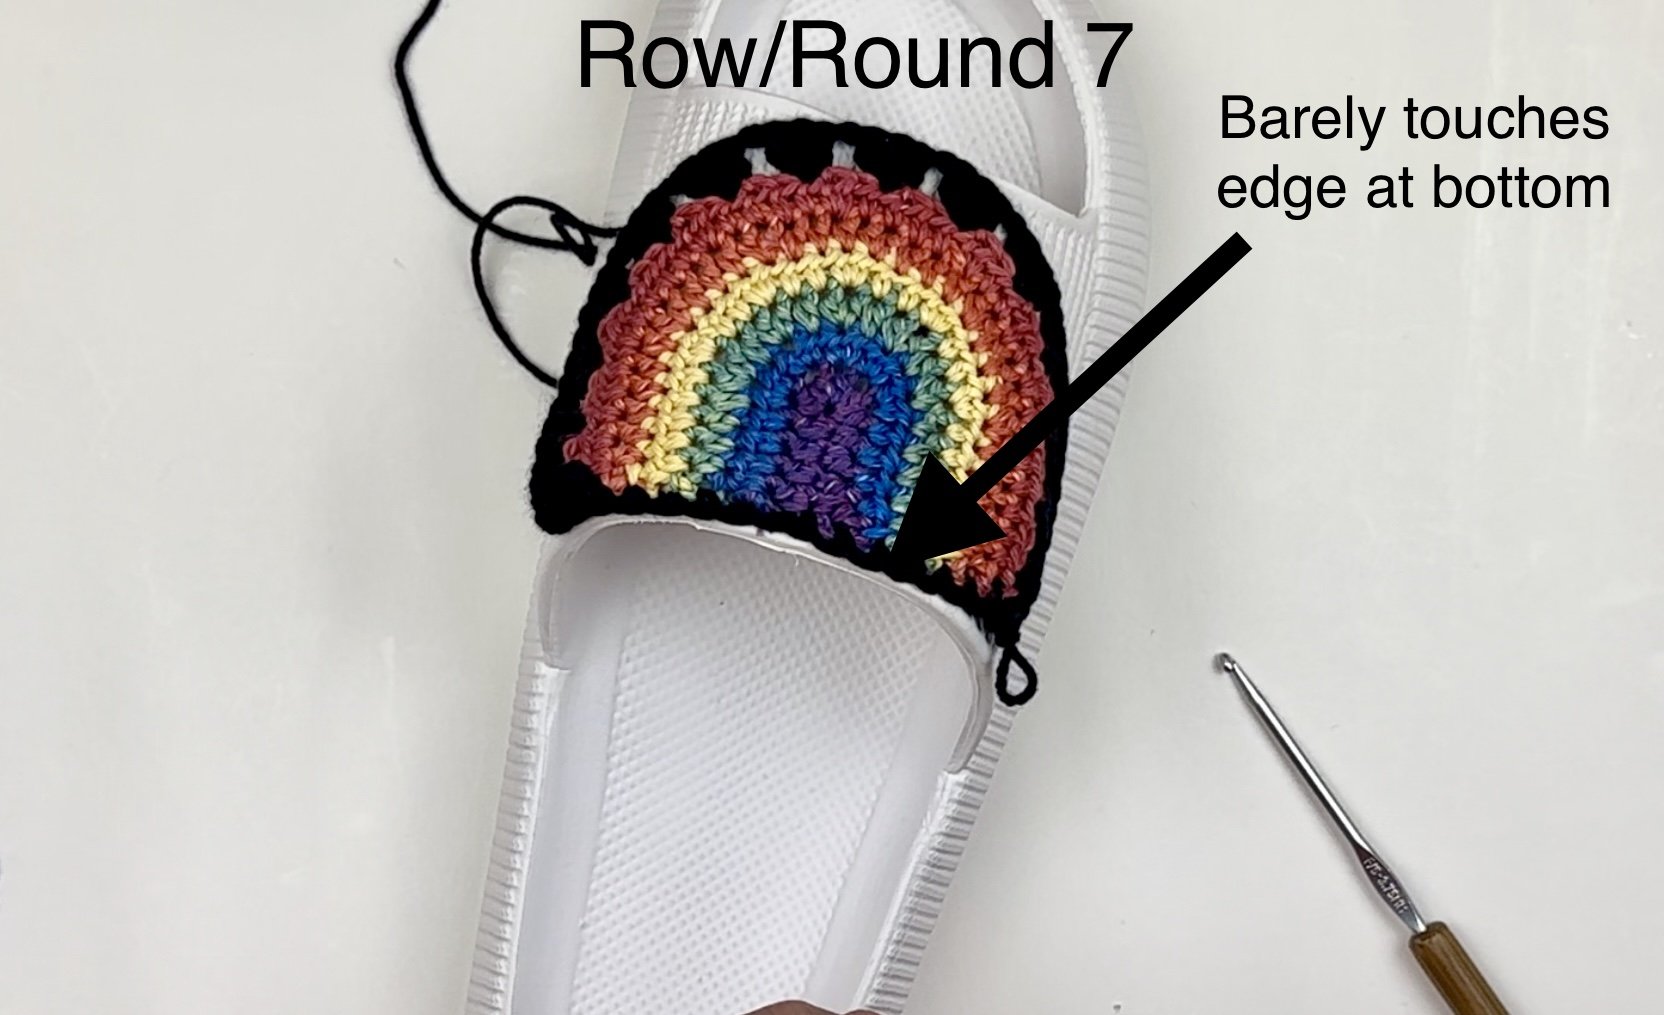
Once your motif reaches that size, you will then add a round of granny clusters and single crochet (mine is in black). This round will make your motif barely touch the edges of your slides on both the top and bottom (see photo below)
Once you have completed this round of granny clusters, you will then grab 2 stitch markers and mark the last stitches touching the top before the empty space on both sides. These stitch markers will be the guide to let you know when to stop your rows on the sides that will cover up the rest of the top of the shoe. (see photo below)

You will simply make rows of single crochet on the sides going from the bottom of the motif to the stitch marker until your rows completely cover the sides. (see photo below)

Once you have done this on both sides of your motif, you will add a row of single crochet to both the bottom and to the top of your motif to clean up the stitches and make it look more polished.
As a general rule, you want your motif to be slightly smaller than the top of your shoe. You can always stretch it a bit as you hot glue it down. But if it’s too large, it will have too much overhang and it won’t look as good. There will be a slight overhang if you follow the pattern concept as written, but you don’t really want too much.
This may sound complicated, but it is really quite simple in concept. I have created a YouTube video tutorial to help you visualize this. My tutorial makes a size Large or a size US 9/10. If your shoe is smaller, you would add fewer rainbow rows, fewer granny clusters, and fewer rows on the sides. If your shoe is larger, you would make more rows in your rainbow and have more granny clusters and side rows. Regardless, the concept remains the same.
The number of rainbow rows and utilizing stitch markers at the top is really the key in making this adjustable to your size.
As you make rows, you will change color in the last stitch of the row/round. If you are unfamiliar with this technique, see my video.
Let’s make it!!
Supplies Needed
Approx. 100-115 yds of lightweight or sport weight cotton (size 2 or 3 will work). I used Yarn Bee Mini Cotton Sugarwheel for mine and separated the colors out. I also used Knitpicks Shine sportweight cotton in the color black. You shouldn’t need more than 15-20 yards of any one color. This cotton yarn assortment from Amazon would be a good option.
Size 3.75 mm hook
Slide-on thick-cushioned sandals in the size of your choice. I purchased mine from the Spring Shop at Hobby Lobby, but Temu also carries these exact slides.
2 stitch markers
Hot glue gun and glue sticks
Tape measure, tapestry needle, scissors
Terms Used and abbreviations
Pattern is written in US terminology.
Chain - ch
Double Crochet - dc
Granny Cluster - GC
Half double crochet - hdc
Repeat - rep
Single Crochet - sc
Skip - sk
Slip stitch - sl st
Space(es) - sp(s)
Stitch(es) - st(s)
* - Repeat directions given from *
[ ] - Indicates the number of stitches you should have
( ) - Work stitches within ( ) in the same stitch or space
{ } - Indicates a group of repeating instructions
special terminology
Granny Cluster - A granny cluster is simply a group of 3 dc in the same stitch.
Rainbow motif
You will make rows of the rainbow as follows until it is about ¼ inch away from touching the top and bottom portion of the top of your slides. You will need to put your motif on your shoe every so often to see when you should stop. Once you have the right sized rainbow, you will skip down to the granny cluster portion. NOTE: You will want to err on the smaller side if you find your motif does not leave a ¼ inch on both sides. It will stretch.
To visualize the rainbow portion, see my video.
Row 1: Ch 7, hdc in 3rd ch from hook (turning ch will count as a st), hdc in next 3 sts, 5 hdc in last st, turn to work alongside the bottom of the ch, hdc in last 5 sts. [15 hdc]
Row 2: Ch 1, turn, hdc in first 5 sts, {2 hdc} in next 5 sts, hdc in last 5 sts. [20 hdc]
Row 3: Ch 1, turn, hdc in first 5 sts, {2 hdc, hdc in next st} complete brackets 5x’s, hdc in last 5 sts. [25 hdc]
Row 4: Ch 1, turn, hdc in first 5 sts, {2 hdc, hdc in next 2 sts} complete brackets 5x’s, hdc in last 5 sts. [30 hdc]
Row 5: Ch 1, turn, hdc in first 5 sts, {2 hdc, hdc in next 3 sts} complete brackets 5x’s, hdc in last 5 sts. [35 hdc]
Row 6: Ch 1, turn, hdc in first 5 sts, {2 hdc, hdc in next 4 sts} complete brackets 5x’s, hdc in last 5 sts. [40 hdc]
NOTE: If your shoe is larger than a size 9/10, continue making rows as follows until it reaches the correct size as mentioned in the pattern notes. This is not included in the video.
Row 7: Ch 1, turn, hdc in first 5 sts, {2 hdc, hdc in next 5 sts} complete brackets 5x’s, hdc in last 5 sts. [45 hdc]
Row 8: Ch 1, turn, hdc in first 5 sts, {2 hdc, hdc in next 6 sts} complete brackets 5x’s, hdc in last 5 sts. [50 hdc]
granny cluster round
Regardless of your rainbow size, you will follow the concept. I will write it as I made it for my size US 9/10 shoe to help you visualize it, but follow the concept if your shoe is larger or smaller. To visualize this round, see my video.
Change colors in the last st of your rainbow row and turn to work back up the arch. Ch 3 (counts as a dc), 2 more dc in same st, sk 2 sts, GC in next st, rep bolded instructions a total of 3 times, ch 1, * sk 2 sts, GC, ch 1; rep from * a total of 7 times, rep bolded instructions a total of 4 more times.
NOTE: If your rainbow is a different size, you will only ch-1 between the GC that are over the arch of the rainbow to compensate for the curve. The sides will not have ch-1 sps. It’s not super important on how many ch-1 sps you have, just make sure you have the same number of GC without a ch-1 sp on both sides. (See photo below)

So far, this is what your motif should look like:

Ch 1, turn to continue along the bottom of your rainbow in the sides of the rows, 2 sc around dc post, sc in every row to end, 2 sc around last dc.
Lay your motif on top of the shoe. It should barely be touching the bottom and the top of the shoe (see photo below). If it’s a tad smaller, that’s fine because we will be adding finishing rows to the top and bottom later to clean up the motif.

Grab your 2 stitch markers. Mark the dc sts that are the last sts to touch at the top. For me, that was the middle st of these 2 GC shown in the photo below. NOTE: Don’t worry about marking the exact sts as me. Follow the concept and mark the last sts to touch the top.

side rows
Side Row 1: Joining where you left off, Ch 1, sc in every st and ch-1 sp to marked st, sc in marked st and change colors. To visualize this portion, see my video.
Side Row 2: Ch 1, turn, sc across.
You will essentially Rep row 2 until your rows completely cover the sides of your slides. NOTE: I do some decreasing and increasing in the video, but I don’t feel it’s truly necessary. It’s simpler to just make rows of sc. If you feel you need to shape your motif a bit as you go, I recommend increasing or decreasing as you see fit on the ends of the rows.

Now you will repeat this same process on the other side of your motif, making rows of sc until you reach the marked st and until it covers the sides. NOTE: I had the same number of rows on both sides of my motif, but I did not have the same number of sts.
Once you have your side rows complete, you will join at the bottom with the color of your choice and sc evenly across, putting a sc in every row and st. Then you will join at the top, putting a sc in every row, st, and ch-1 sp across. To visualize this, see my video.

Fasten off and weave in all tails. If your motif is a tad small, give it a bit of a stretch.
Hot glue your motif to the shoe, starting at the outer border. BEFORE you hot glue, make sure you have your motif lined up the way you marked it with your stitch markers. For example, my motif has 7 GC on the outer portion, but only 6 GC on the inner portion. It’s important you don’t mix it up. To visualize what I mean, see my video.
Once you hot glue the outer edge down, gently stretch your motif across the top, making sure it’s straight and hot glue the inner edge. Once it’s dry, carefully hot glue the top and bottom of the motif down. Repeat this process to the other shoe.
Your project is complete! I would love to see your finished work! If you want to tag me on IG, I’m @dayscrochetnc. You could also use the hashtag #crochetsummerslides to follow what others are making. I can’t wait to see your projects! If you would like to see other versions that I will be making after this publication, be sure to check me out on IG!

Come join my Facebook group, Crochet for Days! We have a lot of fun and I often offer discounts and coupon codes to my members that I don’t offer anywhere else! Request to join and answer the questions by following this link.
did you enjoy this project? Let me know in the comments!
Happy hooking!
~Dana