
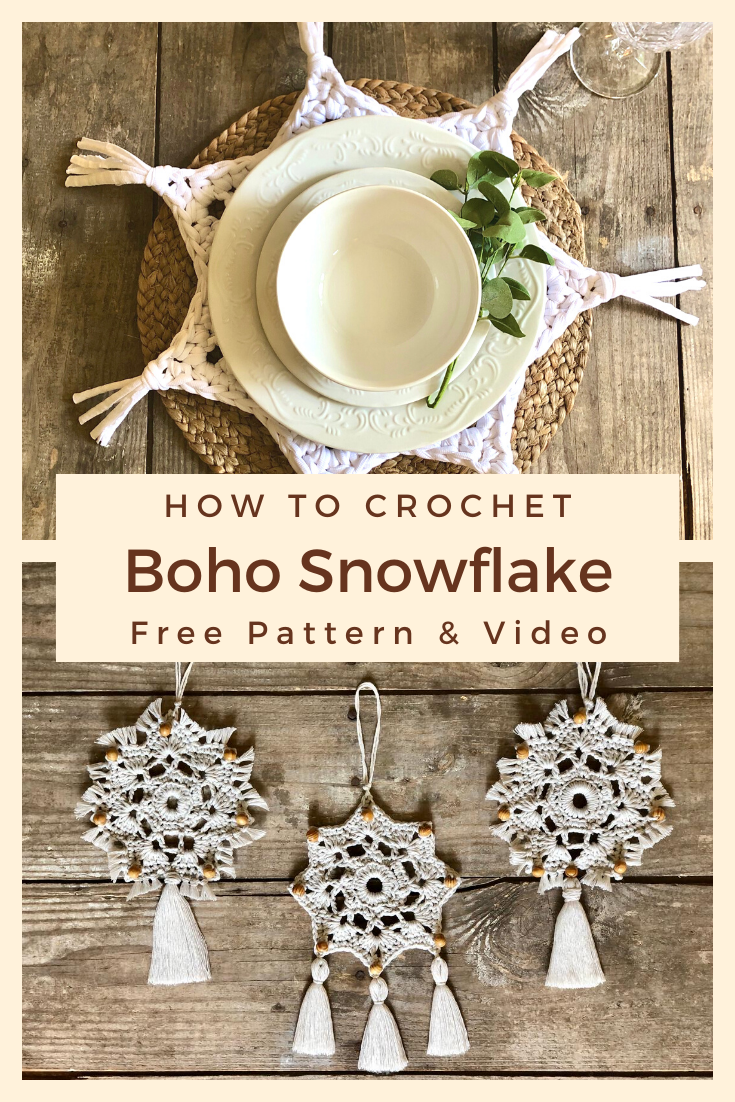
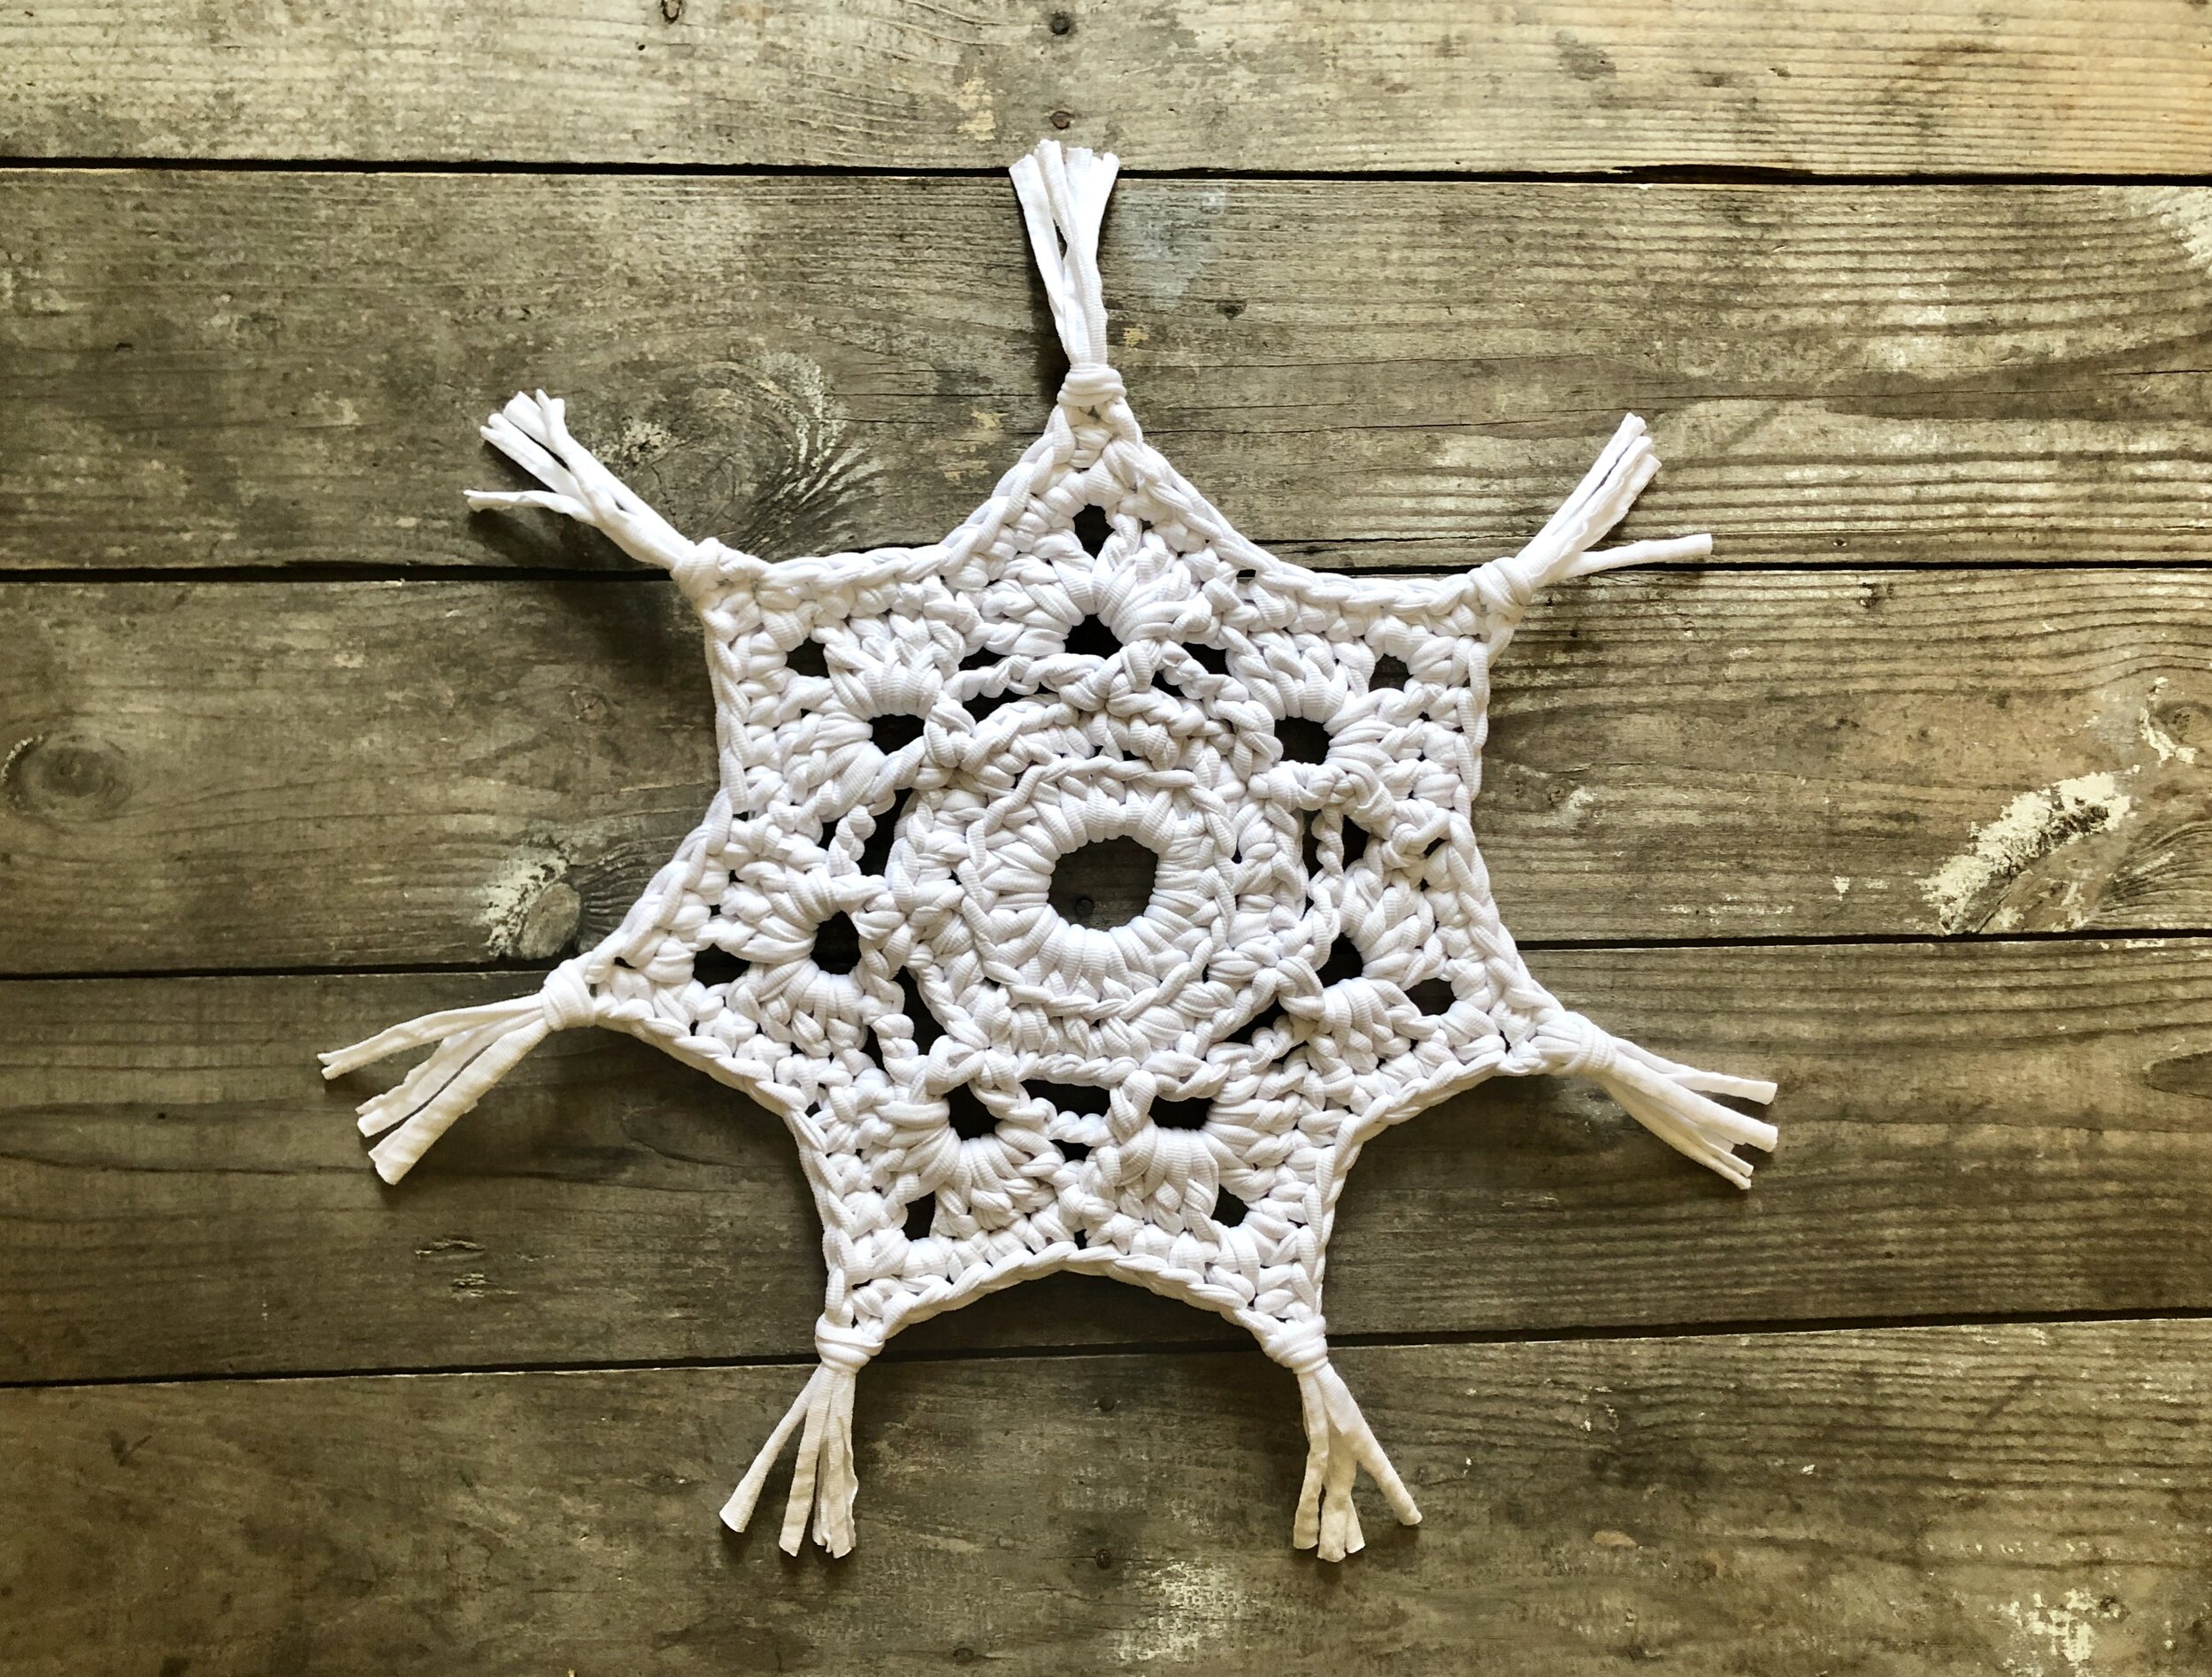
Boho Snowflake Motif
For all my weekly content follow me below:
On Pinterest Click Here
On YouTube Click Here
On Instagram Click Here
On Facebook Click Here
Etsy shop Click Here
Ravelry shop Click Here
Come join my Facebook group Crochet for Days! We have a lot of fun in there and I often offer coupons and discounts to my members that I don't offer anywhere else! Just follow this link to answer the questions and request to join: Facebook Group
For the free version just keep scrolling but for an Ad-free printable pdf, see my Etsy shop or my Ravelry store.
Ravelry: https://www.ravelry.com/patterns/library/boho-snowflake
Etsy shop: https://www.etsy.com/listing/844186780/boho-snowflake-pdf-pattern-only-not-a
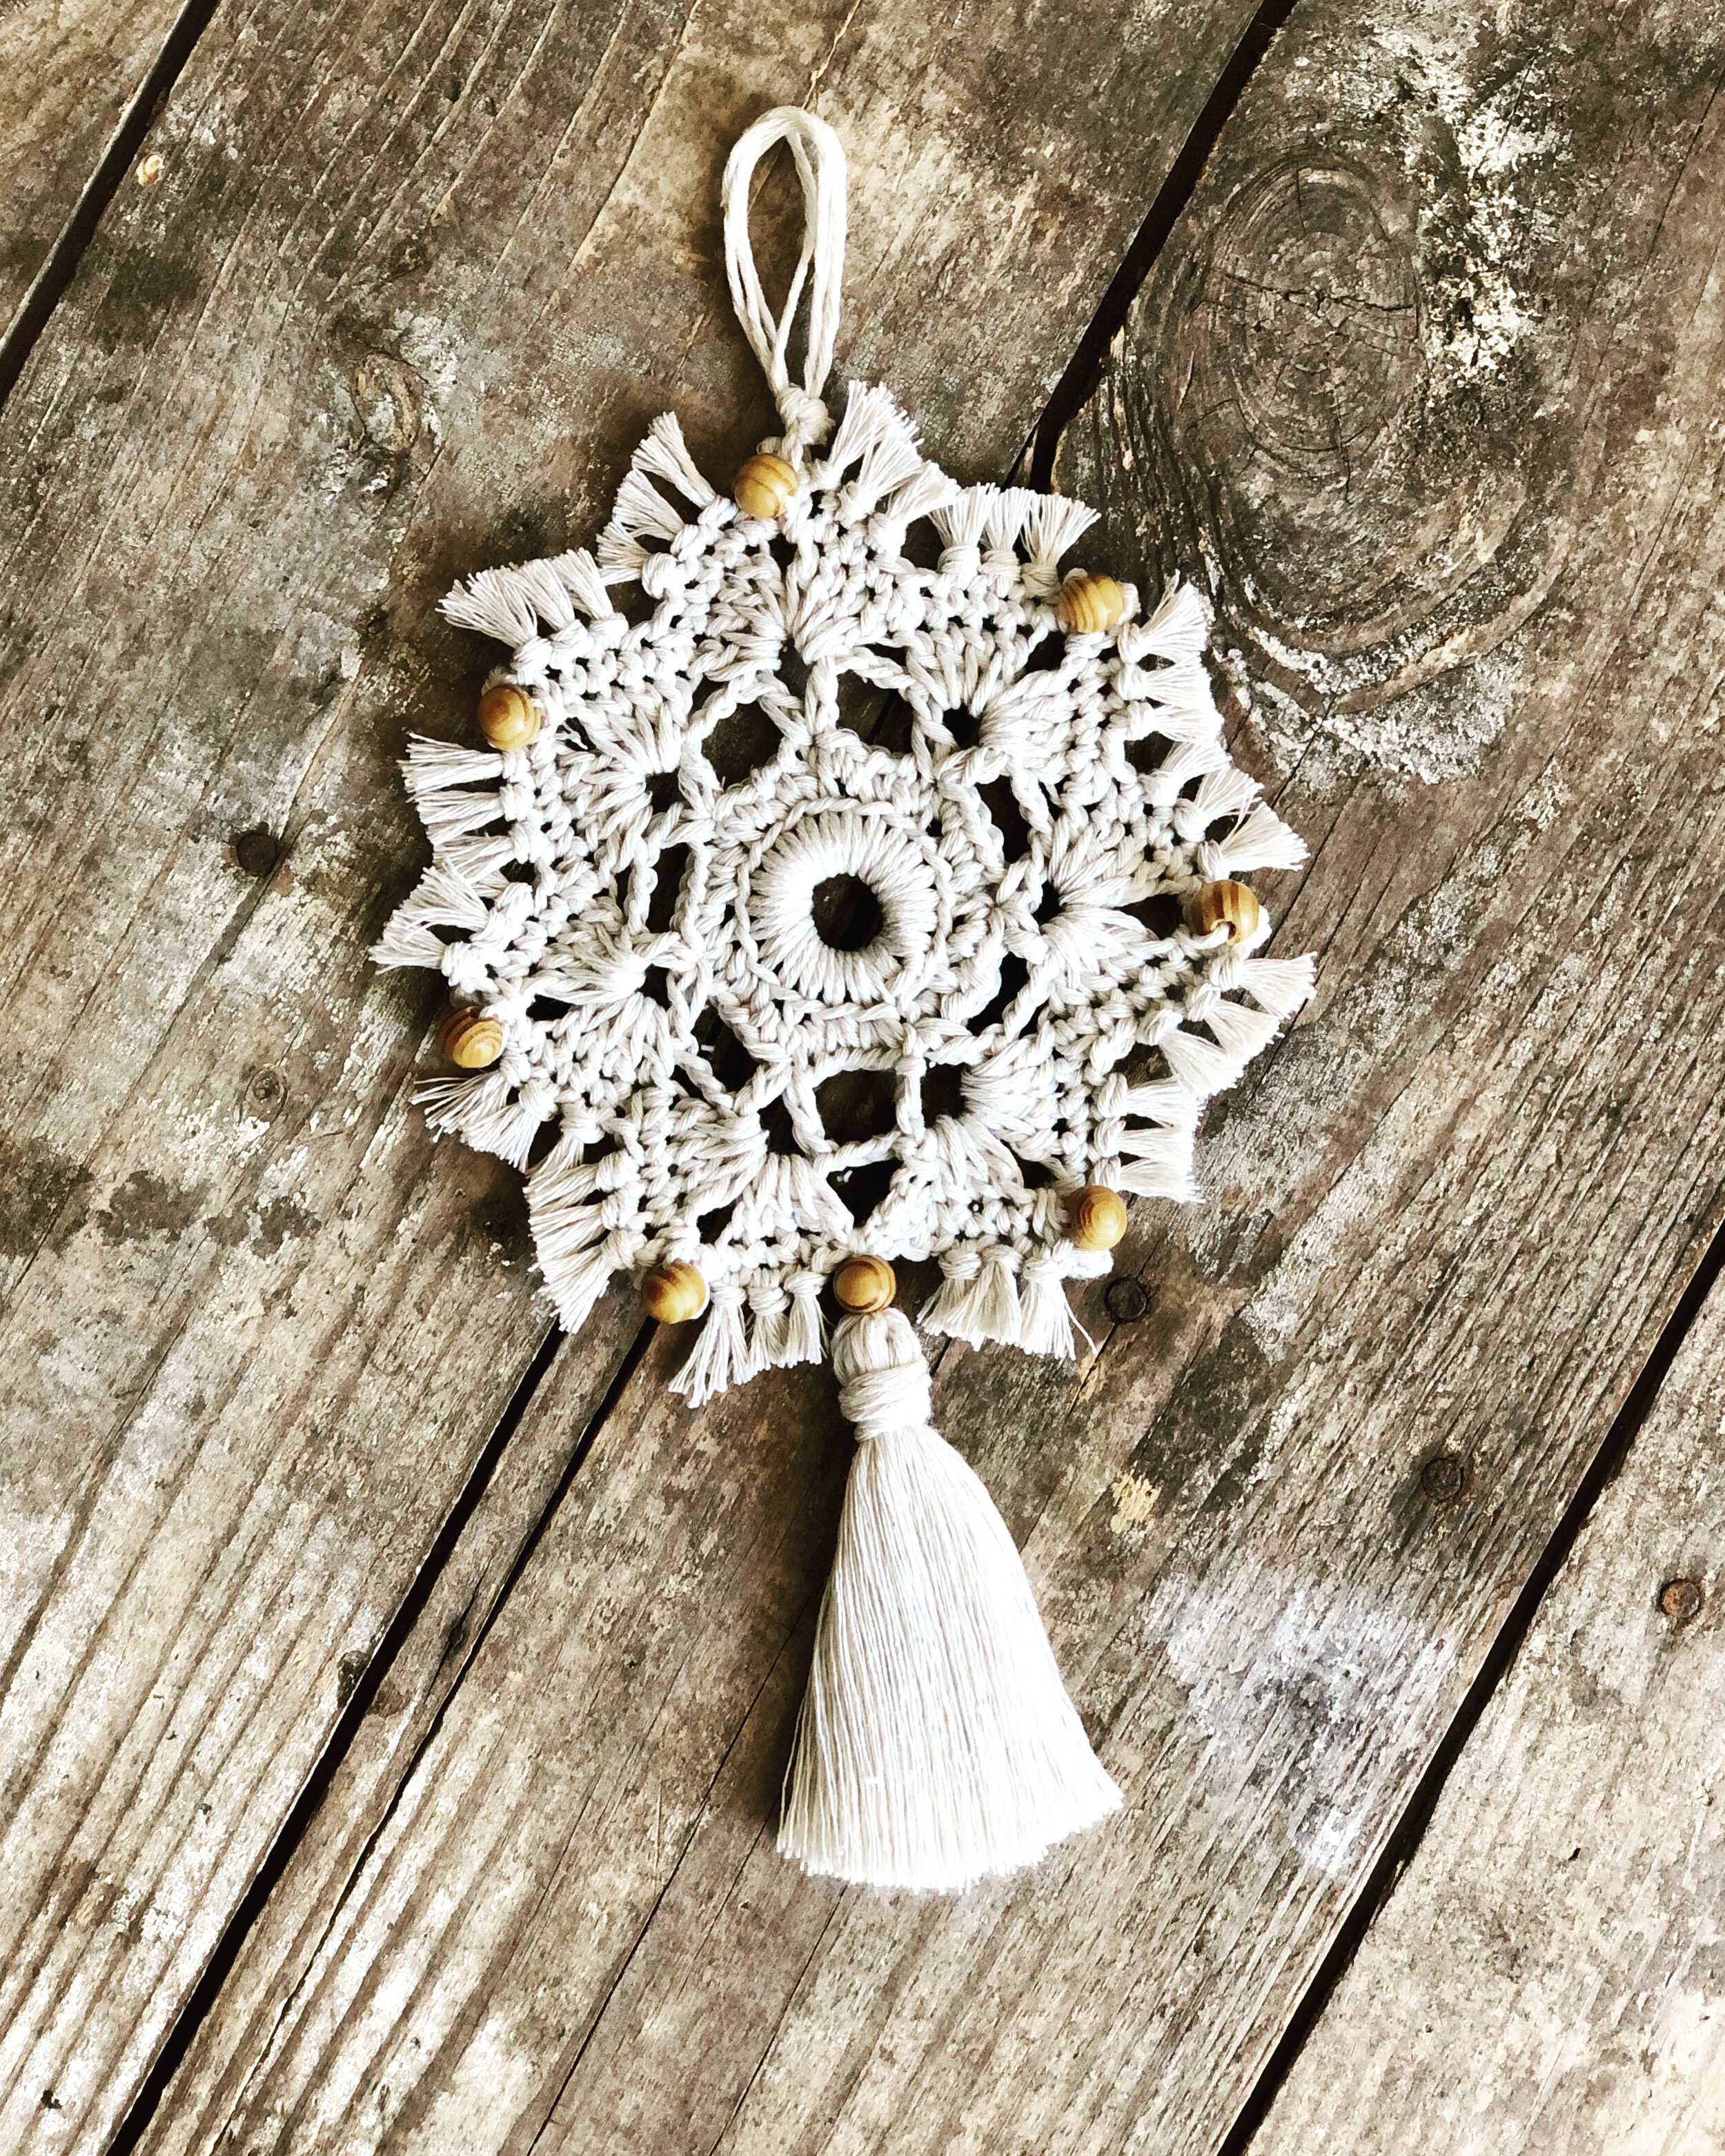
When I first made this snowflake, it was in the form of an ornament. I was inspired by one I saw on Pinterest made using macrame knots. However, once I made it, I began to think of all the different ways it could be adapted to be so much more than just an ornament! The wheels in my brain started turning, and in no time I had a placemat, a trivet, and a coaster, all by following the same pattern for the snowflake motif, but simply changing a few things.

For the placemat, I used a large P 15.0 mm hook and some t-shirt yarn. I left off the fringe and tassel placement for the ornament, and simply put tassels on all the tips of the snowflake points. It took very little time and the resulting placemat was stunning! It would also look great as a simple mat underneath a Christmas dish as a sort of trivet, or as a simple mat underneath a plant (think poinsettia!). The options are really endless.

For the trivet, I used the chunky yarn that Wal-Mart brand has started carrying. It is 100% cotton and is a super bulky weight size #6 yarn. I used an N 9.0 mm hook and followed the same pattern for the motif, omitting the fringe and putting tassels on the snowflake points (like I did for the placemat). My only regret is I did not use the pattern for the 8-point snowflake. I think it looks a bit off balance with just 7 points, but it still turned out lovely! It was actually almost big enough to be a small placemat! I had some yarn leftover (it is only 50 yds a skein), but I do not know if I would have had enough for the 8-point snowflake. I also know that Knitpicks brand on crochet.com carries a bulky weight cotton yarn. (You want it to be 100% cotton or wool if you are using it as a trivet for hot plates).

For the coaster, I followed the same pattern for the ornament, hook size and all. I omitted the hanging loop of course, as well as the tassel at the bottom. I kept the fringe around the points, because I think it looks SO beautiful with it. I also used the 100% cotton twine so that it would be more functional. I bought some round cork coaster bottoms at Hobby Lobby and I sewed them onto the bottom of the motif to make it even more functional. I just used some clear nylon thread and a regular sewing needle— that’s it! You could probably also glue it to the bottom, but I wanted it to be extra secure.
These are just a few ways you can change up this simple yet beautiful snowflake motif to make it something fabulous! You could even add longer hanging loops to each point and make it into a plant hanger! Throw a tassel at the base and it will be STUNNING! You could use it to jazz up your Christmas wrapping, make one out of crochet thread and turn it into a smaller ornament, throw it on a keychain and turn it into a purse embellishment, make one out of super thin crochet thread and add it to a necklace for a boho fashion statement, string them along your fireplace mantel, make a giant one into a wall hanging—LITERALLY endless!!! You could even make one into a bowl to set on your coffee table using a balloon/bowl form and some starch!
I cannot WAIT to see what you come up with! Be sure to tag me on Instagram @dayscrochetnc so I can see all of your creative ways you use it!
Supplies Needed:
-1.25” (30 mm) wooden ring. (Optional, but it does look better with it in my personal opinion)
-7 (8) 8mm wooden beads (Optional, but it does look better with them in my personal opinion)
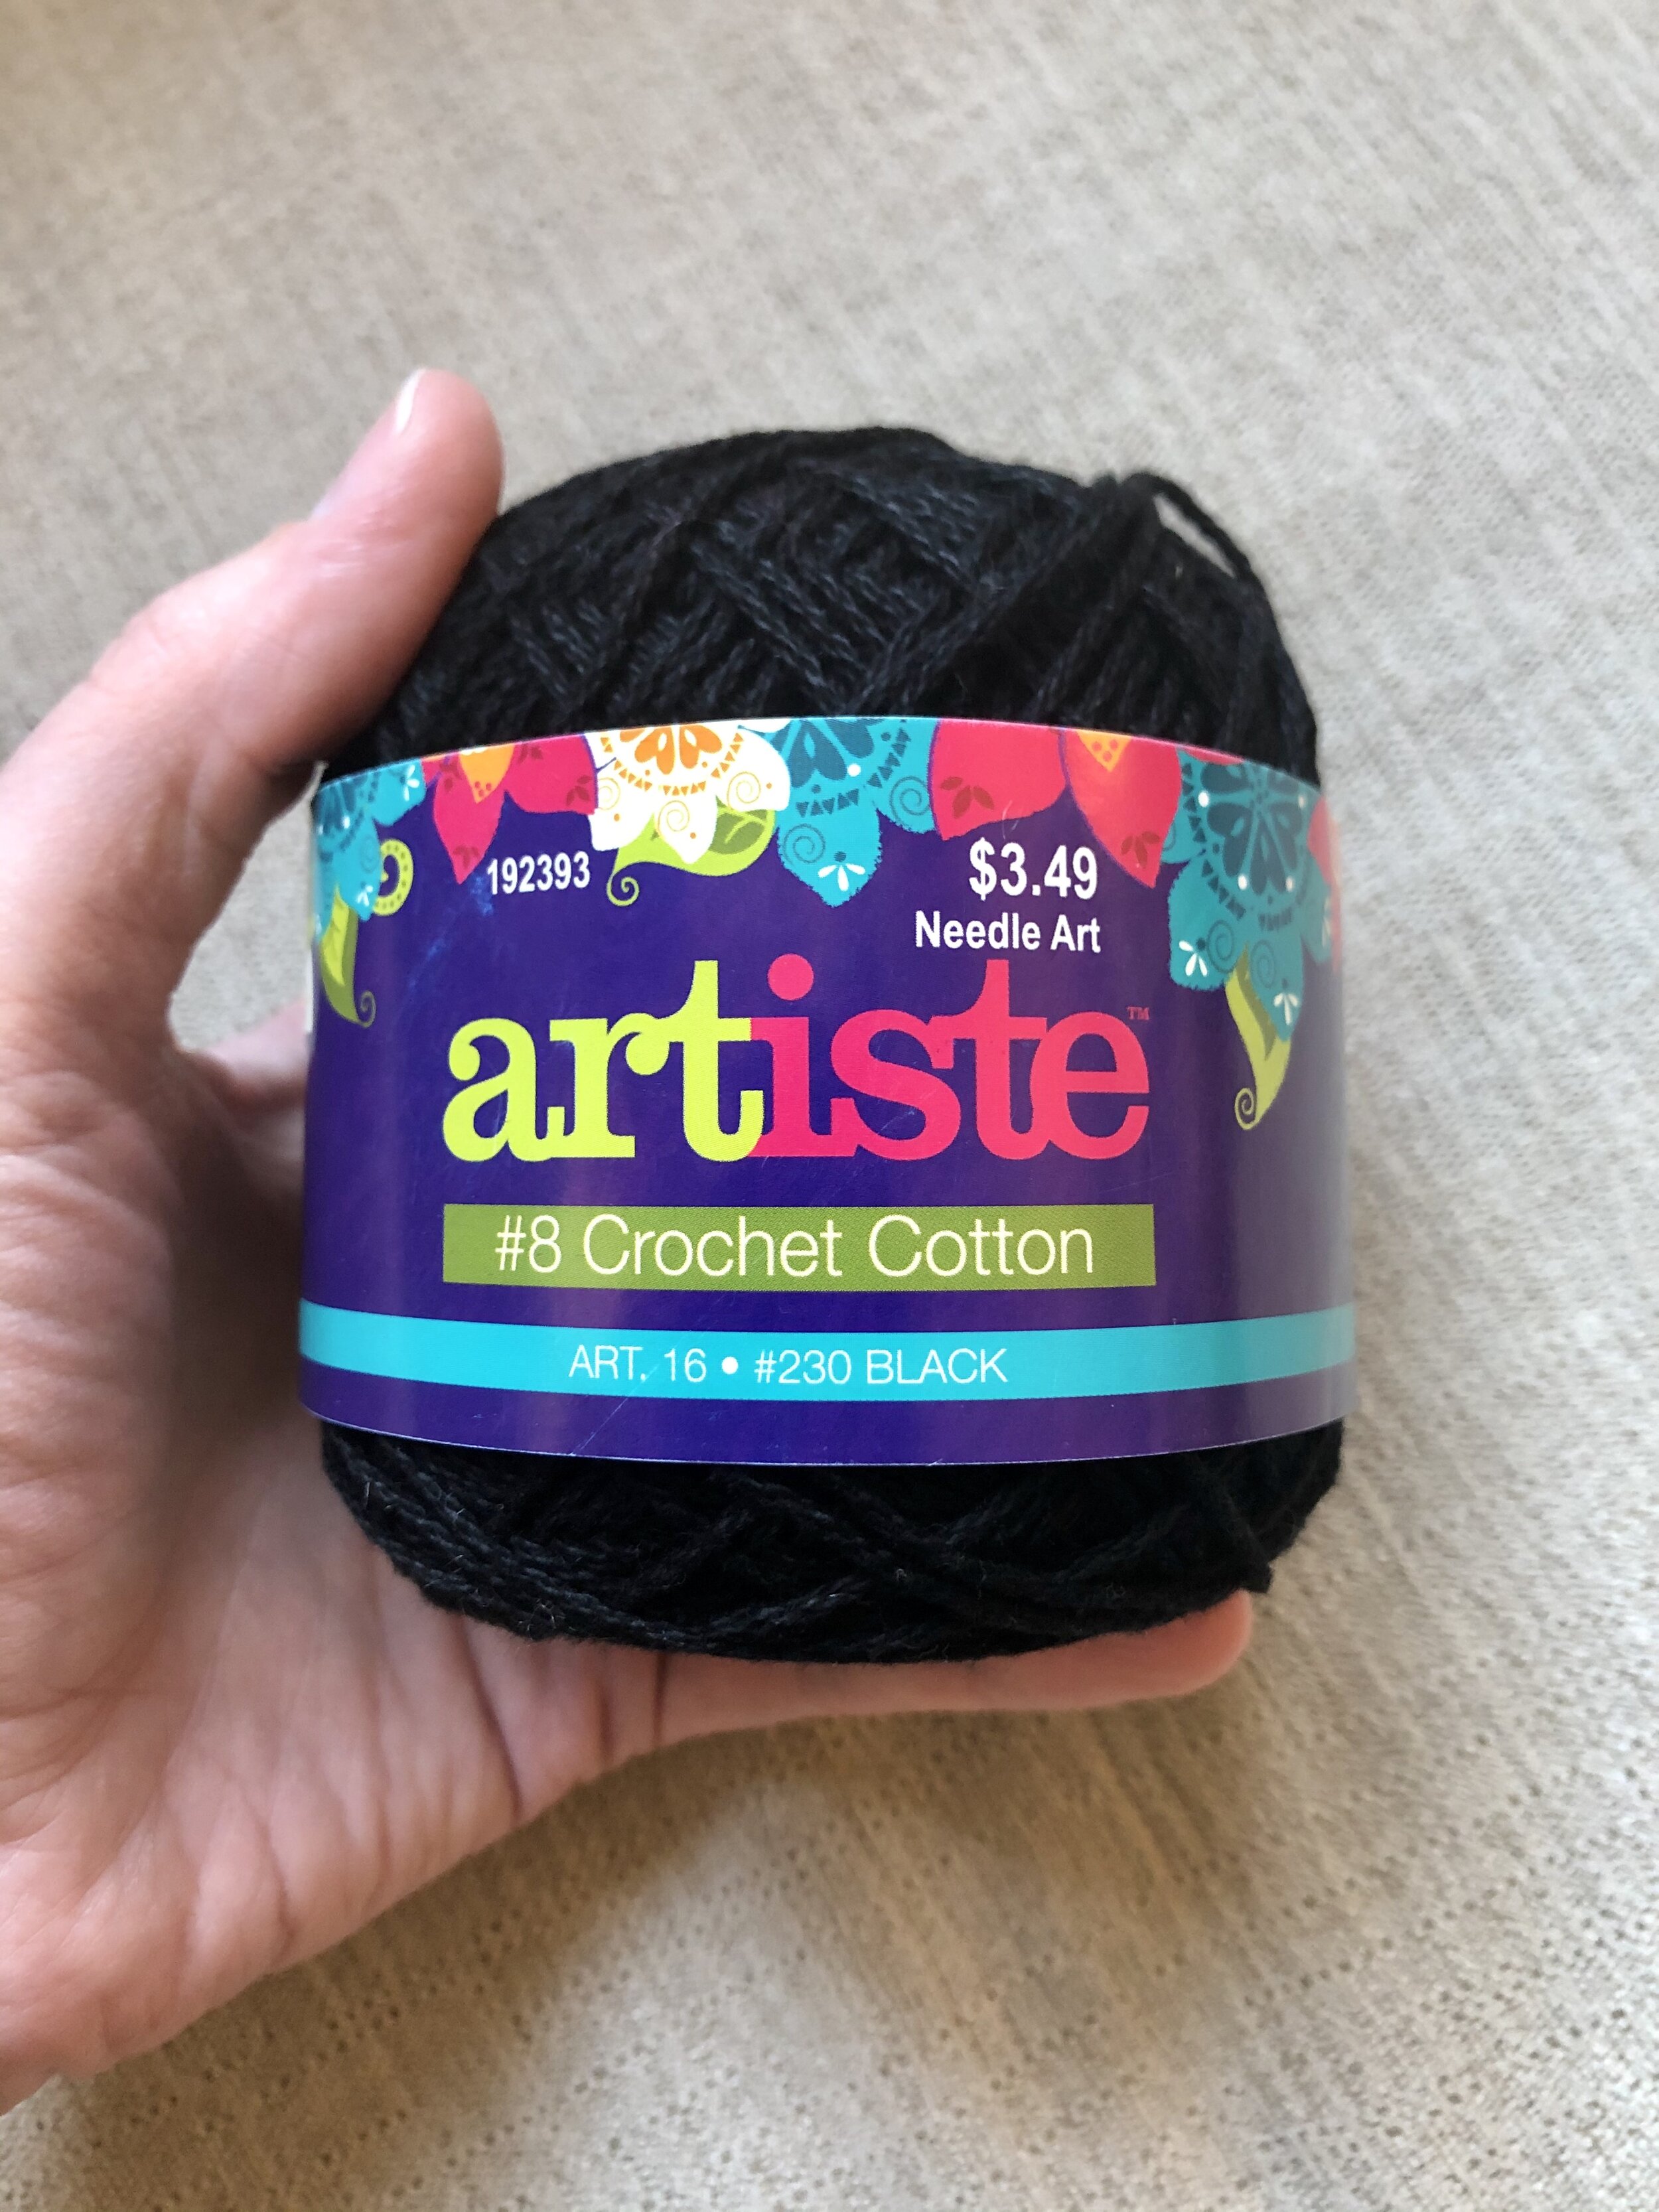
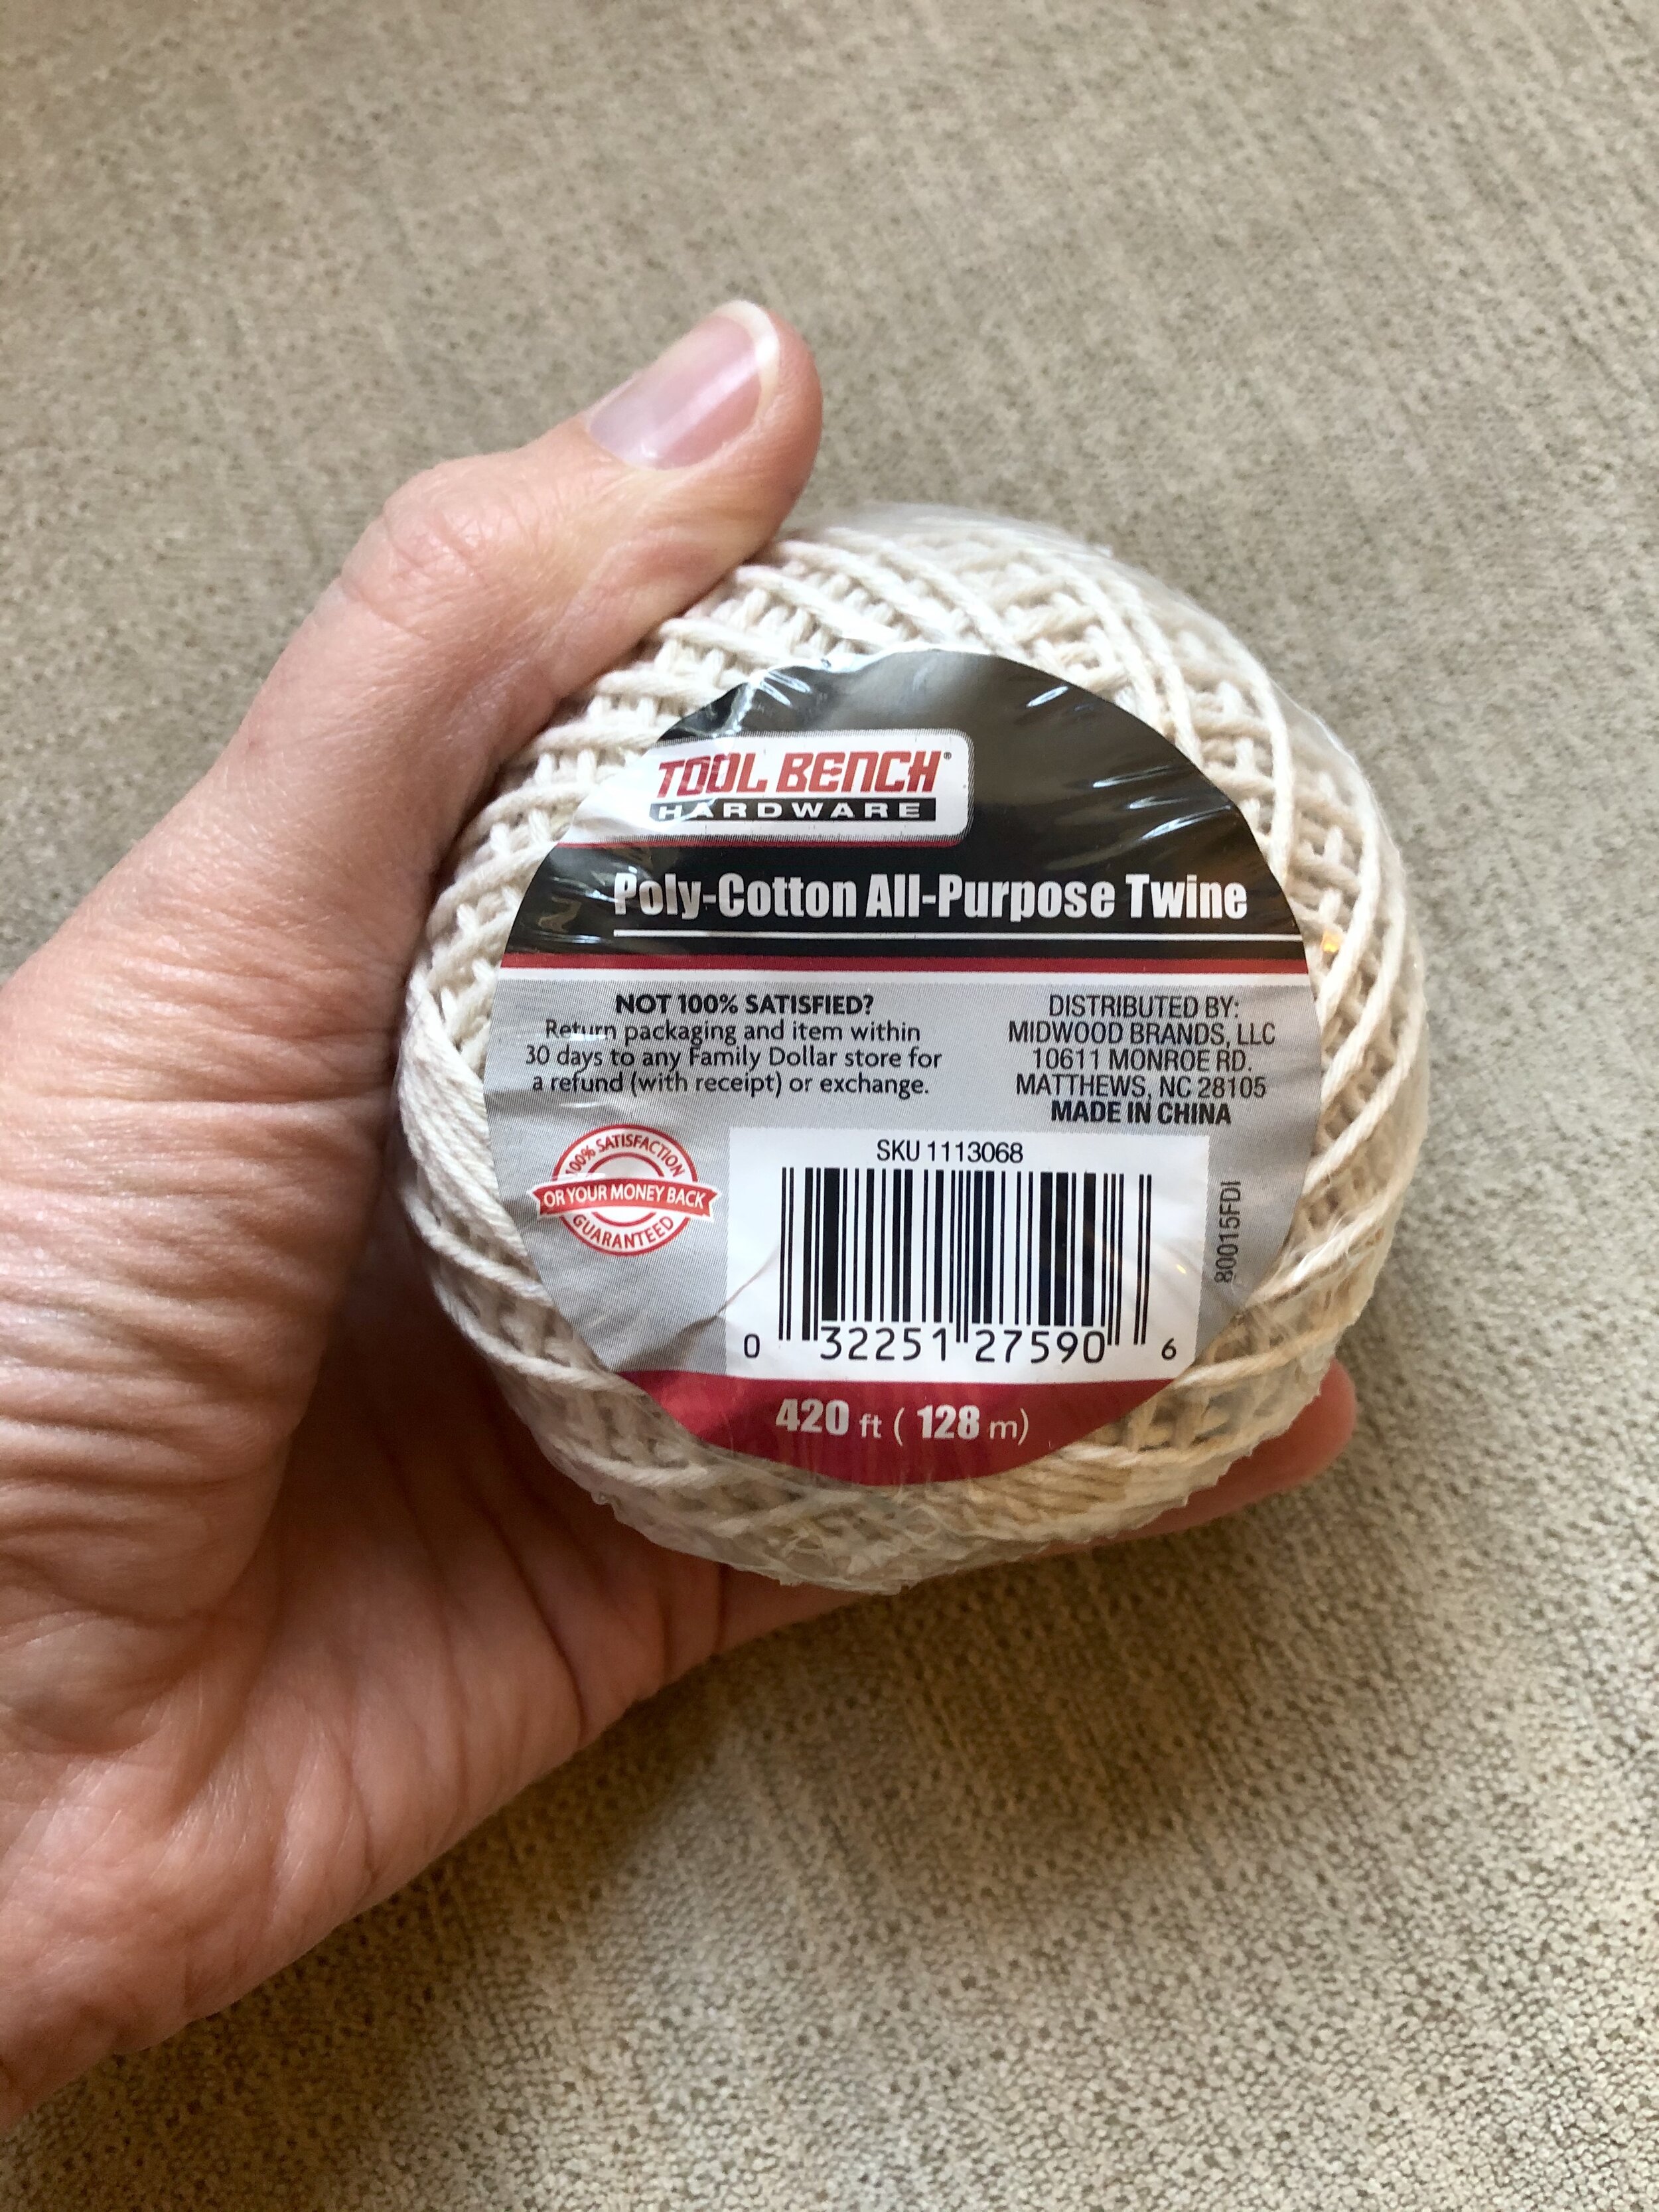
-approximately 50-75 yards 100% cotton cording/yarn. I purchased mine from the Dollar Store for very little. It is called “Poly-Cotton All Purpose Twine” (see photo below). The size of the yarn strand is exactly the same as Lion Brand Coboo. I do not recommend using anything other than 100% cotton or the piece is not likely to hold its shape and the fringe will not look as good. Another comparable yarn is #8 Artiste Crochet Thread (see photo below). NOTE: You could also use a thinner crochet thread and smaller hook if you wanted smaller snowflakes.
-Scissors, yarn needle, tape measure
-size F 3.75 mm hook
-small tooth comb or wire dog brush
-Aileen’s Stiffen Quick fabric stiffener
-piece of cardboard 4” (5 cm) wide

Terms Used and Their Abbreviations:
Pattern is written in US terminology.
Beginning – beg
Back Loop Only - BLO
Chain(s) - ch(s)
Cluster V-Stitch(es) - Cl V - st
Double Crochet - dc
Fasten Off – FO
Half Double Crochet – hdc
Place Bead - PB
Repeat - rep
Single Crochet - sc
Skip - sk
Slip Stitch - sl st
Space(s) - sp(s)
Stitch(es) - st(s)
V-Stitch(es) - V-st
Yarn Over - YO
Special Stitches:
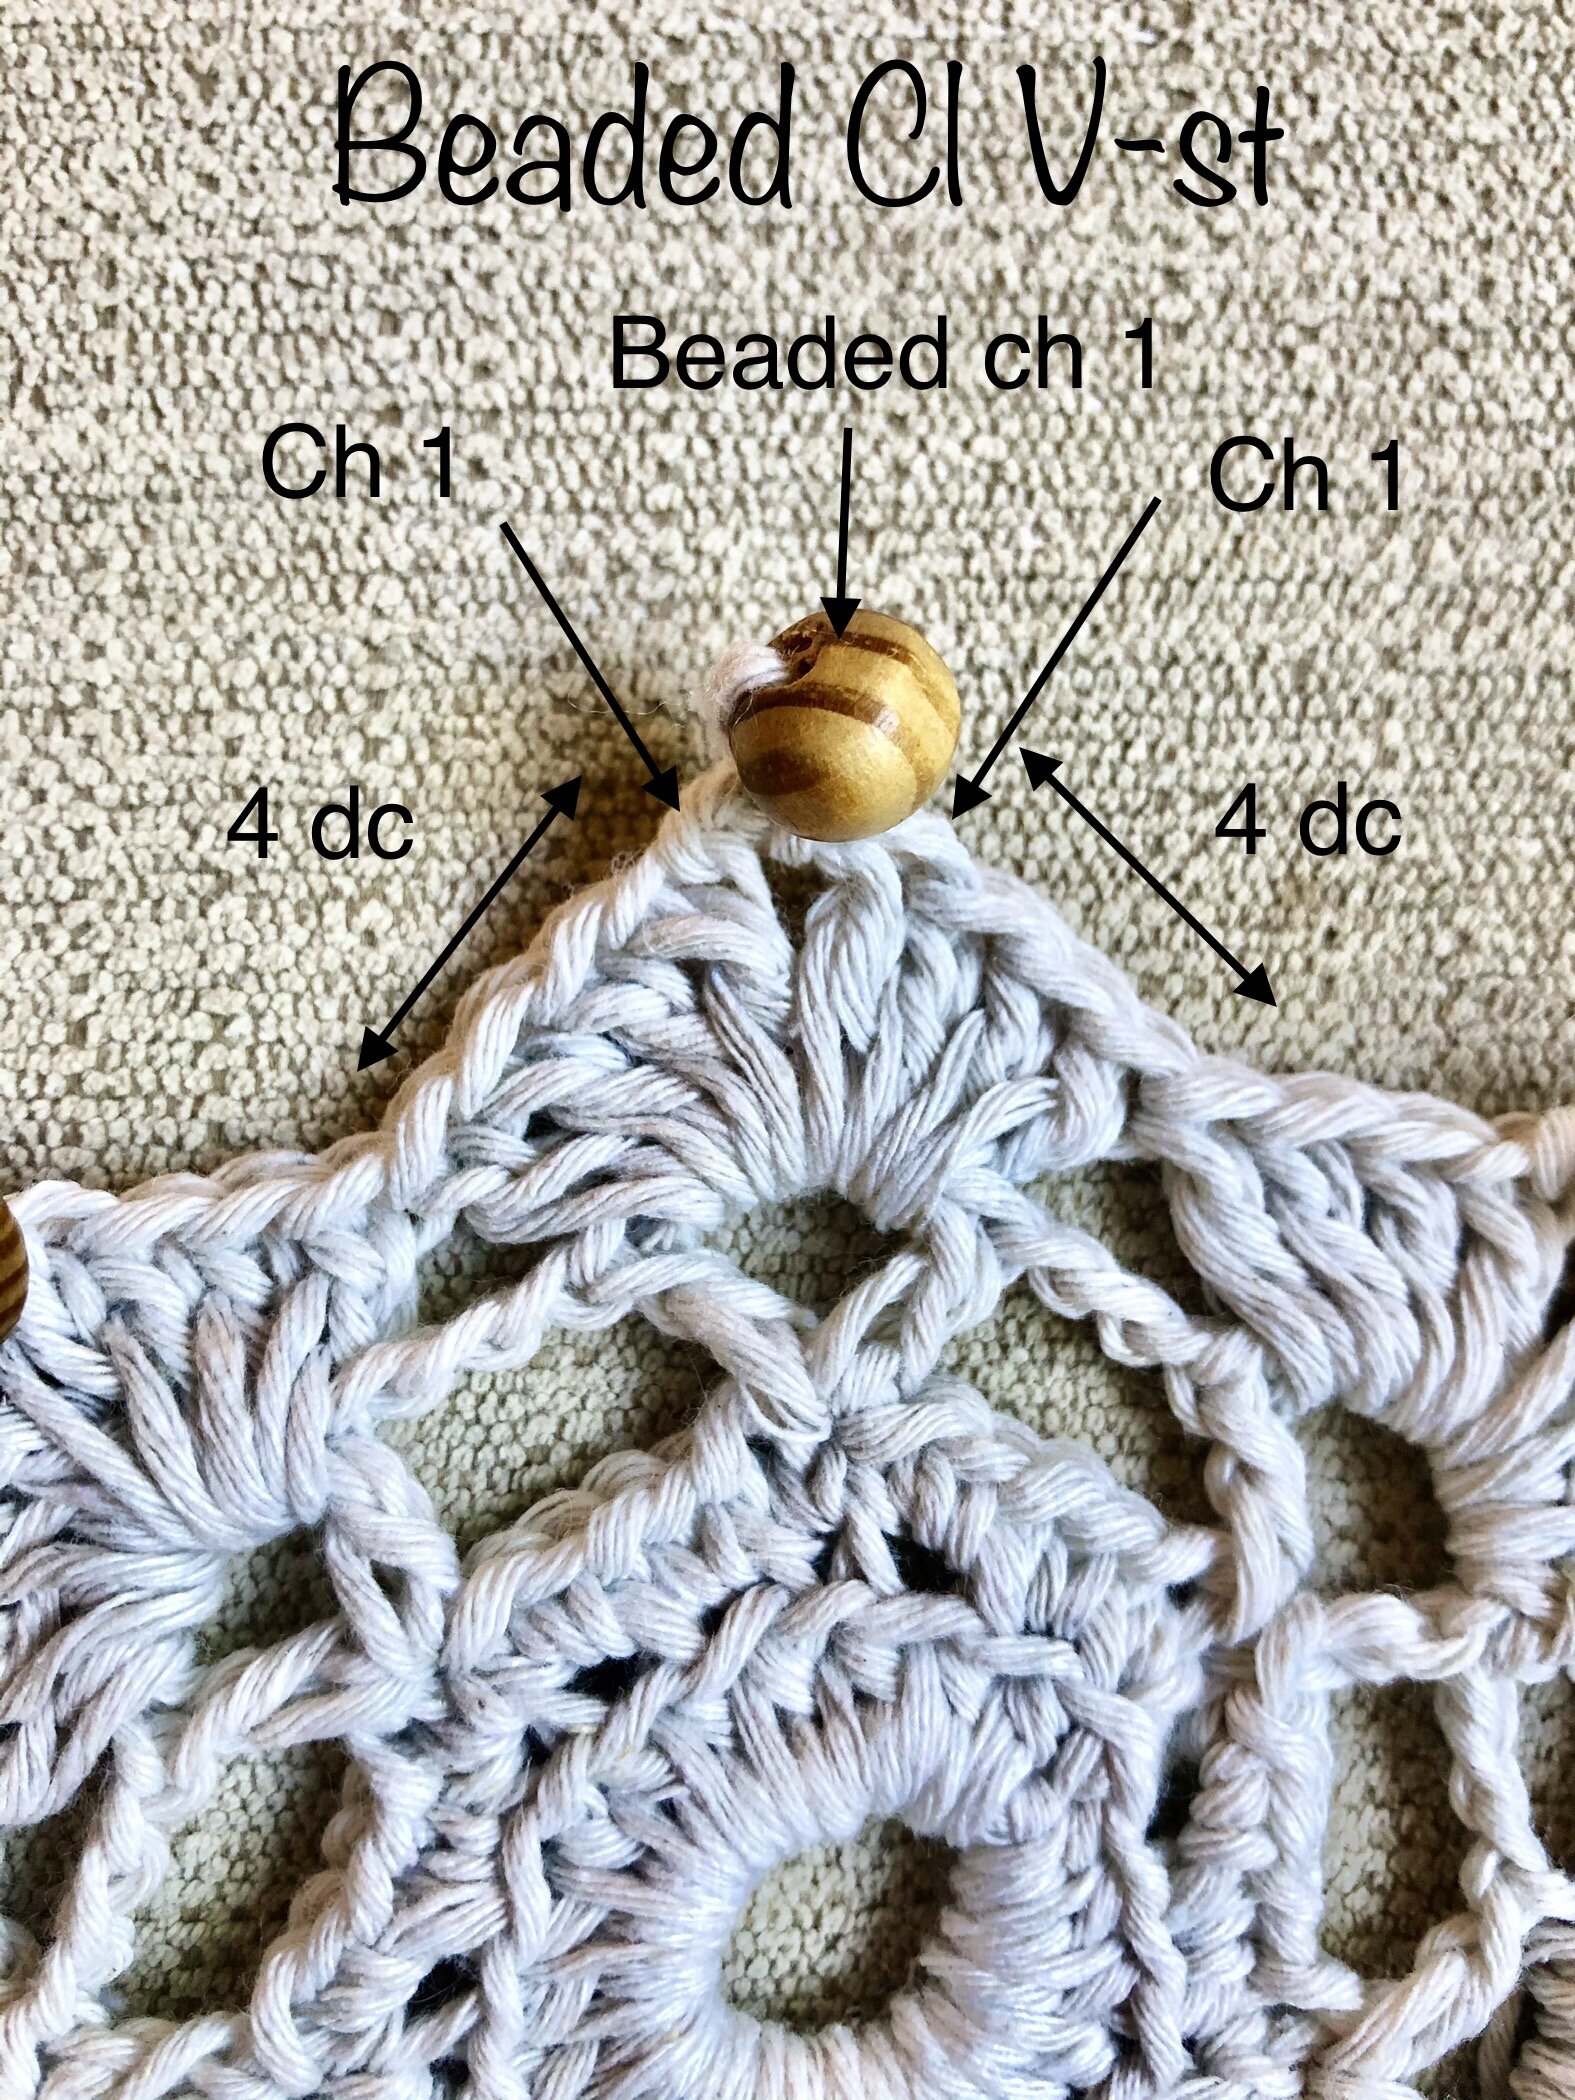
Beaded Cluster V-Stitch: {4 dc, ch 1, PB, ch 2, 4 dc} in the same st or sp.
Picot: Ch 3, sc in 3rd ch from hook.
Place Bead: Bring bead flush to your hook. Complete next st as usual.
V-Stitch: {1 dc, ch 3, 1 dc} in the same st.
Finished Measurements:
Snowflake motif without fringe border measures 5” (13 cm), 6” (15 cm) with border fringe.
Be sure to subscribe to my YouTube channel!
Instructions:
Instructions are written for 7-point snowflake, with 8-point snowflake instructions in parentheses. Begin by threading 7 (8) 8 mm wooden beads onto your working yarn. You will push the beads down as you go until you need them in Round 4.
WITH wooden ring
Round 1: Sl st into ring. Ch 1. 21 (24) sc into ring. Join with a sl st in top of first sc. [21 (24) sc]
Continue in rounds 2-5 below.
WITHOUT wooden ring
Ch 9 and sl st in first ch made to form a ring.
Round 1: Ch 1. Make 21 (24) hdc in the ring. Join with a sl st in top of first hdc. [21 (24) hdc]
Continue in rounds 2-5 below.
Round 2: Ch 1. Going through the BLO, make 2 sc in same st as join and in each st around. Join with a sl st in top of first sc. [42 (48) sc in the BLO]
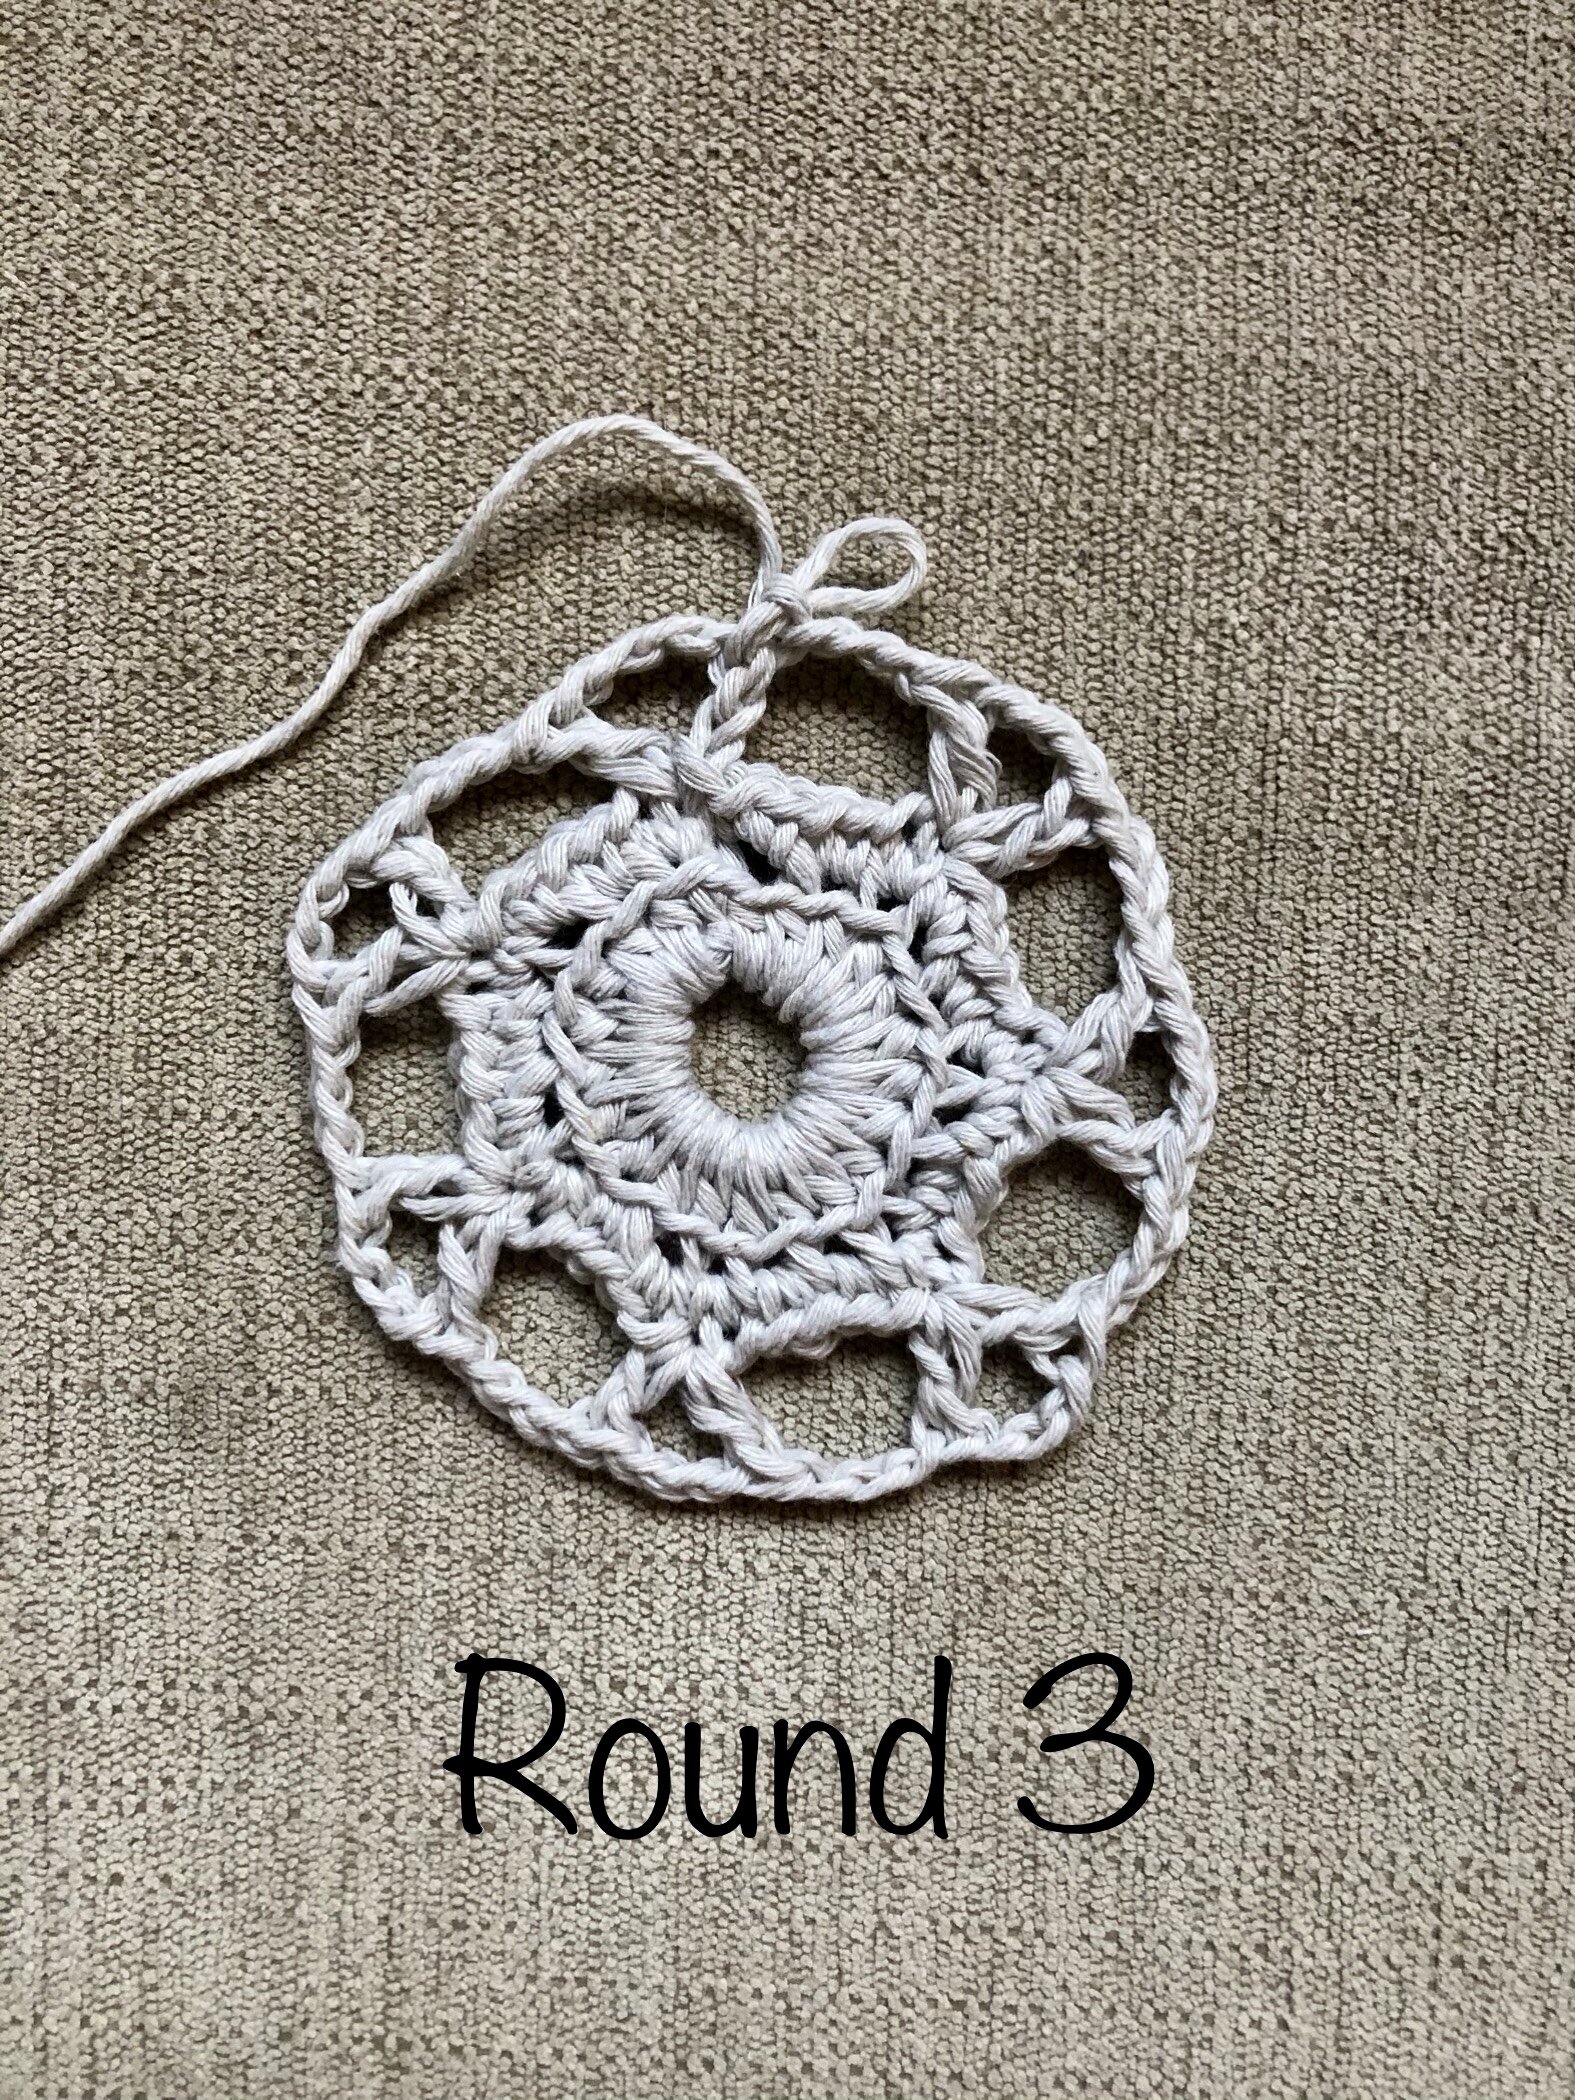
Round 3: Ch 6 (counts as a dc, ch 3), dc in same st (V-st made), ch 3, sk 5 sts, *V-St in next st, ch 3, sk 5 sts; repeat from * around. Join with a sl st in 3rd ch of beg ch. [7 (8) V-sts]
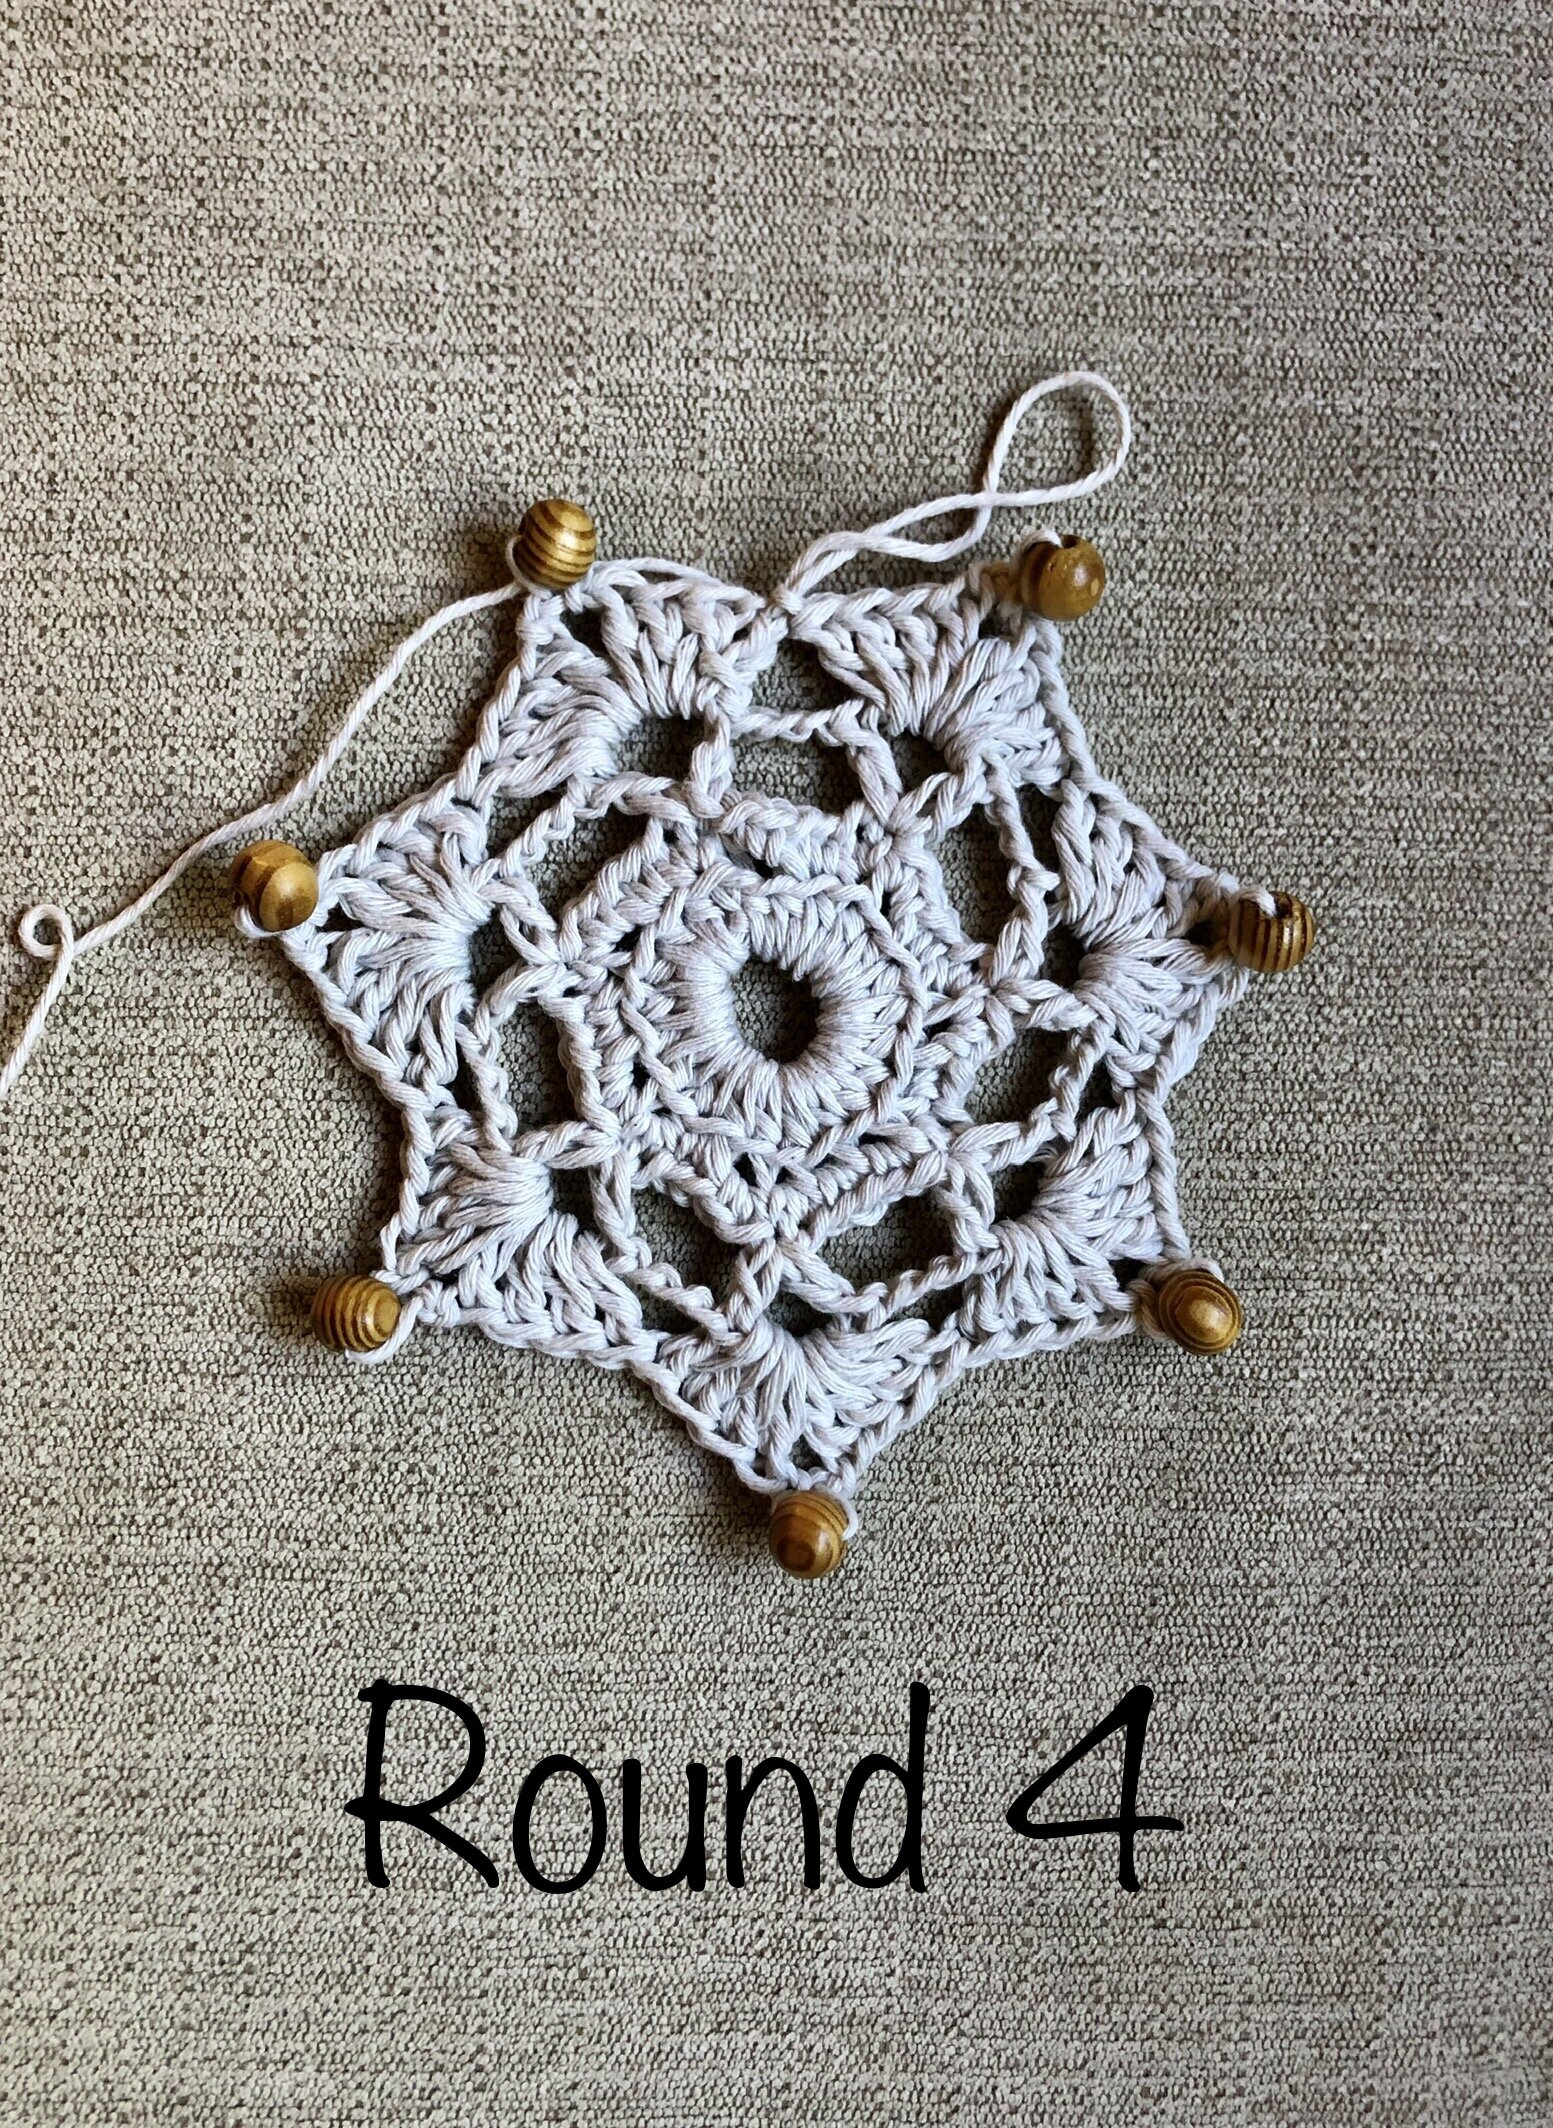
Round 4: Sl st into ch-3 sp of V-st. Ch 3 (counts as a dc), {3 dc, ch 1, PB, ch 2, 4 dc} in same ch sp (counts as a beaded Cl V-st), sk next ch-3 sp, *make beaded Cl V-st in next ch-3 sp, sk next ch-3 sp; repeat from * around. Join with a sl st in top of beg ch 3 and into next st. [7 (8) beaded Cl V-sts]
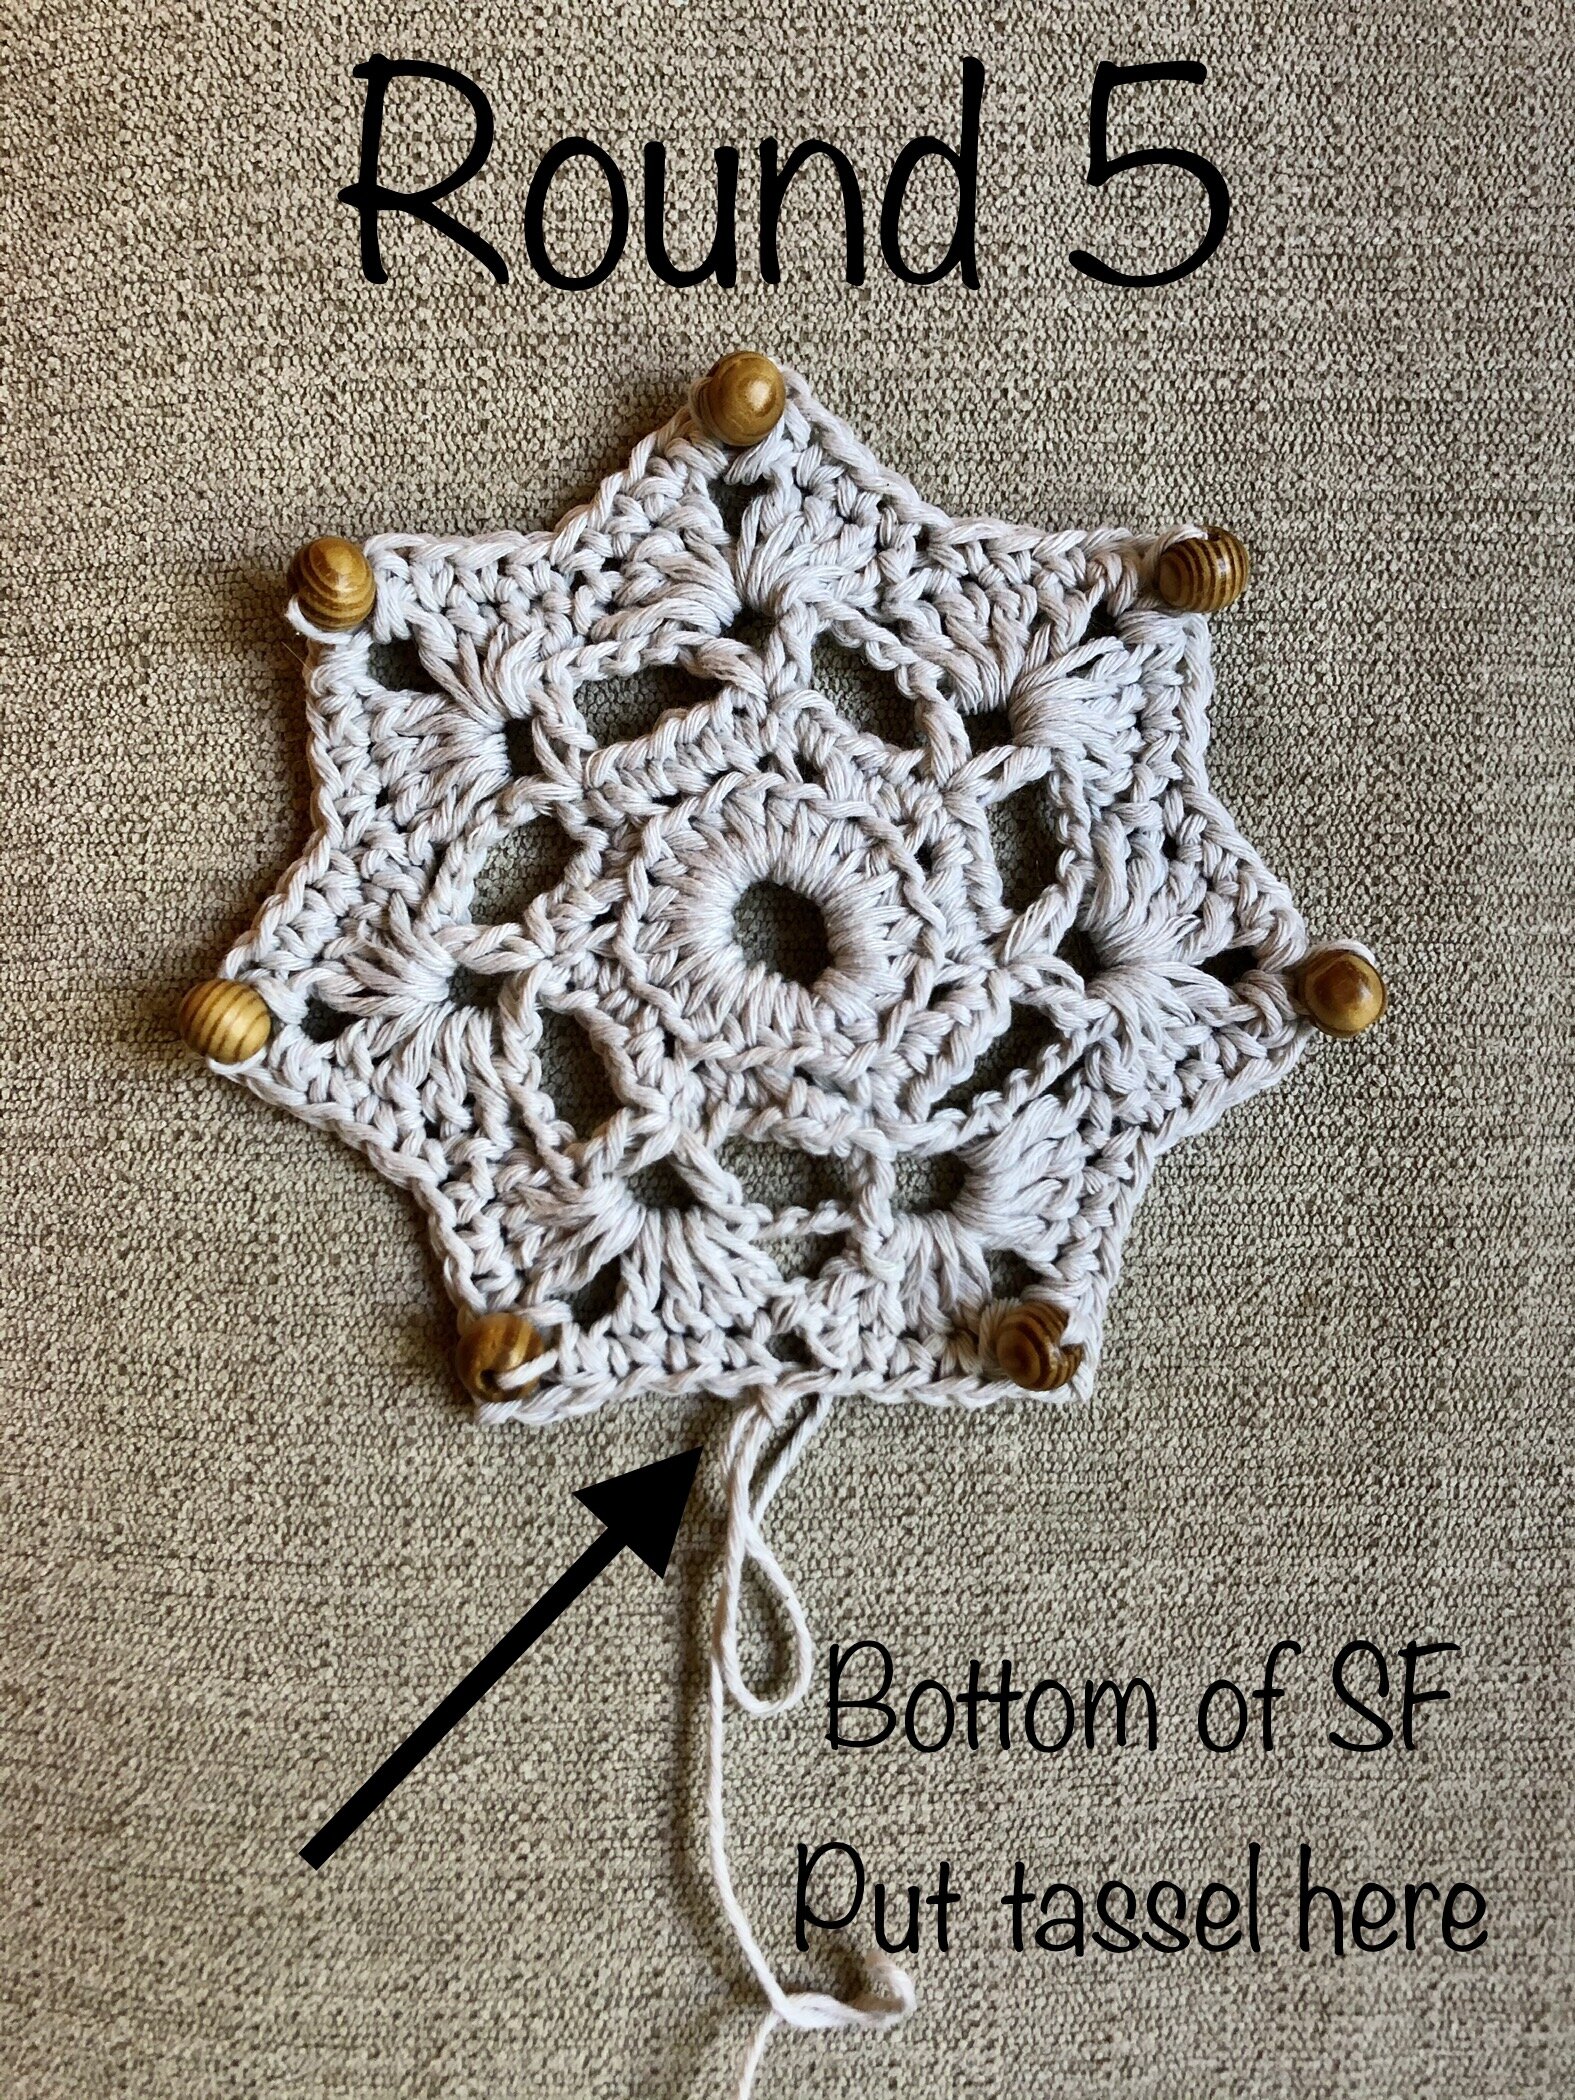
Round 5: Ch 1, sc in same st and in next 2 sts, hdc in ch sp BEFORE bead, picot, hdc in ch sp AFTER bead, sc in next 3 sts, sk next 2 sts, * sc in next 3 sts, hdc in ch sp BEFORE bead, picot, hdc in ch sp AFTER bead, sc in next 3 sts, sk next 2 sts; repeat from * around. Join with a sl st in top of first sc. FO and weave in tails.

The 8-point snowflake should look like the snowflake on the right.

Tassel/fringe
At the bottom where you FO, you could do a beaded tassel or fringe. I chose to do both so you could see how it looks both ways (see photo below). I decided not to add a bead with my fringe option because I think it looks better without it.
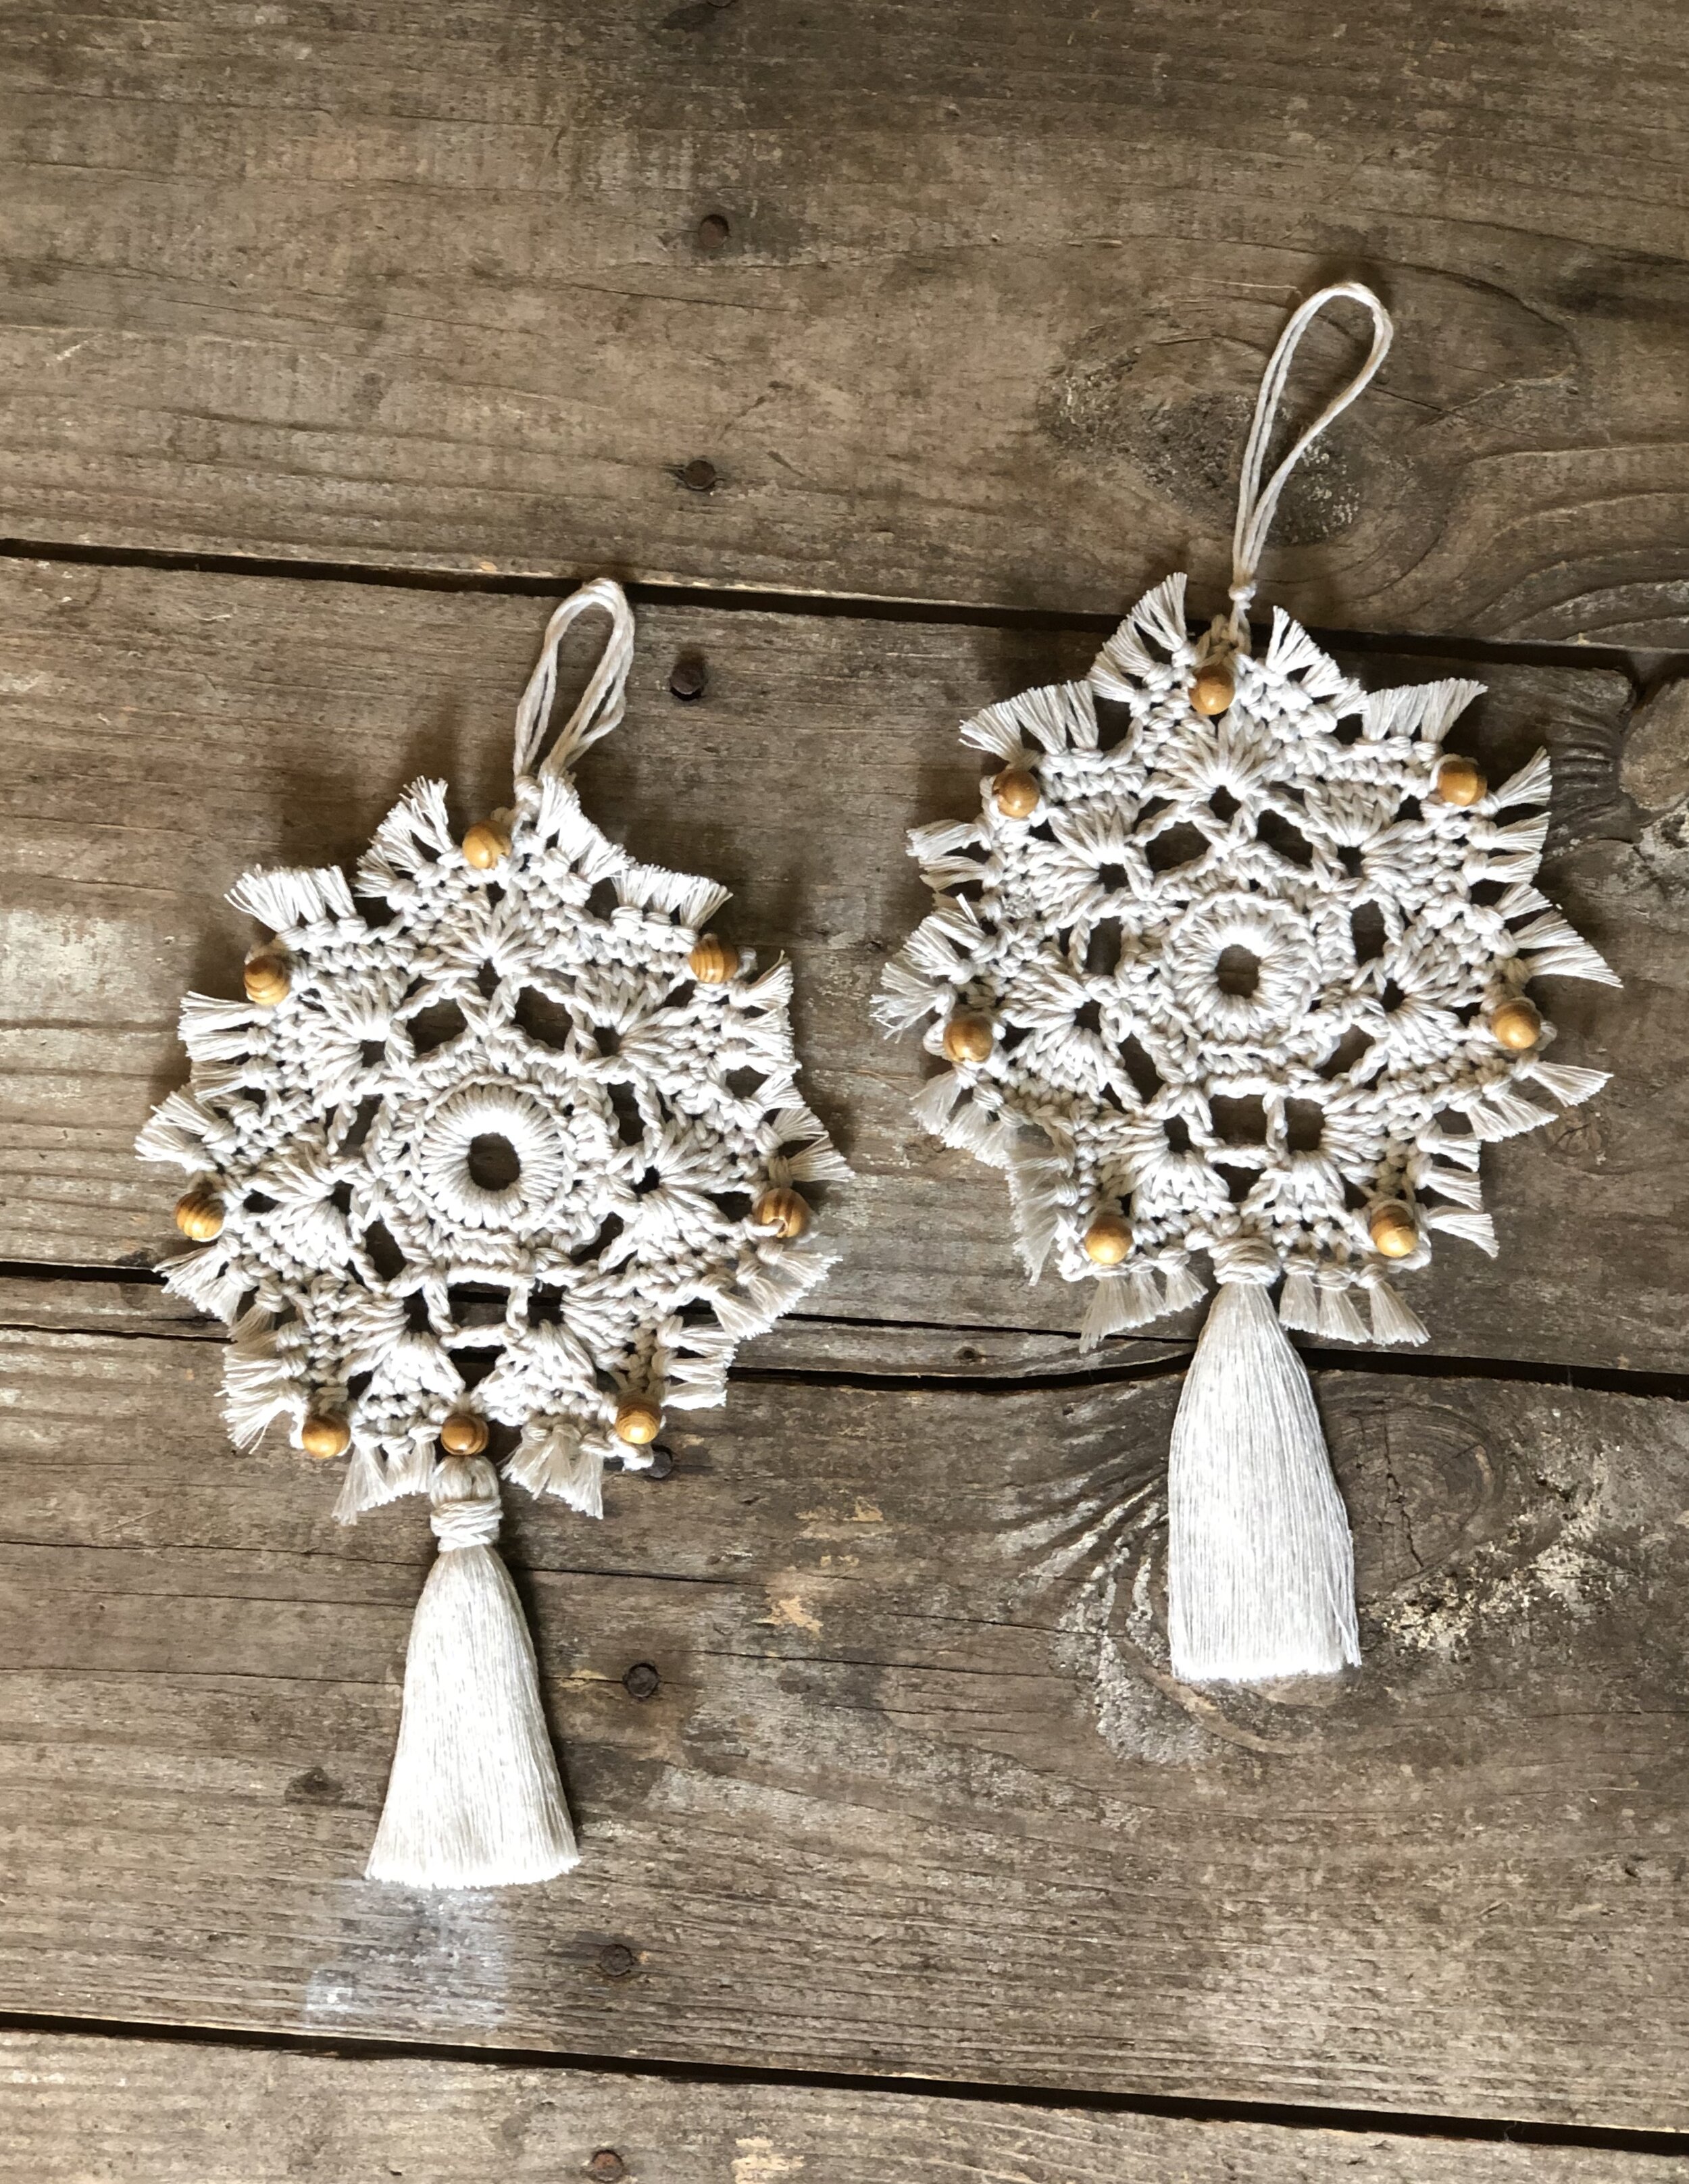
The beaded tassel is on the left, fringe is on the right.
1) Cut 1 (3) piece(s) of yarn that is approx. 12” (30.5 cm) long. Using the Larks Knot, attach the yarn to the bottom of the snowflake where you FO (on your 7-point snowflake), or on the 3 adjacent picot sts as shown in the photo above (for the 8-point snowflake).
2) Thread the bottom tails onto your yarn needle and thread through bead. Open your tails and set aside.
3) Wrap a piece of cardboard approx. 4” (5 cm) in width 20 times per tassel. Cut bottom.
4) Set tassel tails inside open tails just below bead in the center. Tie around the tassel tails.
5) Brush tassel with wire brush until all ends are undone. (It will curl but we will fix it later.)
6) Cut another length of yarn approx. 8” in length and tie around the top of the tassel to hold the tails together.
7) Brush the tassel(s) again, lightly spraying with the stiffener until it is the shape you want. Cut bottom evenly and let dry.
For fringe
1) Wrap a piece of cardboard approx. 6” (15 cm) wide 12 times. Cut bottoms.
2) Insert your hook at the bottom of your snowflake from back to front. Fold tails in half and hook the middle through to the back. Put your fingers inside the loop and make a Larks Knot.
3) Brush the fringe tails until all ends are undone. Lightly spray with stiffener and shape as you go. Cut bottom evenly and allow to dry.
Add a hanging loop at the top picot of your snowflake, as pictured above.
Add your border fringe
This is optional, but it really MAKES the ornament!
Wrap a piece of cardboard that is 2” wide (or just about 3 fingers) 84 (96) times (12 times per beaded point). Place 2 pieces of yarn together per fringe. Using the Larks knot, place fringe in every hdc and the 2 sc preceding, and the 2 sc following the hdc on each side of the snowflake points. Brush fringe with a small tooth comb or wire dog brush. Cut fringe at the same angle of each point, approximately ½” in length. Lightly spray border fringe with stiffener spray and let dry.
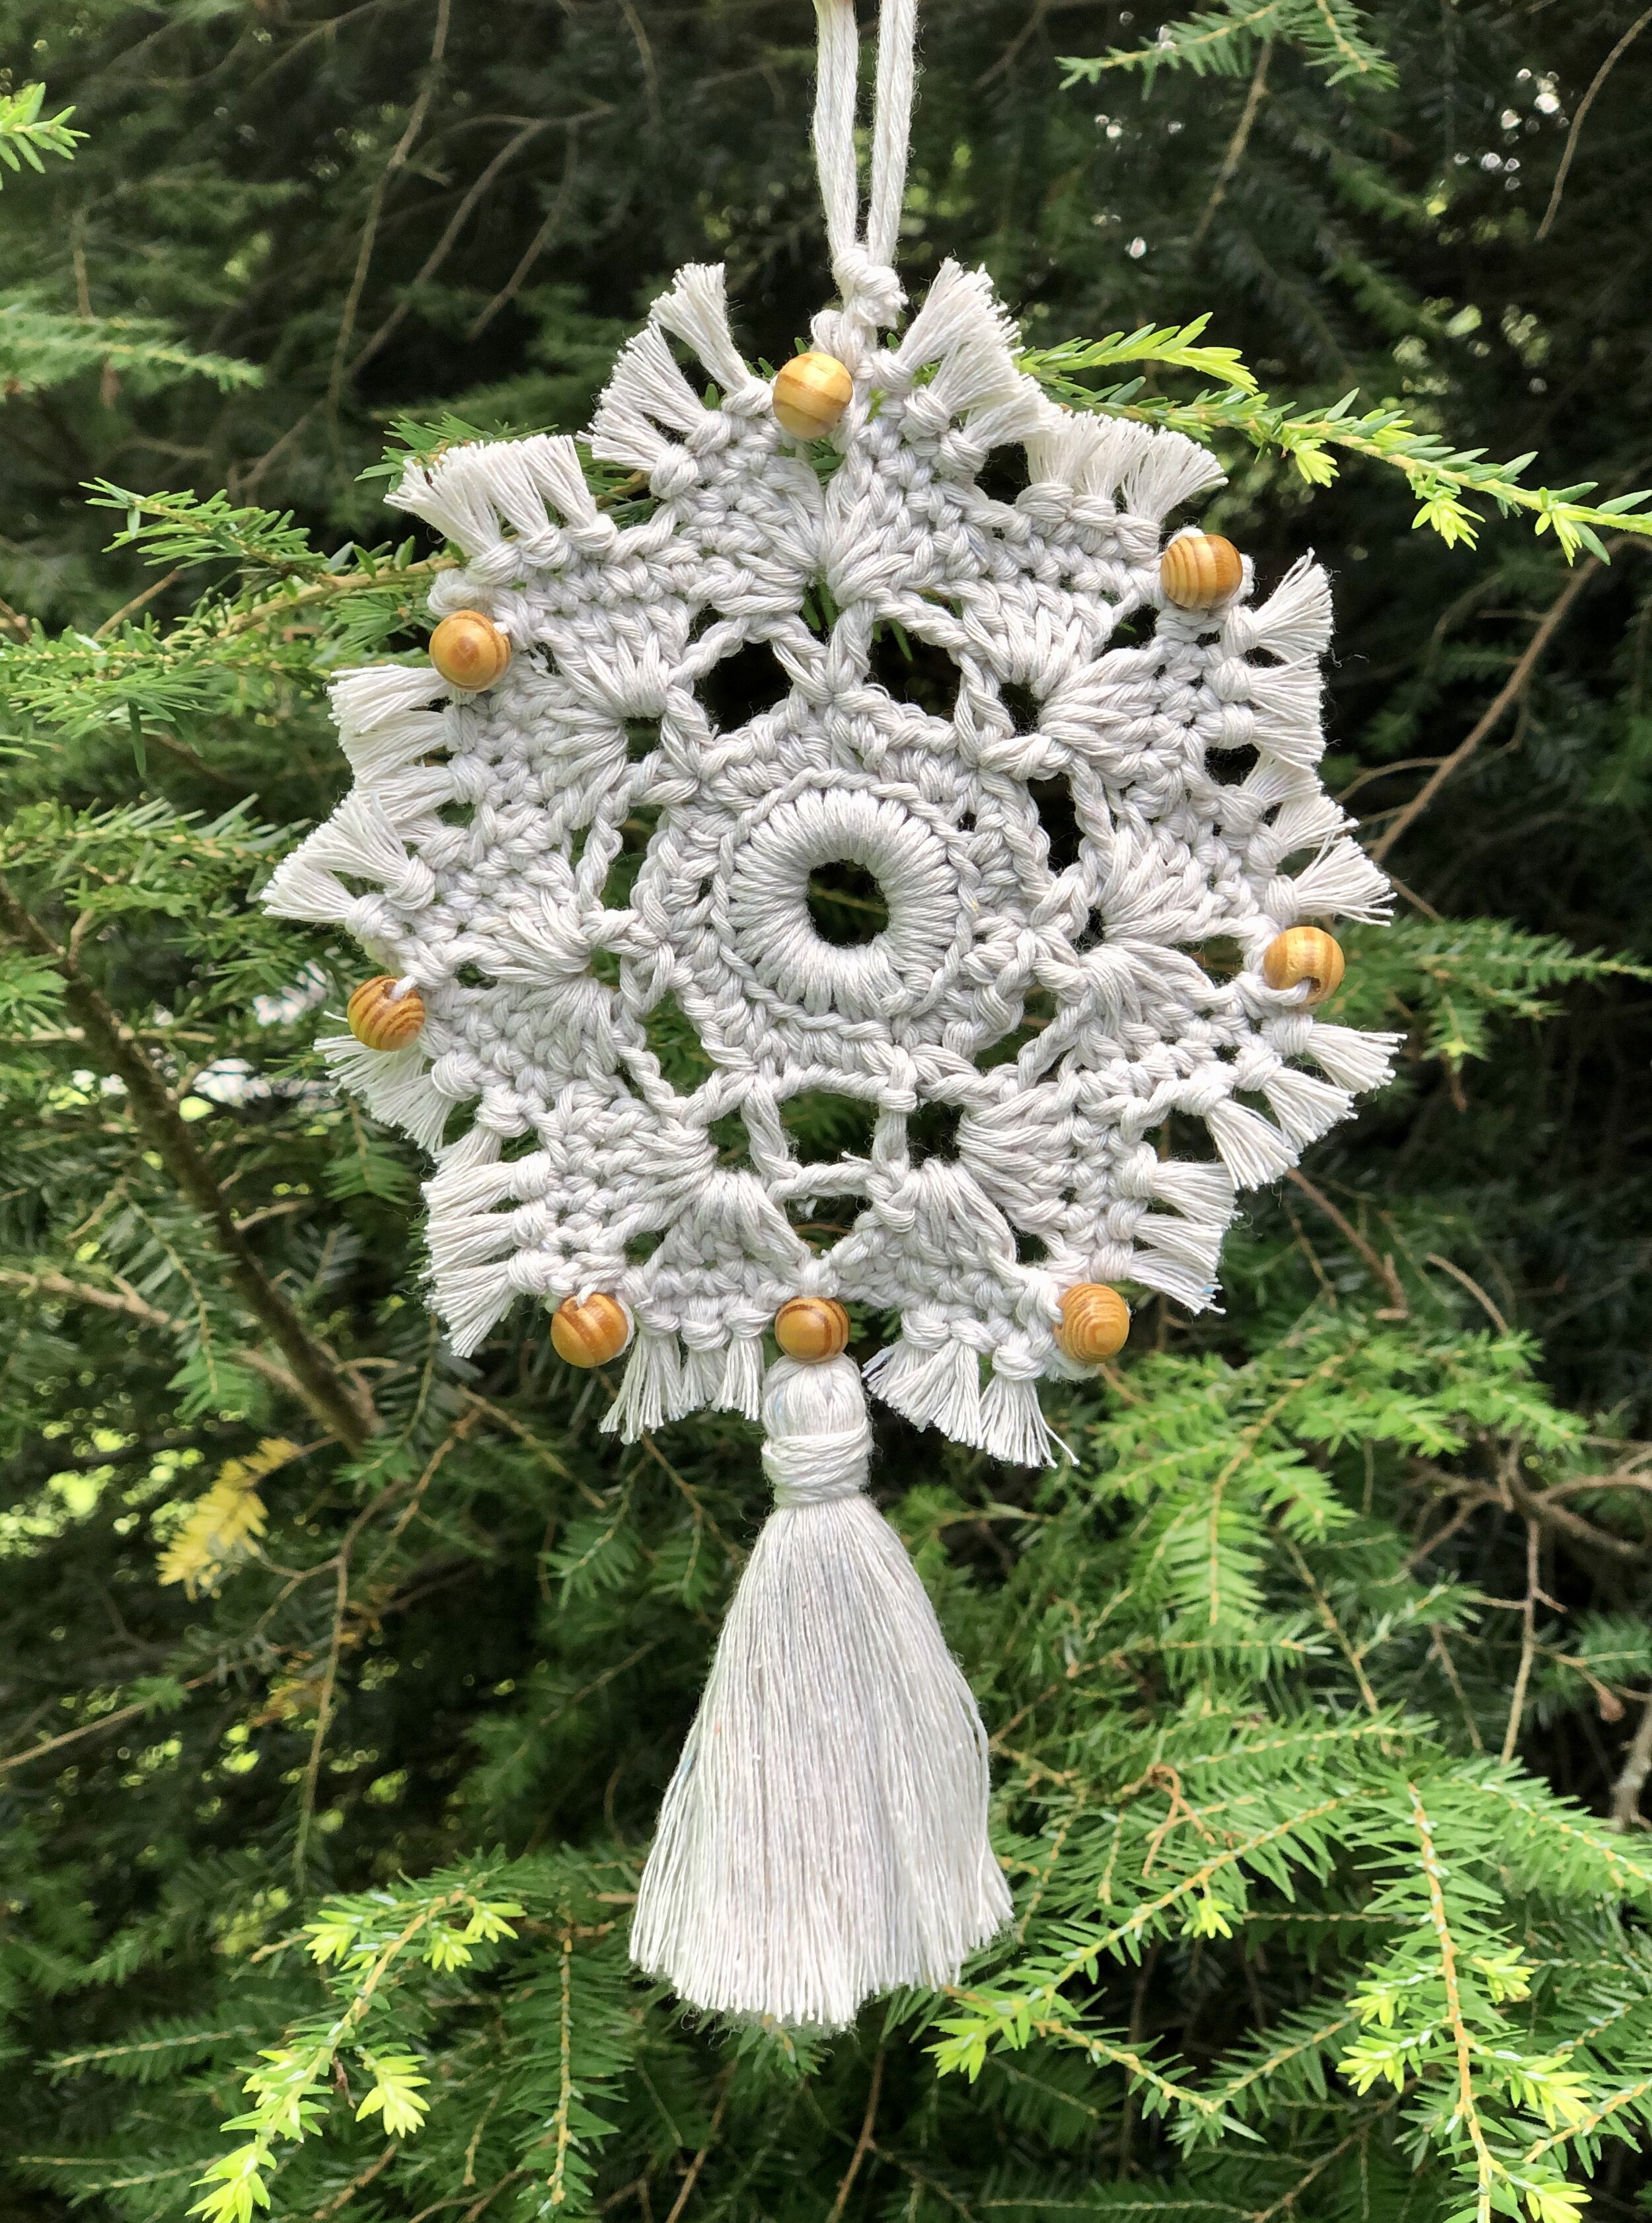
Your Boho Snowflake is complete! I would love to see your finished work! If you want to tag me on IG, I’m @dayscrochetnc. You could also use the tags #bohosnowflake, #bohochristmasornament, #bohocrochet, #moderncrochetdecor – you get the idea! I can’t wait to see your projects! If you would like to see other versions that I will be making after this publication, be sure to check me out on IG!
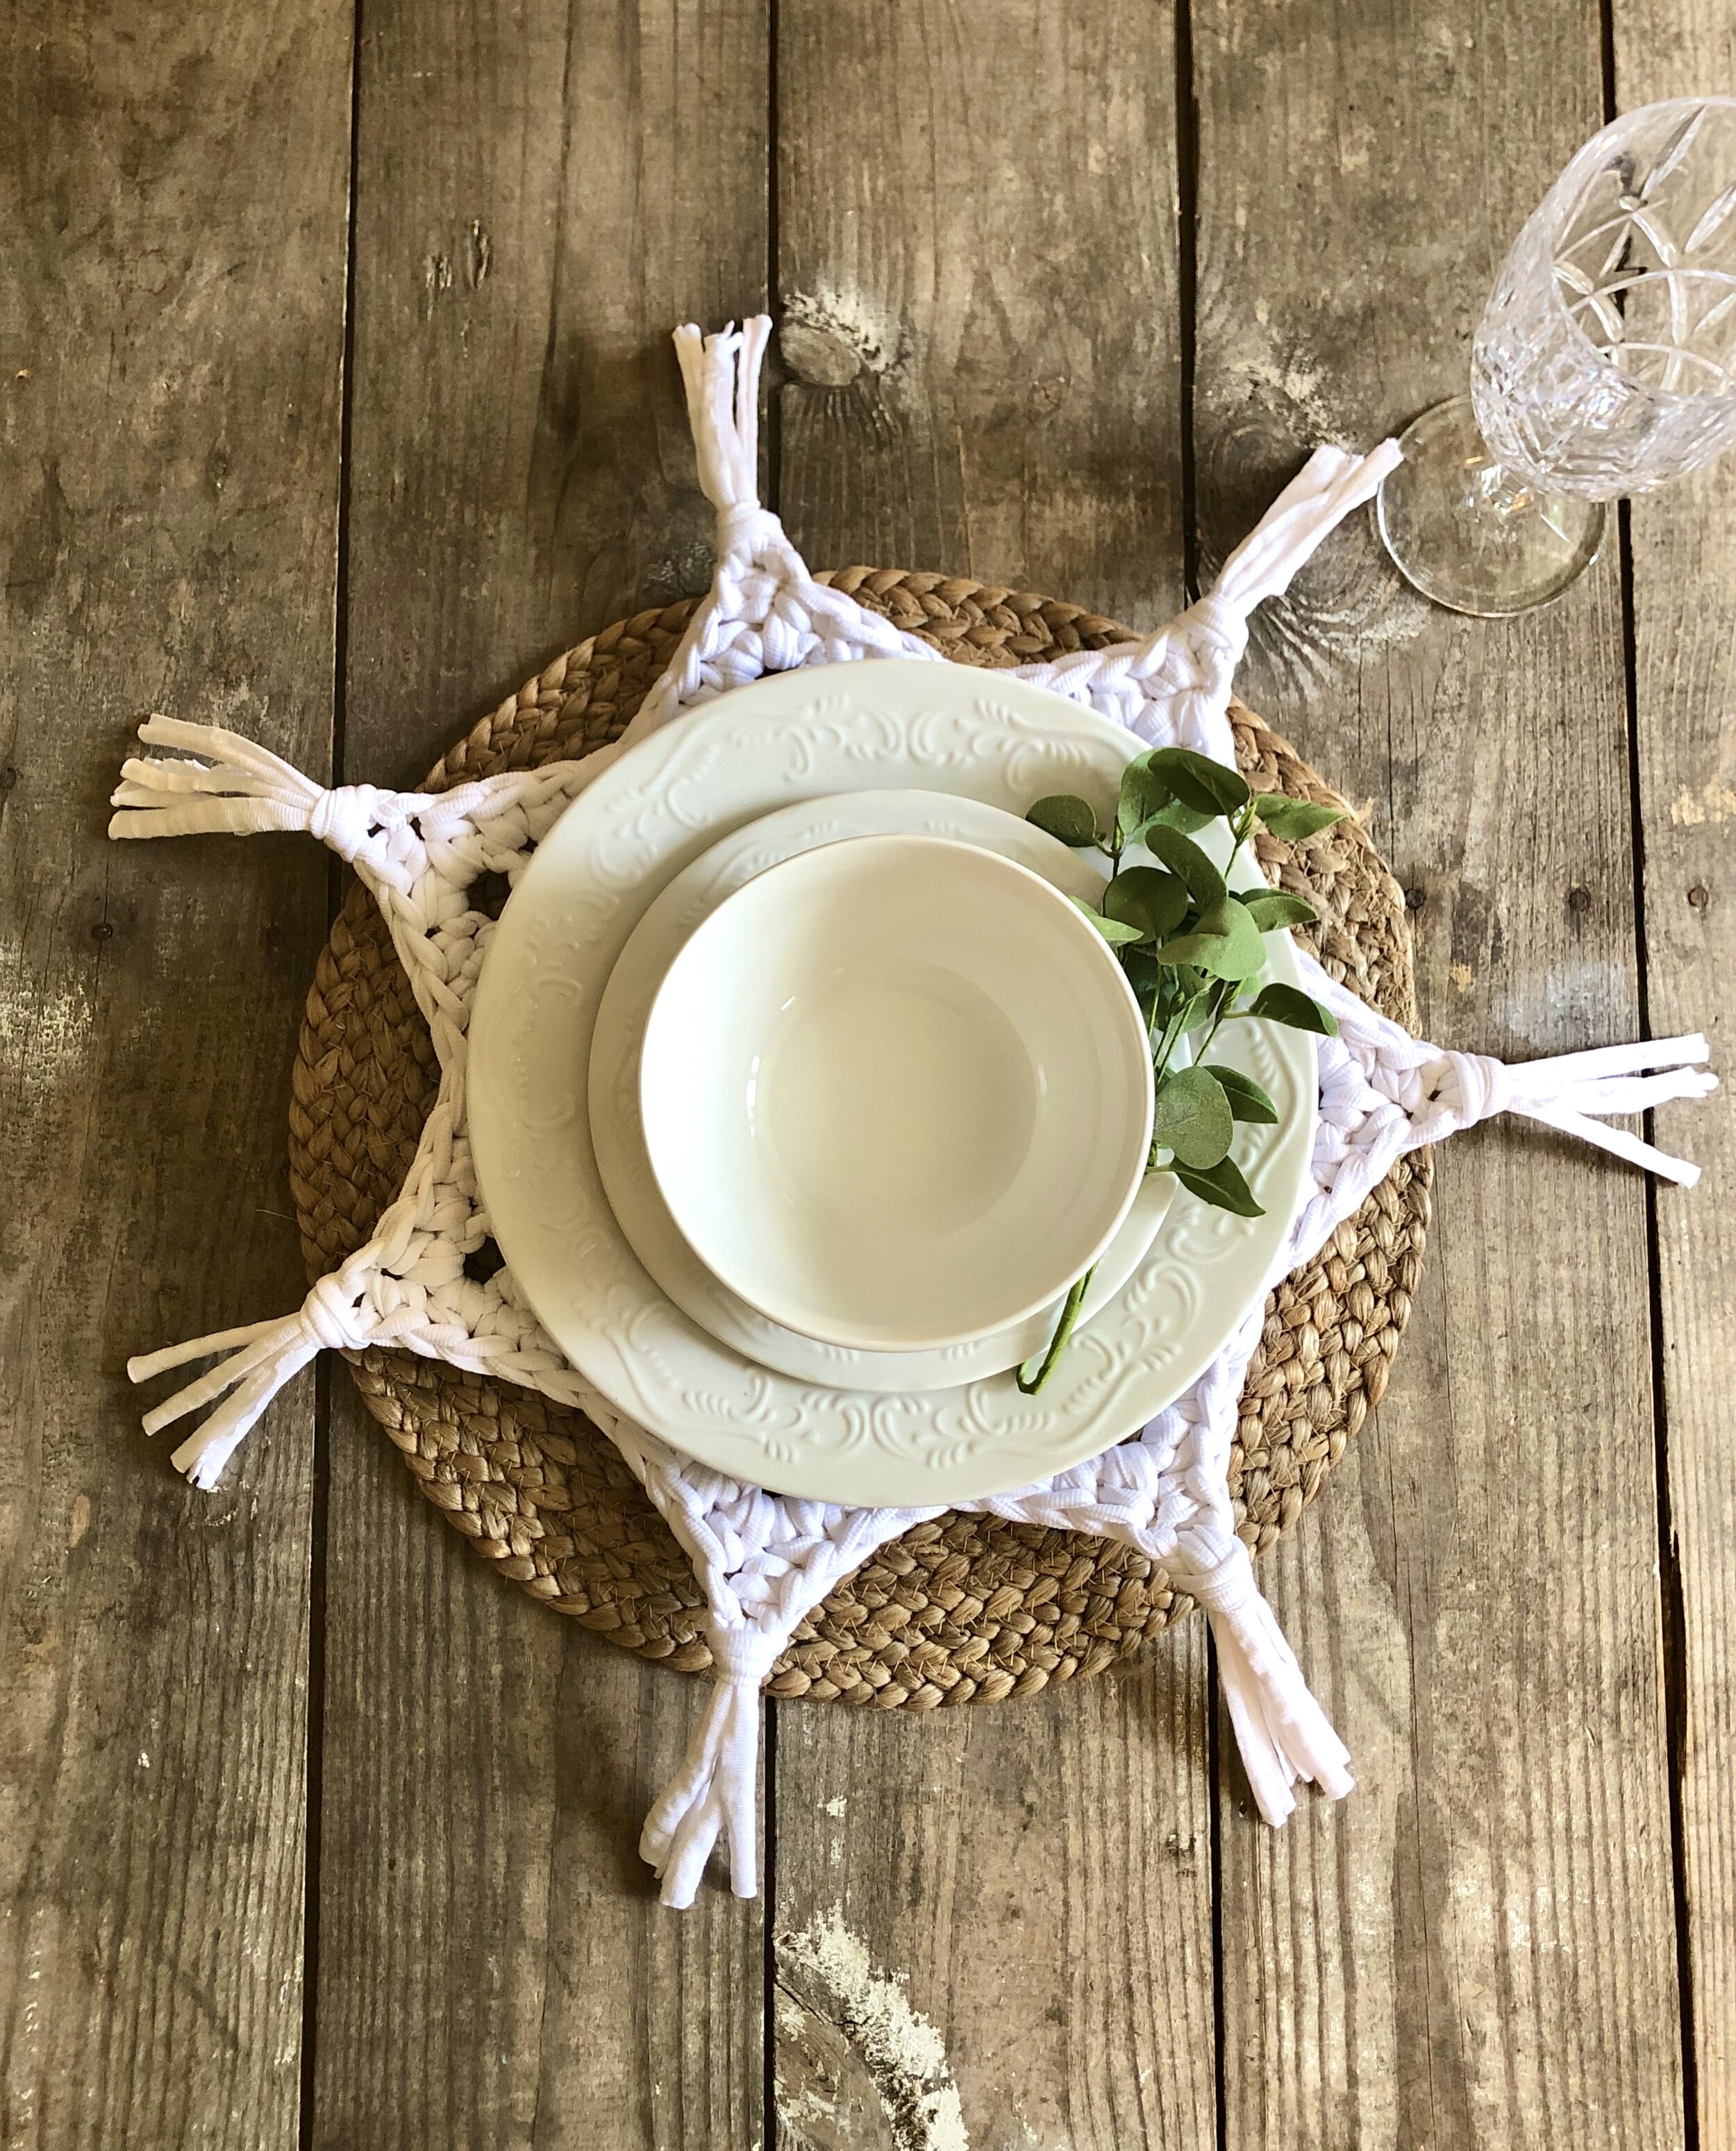
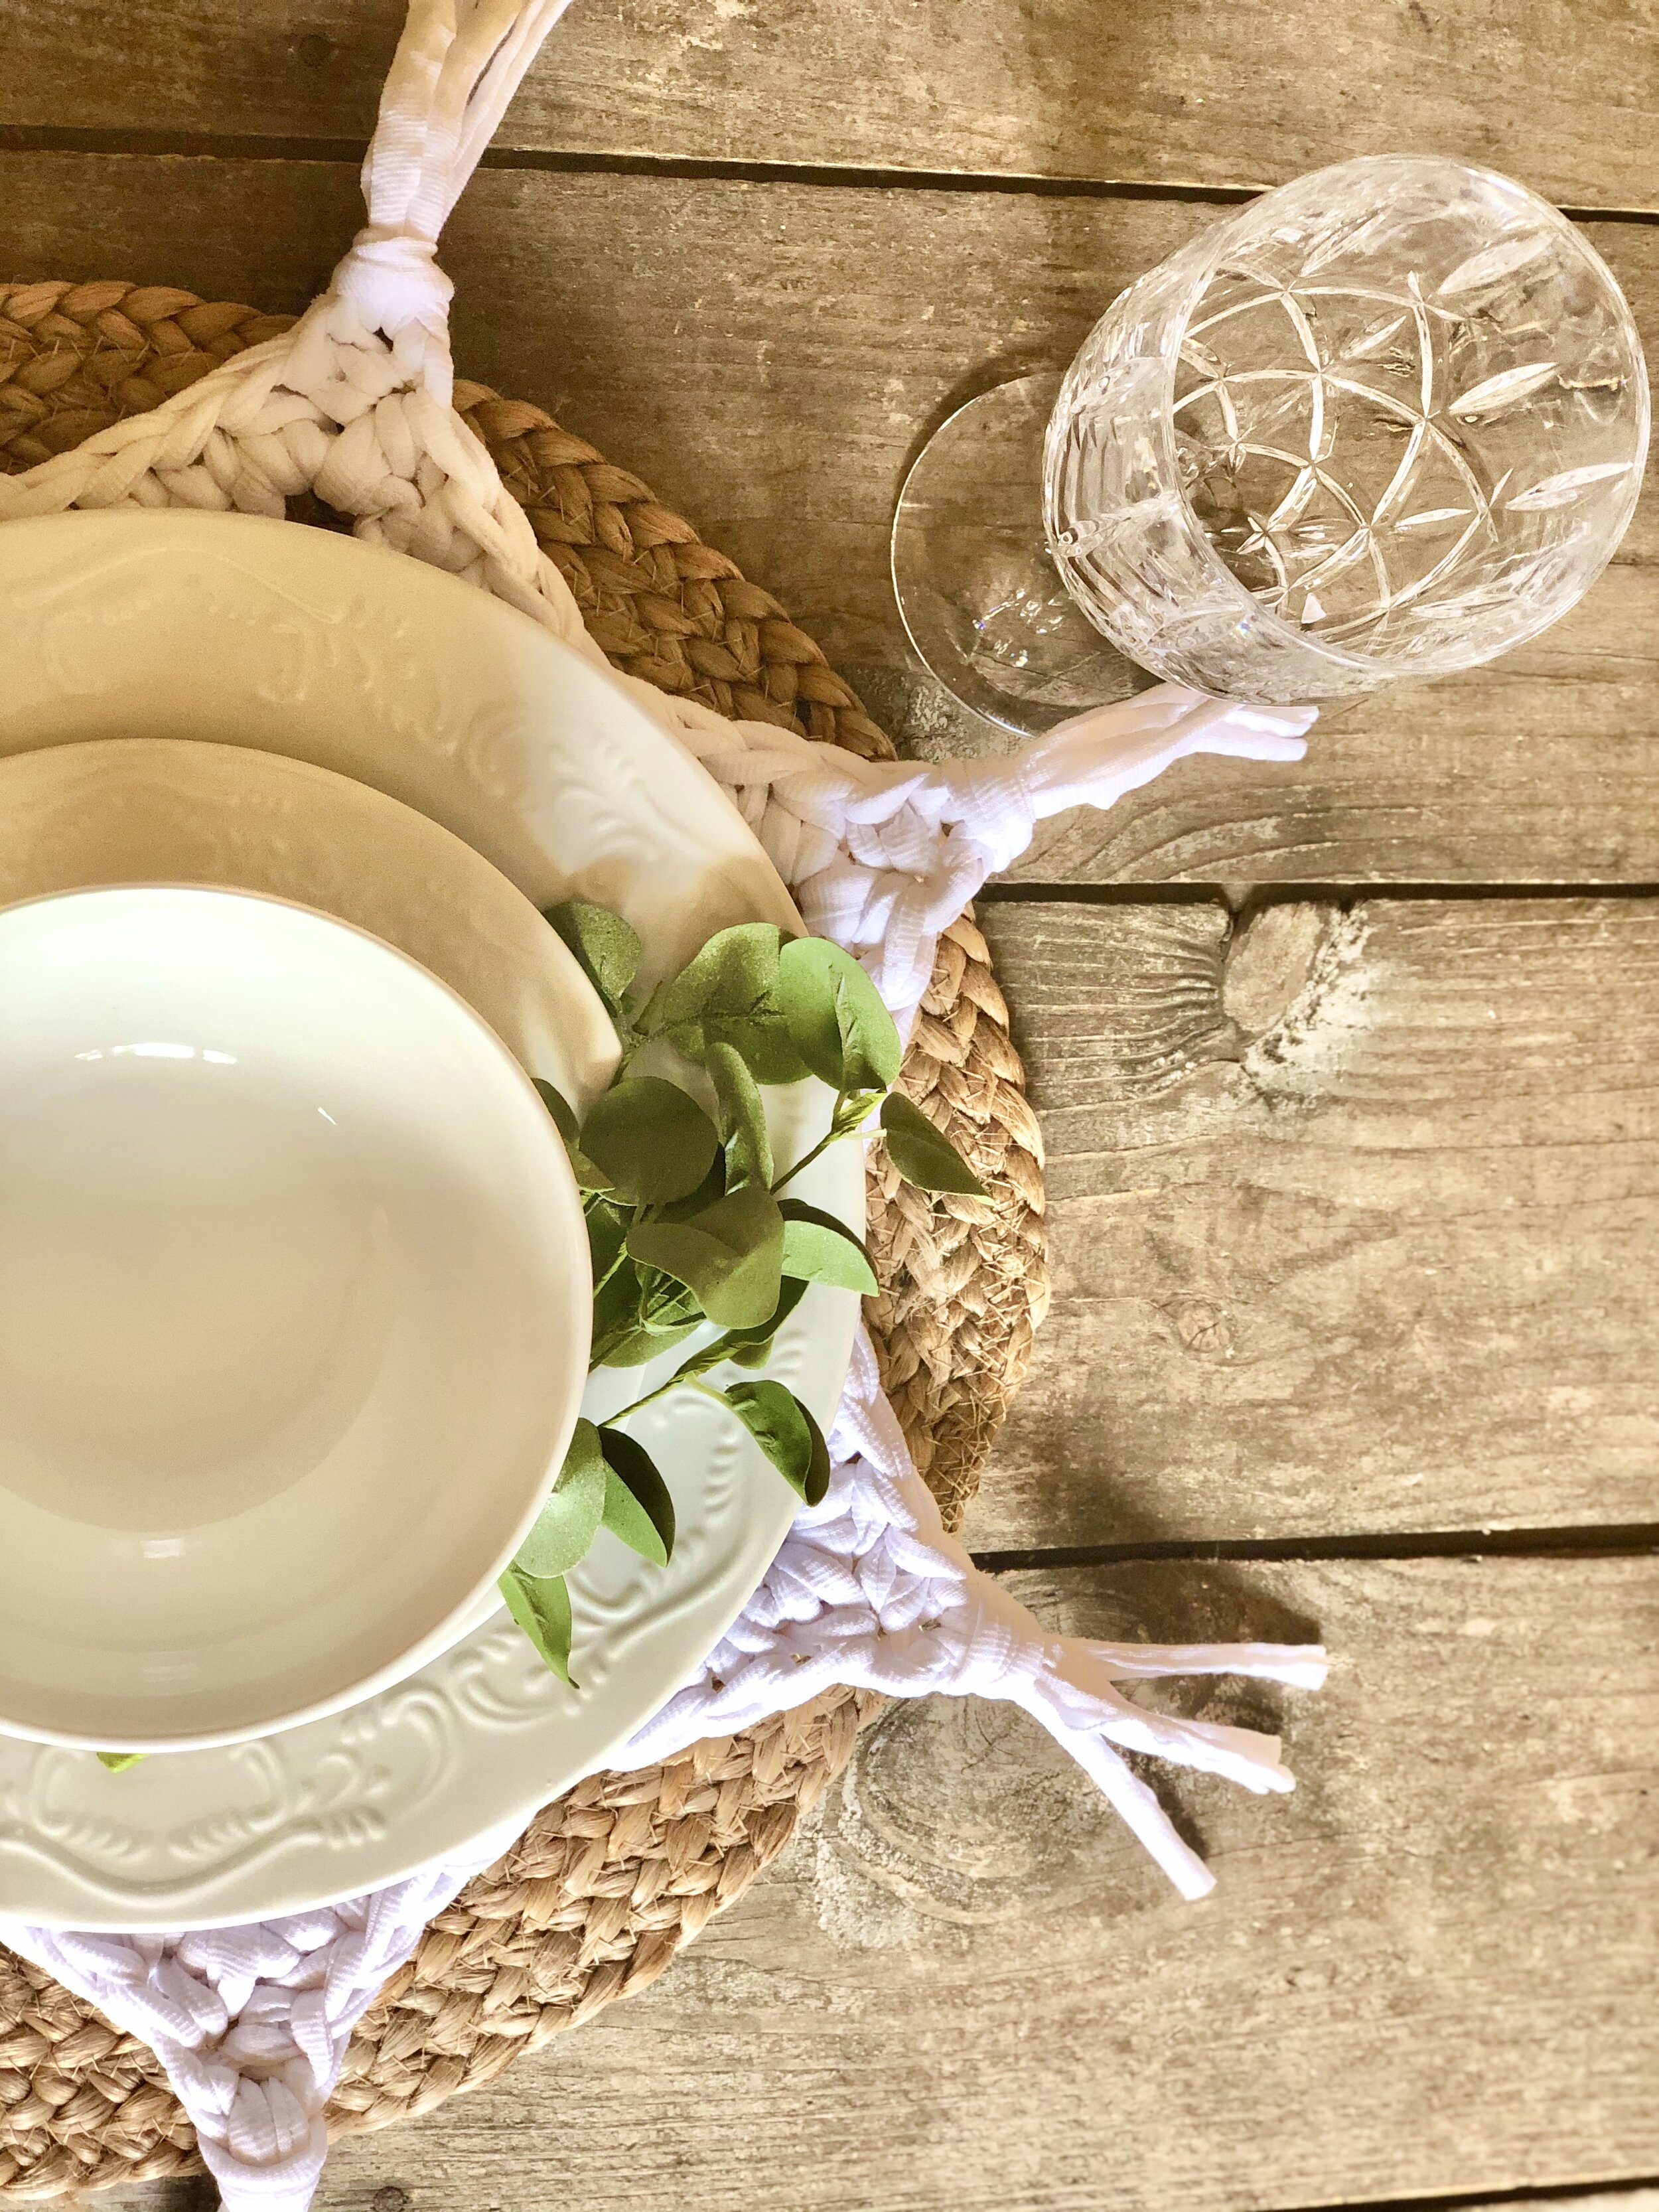
I used t-shirt yarn and a size P15 10.0 mm hook to create this placemat. It would also be beautiful to use under your Christmas platters when setting your table, or underneath a potted plant! I purchased this t-shirt yarn from Fox yarns.
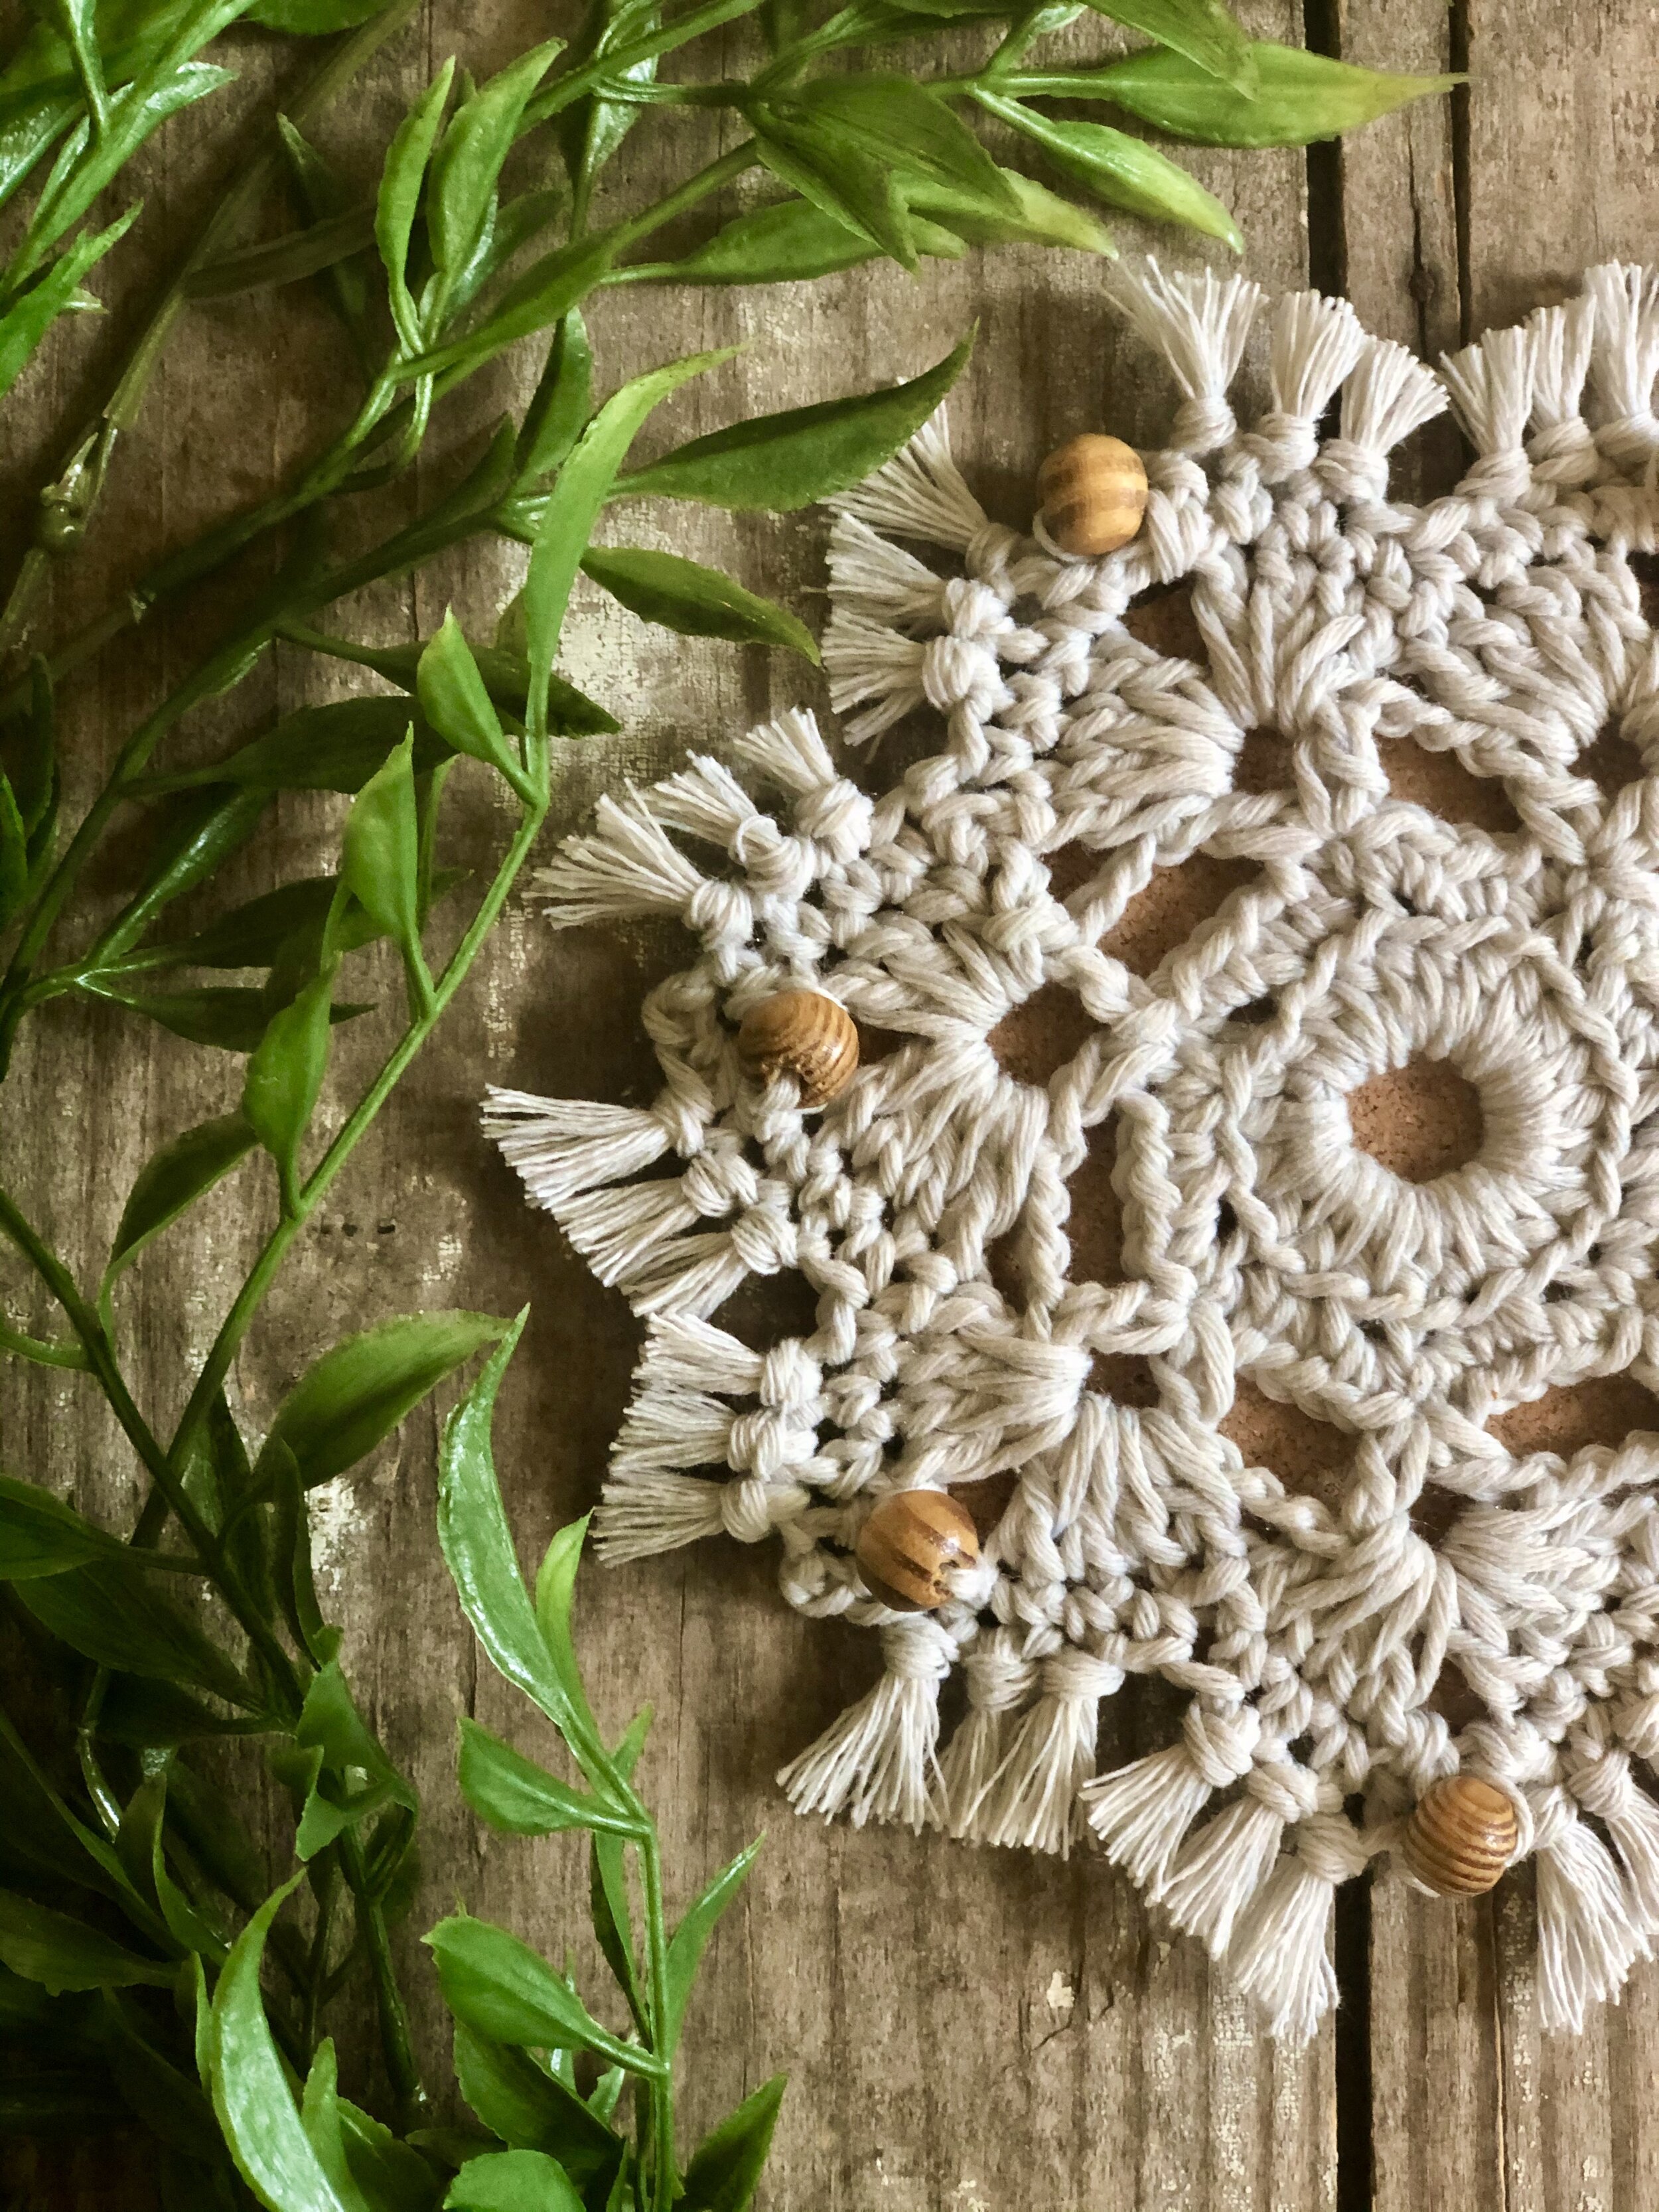
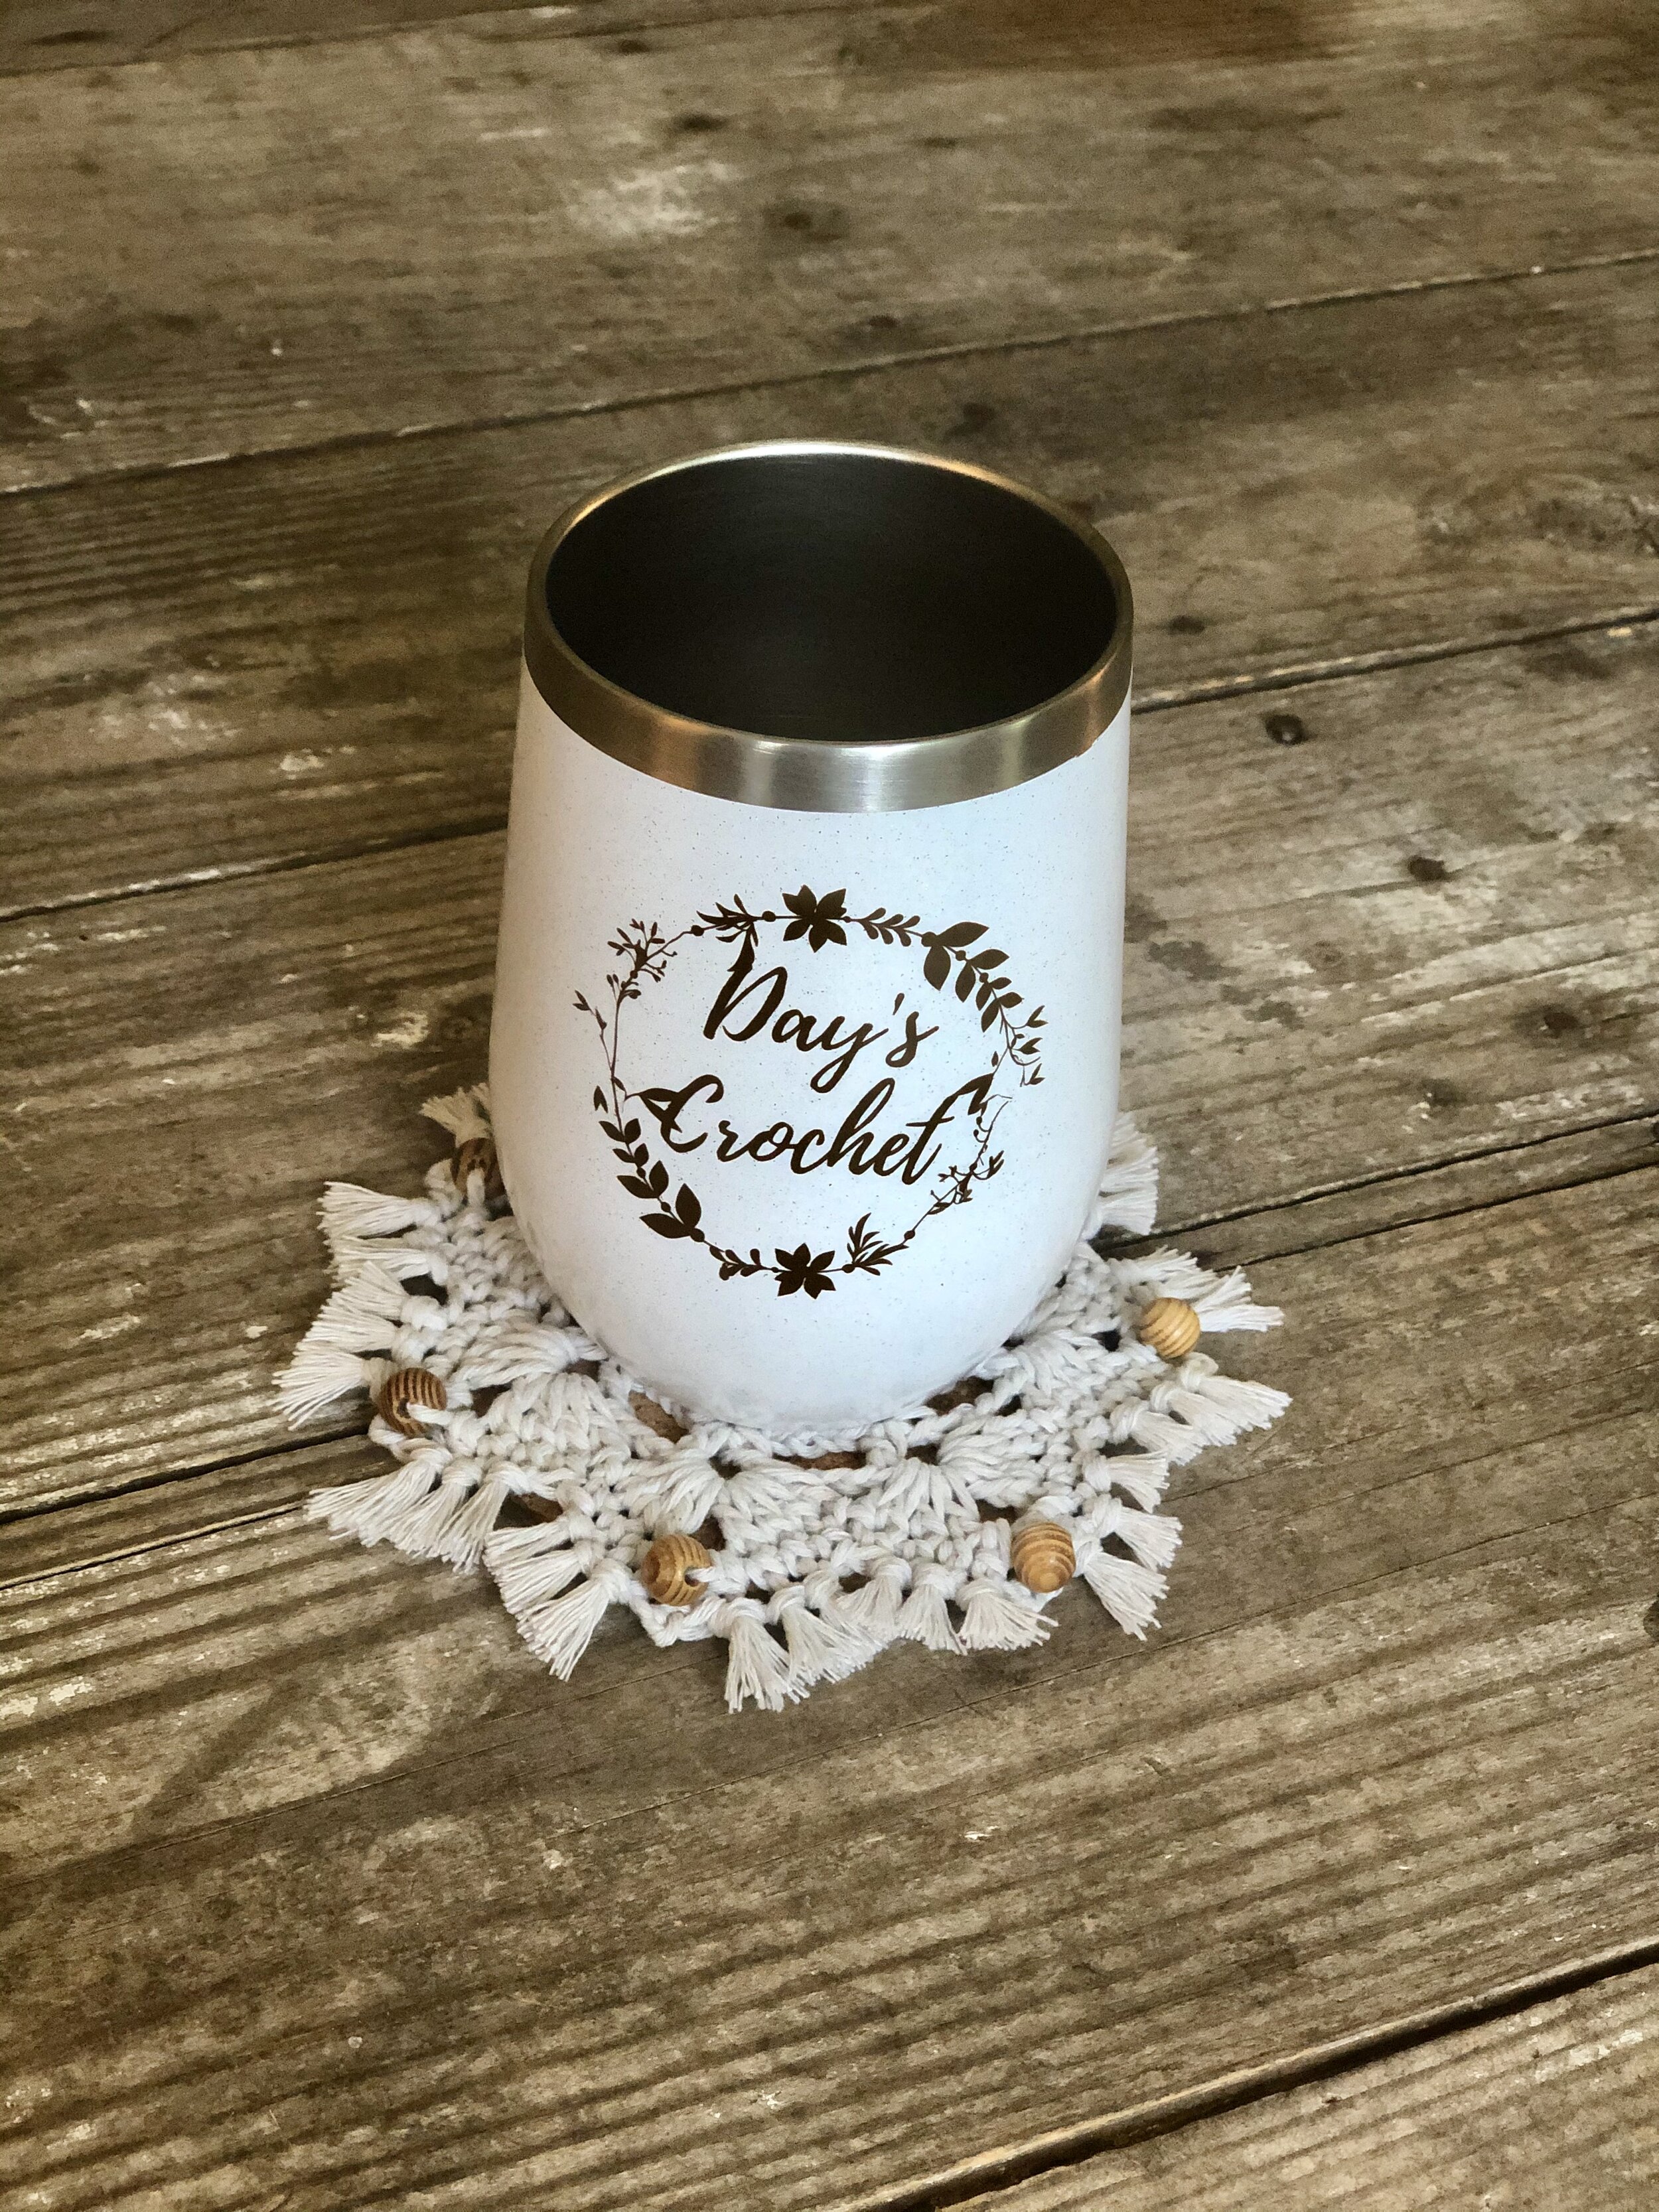
I used the same hook and yarn for this coaster as I did for the ornaments! I simply left off the tassels and sewed a cork coaster to the bottom using a sewing needle and some clear nylon thread. They would be a beautiful addition to your winter décor!

I made this trivet out of Wal-Mart brand’s chunky cotton (size #6) and an N 9.0 mm hook. If I could do over, I would have used the pattern for the 8-point snowflake instead of the 7-point, but it still turned out beautifully.
Please note that you do not have my permission to sell, share, translate, copy, or duplicate this pattern or my photos in any way. Please do not use this pattern for a video, blog, or class tutorial. Thank you so much for following these simple rules! Please message me on Facebook or send me an email at dayscrochetnc@gmail.com with any questions.