
Merry Jane Christmas Stocking

I dubbed this simple pattern “Merry Jane” because she’s a rather ‘plain Jane’ stocking.
The beauty of her plain-ness is that she can be embellished according to any style you desire! It is a quick and simple project that doesn’t require special stitches or supplies—just a little imagination! My favorite part about this stocking is the fact that it is worked all in one piece in the round, with only 2 ends to weave in!

I have noticed that a lot of crochet Christmas stockings have a different piece that appears to be sewn on to form the heel. I have to be honest…my laziness doesn’t like the extra step that an extra piece would take to make and sew on. I am more attracted to quick and easy crochet projects because my attention span is practically nonexistent and I get bored with projects that take too long to make or require several pieces to be sewn together.
I also sell my finished goods, and as you know, time is MONEY. The longer a project takes to make, the less profitable it becomes. I also love that it doesn’t require a ton of yardage, making it even better for your profit margin if you sell your goods. Add the fact that the design is plain enough to embellish in literally any way you desire, and you’ve got yourself a fun, quick, sellable item.
If I’m being 100% honest with you, however, I don’t really make much holiday items to sell at vendor markets. I don’t think it’s a good idea to make very much holiday decor for markets. If you don’t end up selling them, you have to store them until the next time the season rolls around, or mark them down incredibly low in the off season.
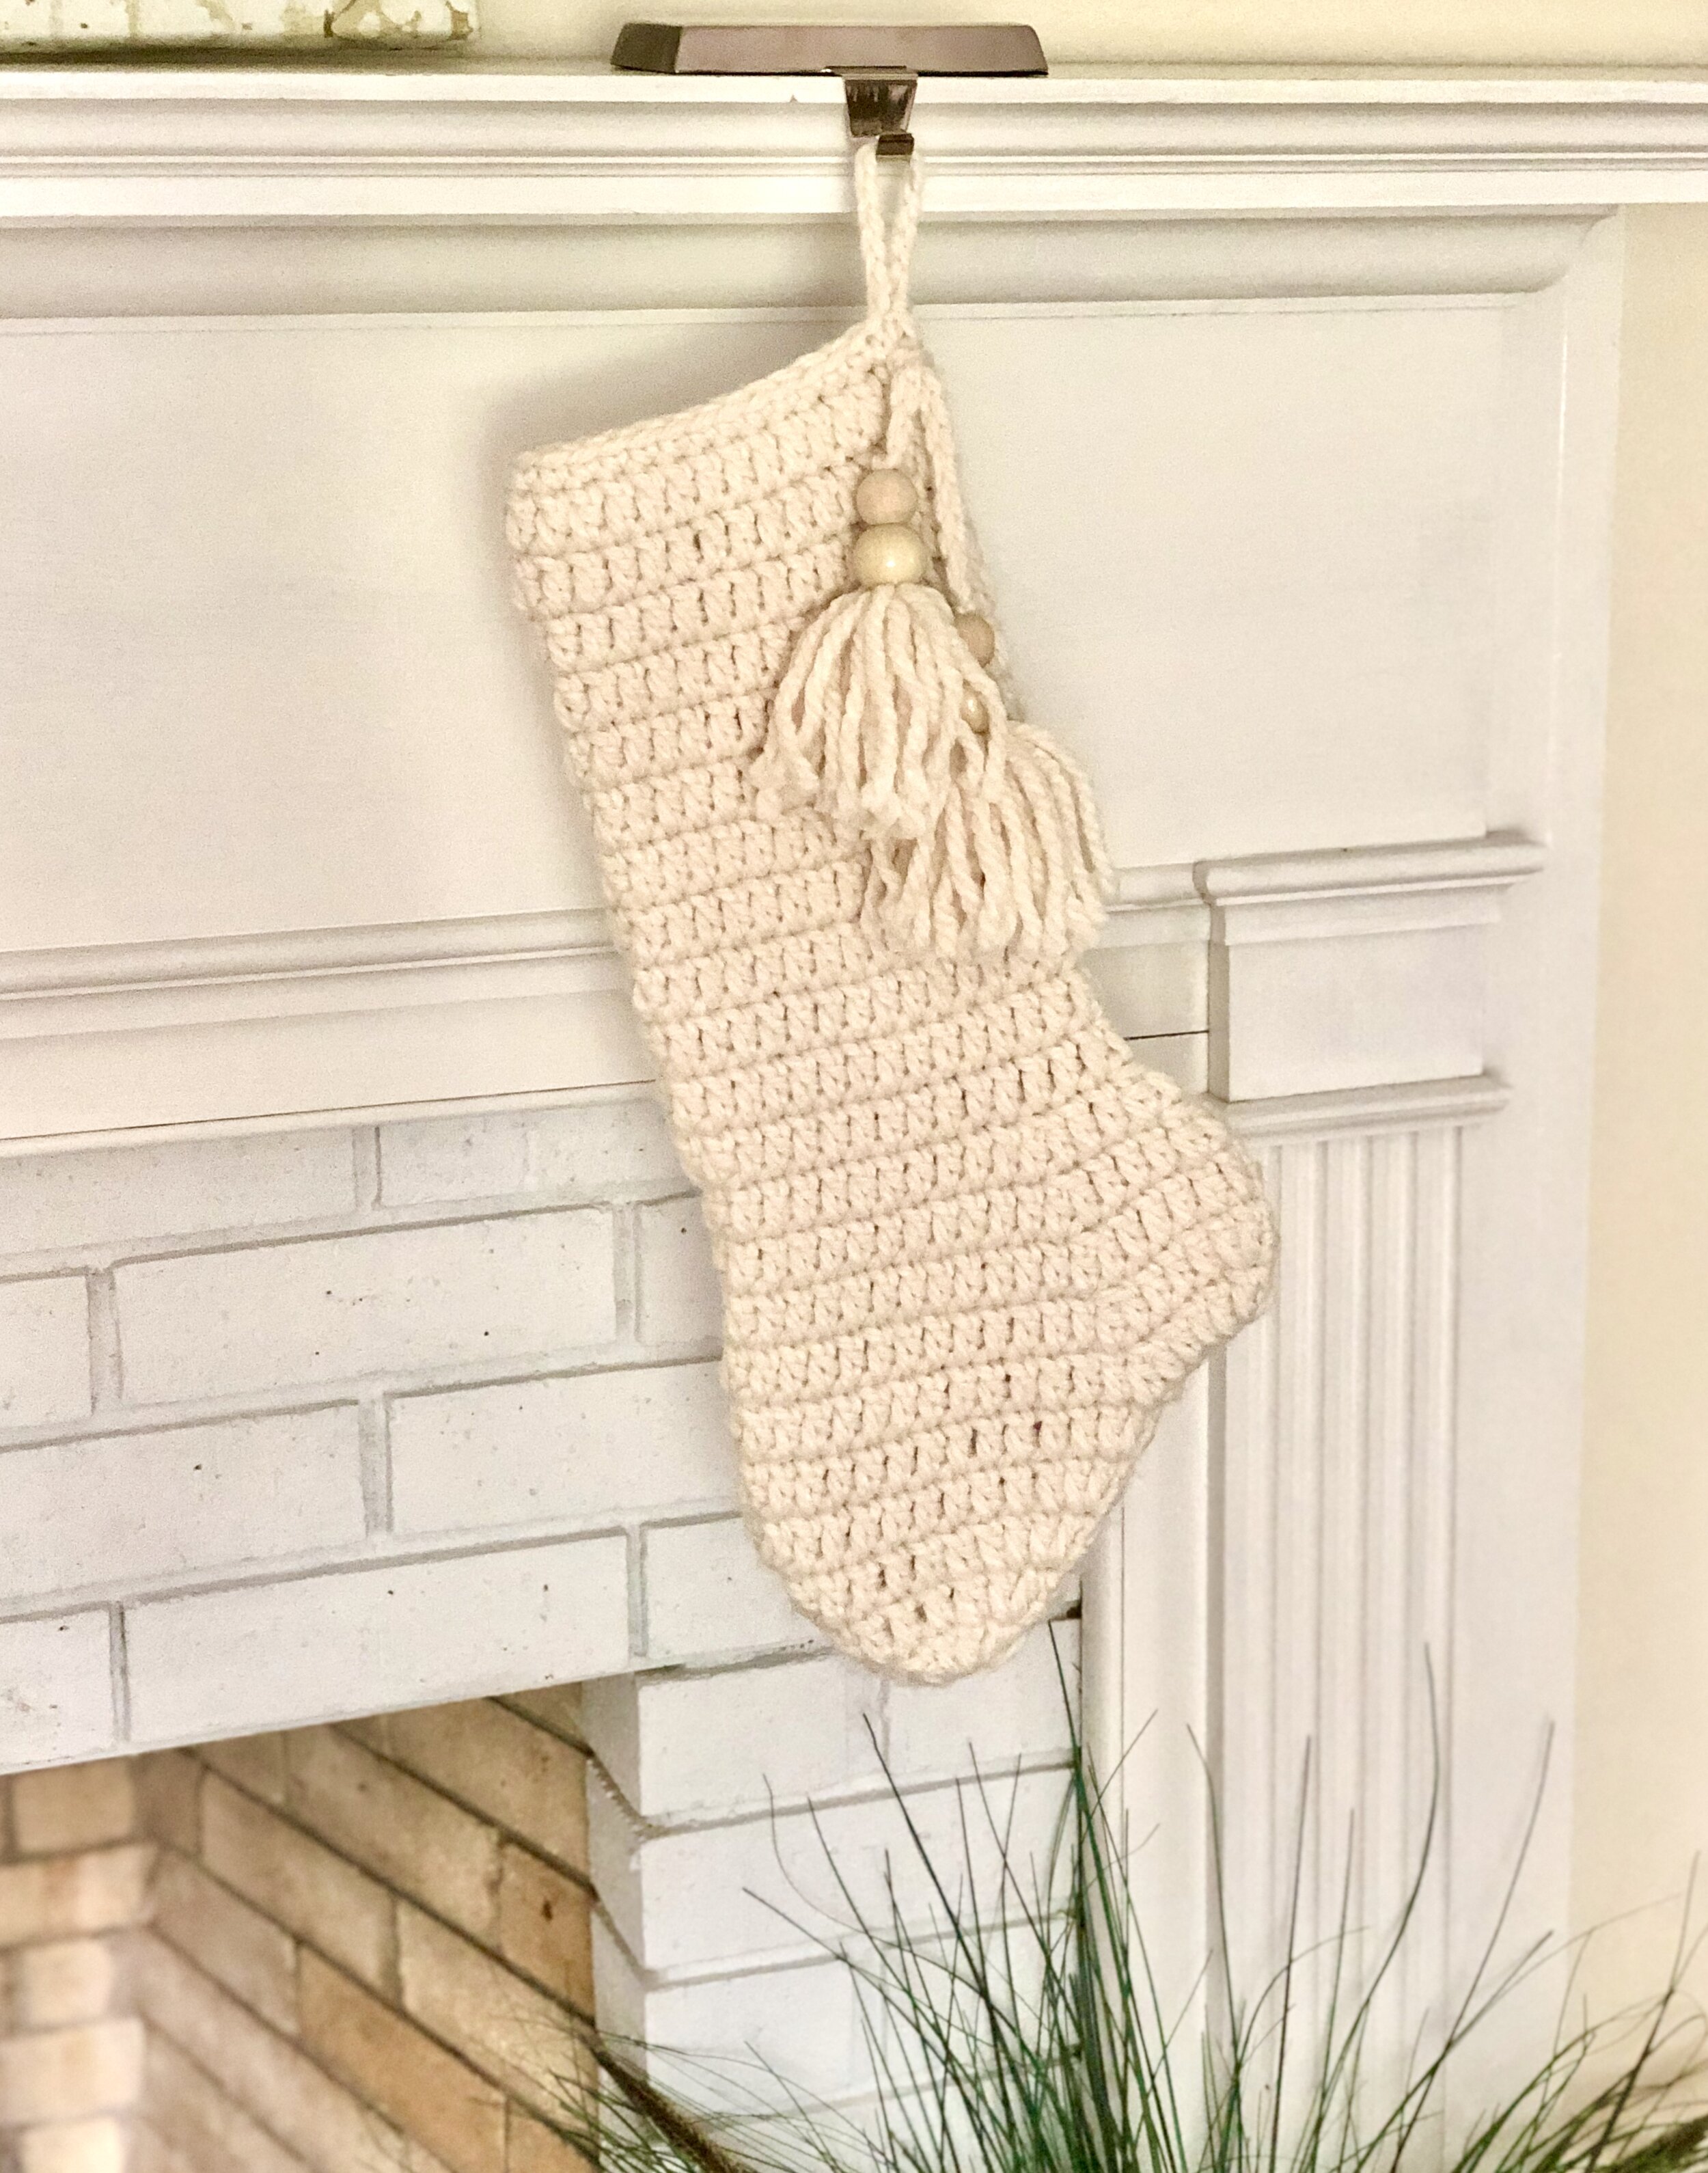
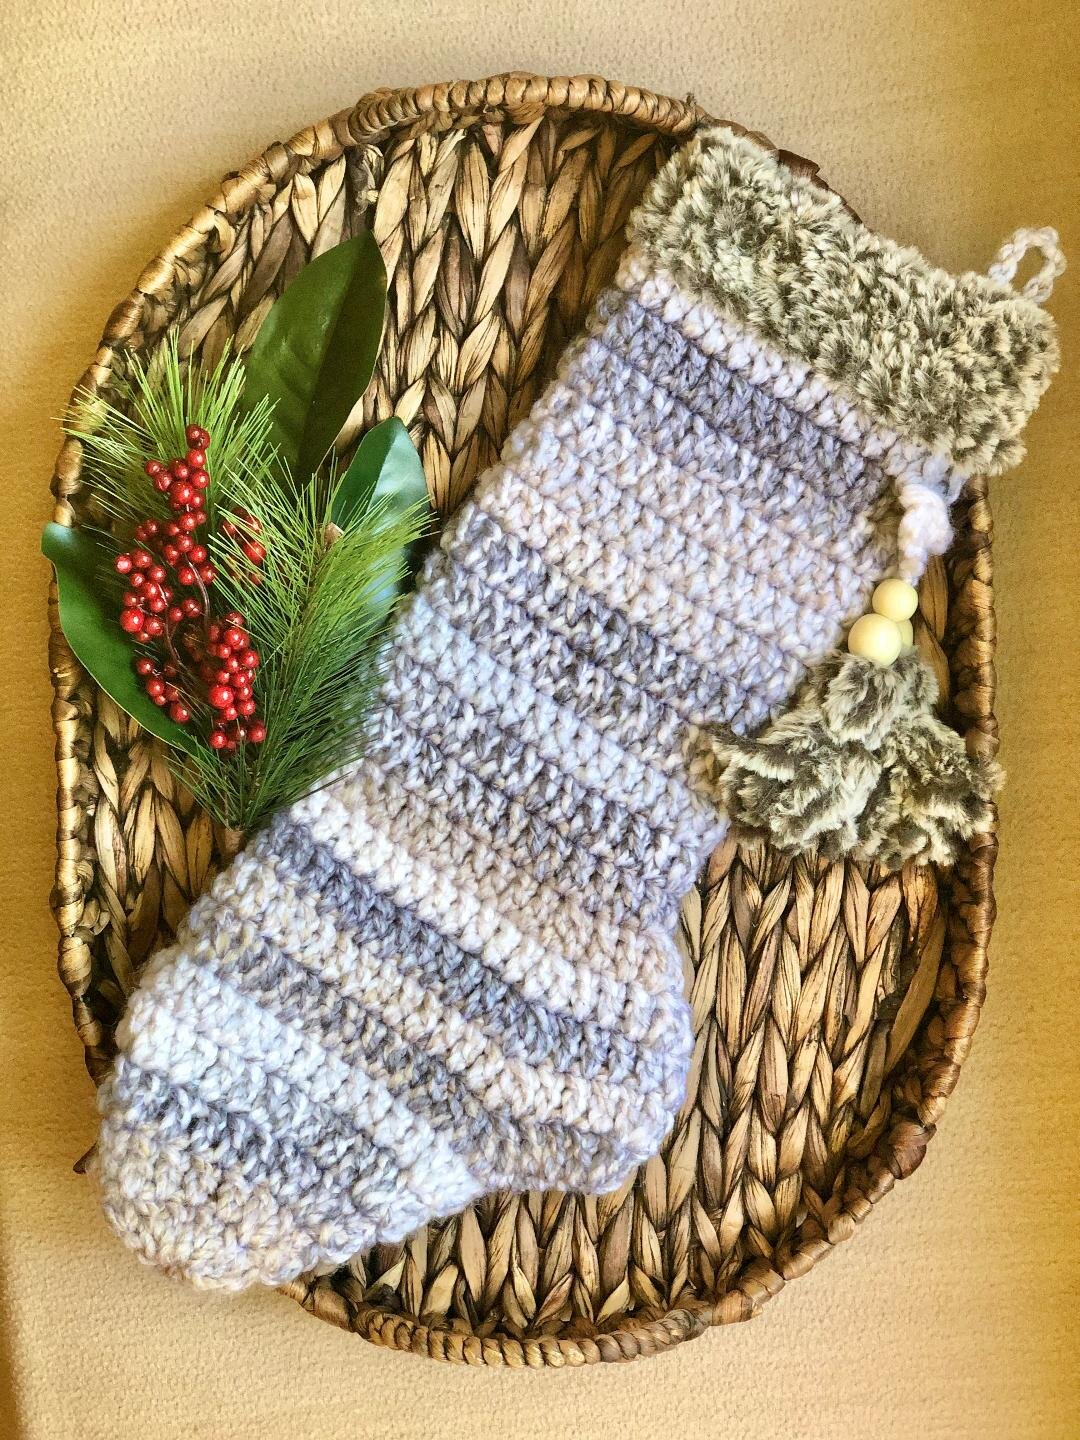
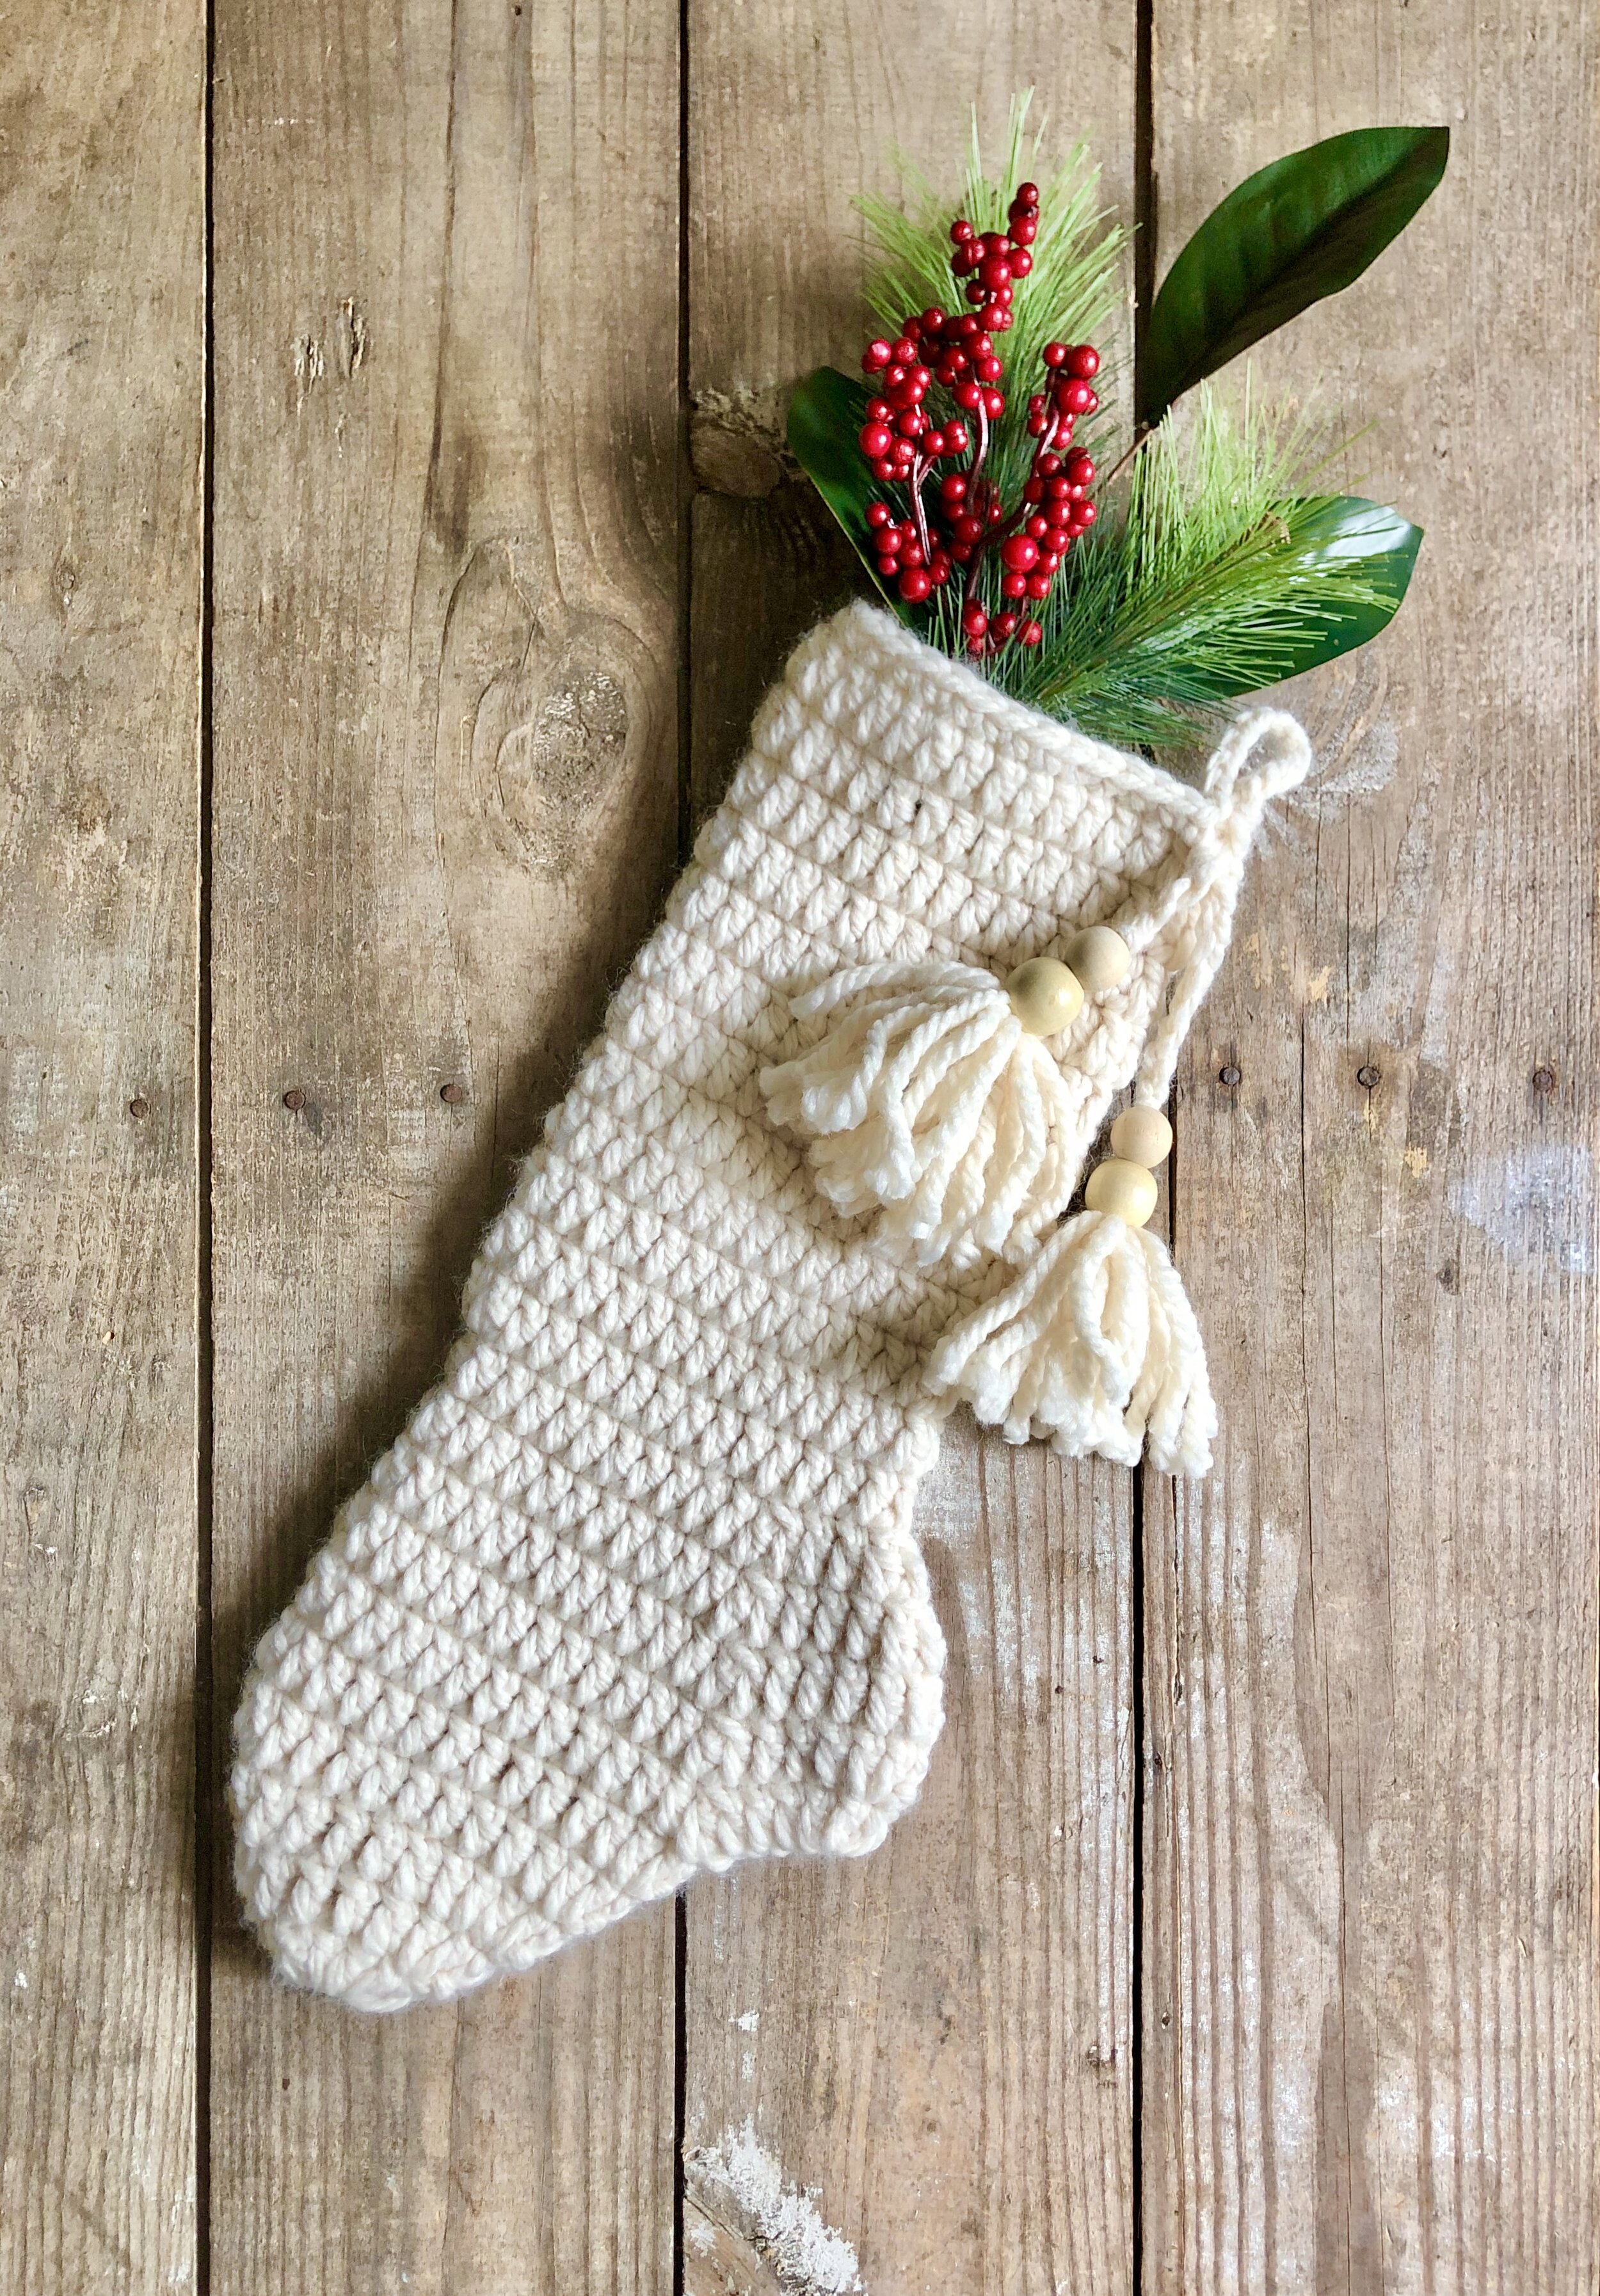
I mainly made these stockings to give as gifts. Add a little wooden letter or other wooden accents to make it simple yet modern. The one that was the most time-consuming but fun to make was my boho version of this stocking. I added beads, tassels, and several fun yarns. I think it turned out great!

Let’s make it!!
Supplies Needed:
Approx. 150-160 yds of super bulky size #6 yarn
Size K 6.5 mm hook, or size needed to obtain gauge
Embellishments of your choice
Terms Used and Abbreviations:
Pattern is written in US terminology.
Back Post Double Crochet - bpdc
Beginning – beg
Chain – ch
Double Crochet – dc
Double Crochet 2 together – dc2tog
Fasten Off – FO
Front Post Double Crochet - fpdc
Repeat – rep
Single Crochet – sc
Slip Stitch – sl st
Stitch(es) – st(s)
Gauge:
11 dc and 5 rows = 4”
Pattern Notes:
-Item is worked in the round from the bottom up.
-Beg ch 2 does not count as a st throughout the entire pattern.
-The first st of every round will always be the same st as join.
Finished Measurements:
Stocking measures approx. 18” (46 cm) in length and 7.5” (19 cm) at the widest portion.

Instructions:
Subscribe to my YouTube channel!
Round 1: Ch 3, 12 dc in 3rd ch from hook. Join with a sl st in top of first dc. [12 dc]
Round 2: Ch 2, 2 dc in first st, dc in next 4 sts, (2 dc) in next 2 sts, dc in next 4 sts, (2 dc) in last st. Join with a sl st in top of first dc. [16 dc]
Round 3: Ch 2, (2 dc) in first 2 sts, dc in next 5 sts, (2 dc) in next 2 sts, dc in next 5 sts, (2 dc) in last 2 sts. Join with a sl st in top of first dc. [22 dc]
Round 4: Ch 2, 2 dc in first st, dc in next 9 sts, (2 dc) in next 2 sts, dc in next 8 sts, (2 dc) in last 2 sts. Join with a sl st in top of first dc. [27 dc]
Round 5: Ch 2, 2 dc in first st, dc in next 25 sts, 2 dc in last st. Join with a sl st in top of first dc. [29 dc]
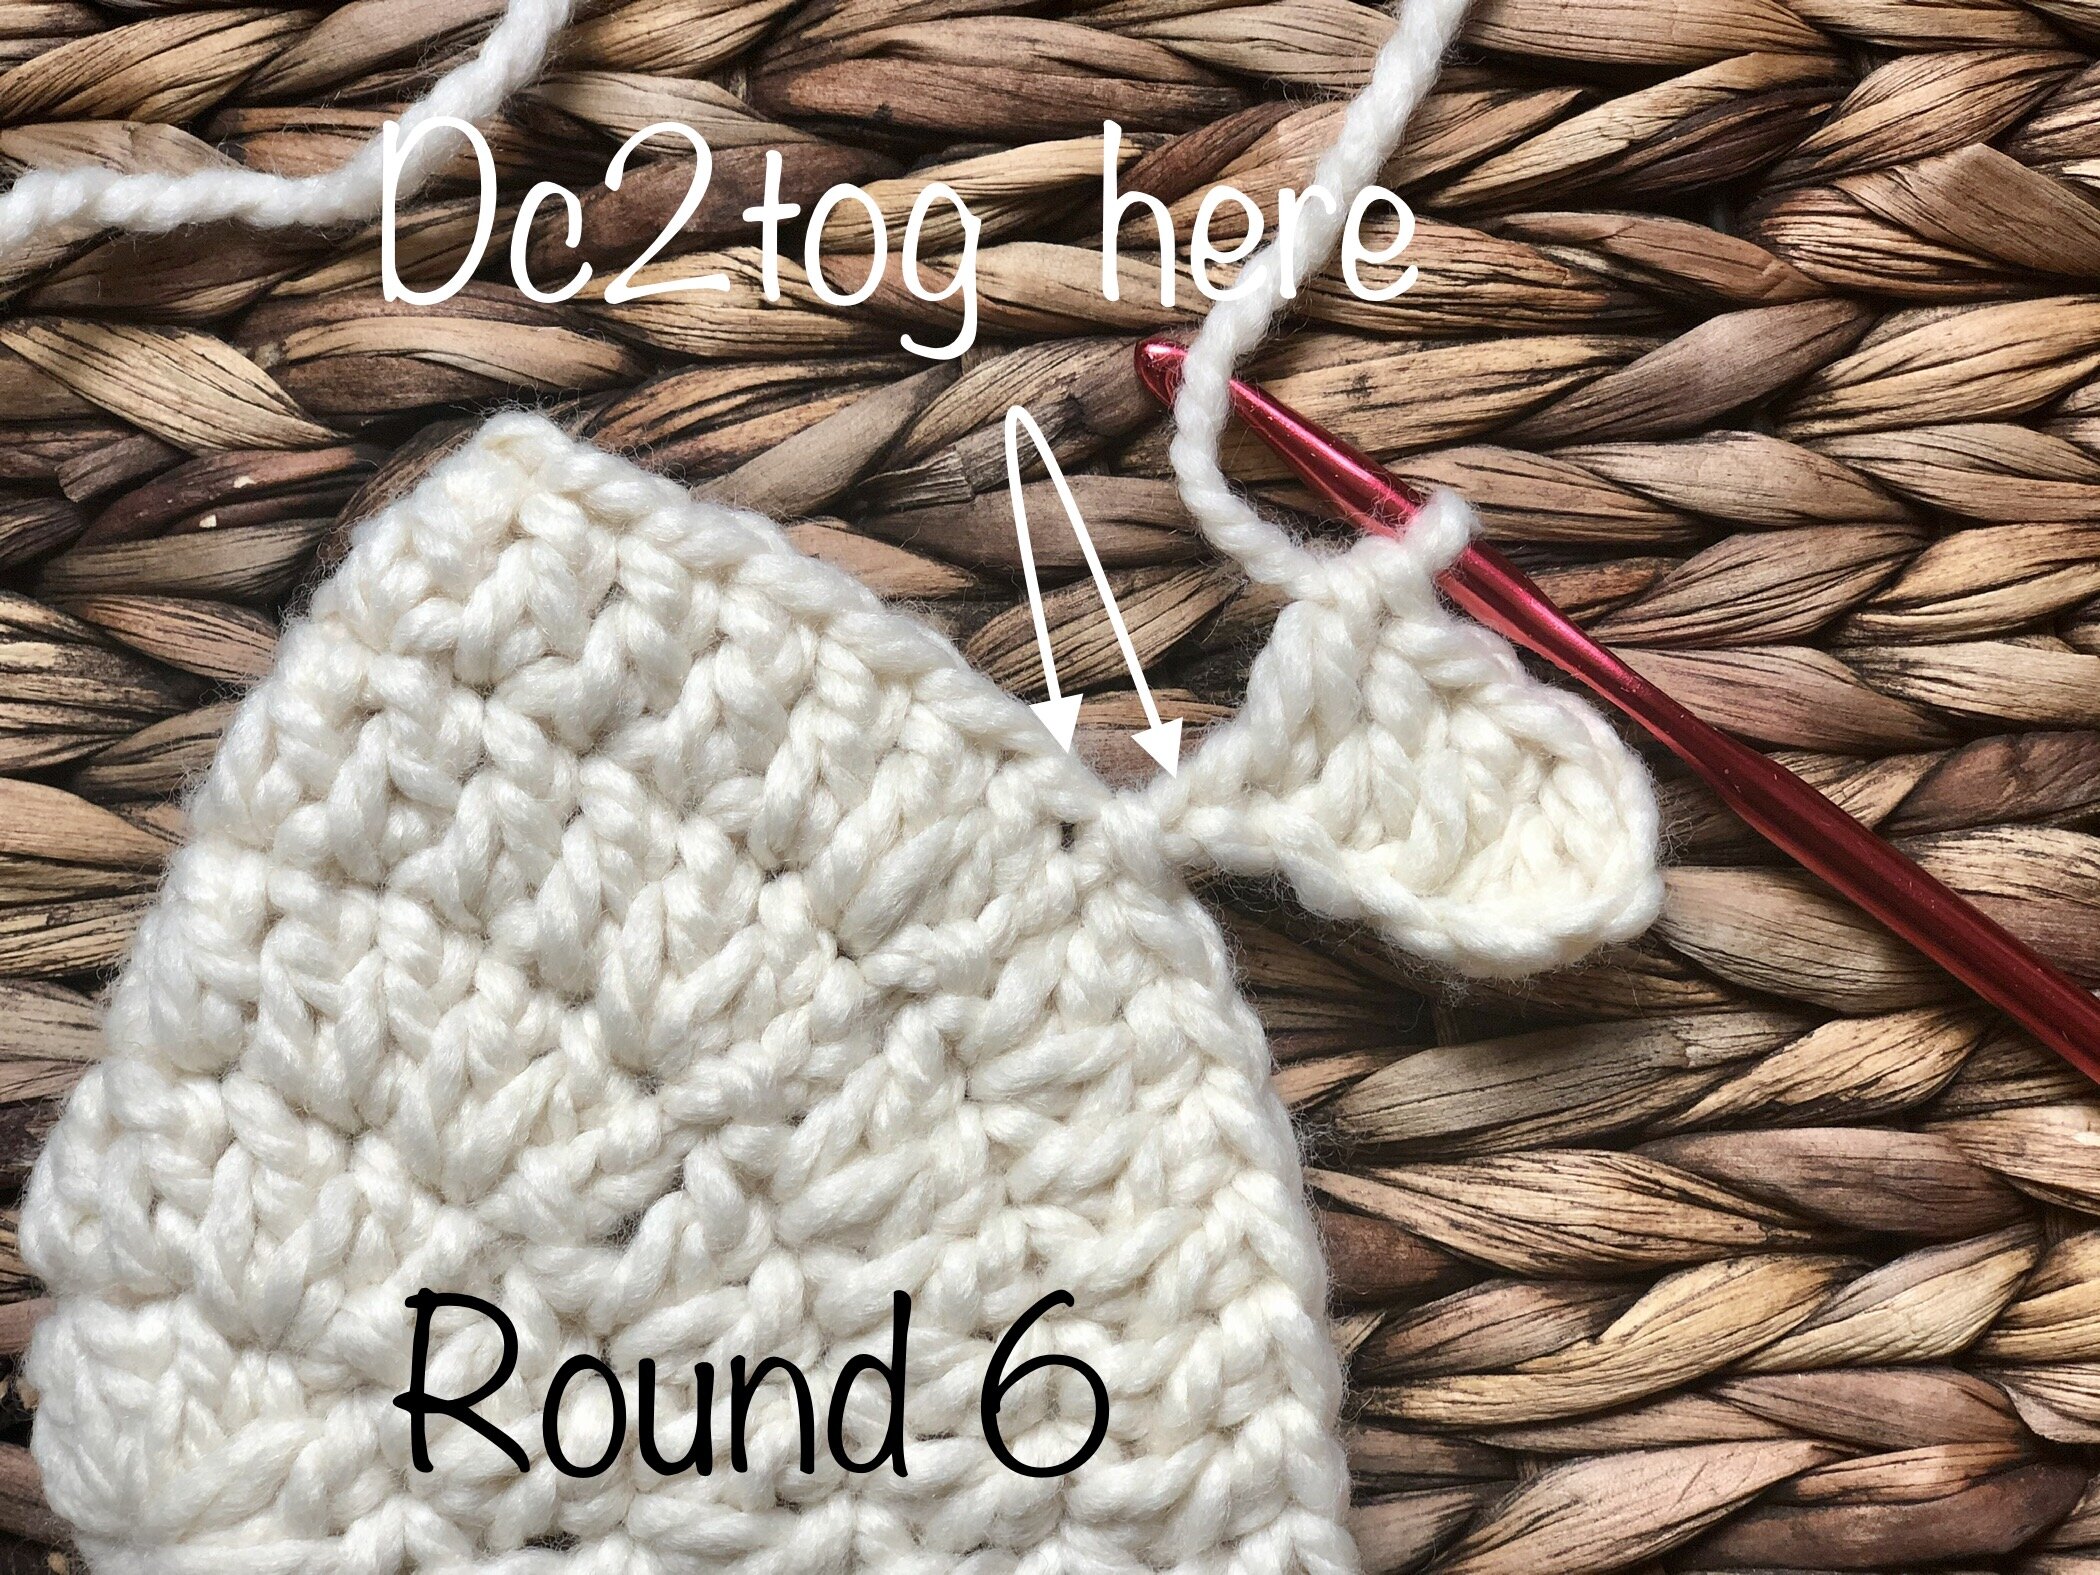
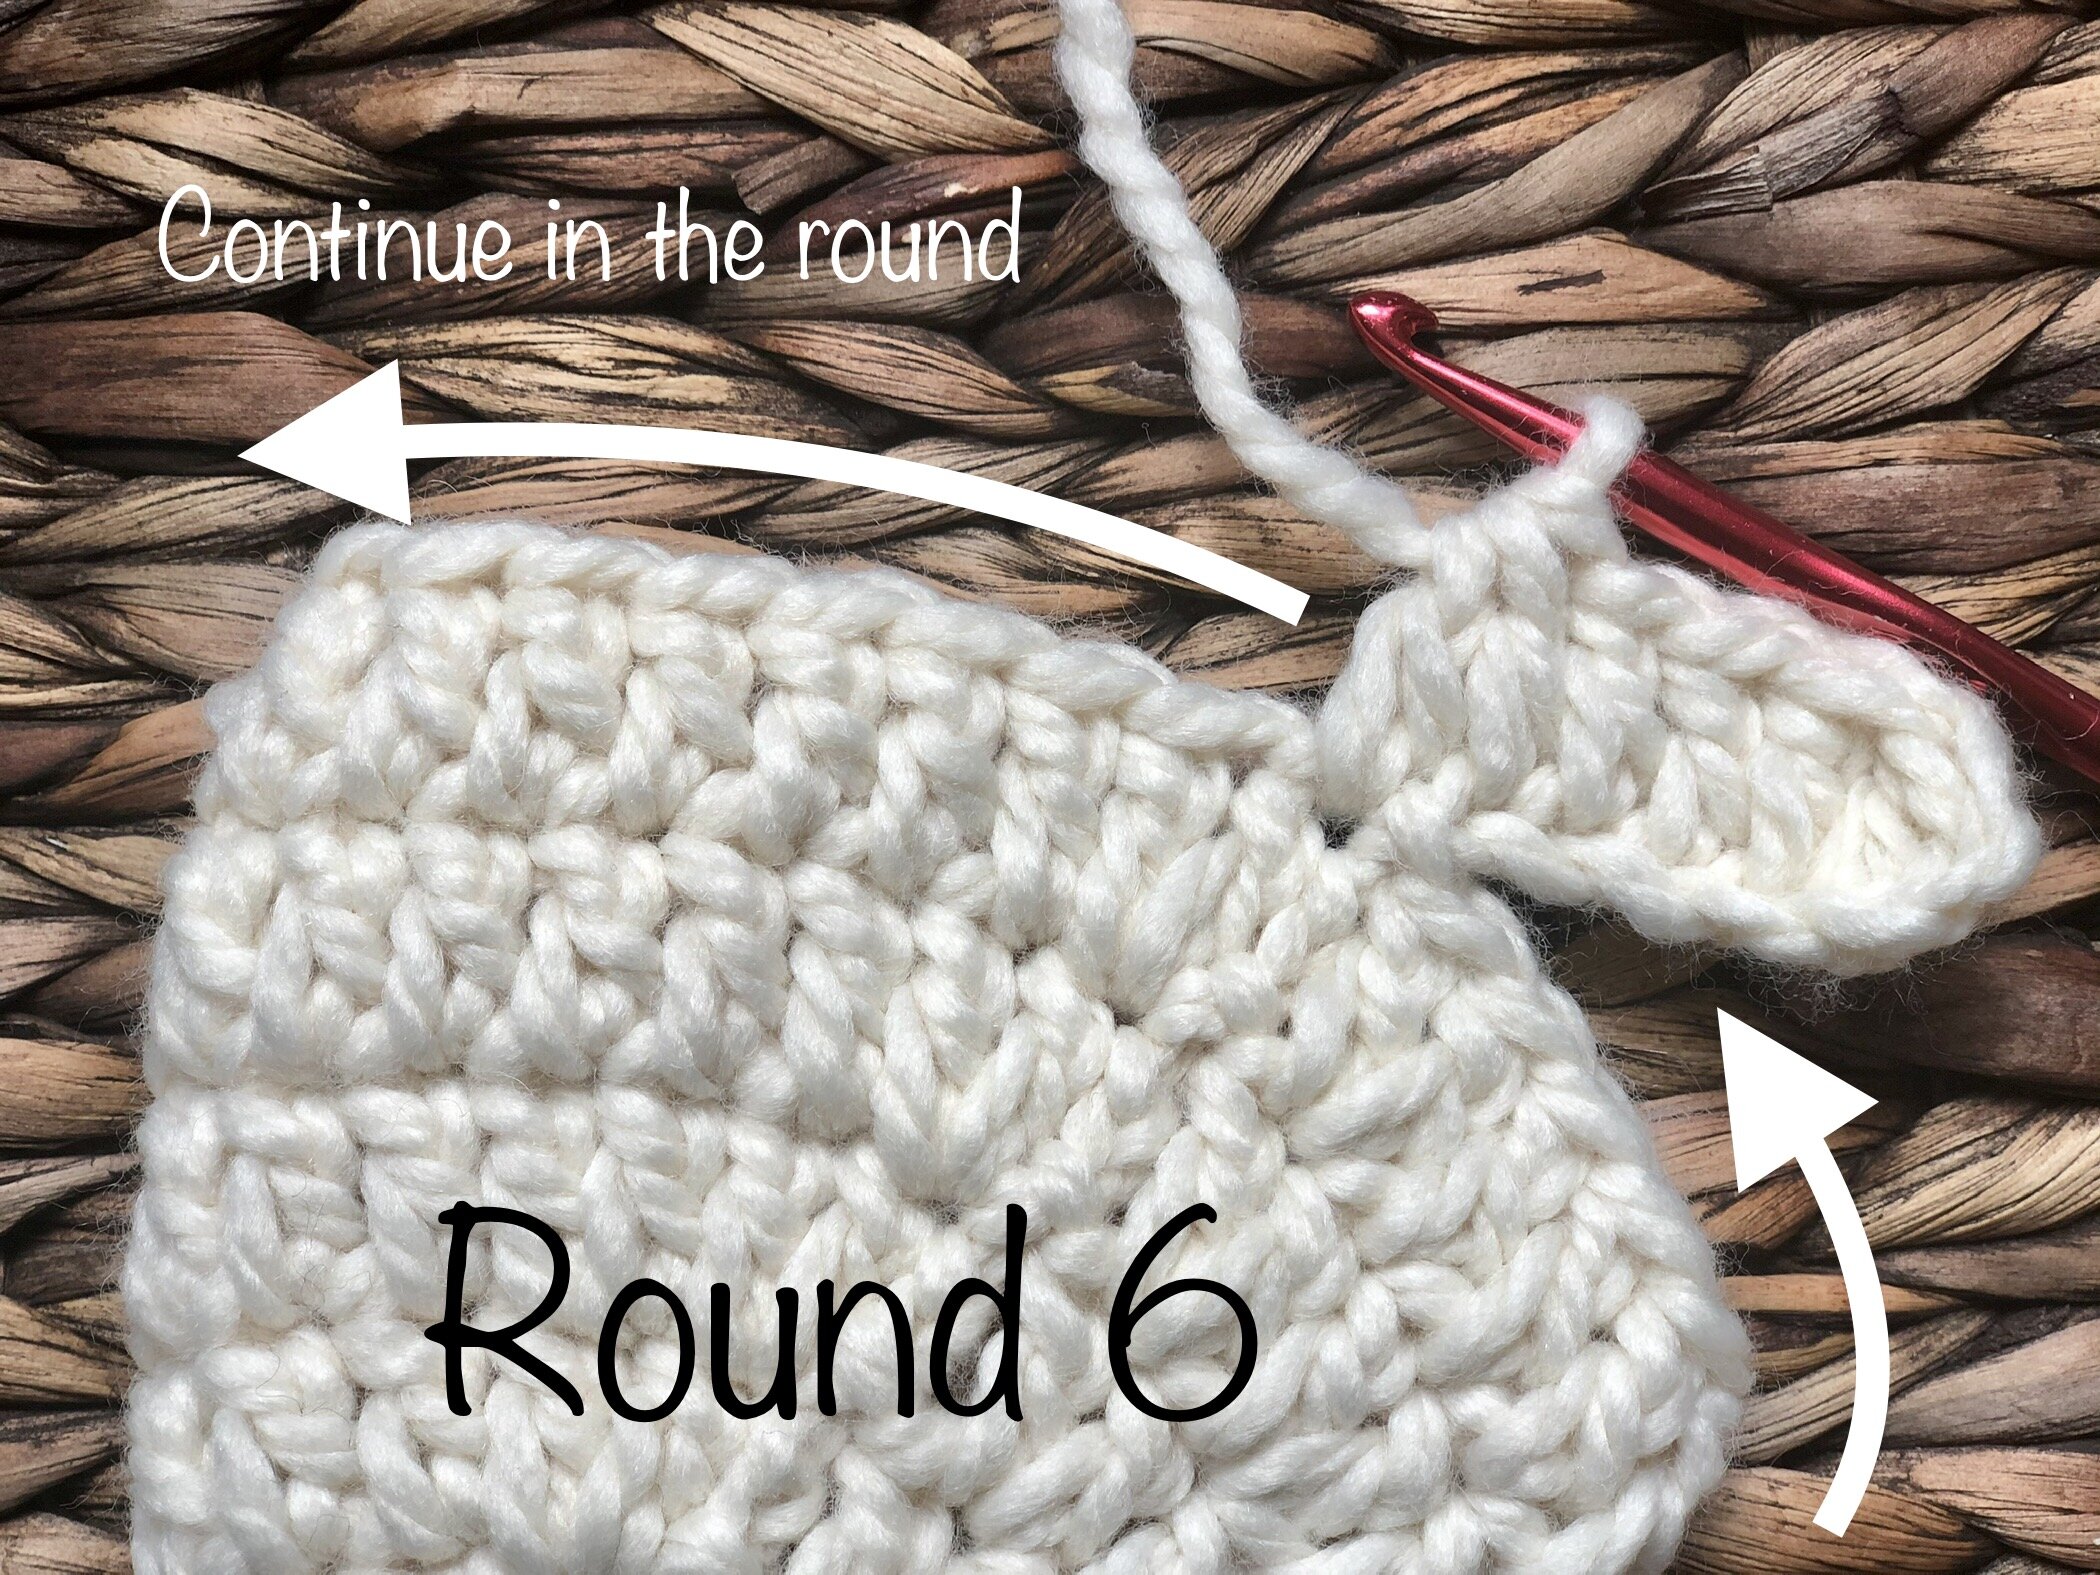
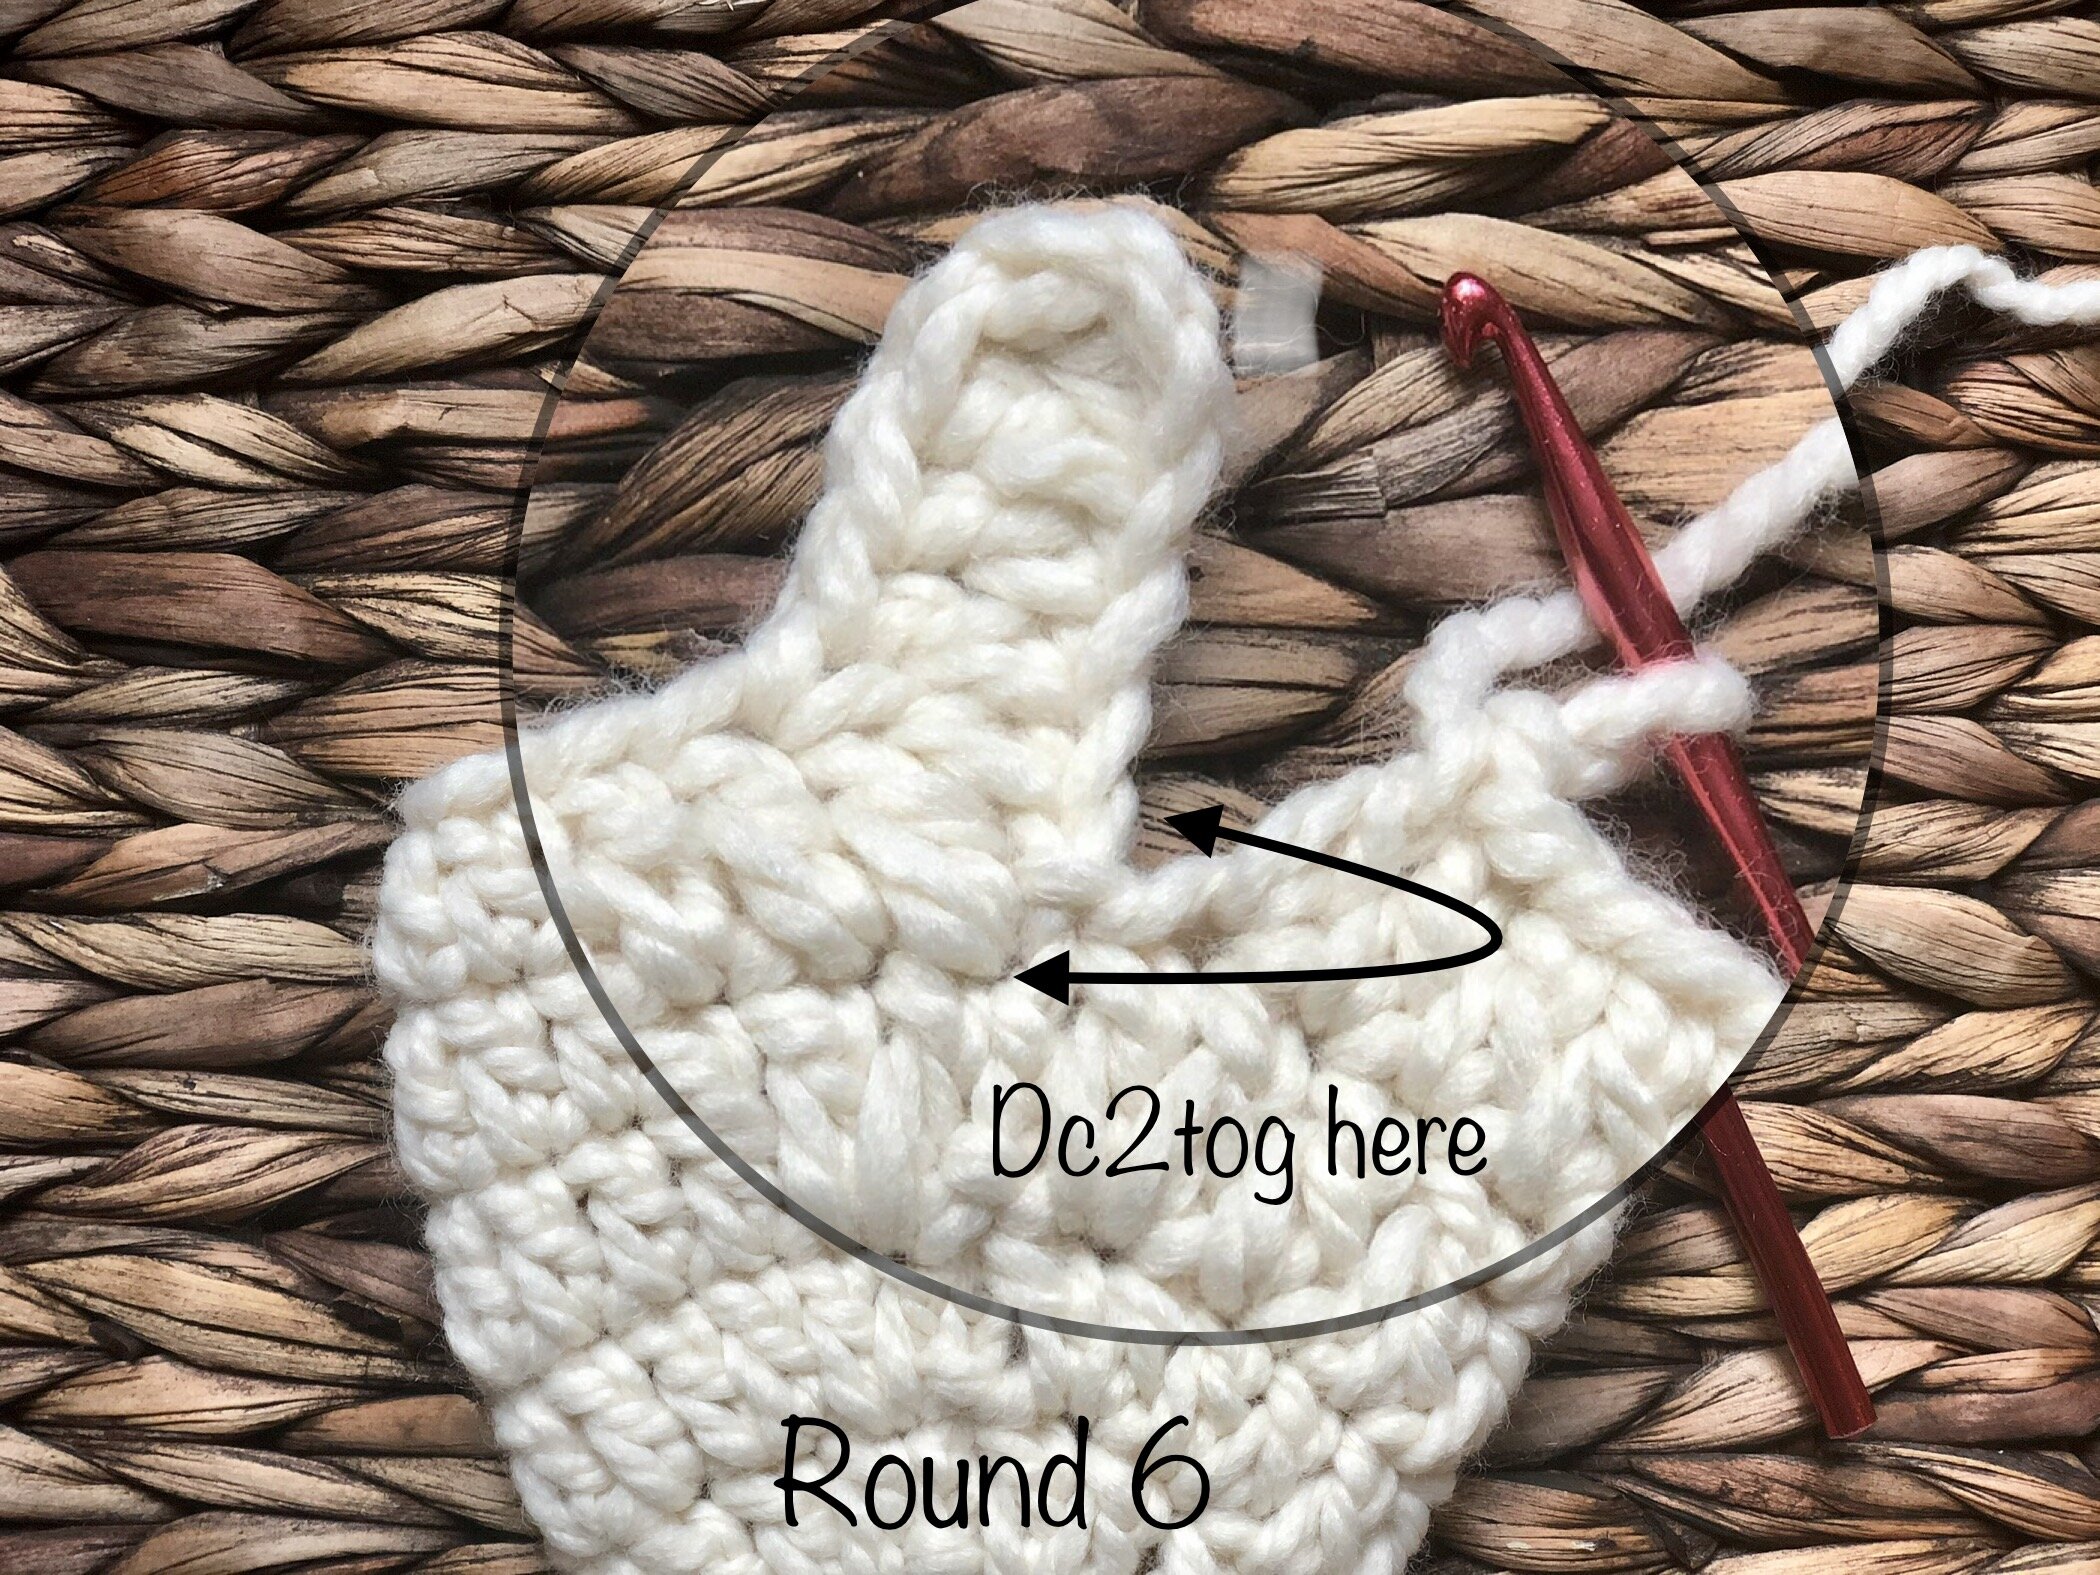
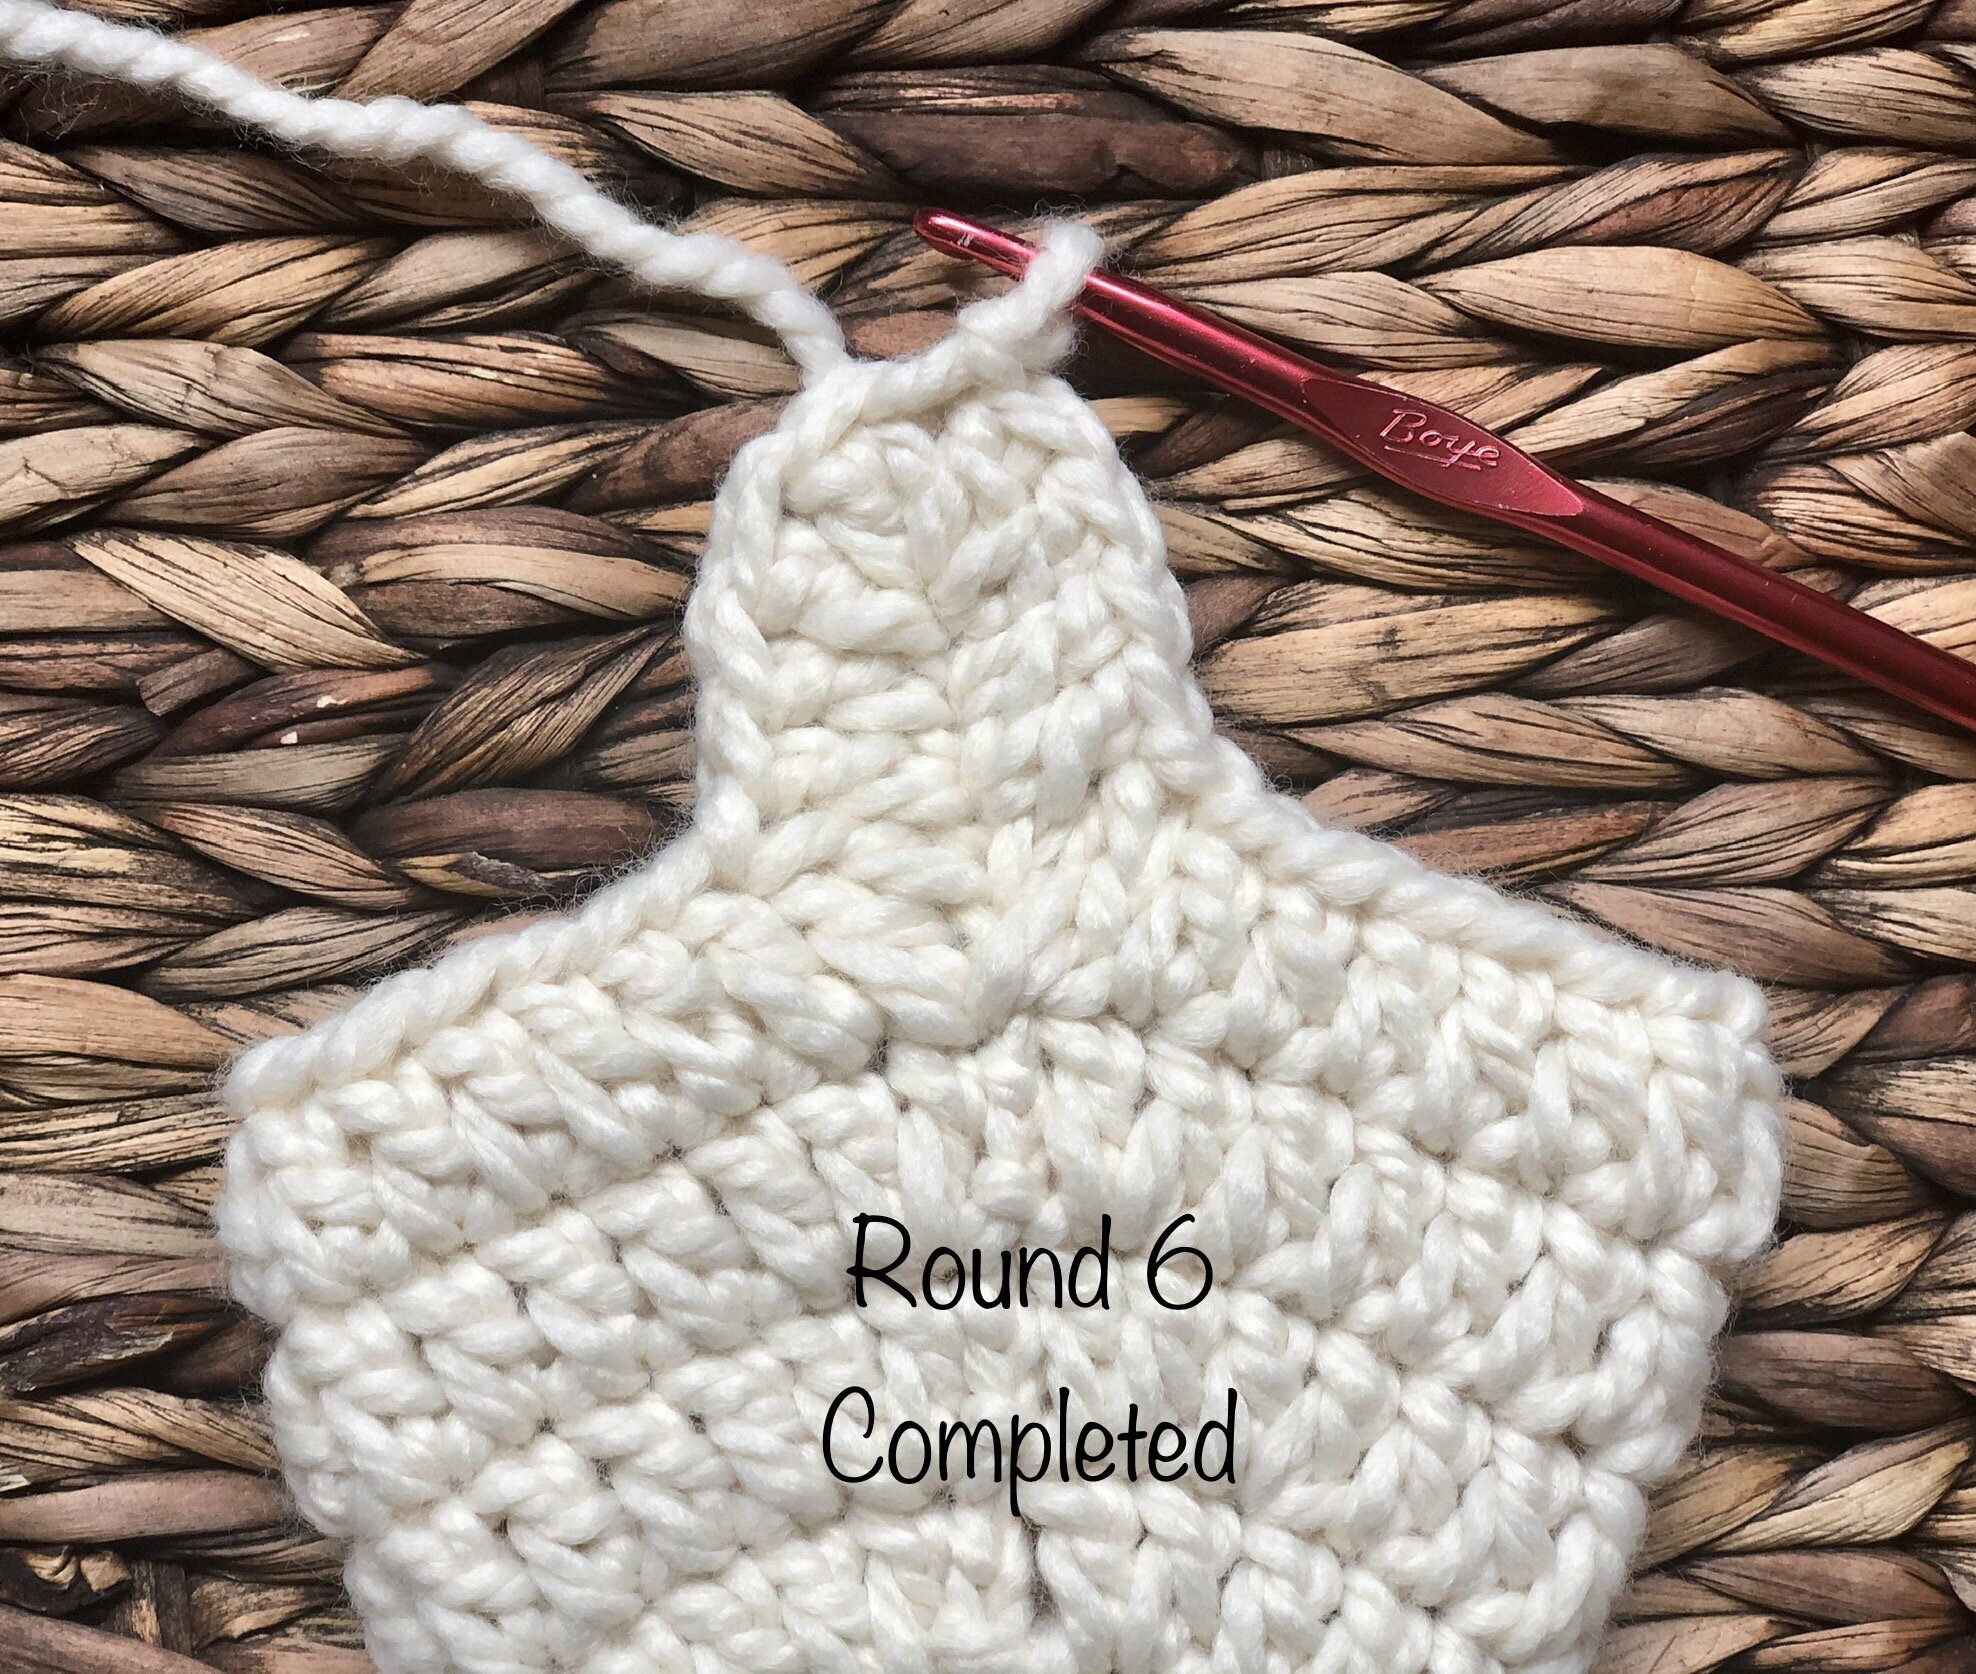
Round 6: Ch 6, 2 dc in 3rd ch from hook, dc in next 2 sts, dc2tog over last st of ch and first st of previous round, dc in next 28 sts. Working your way back up the beg ch, dc2tog over same 2 sts again (see 3rd photo below), dc in next 2 sts, 2 dc in last st of ch. Join with a sl st in top of first dc. [38 dc]
Round 7: Ch 2, 2 dc in first st, dc in next 3 sts, dc2tog over next 2 sts, dc in next 26 sts, dc2tog over next 2 sts, dc in next 3 sts, 2 dc in last st. Join with a sl st in top of first dc. [38 dc]
Round 8: Ch 2, dc in first 5 sts, dc2tog over next 2 sts, dc in next 24 sts, dc2tog over next 2 sts, dc in last 5 sts. Join with a sl st in top of first dc. [36 dc]
Round 9: Ch 2, dc2tog over first 2 sts, dc in next 3 sts, dc2tog over next 2 sts, dc in next 22 sts, dc2tog over next 2 sts, dc in next 3 sts, dc2tog over last 2 sts. Join with a sl st in top of first dc. [32 dc]

Round 10: Ch 2, dc2tog over first 2 sts, dc in next 2 sts, dc2tog over next 2 sts, dc in next 20 sts, dc2tog over next 2 sts, dc in next 2 sts, dc2tog over last 2 sts. Join with a sl st in top of first dc. [28 dc]
Round 11: Ch 2, dc in first 14 sts, (2 dc) in next 2 sts, dc in last 12 sts. Join with a sl st in top of first dc. [30 dc]
Rounds 12-22: Ch 2, dc in each st around. Join with a sl st in top of first dc. [30 dc] NOTE: If you want a ribbed cuff on your stocking, stop at round 20.
For ribbed cuff
Rounds 21-22: Ch 2, bpdc in first st, fpdc in next st, *bpdc in next st, fpdc in next st; rep from * around. Join with a sl st in top of first bpdc. [30 dc]
Round 23: Sc in first 6 sts, ch 12, sl st into first ch made to create a loop, sc in next 24 sts. Join with an invisible join to first sc. FO and weave in tails. [30 sc, ch-12 loop] NOTE: If you chose to do a ribbed cuff, you may need to make your ch-12 loop sooner. I did 3 sc and then my ch-12 loop on my ribbed cuff version. Regardless of which one you do, the object is to get the hanging loop on the corner of your stocking.
Embellishing your stocking
I personally like to add 2 beaded tassels to my stocking, but you could realistically embellish your stocking in any way you see fit. If you are familiar with character hats, you could apply your knowledge of appliqué pieces to create a character stocking. If you like the Farmhouse style, you could leave it simple and add a simple ornament or a wooden letter to the side along with a simple tassel or two. If you like bright and fun, you could easily add pom-pom trim, pom-poms, bright tassels, bright buttons—you name it! You could add felt pieces, vinyl pieces, fabric trimmings, novelty yarns—the only limit is your imagination! I cannot wait to see what you come up with!
Think outside the box! You could also make a mini one for a gift card holder that could also double as an ornament! I made this one using Curio crochet thread from Knitpicks and a size E 3.5mm hook. I stopped at round 15 and then added 2 rounds of ribbing and the finishing round like above. It’s the perfect size for money/gift cards, or even mini Bath & Body Works in it! It would be great for embellishing your Christmas wrapping, or putting little candies in to give out to your kid’s classmates!

Your Merry Jane Christmas Stocking is complete! I would love to see your finished work! If you want to tag me on IG, I’m @dayscrochetnc. You could also use the tags #Merryjanestocking, #Merryjanechristmasstocking, #crochetchristmastocking - you get the idea! I can’t wait to see your projects! If you would like to see other versions that I will be making after this publication, be sure to check me out on IG!

Please note that you do not have my permission to sell, share, copy, or duplicate this pattern or my photos in any way. Please do not use this pattern for a video, blog, or class tutorial. Thank you so much for following these simple rules! Please message me on Facebook or send me an email at dayscrochetnc@gmail.com with any questions.
Come join my Facebook group, Crochet for Days! We have a lot of fun and I often offer discounts and coupon codes to my members that I don’t offer anywhere else! Request to join and answer the questions by following this link.
What did you think of this project? Let me know in the comments!
Happy Hooking!
~Dana