
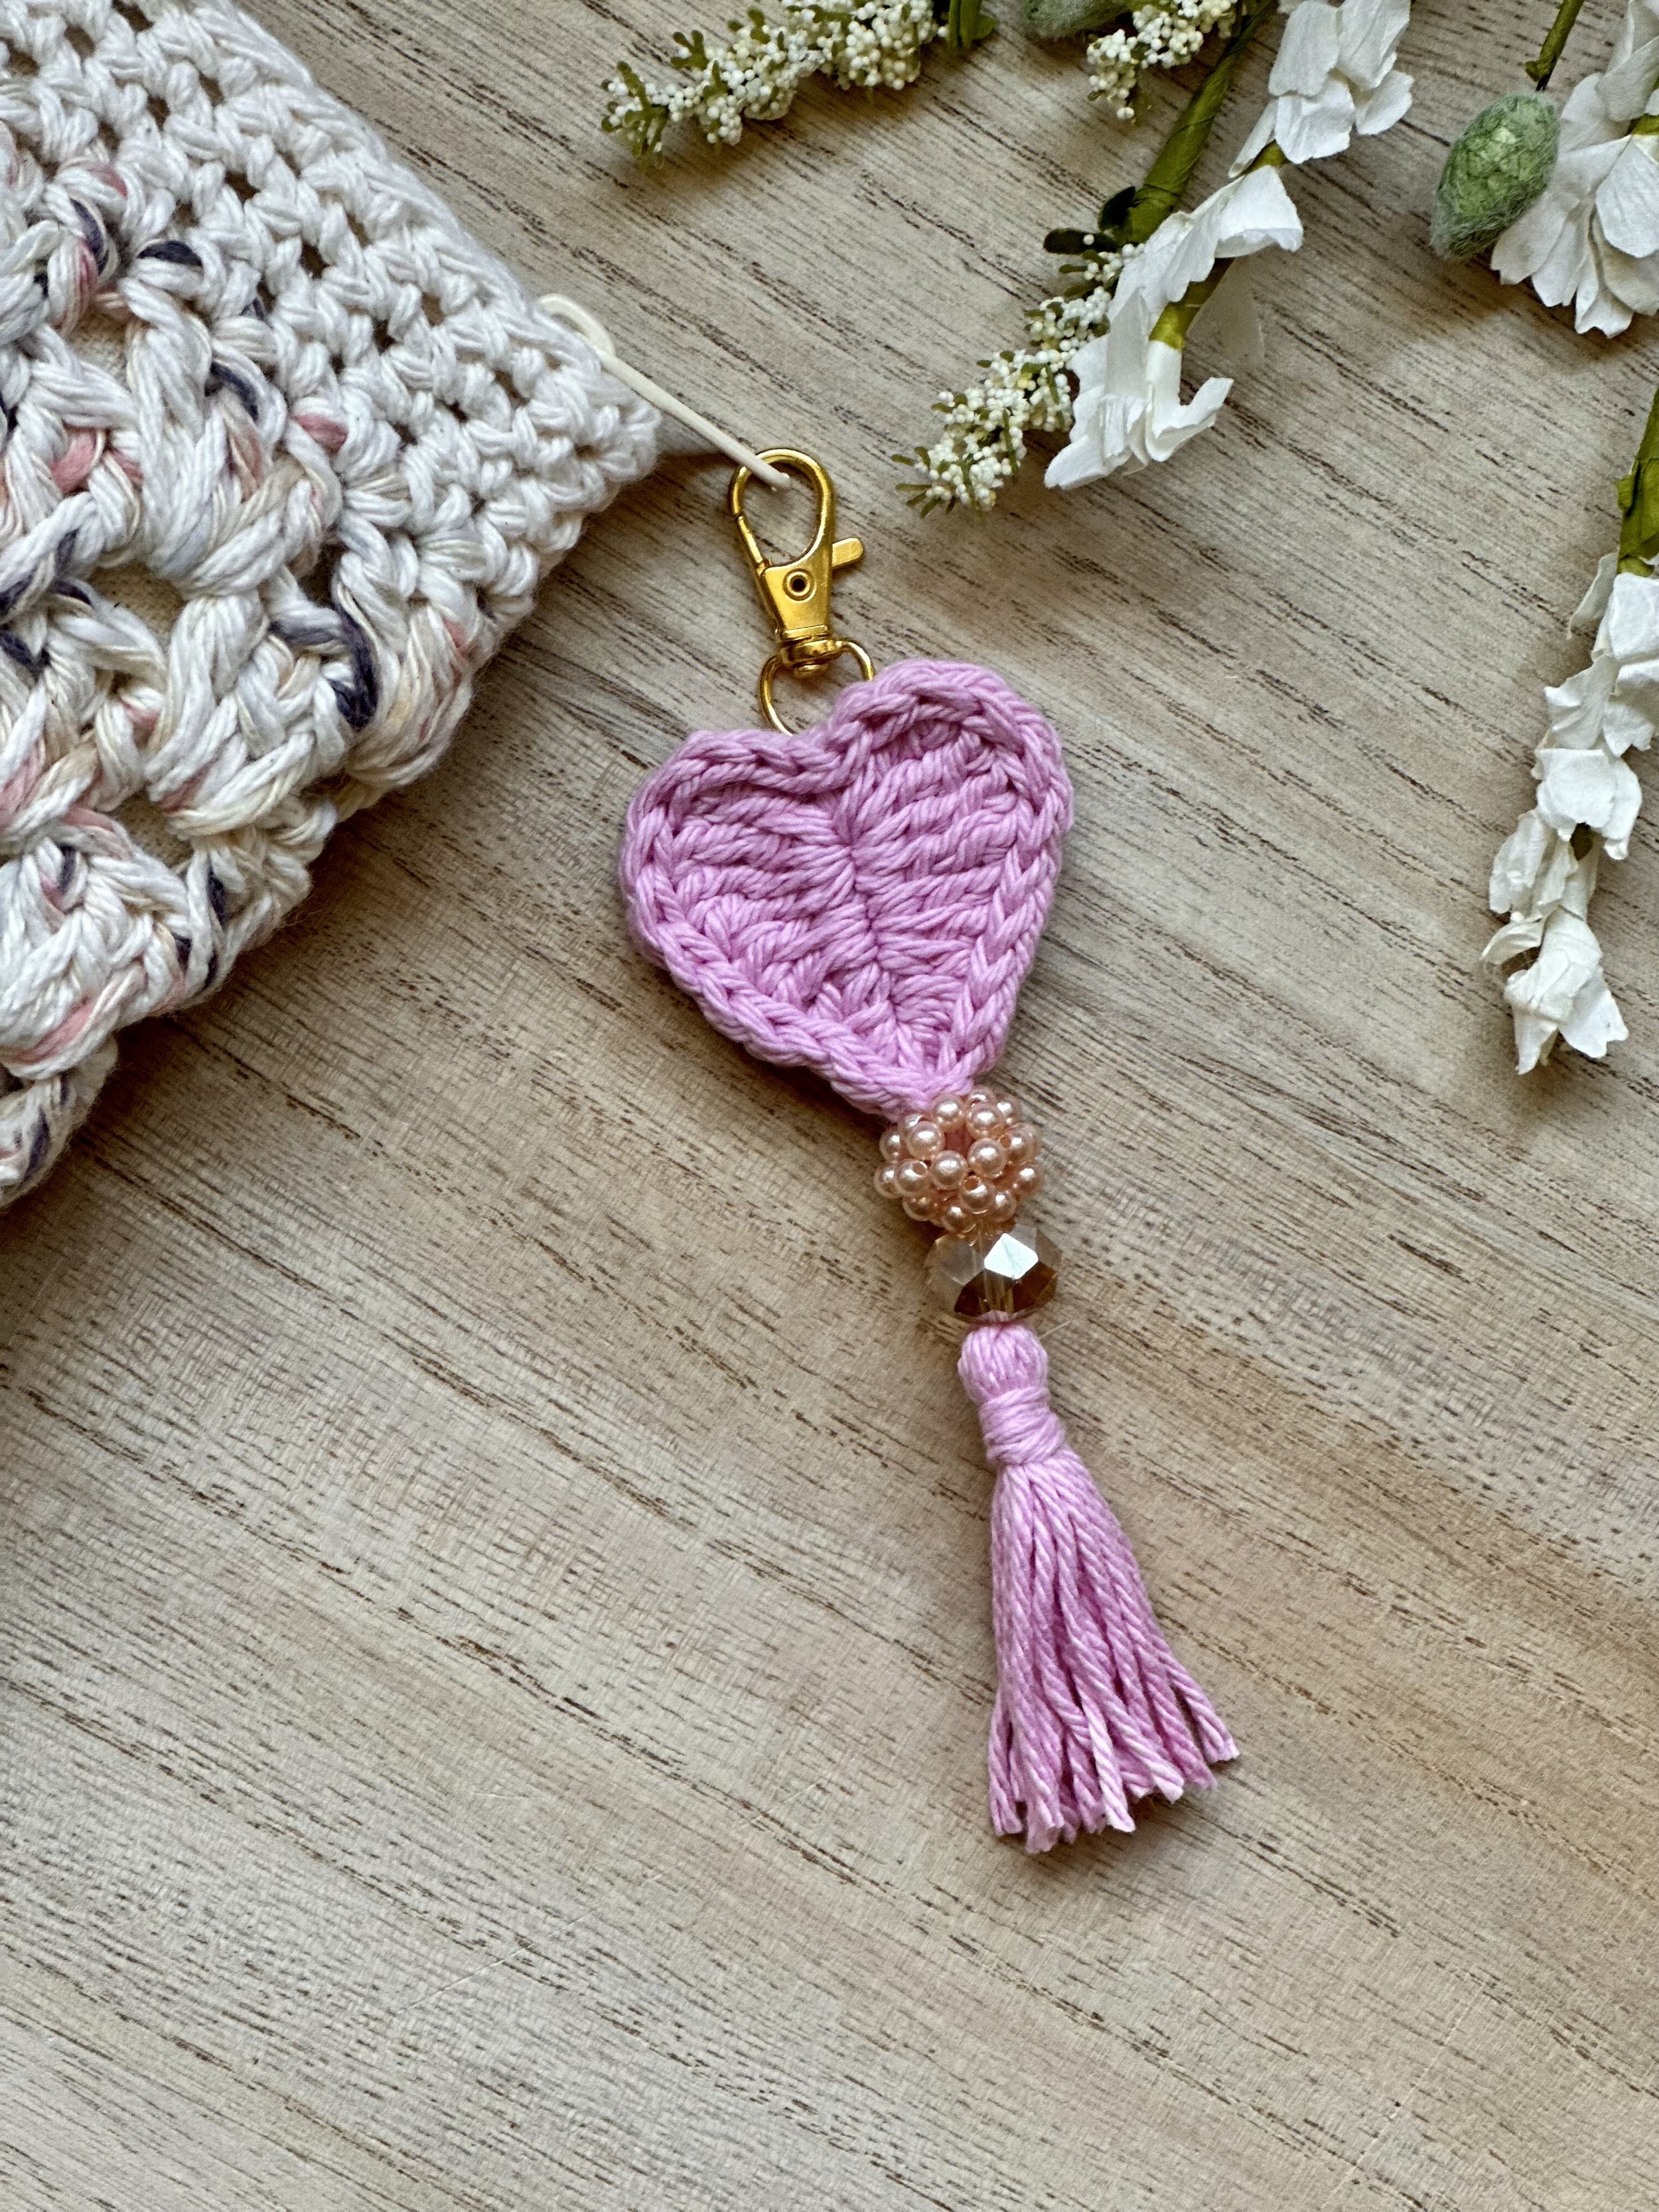
Crochet Heart Keychain

PIN it here!
This adorable heart keychain is super fun and quick to make!
It’s only 1 week away from Valentine’s Day, and I wanted to give you one more amazingly quick project that you can work on for gifting purposes, or just for yourself!
This post may contain affiliate links that help me to continue to post free content. To skip the ads and have a printable pdf of this pattern, you can find it for relatively little cost in both my Etsy and Ravelry shops.
This project is made using 2 heart appliques, lightly stuffed. I wanted to mention that these appliques can be used for SO many things, not just a keychain! You could put them on a wristlet, a hat, ear warmers, fingerless gloves, turn them into earrings (with crochet thread, of course!), put them on a cup cozy–the sky’s the limit, really!

I have actually put one on a cup cozy for one of my coffee-loving friends and added this adorable gift tag. I crocheted a chain of about 105 and tied a bow around the top and I am in love with how cute it turned out!

I designed 2 gift tags to go with a coffee cozy if you wanted to print them off and put them on your cup cozy. You can download them here. I also have several free crochet cup cozy patterns that you can make if you’d like. I have the Carina Cup Cozy and the Kendall Cup Cozy if you’d like to check them out (the one pictured above is one I haven’t written up yet).
I also made some generic gift tags to add to your crochet projects if you don’t want it to say anything about love, etc. I think these little penguins are TOO stinkin’ CUTE!

I of course also made some gift tags to specifically go with the heart keychain. Adding a gift tag and nice packaging is a great way to add value to your items if you plan to sell them. I definitely recommend adding these smaller items to your inventory if you have a Valentine’s Day market of any kind.

If you decide to only make the hearts as appliques, I do recommend that you add a round of slip stitches through the back loops in a different color after completing the last round of the heart. This will make the applique “pop” and give it a bit of pizazz.
That is actually what I did on the one I sewed to the cup cozy. I also left a longer tail to sew the applique on the cup cozy since I knew it wouldn’t show up as much on the underside. And of course you could always hot glue the appliques to your items, although I didn’t think that would be wise on something that was going to be used with a hot beverage.
I wanted to show you how cute this keychain looks on a bag. I tried it several different ways on my Mesh Market Bag, and I think they all look so cute! I think my favorite is the combination of one beaded tassel and one without. What’s your favorite?

I think this one is a close second!

I also really like it in the center!

I think having one with a beaded tassel and one without adds a bit of visual interest.
I also think it would be really cute to simply sew the 2 heart appliques with the wrong sides together without stuffing them, and add a beaded tassel to the bottom with a lobster clasp attached to the top. That way you can add it to a wristlet. (If you make the full-sized keychain, I think it’s a bit too big and bulky for a wristlet.)

I made this wristlet embellishment by simply completing Round 1 and then doing a round of slip stitches, skipping Round 2 altogether. I also joined the 2 hearts through the inner loops with slip stitches instead of single crochet, crocheting through the lobster clasp when I got to the very top. I very lightly stuffed it as well. I think it’s the perfect size for a wristlet!
You could even simply make the appliques with just the first round completed and then add some jewelry making beads to the bottom for a zipper pull or wristlet embellishment. If you choose to use a single heart applique, you will definitely want to add a round of slip stitches to make it more sturdy.
I made this zipper pull using just one heart applique. I completed the first round as usual, skipped Round 2 and did a round of slip stitches. I had to use monofilament illusion cord to attach the beaded tassel because the beads are jewelry making beads. I also crocheted through the lobster clasp in the very center slip stitch on the last round to attach it.
You could also add a long chain at the base of the heart and add a smaller beaded tassel to the end and turn it into a bookmark. Like HOW CUTE would that be?! You could still use the same gift tags I designed specifically for this project and gift it to your besties that love to read.

I made this bookmark by adding a chain at the end of the joining round. I decided to use slip stitches through the inner loops to join rather than sc because it seemed a bit too bulky for a bookmark. I also barely stuffed the hearts.
If you make amigurumi, you could also add the heart applique to your plushies as an embellishment. It would be so cute, especially if you got those little electronic push-buttons that make the heartbeat sound. Kids would love to think their little plushie has a heartbeat!
You could also realistically make this applique using a much thicker yarn and a larger hook and add the beaded tassel for a boho wall hanging. Or go ahead and make the heart with stuffing and use it for a small pillow! I literally could go on and on with ideas for how to use these heart appliques, but I will stop now.

I made this wall hanging using a 10.0 mm hook and Lion Brand’s Woolease Thick & Quick. I only used a single layered applique, but you could always use a doubled up one or add a layer of felt to the back to make it hold its shape a bit better.

The red style is included in the paid version of the written pattern.
Let’s make it!

PIN it for later!
Supplies Needed
Any size 4 worsted weight yarn, approx. 20-25 yards of main heart color, and approx. 10-15 yards in accent color.
3.75 mm hook
Scissors, yarn needle, tape measure
Small piece of cardboard 4 inches wide (optional; for making tassel)
2 15 mm wooden beads (optional; see pattern notes)
Small amount of polyfil stuffing
Terms Used & Abbreviations
Pattern is written in US terminology.
Back Loop Only - BLO
Chain(s) - ch(s)
Double Crochet - dc
Half Double Crochet - hdc
Place Marker - PM
Repeat - rep
Right Side - RS
Single Crochet -sc
Slip stitch - sl st
Space(es) - sp(s)
Stitch(es) - st(s)
Stitch Marker - SM
Treble Crochet - Tr
Wrong Side - WS
* - Repeat directions given from *
[ ] - Indicates the number of stitches you should have
( ) - Indicates a note
{ } - Work stitches within { } in the same stitch or space
Special Terminology
Invisible Join - Complete your last st of the round as usual. Leaving a longer tail, cut your working yarn. Pull that tail all the way through your last st (without doing the usual ch 1). Thread tail onto a yarn needle. Going under both loops of the indicated st, take the yarn needle from front to back. Insert your needle from top to bottom of the BLO of your last st of the round. Weave in this tail extremely well to secure. To visualize this process, see my video that accompanies this project.
Pattern Notes
If you wish to use beads with a smaller central hole (like beads for jewelry making, etc.), you will want to invest in some monofilament illusion cord (similar to fishing wire) and use it in place of the yarn in the first step of making your beaded tassel.
You will notice that I vary from the "norms" a bit in this project. For example, I have you ch 1 at the beginning of Round 2, but then have you sk that stitch. That is because your sl st at the end will serve as the "top" of the ch 1 to make it look like a sc. Doing this, along with Invisible Joins, will help your piece look absolutely seamless.
Gauge
Exact gauge is not imperative for this pattern. In fact, you can use a thicker yarn and larger hook and make larger heart appliques if desired.
Finished Measurements
Finished project measures approx. 2.75 inches wide and 6.5 inches long, not including the hanging loop, when made with suggested hook and yarn.
There is a full video tutorial for this project to help with the most difficult portions of the pattern. You can watch it here:
Instructions
Project is worked in the round, joining 2 motifs and lightly stuffing them, adding the beaded tassel and hanging loop last.
Heart Motif (Make 2)
Round 1: With main heart color ch 4, working in both the back loop and the “back hump” of the ch sts make 2 sc in 2nd ch from hook, {hdc, 2 dc} in next ch, {4 Tr, ch 2, sl st} in last ch. Continue working down the opposite side of the ch in the remaining loops, {ch 2, 4Tr} in same st, {2 dc, hdc} in next st, 2 sc in last st, ch 1, sl st in first sc made to join. [18 sts, 2 ch-2, 1 ch-1 sp]


Round 2: Ch 1 (counts as a st), sk same st as joining, sc in next 4 sts, {2 sc} in each of the next 4 sts, sc in next 2 ch sts, sl st in sl st, sc in next 2 ch sts, {2 sc} in each of the next 4 sts, sc in next 5 sts, {sc, ch 2, sc} in ch-1 sp. Join with a sl st in first sc, PM in sl st just made. [32 sc, 1 ch-2 sp]
Round 3: Continue making sl sts in each st around until you reach the SM, sk marked st and join with an Invisible Join in the next st. Remove SM and gently pull tail until it resembles the surrounding sts. Knot off in back.

This is what your motifs should look like prior to the joining rounds.
Join Your Motifs
Change colors. Place motifs so WS are together. Going through the inner loops of the sl sts of both motifs throughout, join with a sl st at the bottom point of both motifs. Ch 1, sk same st as joining, sc until you reach the top middle 3 sts, sl st in next st, ch 30, sl st in first ch made to form a hanging loop, sk very center st, sl st into next st, continue making sc to end. When you have about a half inch left, lightly stuff the motifs and finish the round. Join with an Invisible Join in first sc. Knot off and weave tails inside heart to hide.

Make sure you are joining through the slip stitches you made on the last round.
Make Your Beaded Tassel
To visualize this process, see my video here.
Step 1: Cut a length of yarn approx. 8 inches long (see pattern notes if using beads with smaller central holes). Fold in half and use the Larks Knot to attach to the bottom point of the heart. Thread both ends onto a yarn needle and slide wooden beads up until they are flush against the heart point. Set aside.
Step 2: Using your fingers or a piece of cardboard approx. 4 inches wide, wrap yarn 15 times. Cut bottoms to create tassel tails.
Step 3: Open remaining tails under beads and set tassel tails in the center, flush against the bottom bead. Tie remaining tails around tassel tails several times in a knot.
Step 4: Cut another length of yarn approx. 6 inches long and use the Gathering Knot to secure tassel tails in place. Cut bottom of tassel evenly. Treat ends with Fray Check if desired.
Attach the project to your bag or a key ring by taking the hanging loop through the ring (or around the purse strap, etc), and then take the heart and beaded tassel through the hanging loop to secure it in place. I show this in detail near the beginning of my video linked above.

Your project is complete! I would love to see your finished work! If you want to tag me on IG, I’m @dayscrochetnc. You could also use the hashtag #keytomyheartkeychain to follow what others are making. I can’t wait to see your projects! If you would like to see other versions that I will be making after this publication, be sure to check me out on IG!
Come join my Facebook group, Crochet for Days! We have a lot of fun and I often offer discounts and coupon codes to my members that I don’t offer anywhere else! Request to join and answer the questions by following this link.

Please note that you do not have my permission to sell, illegally share, copy, or duplicate this pattern or use my photos in any way. Please do not use this pattern for a video, blog, or class tutorial. Thank you so much for following these simple rules!
What did you think of this project? Let me know in the comments!
Happy Hooking!
~Dana