
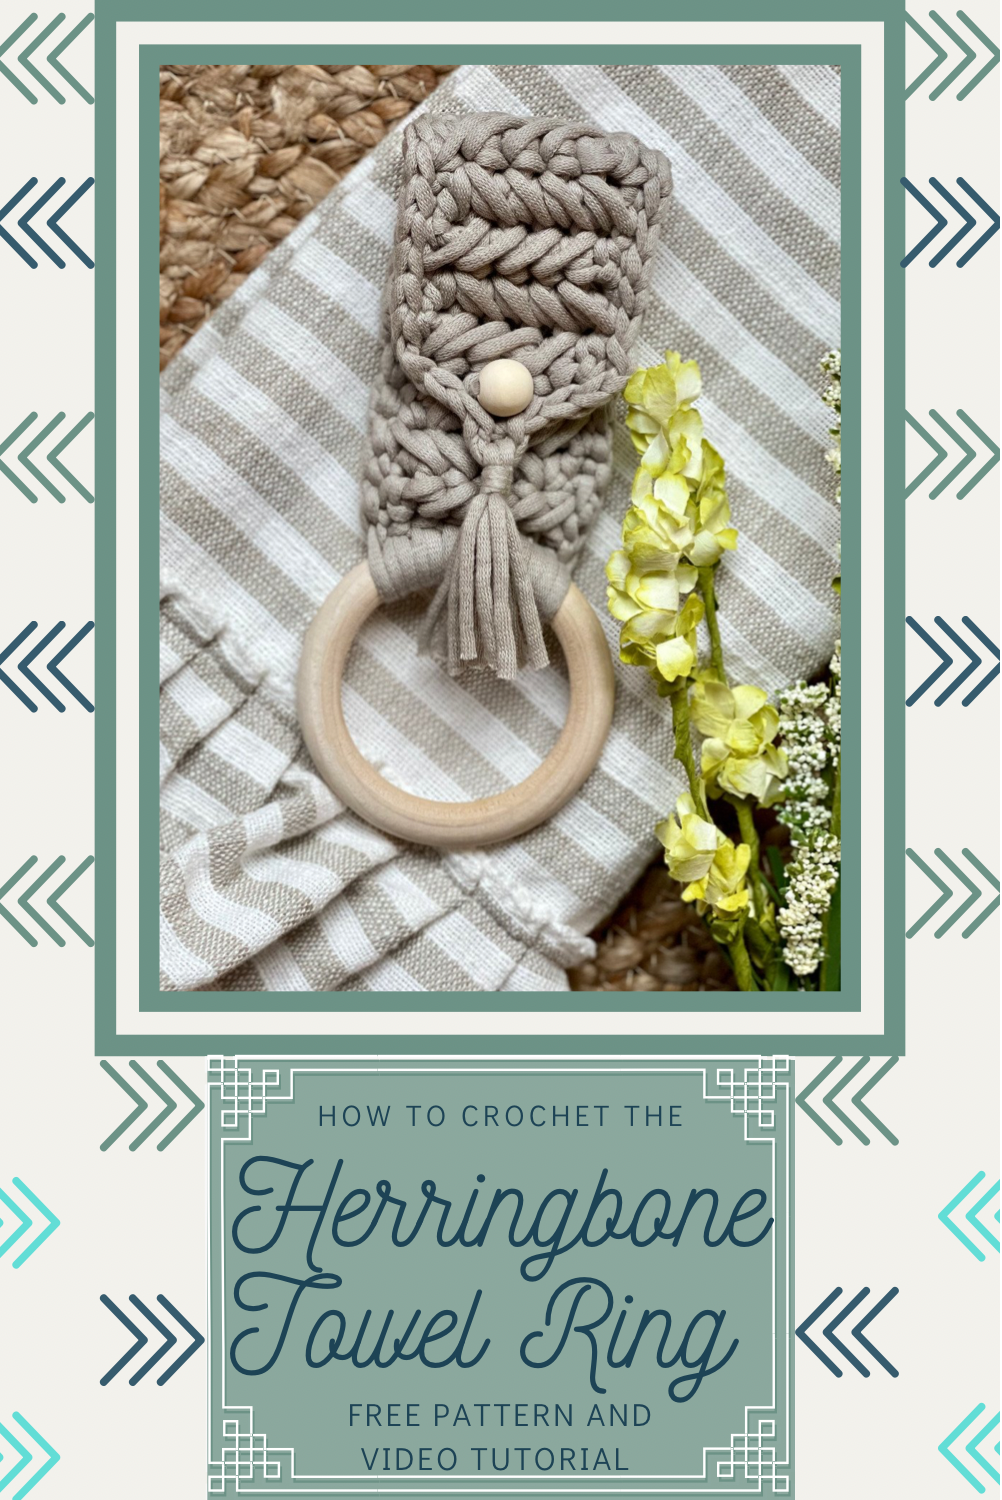
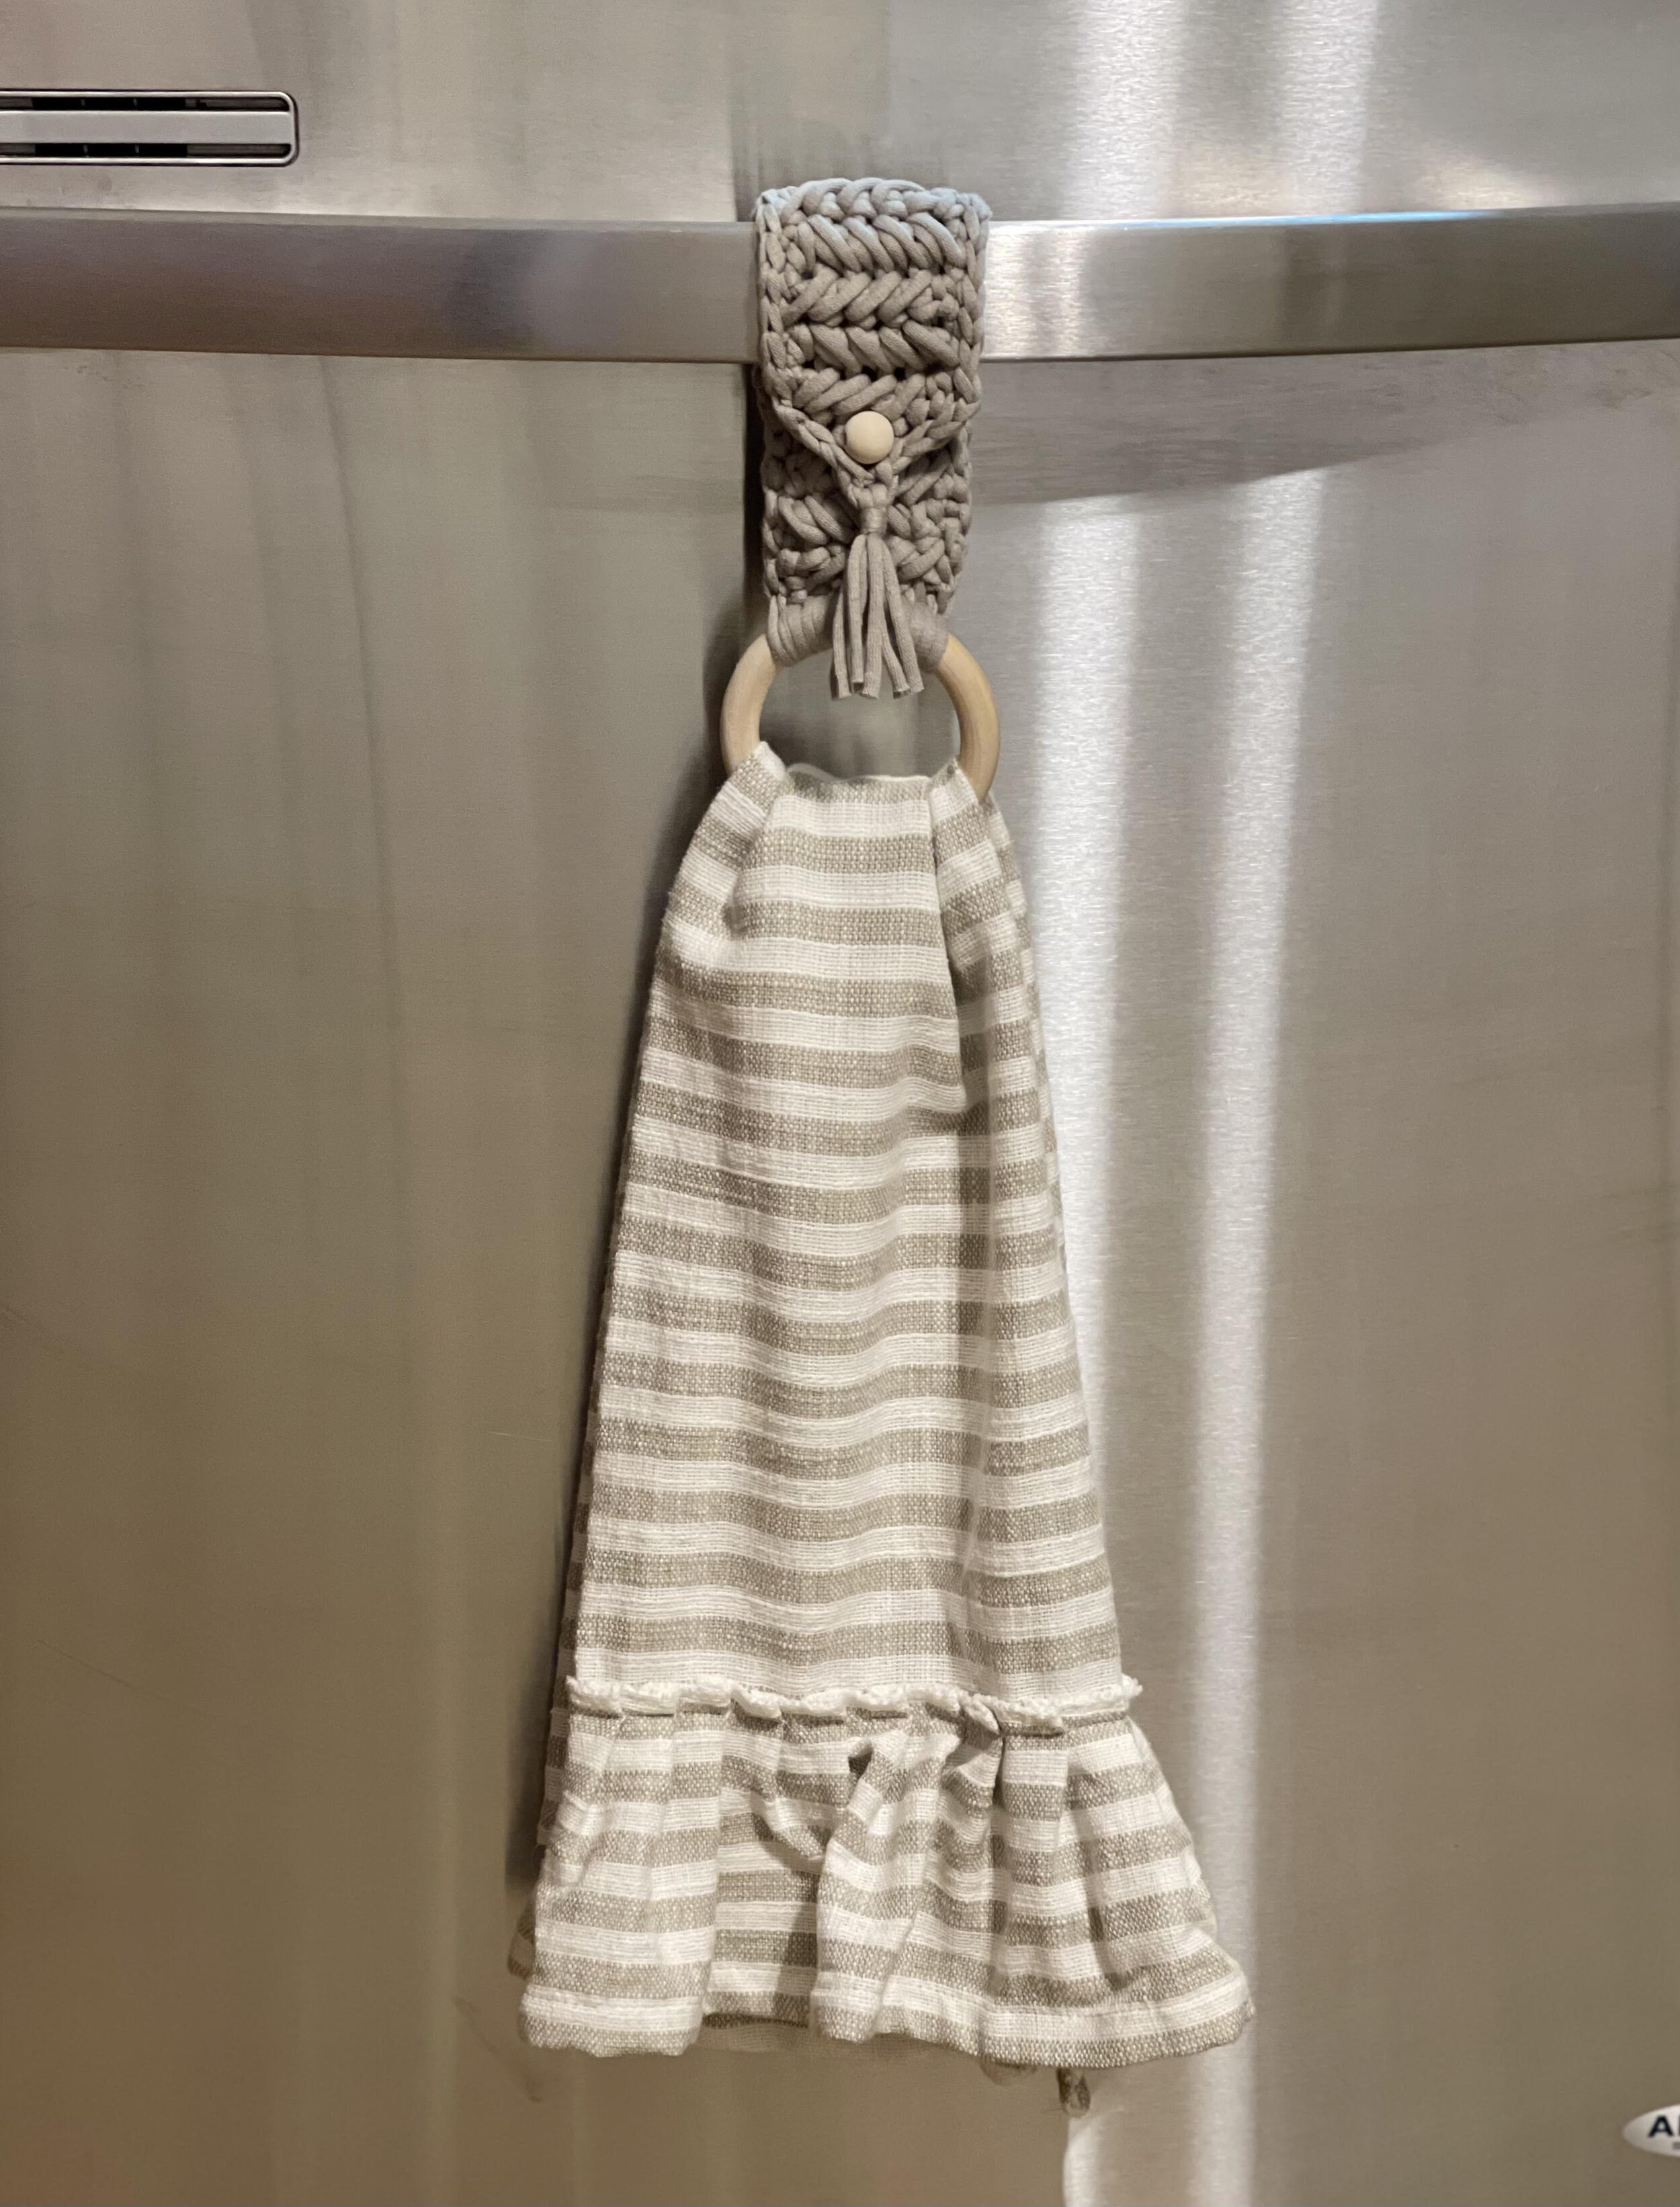
Crochet Modern Towel Ring
Pin it here!
My latest obsession is the half double herringbone stitch and using it for bags and home décor. I really love how this beautiful stitch is so modern and yet so easy to create!
This towel ring is no exception. It is so easy and quick to make and would make a great house warming gift or vendor market seller.
This post contains affiliate links that help me to continue to post free content. To skip the ads and have a printable pdf of this pattern, you can get it for relatively little cost in my Etsy and Ravelry shops.
This idea actually was given to me by one of my wonderful testers (thank you, April!). She made some using the stitch pattern and gave me the green light to make some, adding my own flair. (If it doesn’t have a wooden ring or bead and a tassel somewhere in it, is it even my pattern? LOL!) I absolutely love it so much!
I love how modern and sleek these towel rings look, while still keeping their functionality. Don’t get me wrong, I love the old school towel toppers, but I do not think they compare in style to these boho towel rings. With everyone updating their homes these days, I think you will find most of your customers will agree.
These little towel rings take relatively little in supplies and are extremely quick to make. That means they would make a wonderful vendor market item in my book! If you sell your creations, the price you can put on them will vary depending on your customer base, but I would say you could easily sell these for anywhere from $5-$10. I usually put $8 each or 2 for $15, but that’s what customers are willing to pay in my area.
If you are interested in adding some variety in your booth, I also have another towel ring pattern you can find here. I have put both towel ring patterns in a bundle so you can have both at a lower price if you so choose. You can find the bundle in my Etsy shop as a separate listing, or you can put both towel ring patterns in your cart on Ravelry to receive the automatic discount.
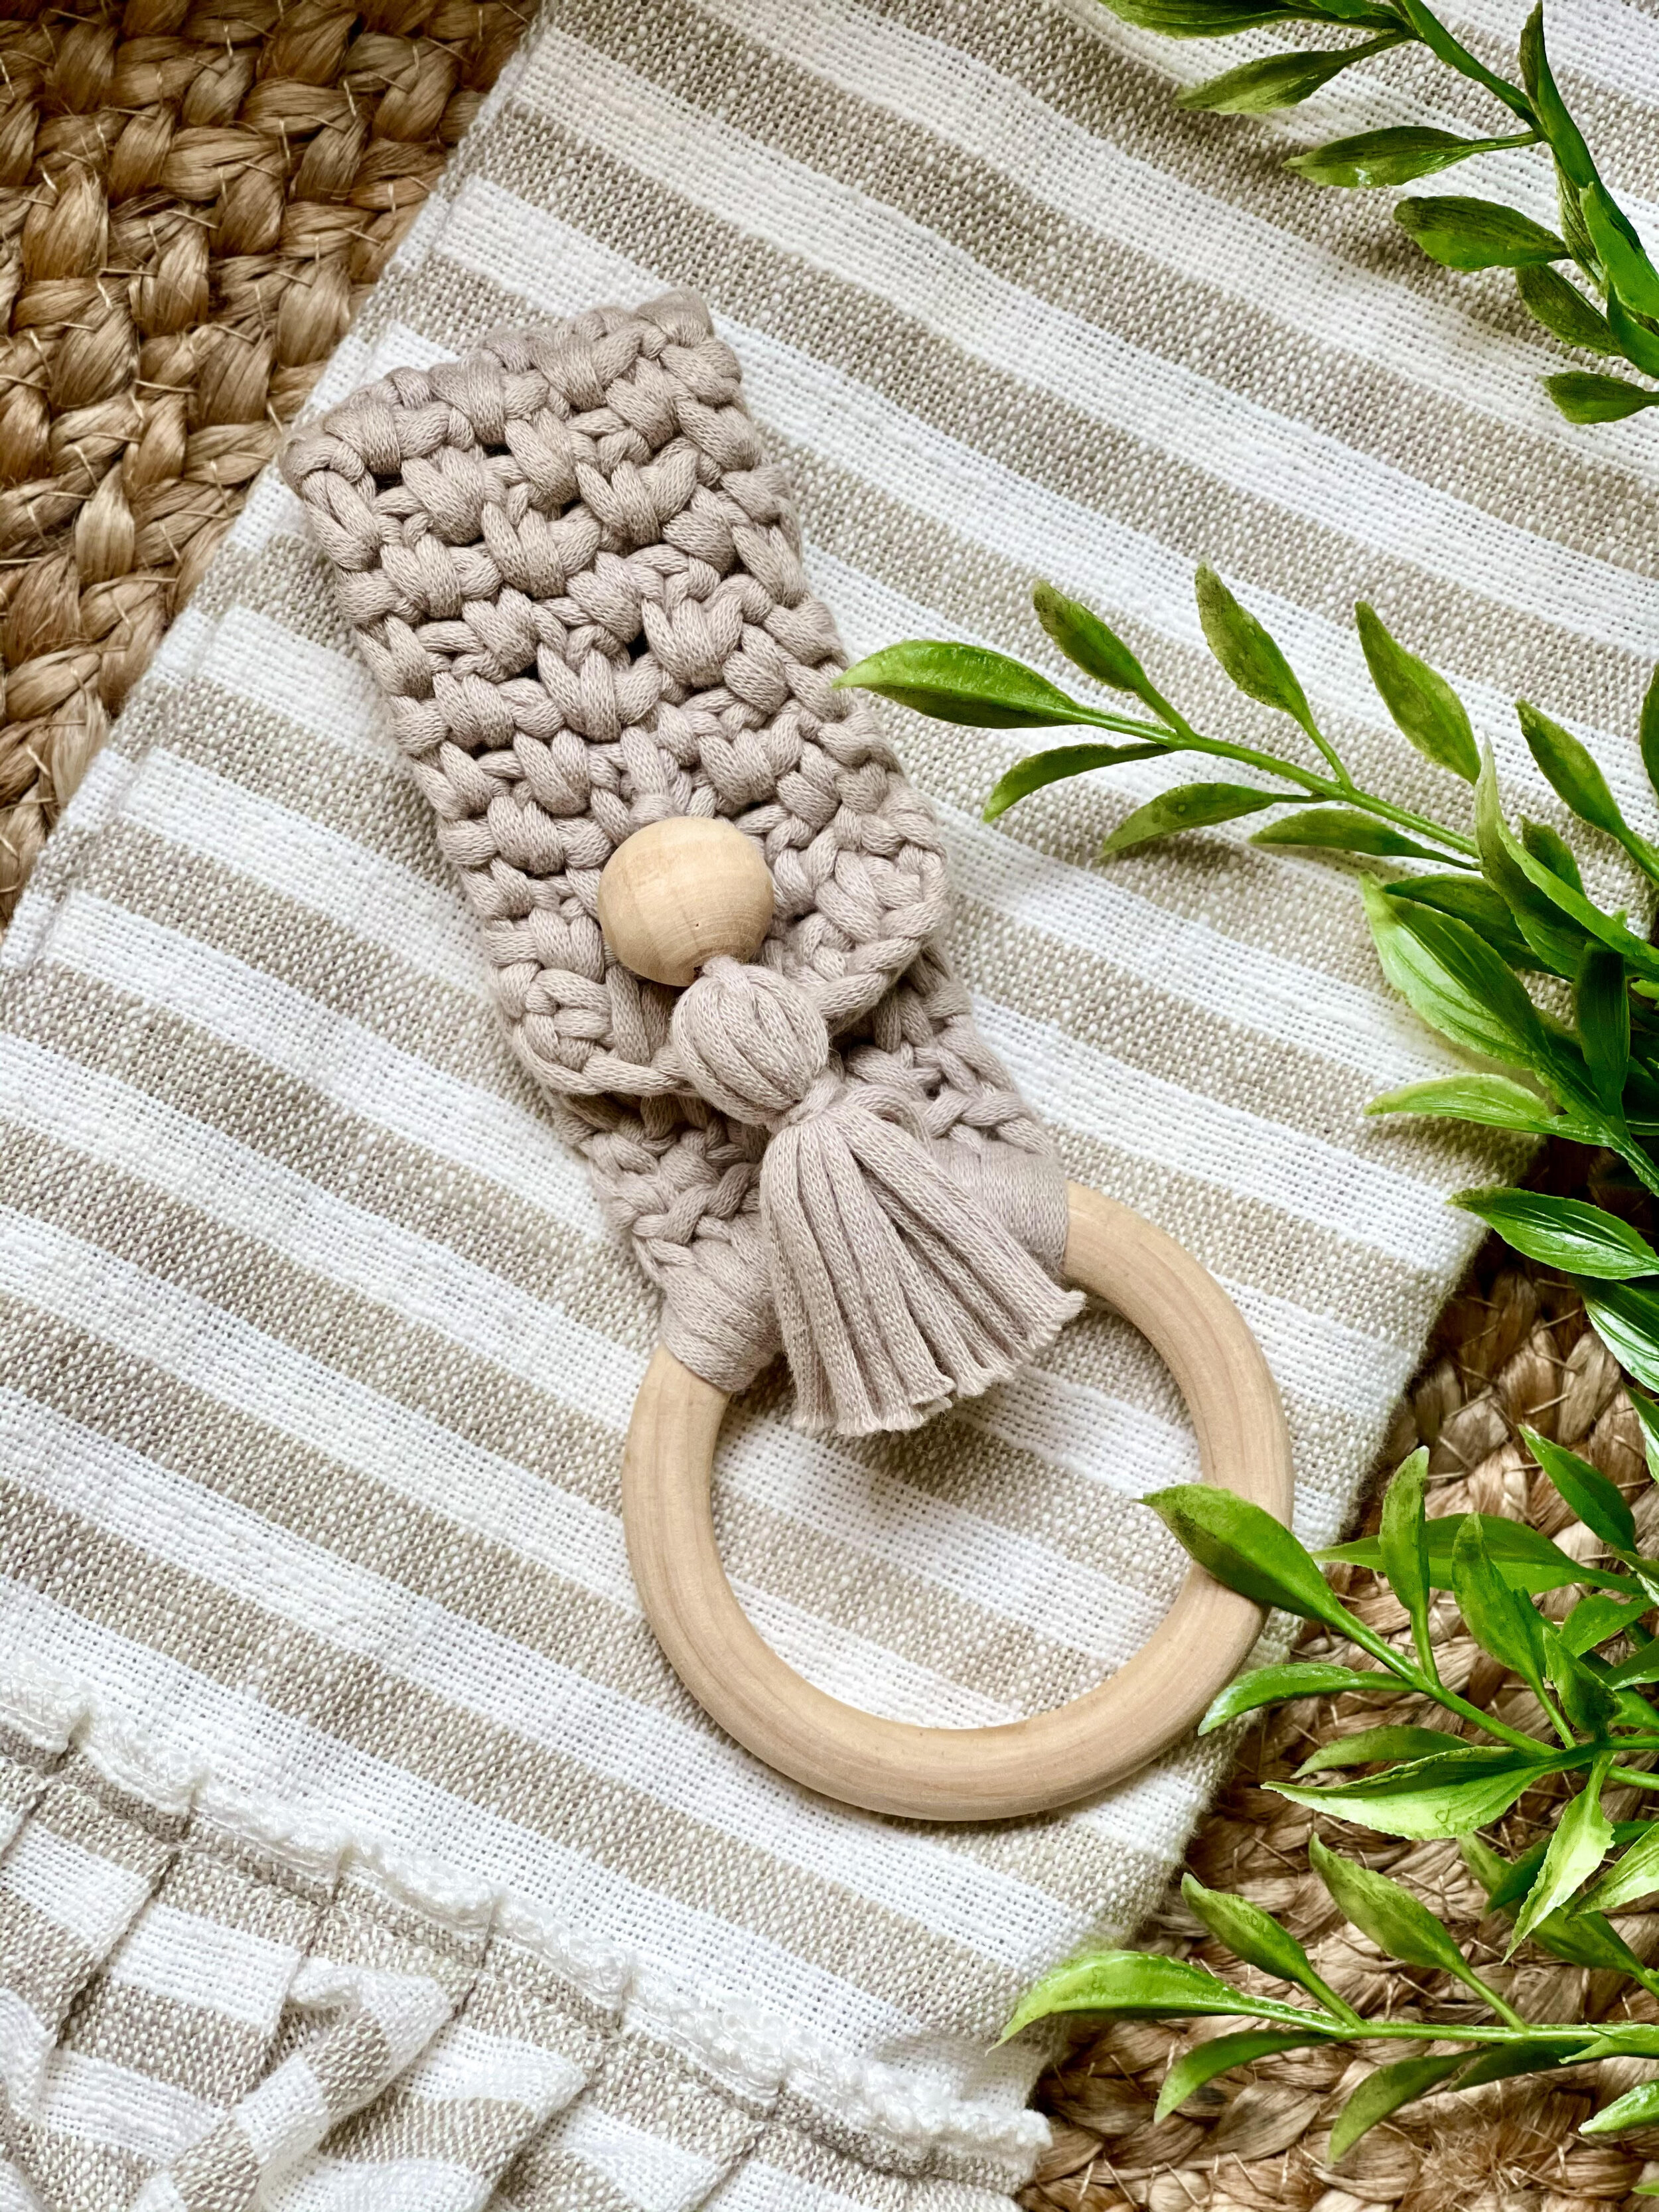
Pictured is my Boho Towel Ring

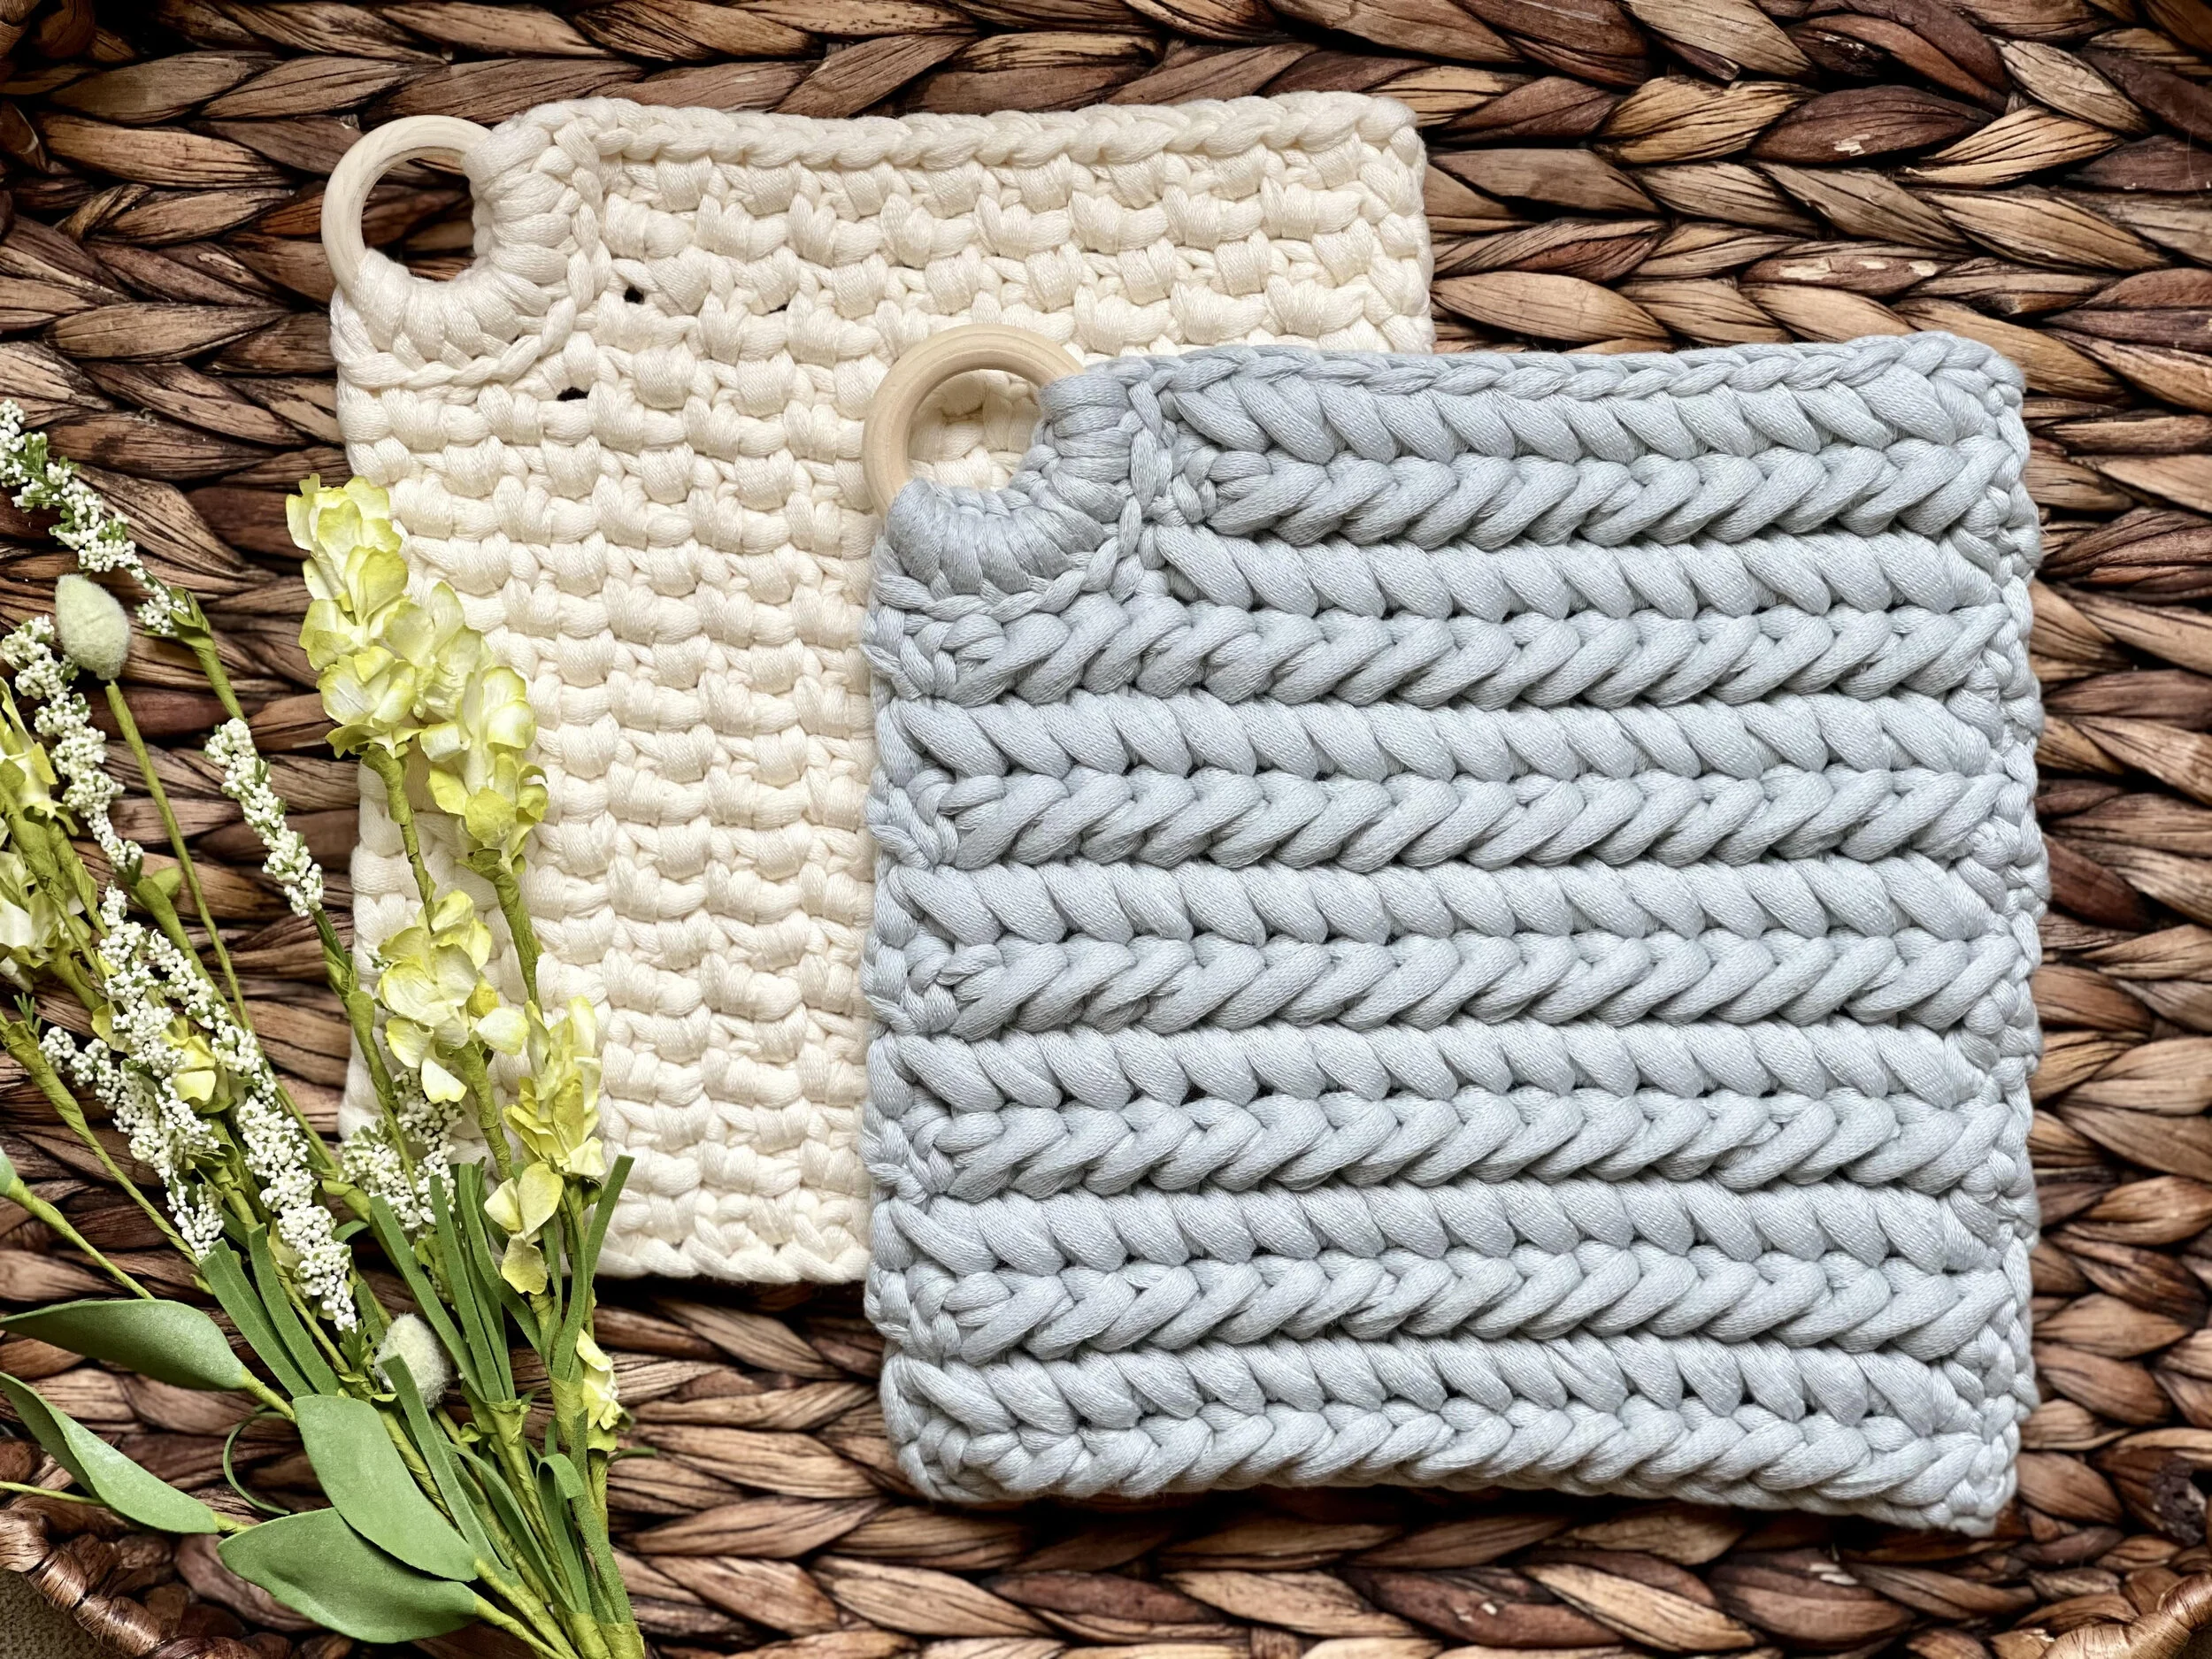
Pictured is both styles of towel rings that are included in the towel ring bundle in my Etsy shop.
I will also mention that both towel rings have matching trivet and coaster patterns. I just released the matching trivet set for this herringbone stitch on my blog. You can find the free pattern here.
If you would like the pattern set of trivets to match the towel rings, you can find the trivet bundle in my Etsy shop, and simply add both trivet patterns in Ravelry to automatically get the discount. They make great vendor market prep items, but also housewarming gifts (and gifts in general).
Pictured is both styles of trivets included in my trivet pattern bundle in my Etsy shop. The patterns also include coaster instructions (and mug rug instructions on the herringbone styled pattern)
I love using Bernat Home Maker Dec yarn from Yarnspirations for my towel rings, but you can easily sub in another yarn (especially since it seems to always be out of stock). I generally like to sub in doubled or tripled ww cottons, or another size 5 bulky weight yarn like Lion Brand Rewind Tape. You could also double worsted weight acrylic yarn, but be advised that it will likely stretch quite a bit. You could use a cotton and acrylic blend, like Lion Brand Comfy Cotton as well.
I also recommend buying your wooden rings in bulk off of Amazon if you are planning to sell them. I personally like these. If you aren’t planning to make a larger quantity of these towel rings, your local craft stores should carry some. I have had the best luck at Hobby Lobby in their macramé aisle.
I also buy wooden beads in bulk because I literally use them in almost every single design. If you plan to make more of my designs, I recommend buying this variety pack off of Amazon. They are nice quality and are bagged by size, so you don’t have to wonder which size is which.
Ok, let’s make this thing!!
Supplies Needed:
-20-30 yards of a size 5 bulky weight yarn. I used Bernat Home Maker yarn, but you could realistically double size 4 ww yarns.
-Size H 5.0 mm hook or size needed to obtain gauge
-A wooden ring size 3” (70 mm)
-1 12 or 14 mm wooden bead or button
-Measuring tape, scissors
Terms Used and Abbreviations:
Pattern is written in US terminology.
Back Loop Only – BLO
Begin(ning) – beg
Chain – ch
Fasten Off – FO
Front Loop Only – FLO
Half Double Crochet – hdc
Repeat – rep
Single Crochet – sc
Skip – sk
Slip Stitch – sl st
Stitch(es) – st(s)
Yarn Over – YO
Special Stitches:
Half Double Herringbone - HDH
Each row of HDH begins with 2 regular hdc sts before you can begin the actual st pattern. Once you have 2 hdc, you will:
1) Count backwards 2 sts (counting the st you made last) and insert your hook, YO, pull up a loop.
2) YO, move forward to the next open st, insert your hook, YO, pull up a loop, YO, pull through all 4 loops on your hook.
You will rep steps 1-2 all the way across until you reach the last st of the row.
Gauge:
12 sts and 9 rows of HDH = 4” (10 cm)
Finished Measurements:
Crocheted portion measures approx. 7.5 x 2.25” (19 x 5.5 cm)
Instructions:
Piece is made as a solid rectangle with the button hole and wooden ring added to a finishing round at the very end. I have included a YouTube video for this project:
Row 1: Leaving a long tail of approx. 6-7” for sewing purposes later, ch 8. Working in the BLO of your ch sts, hdc in the 3rd ch from your hook, hdc in next st, beg steps 1-2 of HDH across (see special sts). [6 HDH]
Rows 2-14: Ch 2 (beg ch does not count as a st), turn, HDH across. [6 HDH]
Finishing Round: Ch 1, turn, sl st in first 3 sts, {ch 4, sl st in first ch made}, sl st in last 3 sts. Turn so that you are working down the side of rows 1-14. Place 3 sl sts for every 2 rows down the side. (NOTE: I tried doing just 1 sl st per row, but it curled up and 2 Sl sts per row were too many.) You should have 21 sl sts when finished with this side. If you need help visualizing how I place my sl sts, see my video here.
Add your wooden ring
Now you will add your wooden ring before continuing onto the other side with your sl sts. To visualize this process, see my video here.
Step 1:
Turn so that you are working across your foundation ch.
Grab your wooden ring and place it between your working yarn and your hook. Going through the wooden ring, YO and draw up a loop (essentially making a sl st into the ring).
Step 2:
Move your wooden ring to the right and out from between your working yarn and hook. Place your hook in the next st. YO and draw up a loop (2 loops on hook).
Step 3:
Move the ring back between your working yarn and your hook. Going through the wooden ring, YO and draw through both loops on your hook.
Repeat steps 2-3 until you have gone through all 6 sts. You should have 6 sc in your wooden ring when you are finished.
Now turn your work so that you are working down the other side of rows 1-14 towards where you began your finishing round. Place 3 sl sts for every 2 rows down the side. You should have 21 sl sts when finished with this side. Join with a seamless join to your first sl st of your finishing round and FO, weaving in your tail. To visualize the seamless join, see my video here.
With the WS of your piece facing you, weave your long beg tail to the middle of the 3rd row above your ring. Use this tail to sew your 10 mm bead onto the WS of your piece. The buttonhole will actually be the sp above your ch-4 loop. The ch-4 loop created a sort of ‘point’ and is also where you will be adding your tassel.
Make your tassel
Wrap your yarn around a piece of cardboard approx. 3” wide 4 times and cut ends evenly to create tassel tails. Bring one end of all 4 strands through the ch-4 loop, folding them in half until the ends meet. Cut a strand of yarn approx. 6” long and use the gathering knot to tie the tassel ends together just below the ch-4 loop. Trim ends evenly. To visualize the gathering knot, see my video here.
Your Herringbone Towel Ring is complete! I would love to see your finished work! If you want to tag me on IG, I’m @dayscrochetnc. You could also follow the hashtag #herringbonetowelring to follow what others are making. I can’t wait to see your projects! If you would like to see other versions that I will be making after this publication, be sure to check me out on IG!
Please note that you do not have my permission to sell, share, copy, translate or duplicate this pattern or my photos in any way. Please do not use this pattern for a video, blog, or class tutorial. Thank you so much for following these simple rules! Please message me on Facebook or send me an email at dayscrochetnc@gmail.com with any questions.
Come join my Facebook group, Crochet for Days! We have a lot of fun and I often offer discounts and coupon codes to my members that I don’t offer anywhere else! Request to join and answer the questions by following this link.
Did you enjoy making this project? Let me know in the comments!
Happy Hooking!
~Dana