
The Lily Lip Balm Cozy

PIN it here!
I made these lil’ lip balm holders for Christmas gifts this year and they were a huge hit! I added them to a wallet wristlet to make a cute but useful gift set.
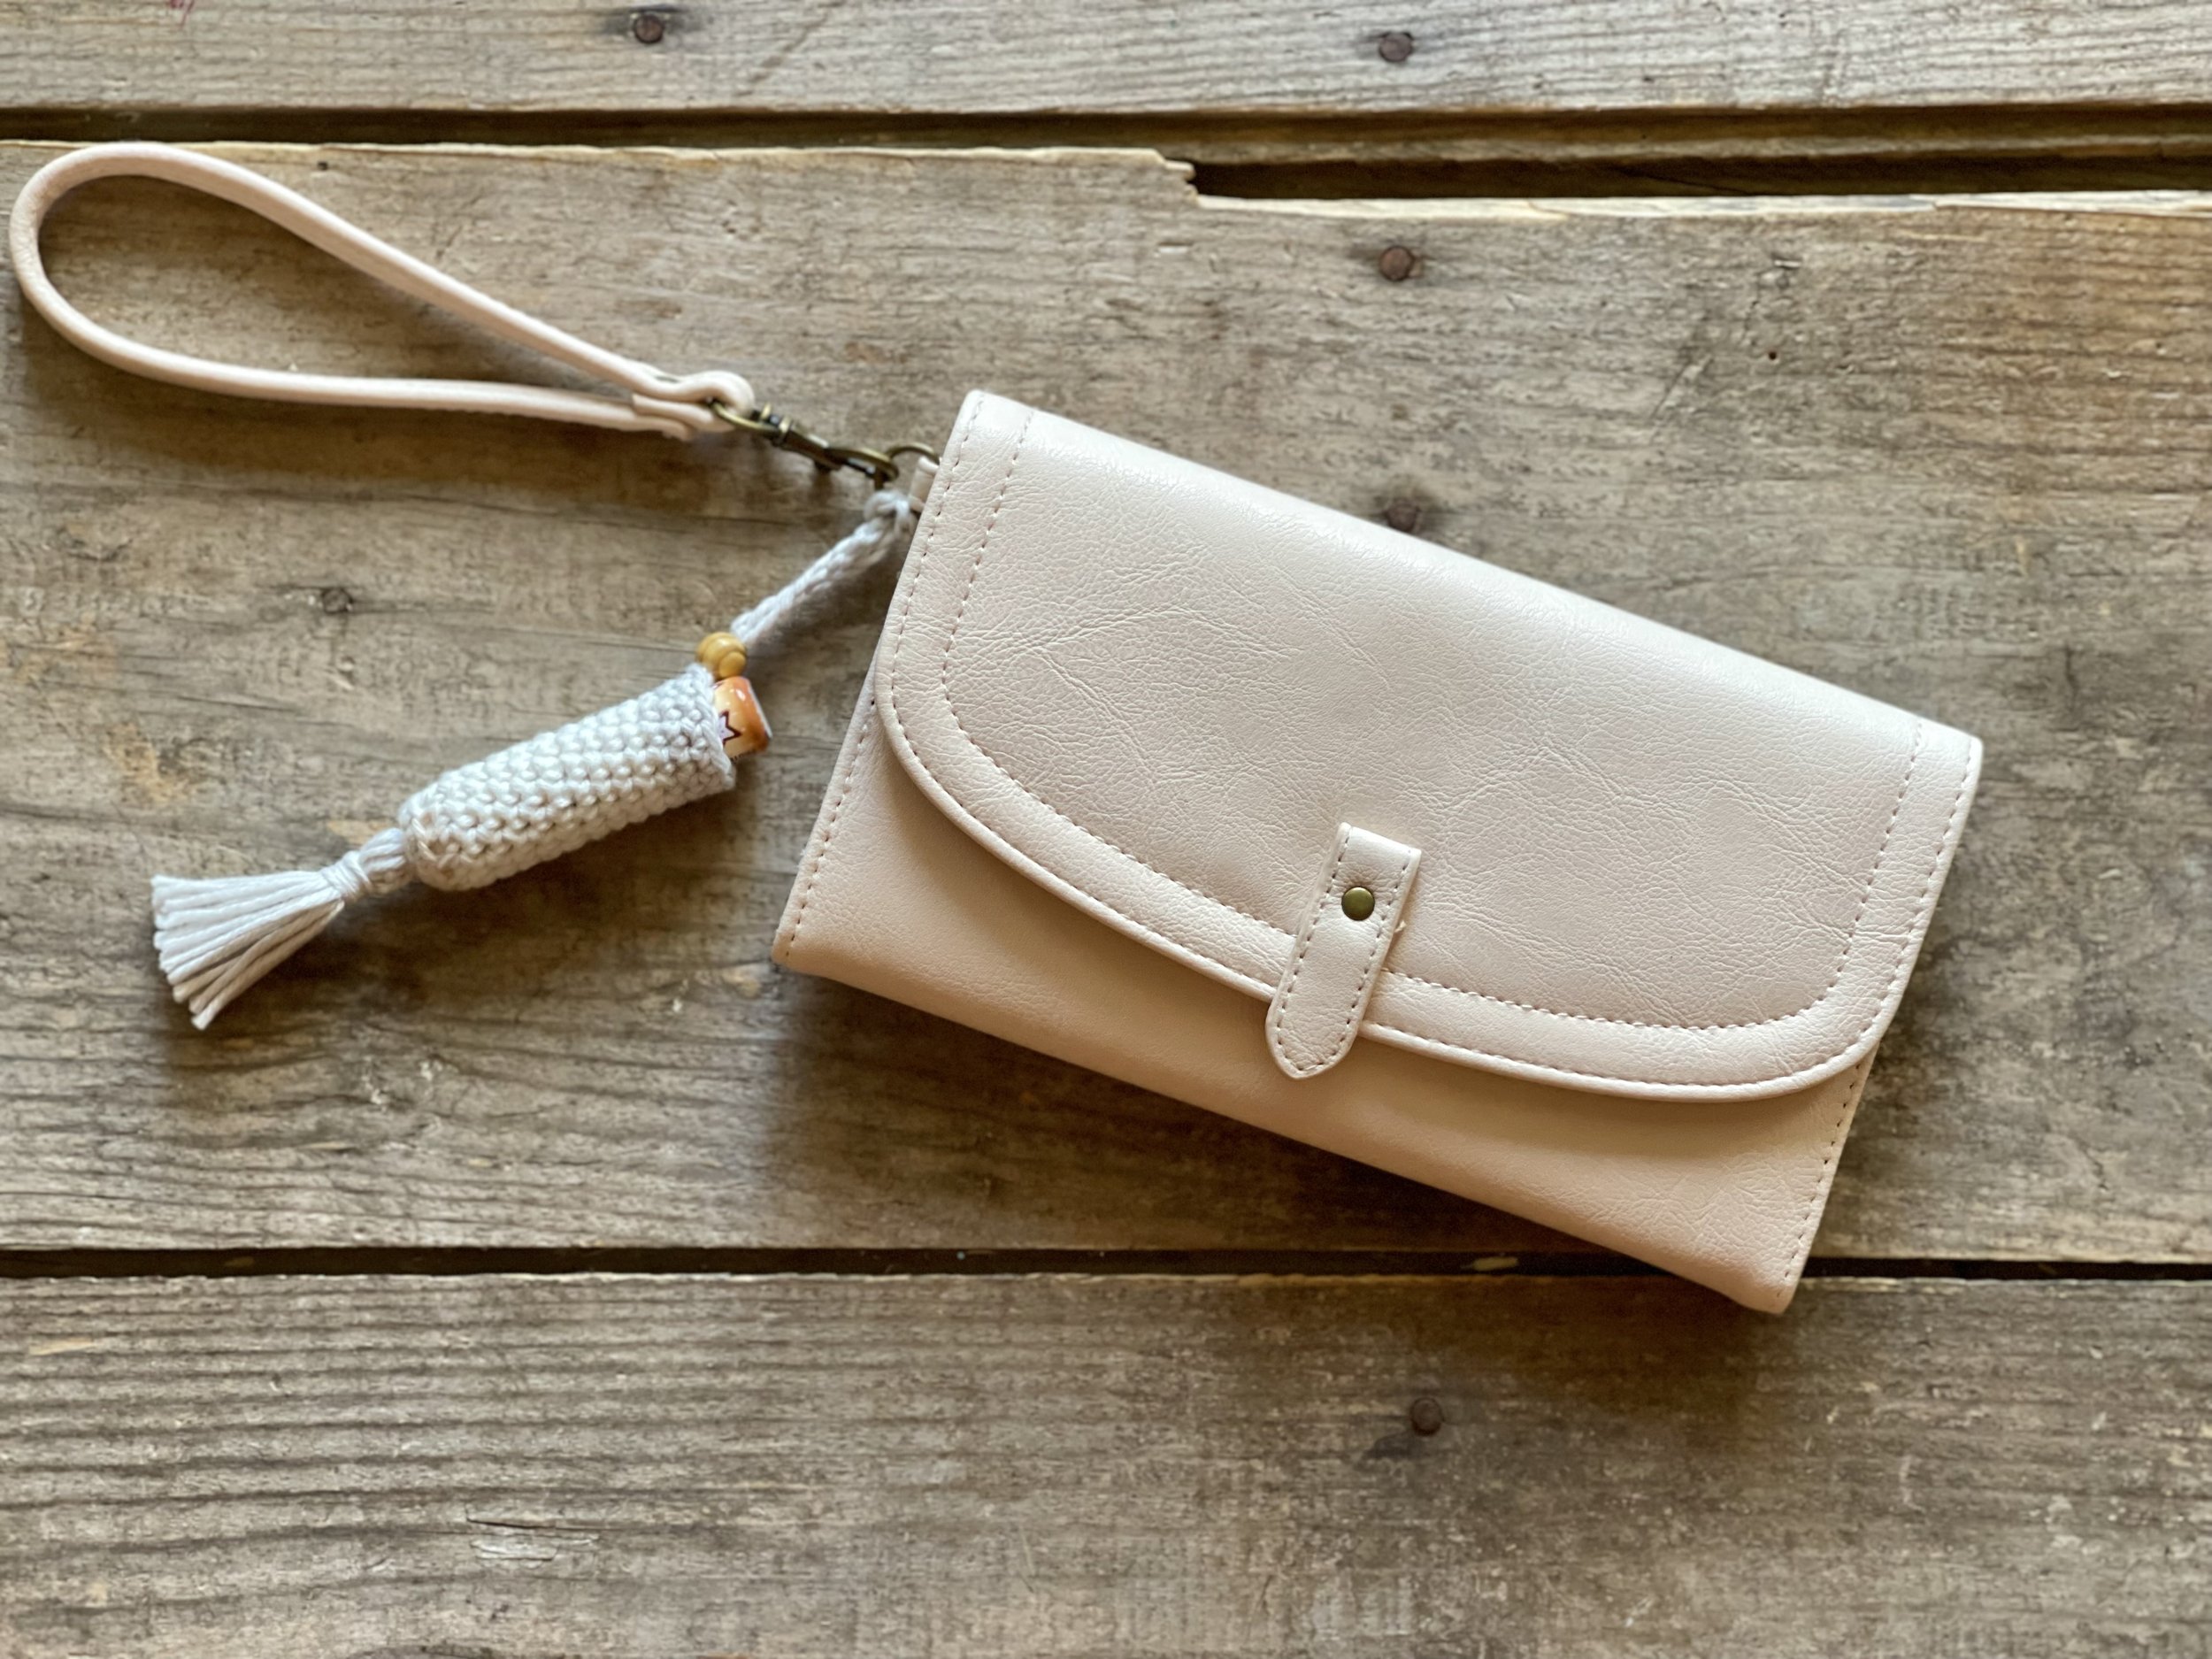
I purchased these wallet wristlets from Wal-mart
This post may contain affiliate links that help me to continue to post free content. To skip the ads and have a printable pdf, you can find this pattern for relatively little cost in both my Etsy and Ravelry shops.
I am always on the hunt for great gift ideas that meet my motto of fashionable AND functional, and this year I decided to make these adorable chapstick cozies. I had so many people tell me they wanted one, I just knew I had to give them as gifts to all my girlfriends this year.
Nobody likes digging around in their bag for their ever-elusive chapstick (myself included!), and I have found this to be the perfect solution. One of the biggest pros about this design is that is requires yarn and a hook only! No hardware is needed to complete this project, which I have found to be a huge WIN when it comes to making these.
They not only make great gifts, but I am most definitely adding them to my Summer and Spring market inventory. Because they require so little in supplies and take only about 10-12 minutes to make, they are a must in my upcoming market prep. I have made other lip balm holders in the past, but I have found this one to be the best one when it comes to saving time and money. I will likely make some just like they are designed and I will probably add some keychain rings to others in case people prefer to have them on their key ring.
Another thing I love about this design is how simple it is. It truly looks so classy just like it is without any added embellishments. But it also can be made with a macrame or boho feel by adding a wooden bead or a tassel. In my YouTube video, I show how it looks with a tassel at the bottom, but you can certainly play around with the looks and add one to the front. Or simply leave it plain—it really looks great just like it is.
I also made some that were slightly bigger to add to a little girl purse. I went up to a G 4.0 mm hook and followed the same pattern otherwise. I used sparkle acrylic yarn, then did a round of faux fur at the top to make it a bit more fun and festive. These little chapsticks are about the same size as the Nivea brand, which is about the size of a lipstick case.

The bag and chapstick was purchased at Walmart. The chapstick came in other characters like unicorns.
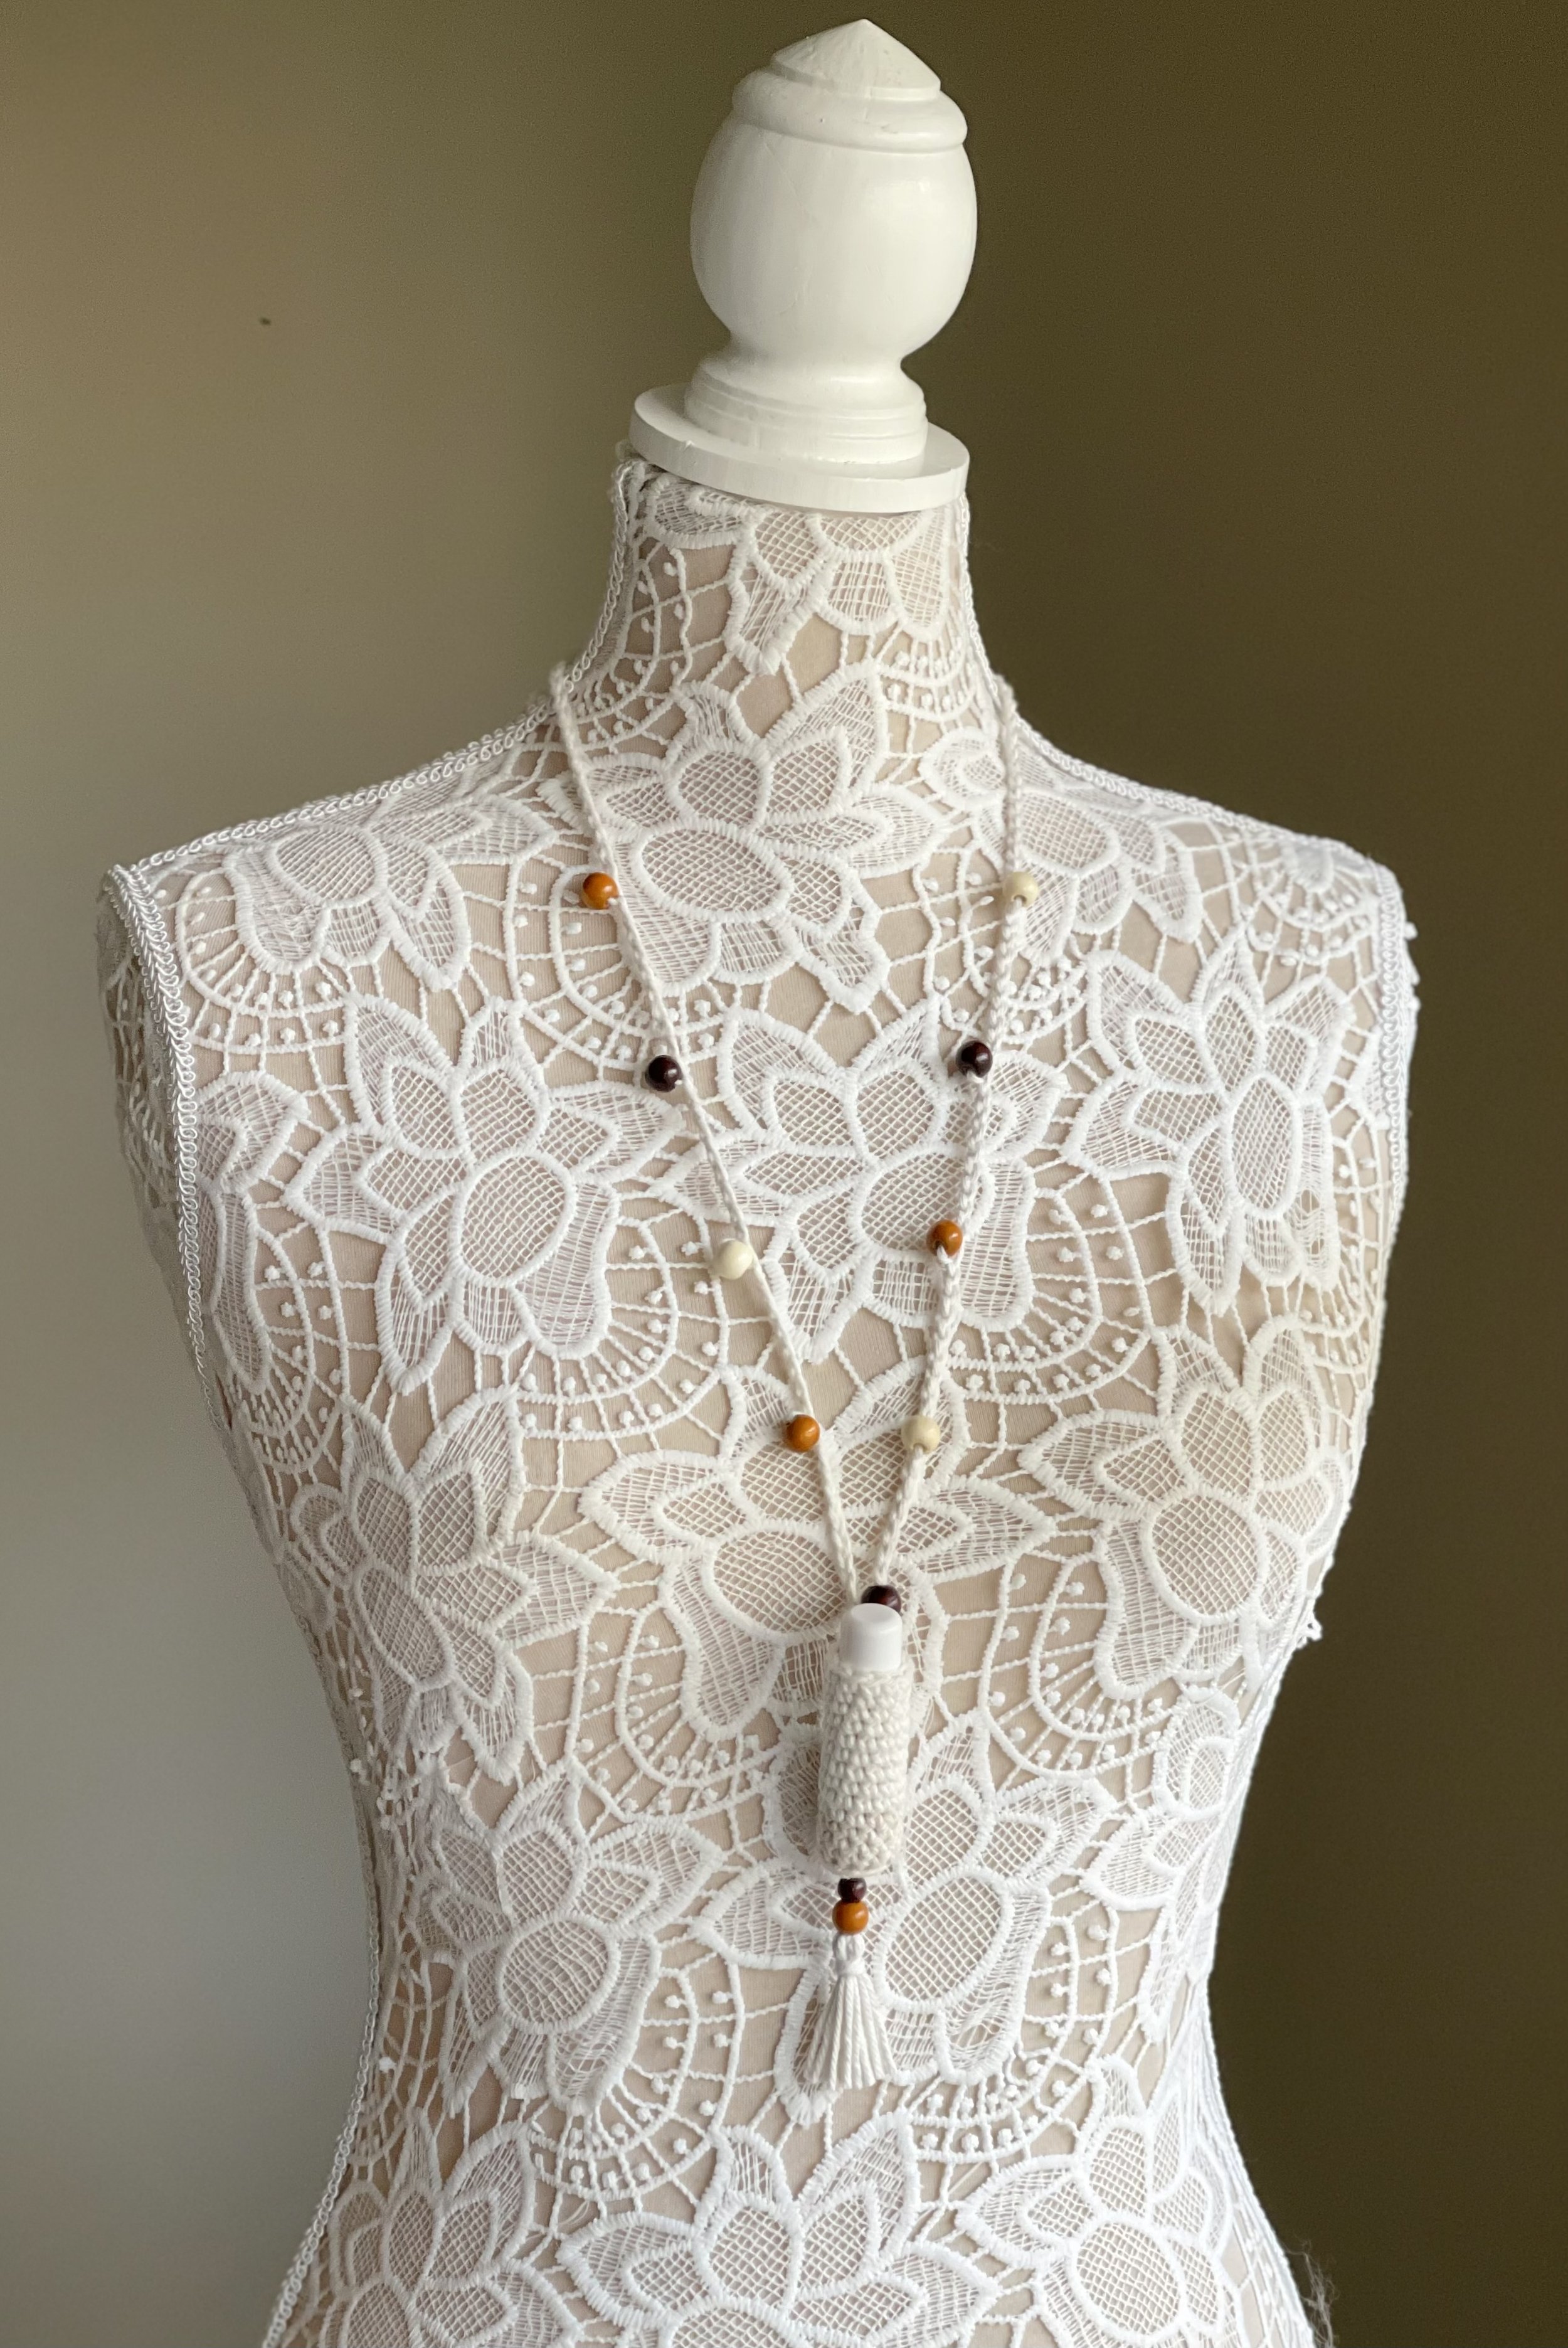
I have also updated this post to contain a necklace version of this cozy. Someone mentioned they knew someone with a rare disease that made them need to apply lip balm almost constantly. That made me think of how nice it would be if she had it readily available and a cute boho necklace to boot.
I also thought about how many people taking chemo need a lot of lip balm. If you desire to make a necklace version, you can make it with or without beads and give them to a special friend in need. You could also use some essential oil beads to make the beads not only cute but functional—especially if they are combating nausea from the chemo. Add some drops of peppermint oil to the essential oil beads and maybe gift some peppermint lip balm to soothe their chapped lips while fighting the nausea.
It would also be cute for teens or even older children who like to have their chapstick or lip gloss close by. The options are truly endless!

Make them something fashionable and functional!
Enough of my rambling! Let’s make it already!
Supplies Needed:
-25-35 yds of any size 4 worsted weight yarn (cotton is best, but you can use acrylic)
-Size F 3.75 mm hook or size needed to obtain gauge
-Stitch marker, scissors, yarn needle, tape measure
-8 mm wooden bead (optional)
Terms Used and Abbreviations:
Pattern is written in US terminology.
Back Loop Only - BLO
Chain(s) - ch(s)
Fasten Off – FO
Place Bead - PB
Place Marker - PM
Repeat - rep
Single Crochet - sc
Slip Stitch - sl st
Stitch(es) - st(s)
Stitch Marker - SM
Special Stitches:
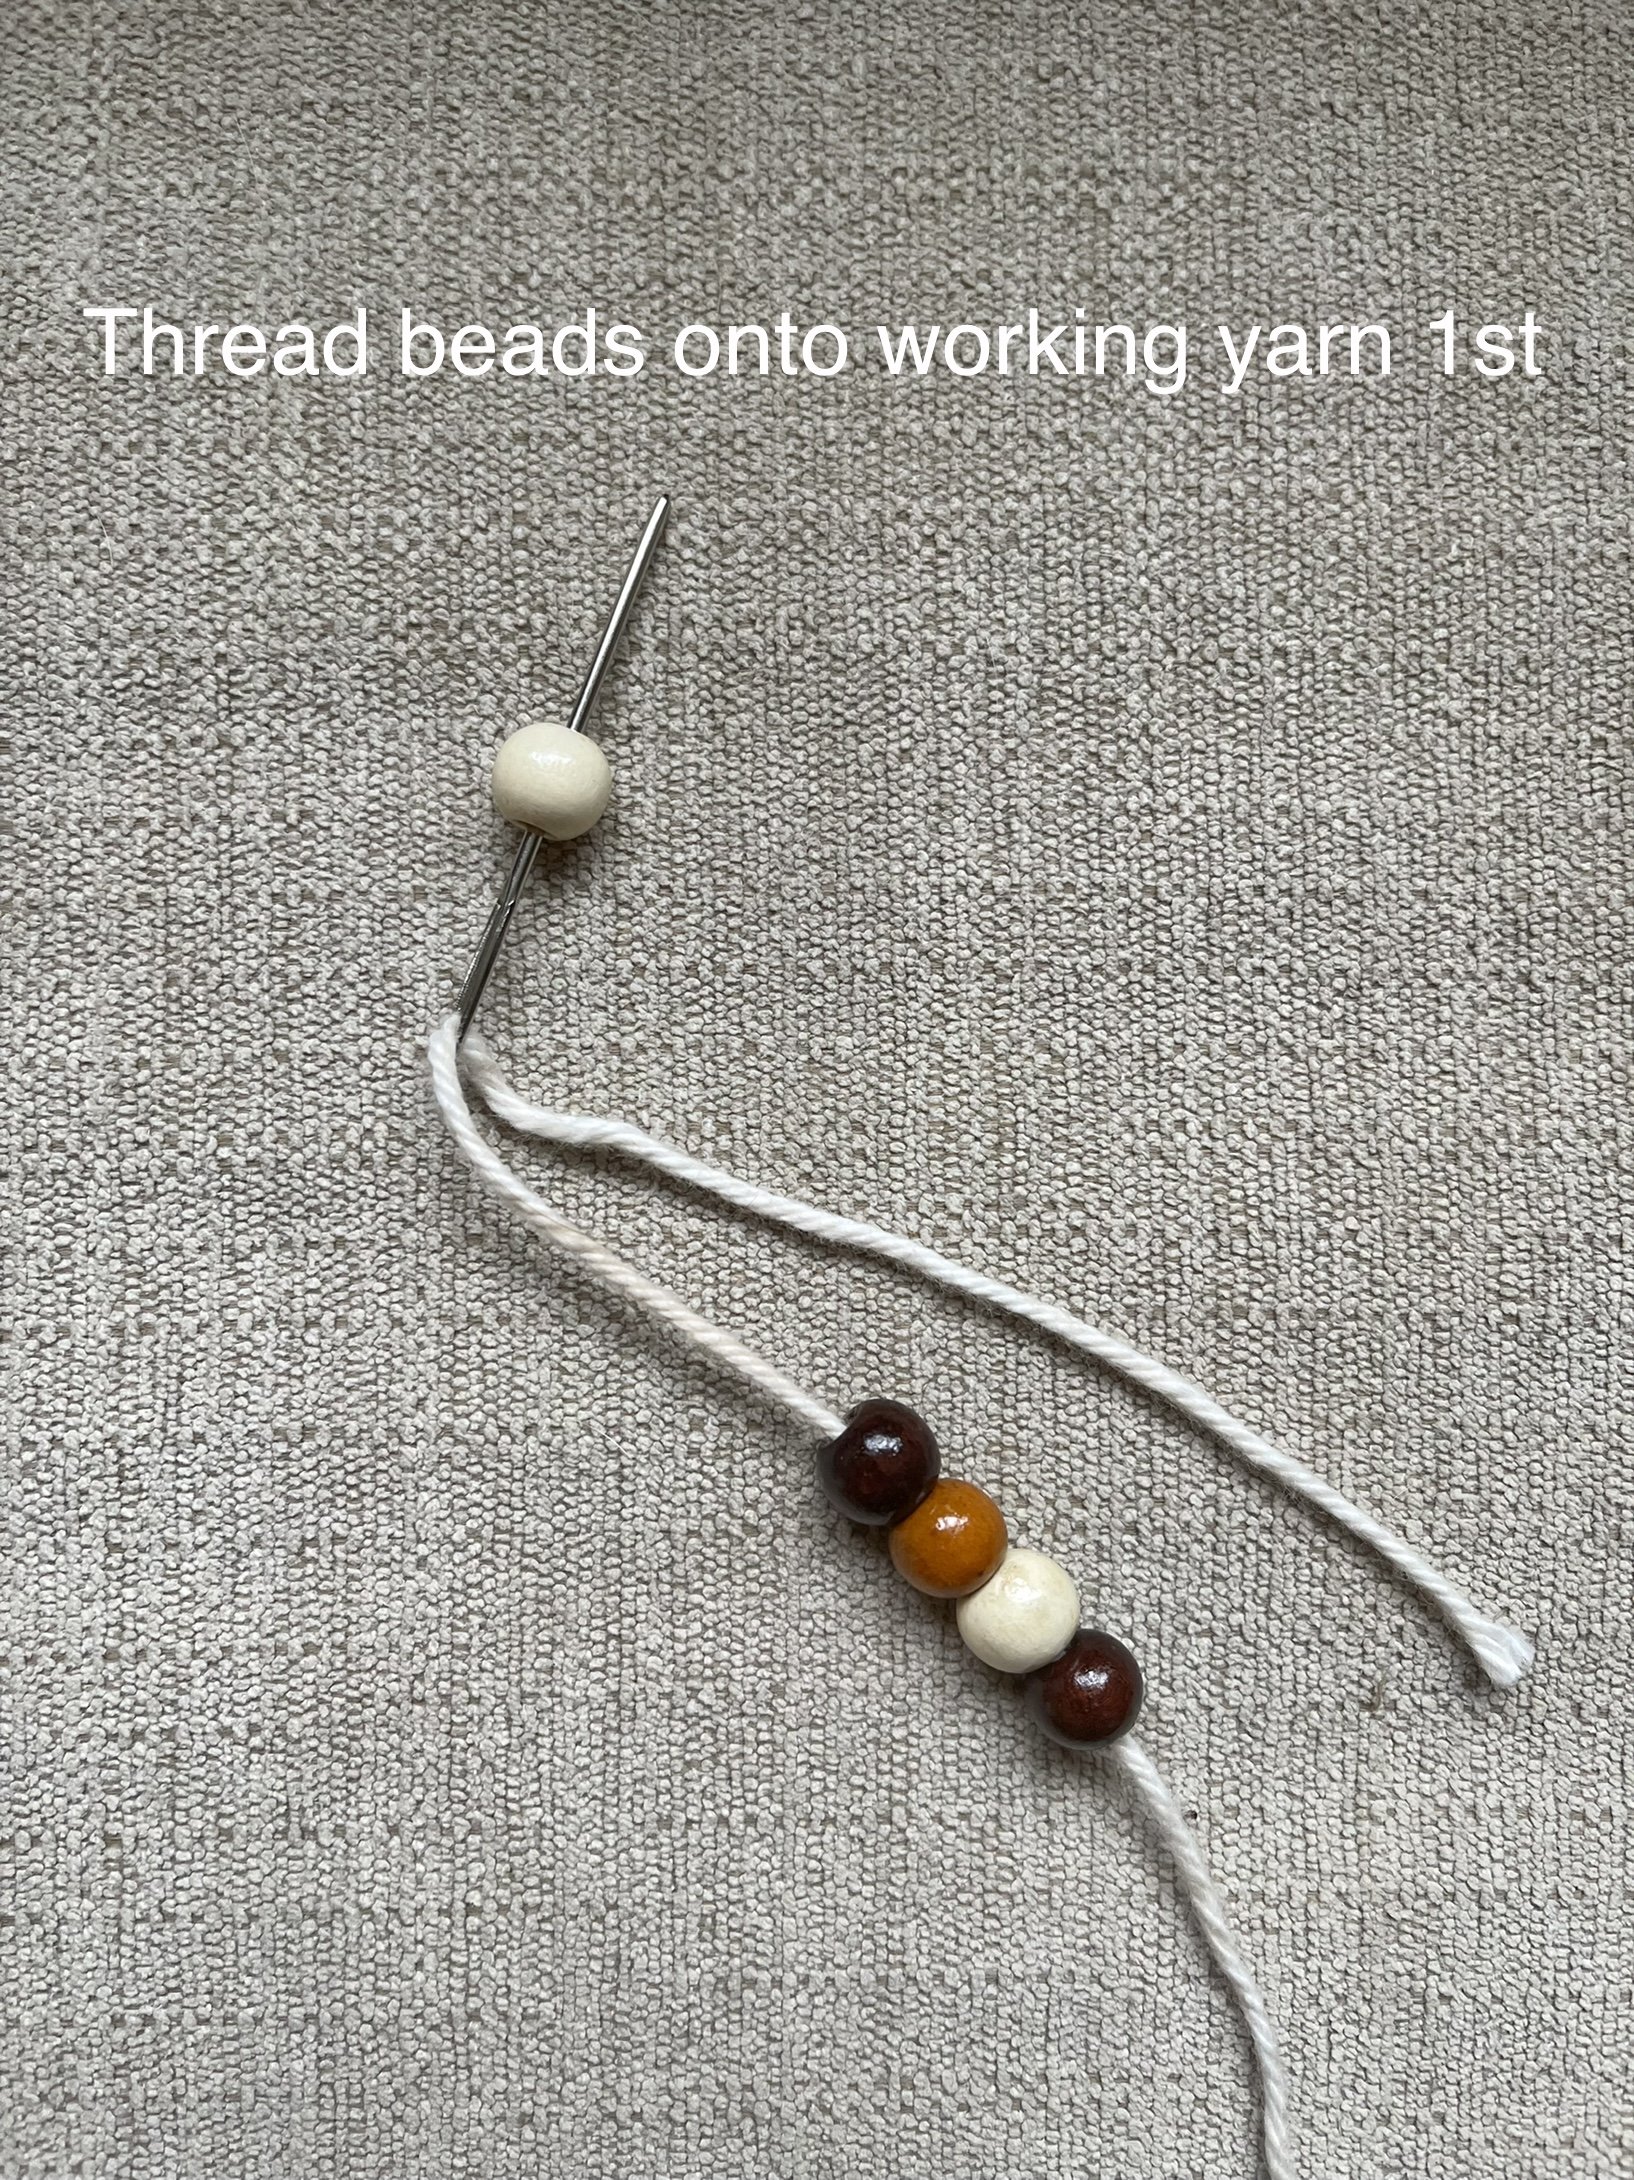
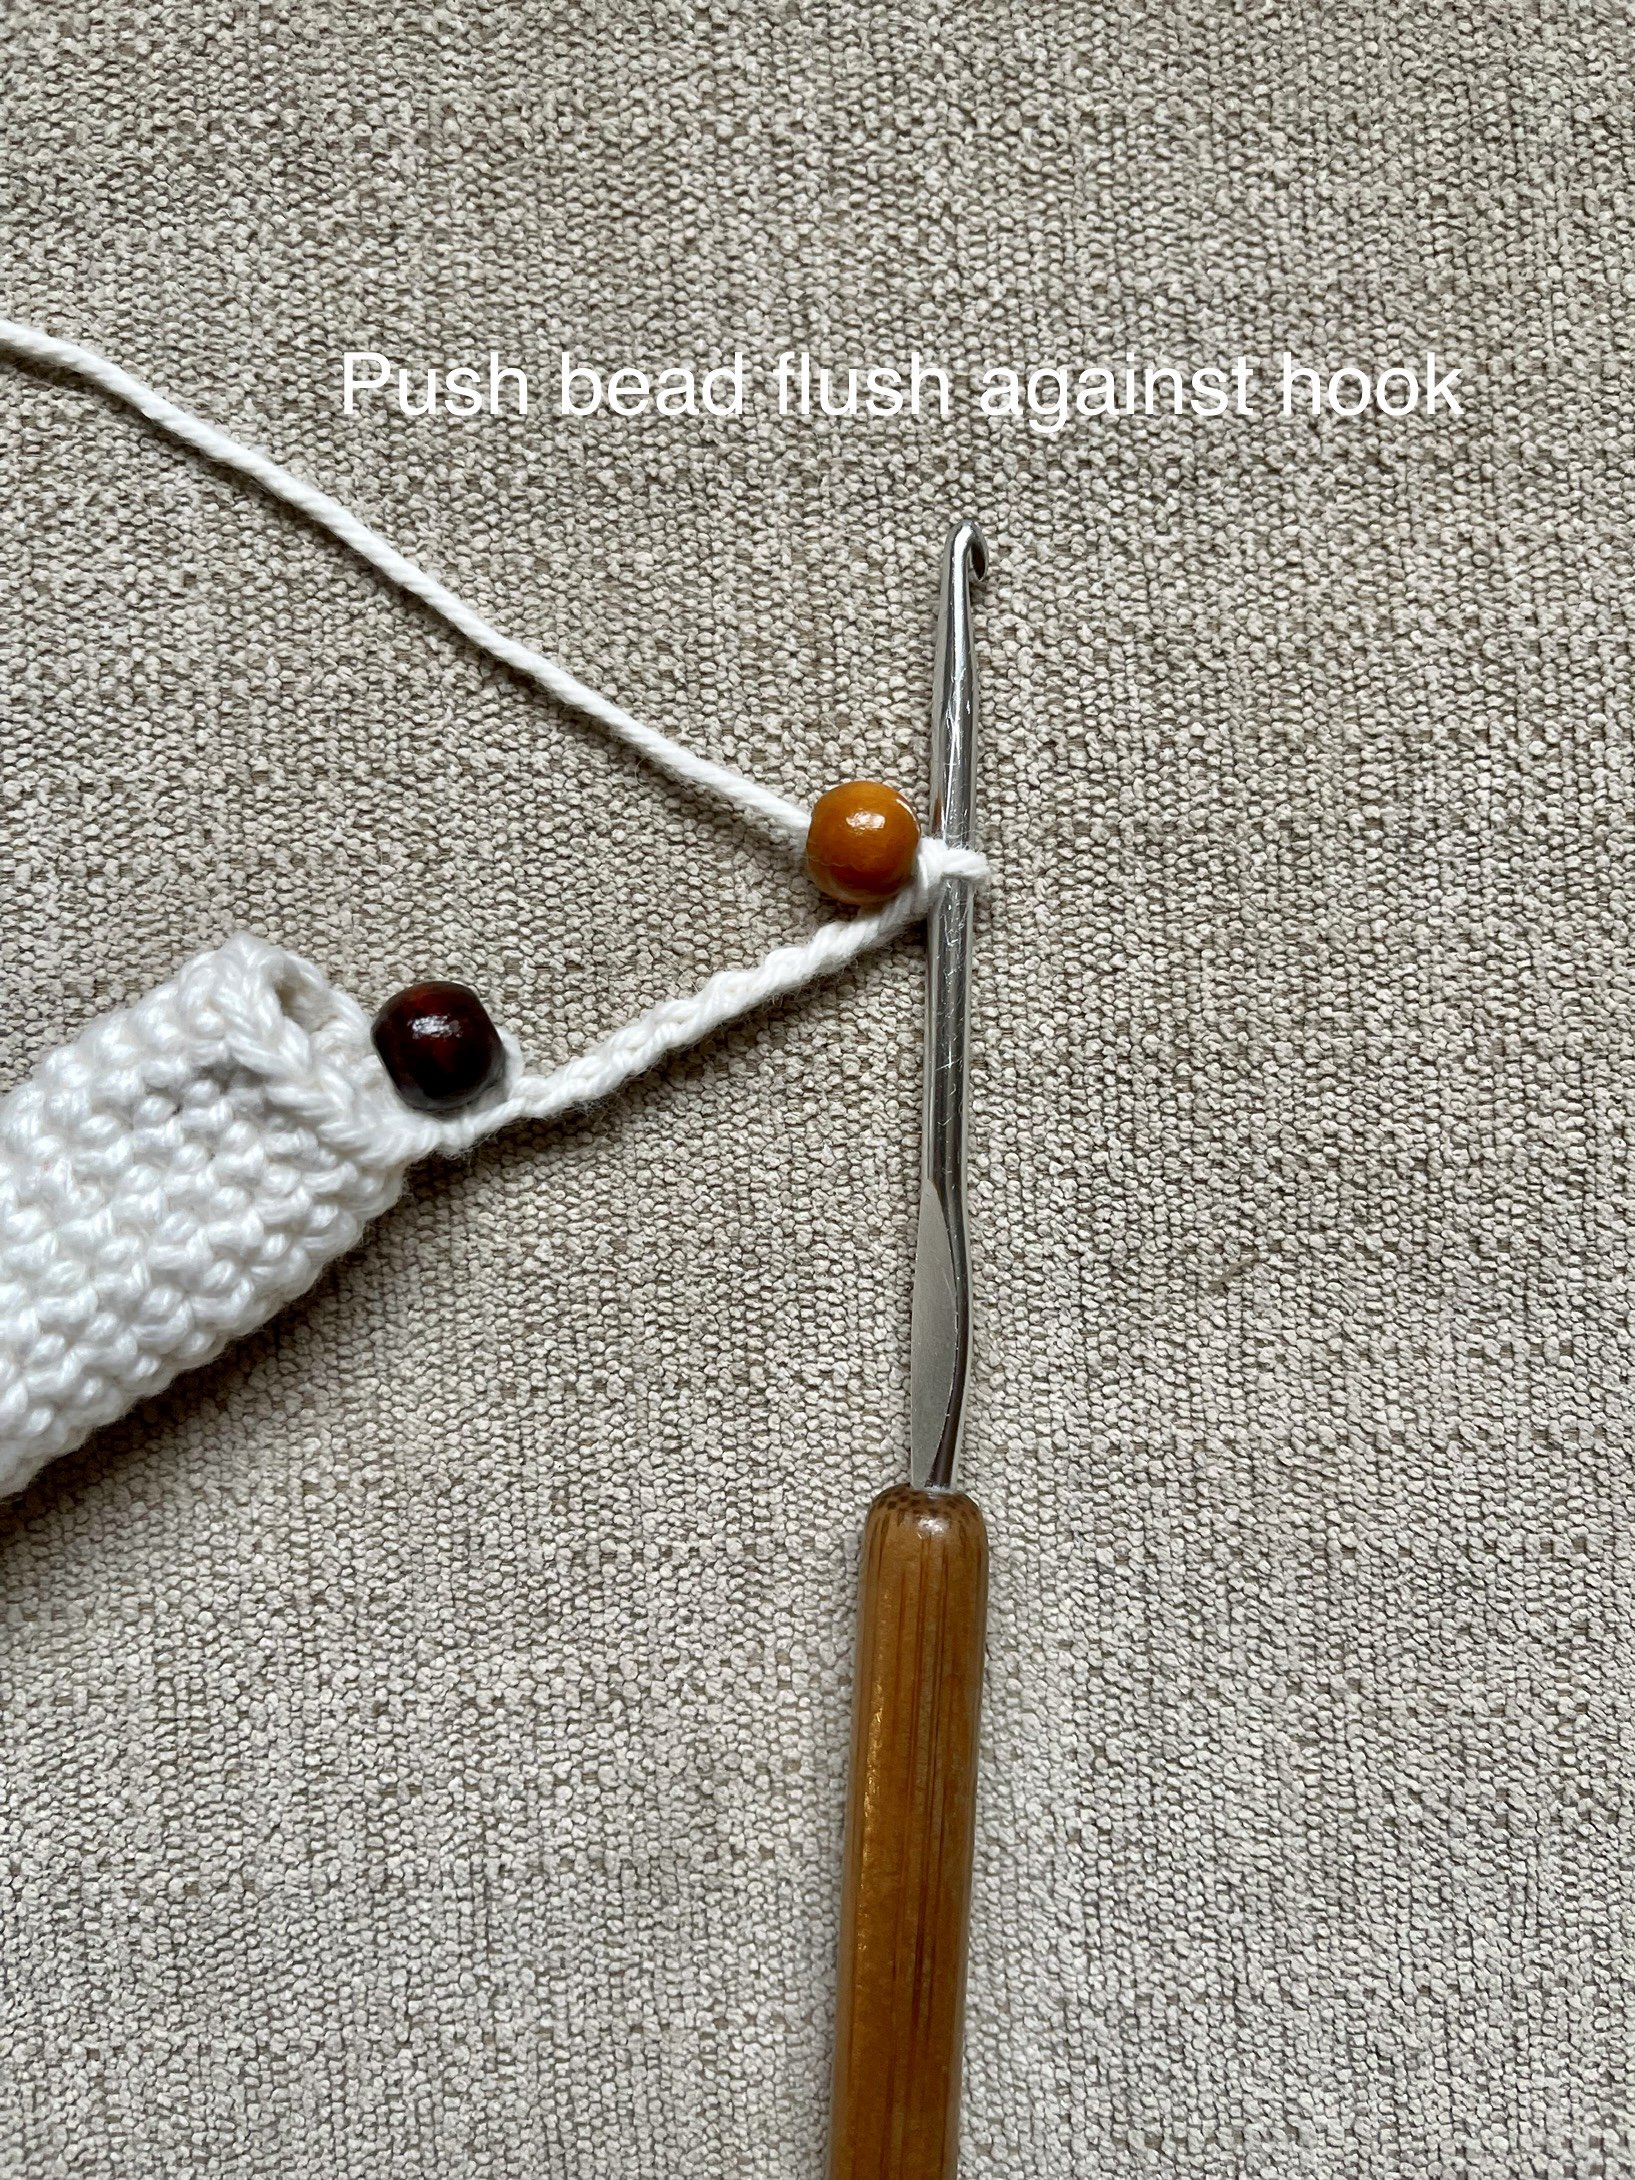
Place Bead: Slide bead on working yarn until it is flush against your hook. Continue as usual.
Gauge:
23 sc and 22 rows = 4" (10 cm)
Finished Measurements:
Cozy measures approx. 2.5" x 1" (6 x 2.5 cm) when laying flat, not including tassel or hanging loop.
Pattern Notes:
-Entire pattern will be worked in the continuous round, so you will need a SM. Do not sl st to join unless instructed to do so otherwise.
-Gauge is important for this project. You want your cozy to fit very snugly on your chapstick so that it doesn’t fall out. You also don’t want your stitches to be so loose that you can see holes in your cozy.
-Try your cozy on your chapstick every few rounds to make sure it’s fitting correctly. If it feels too loose, switch to a smaller hook and start over.
-I have included a YouTube video tutorial for this project. You can find it here:
Instructions:
Cozy is worked in the continuous round from the bottom up with the hanging loop added last. For the necklace version, you will need to add your 9 beads to your working yarn BEFORE you begin your cozy. You can add them using a yarn needle. I have included step-by-step photos for that portion of the pattern below.
Round 1: Ch 2, 6 sc in 2nd ch from hook. Do not sl st to join. [6 sc]
Round 2: 2 sc in first st, PM in first sc, 2 sc in each st around. [12 sc]
Round 3: Working in the BLO in this round, 1 sc in each st around. [12 sc BLO]
Rounds 4-15: Working through both loops, sc in each st around. [12 sc]
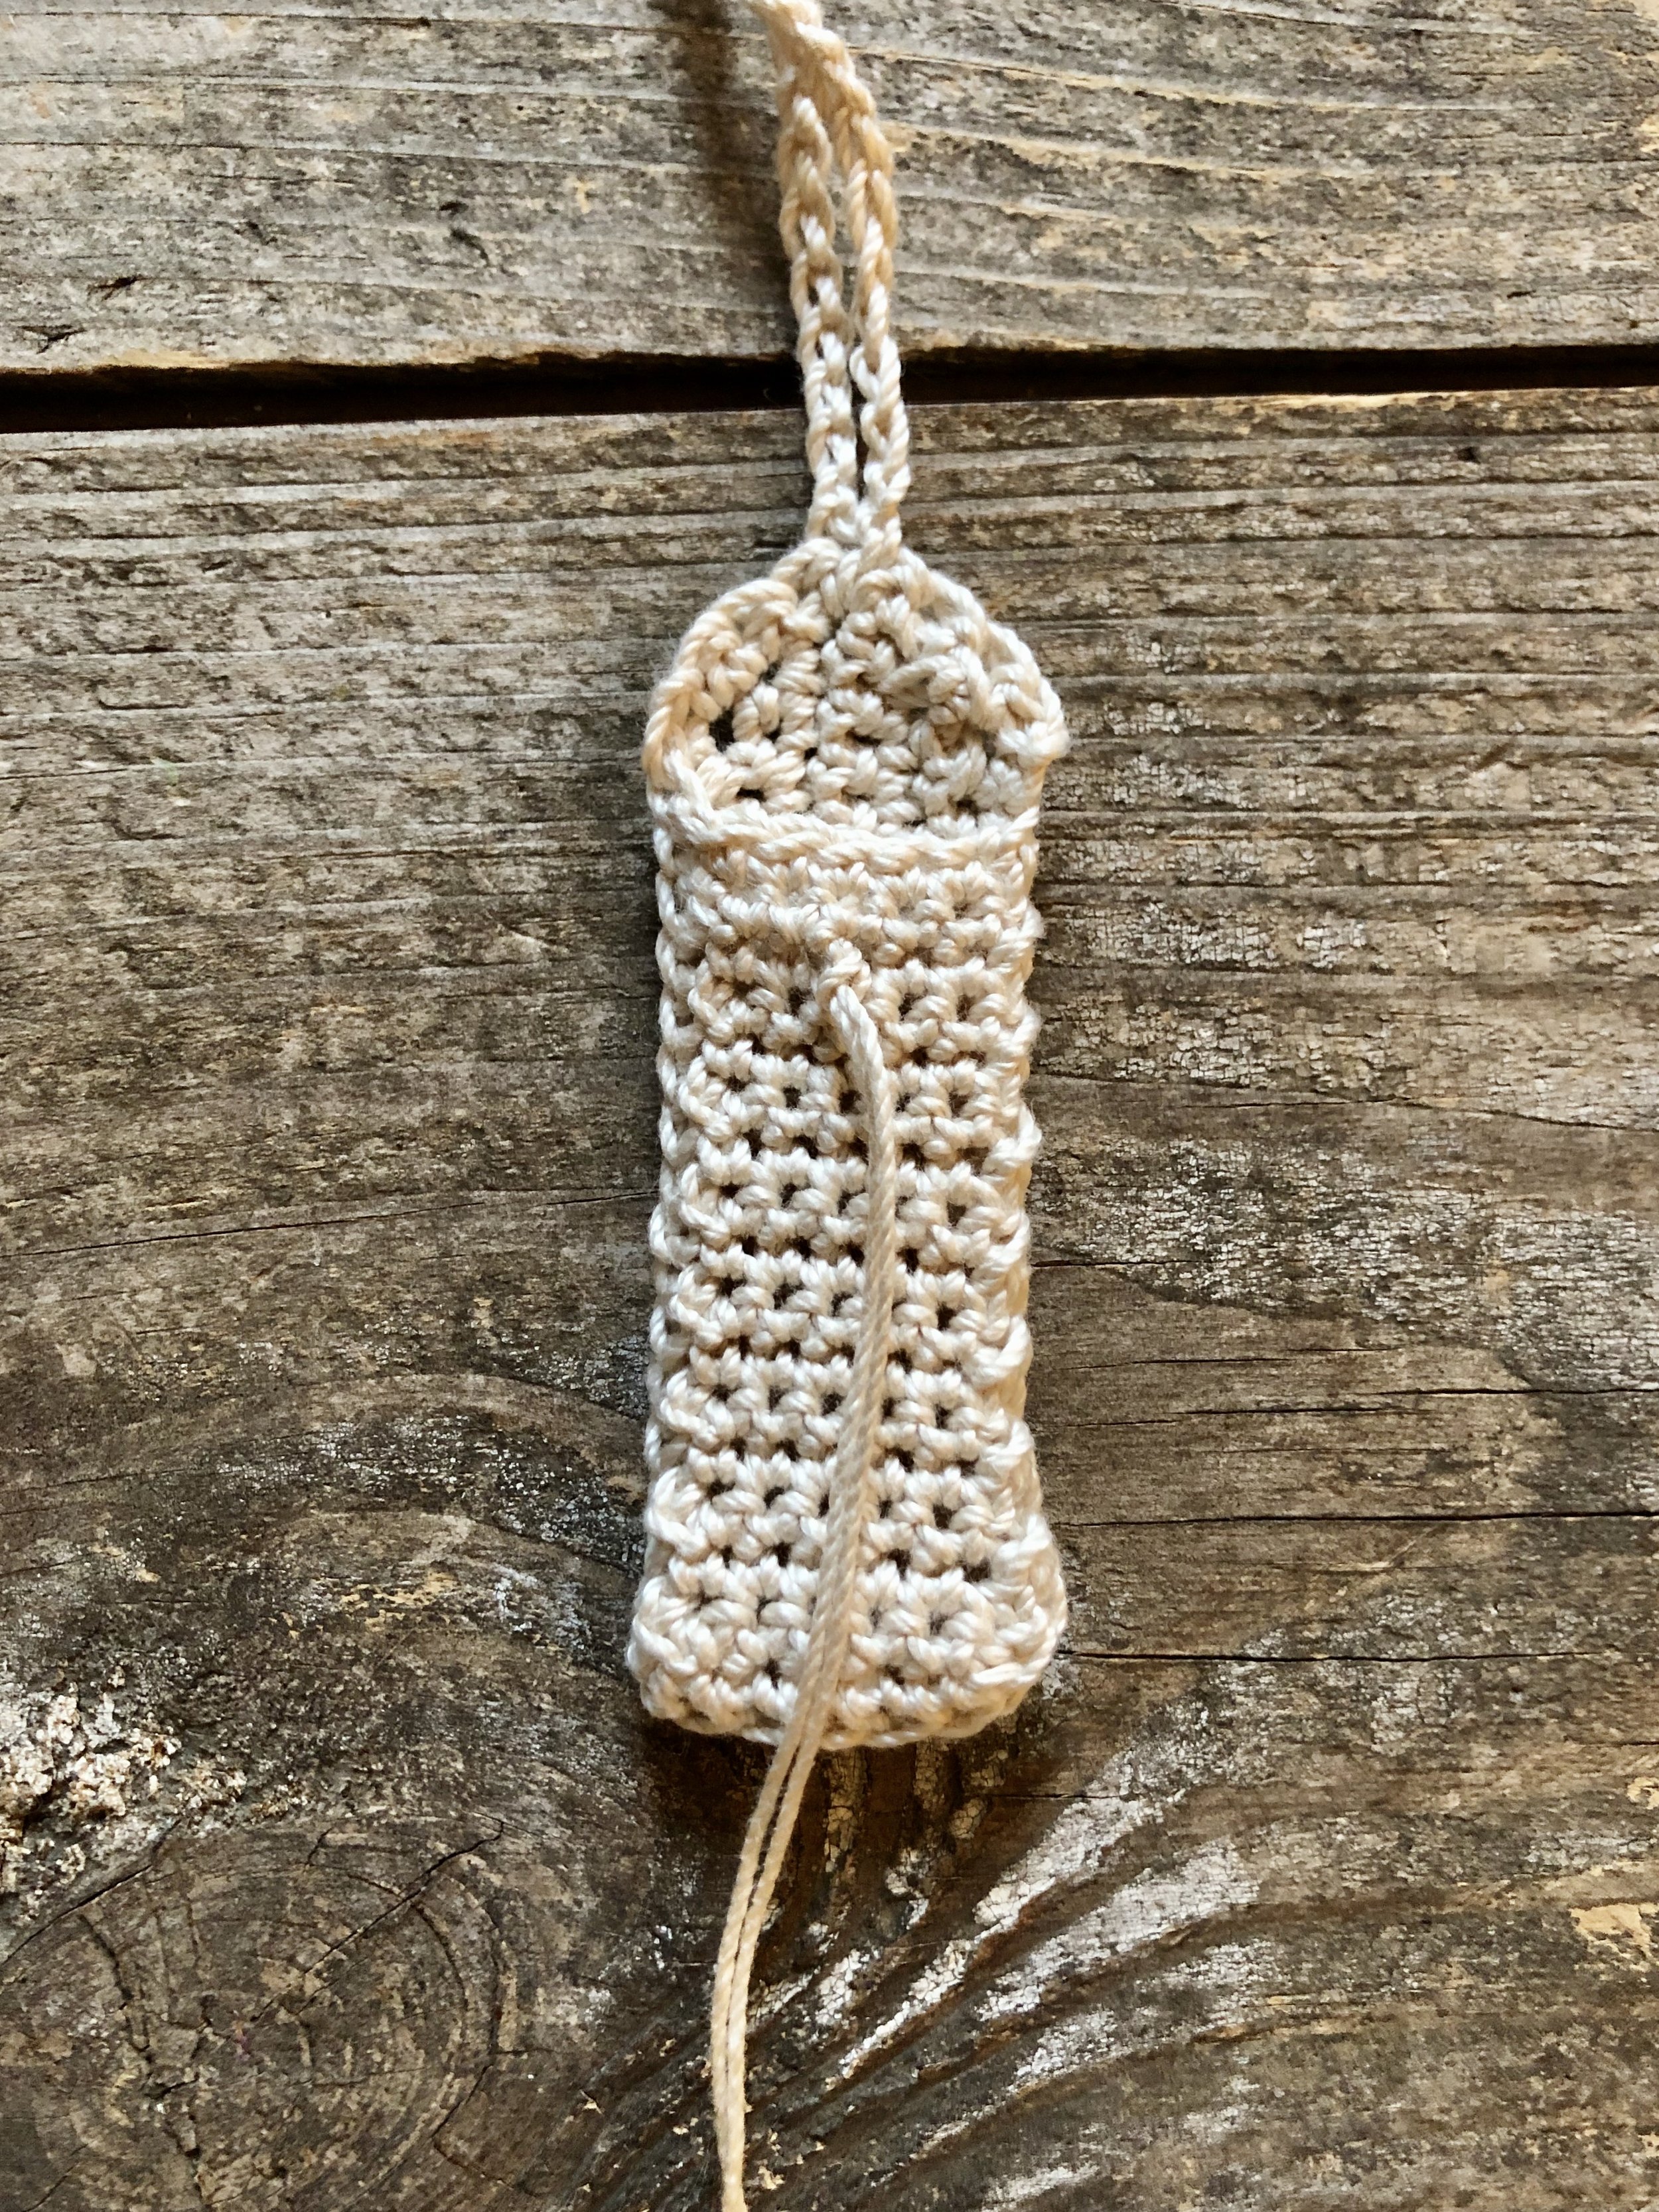
Create hanging loop
After completing round 15, sl st to join in first sc of round 15. Ch 25 (or until your ch measures approx. 4.5" or 11.5 cm). Sl st in first st of round 15 once again. FO and weave in tail. To visualize how to attach your cozy to your purse, see my video.
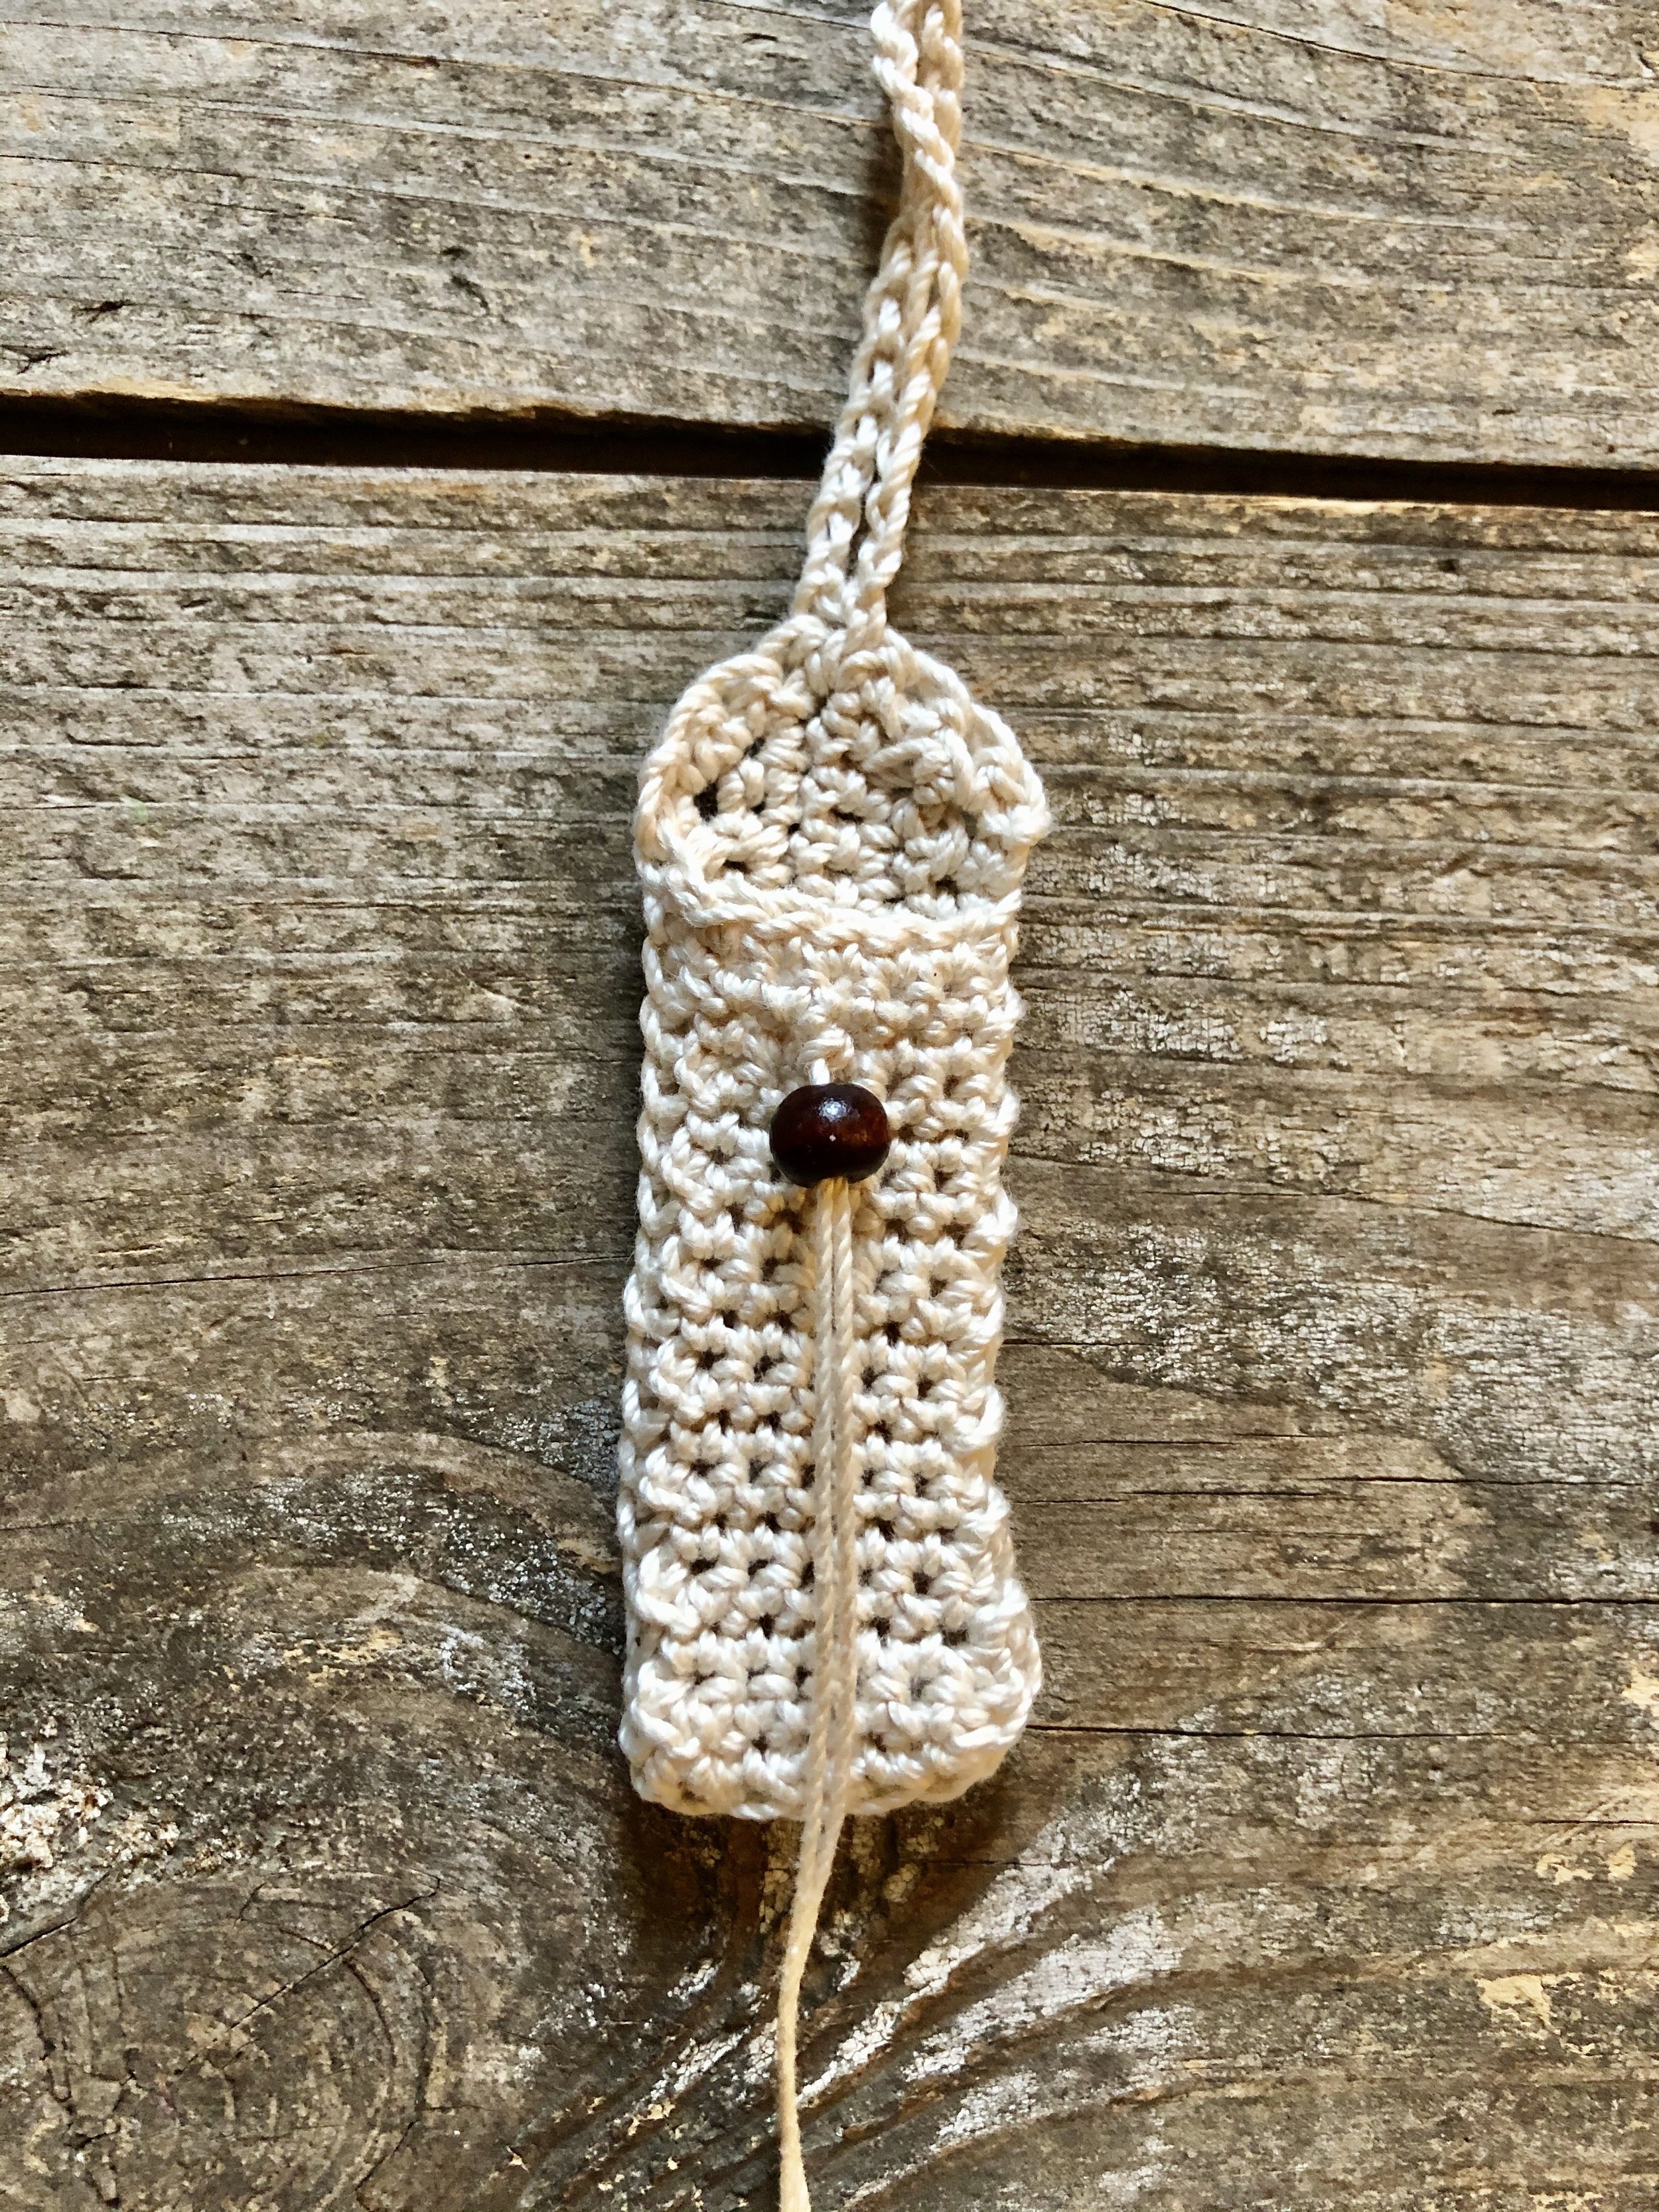
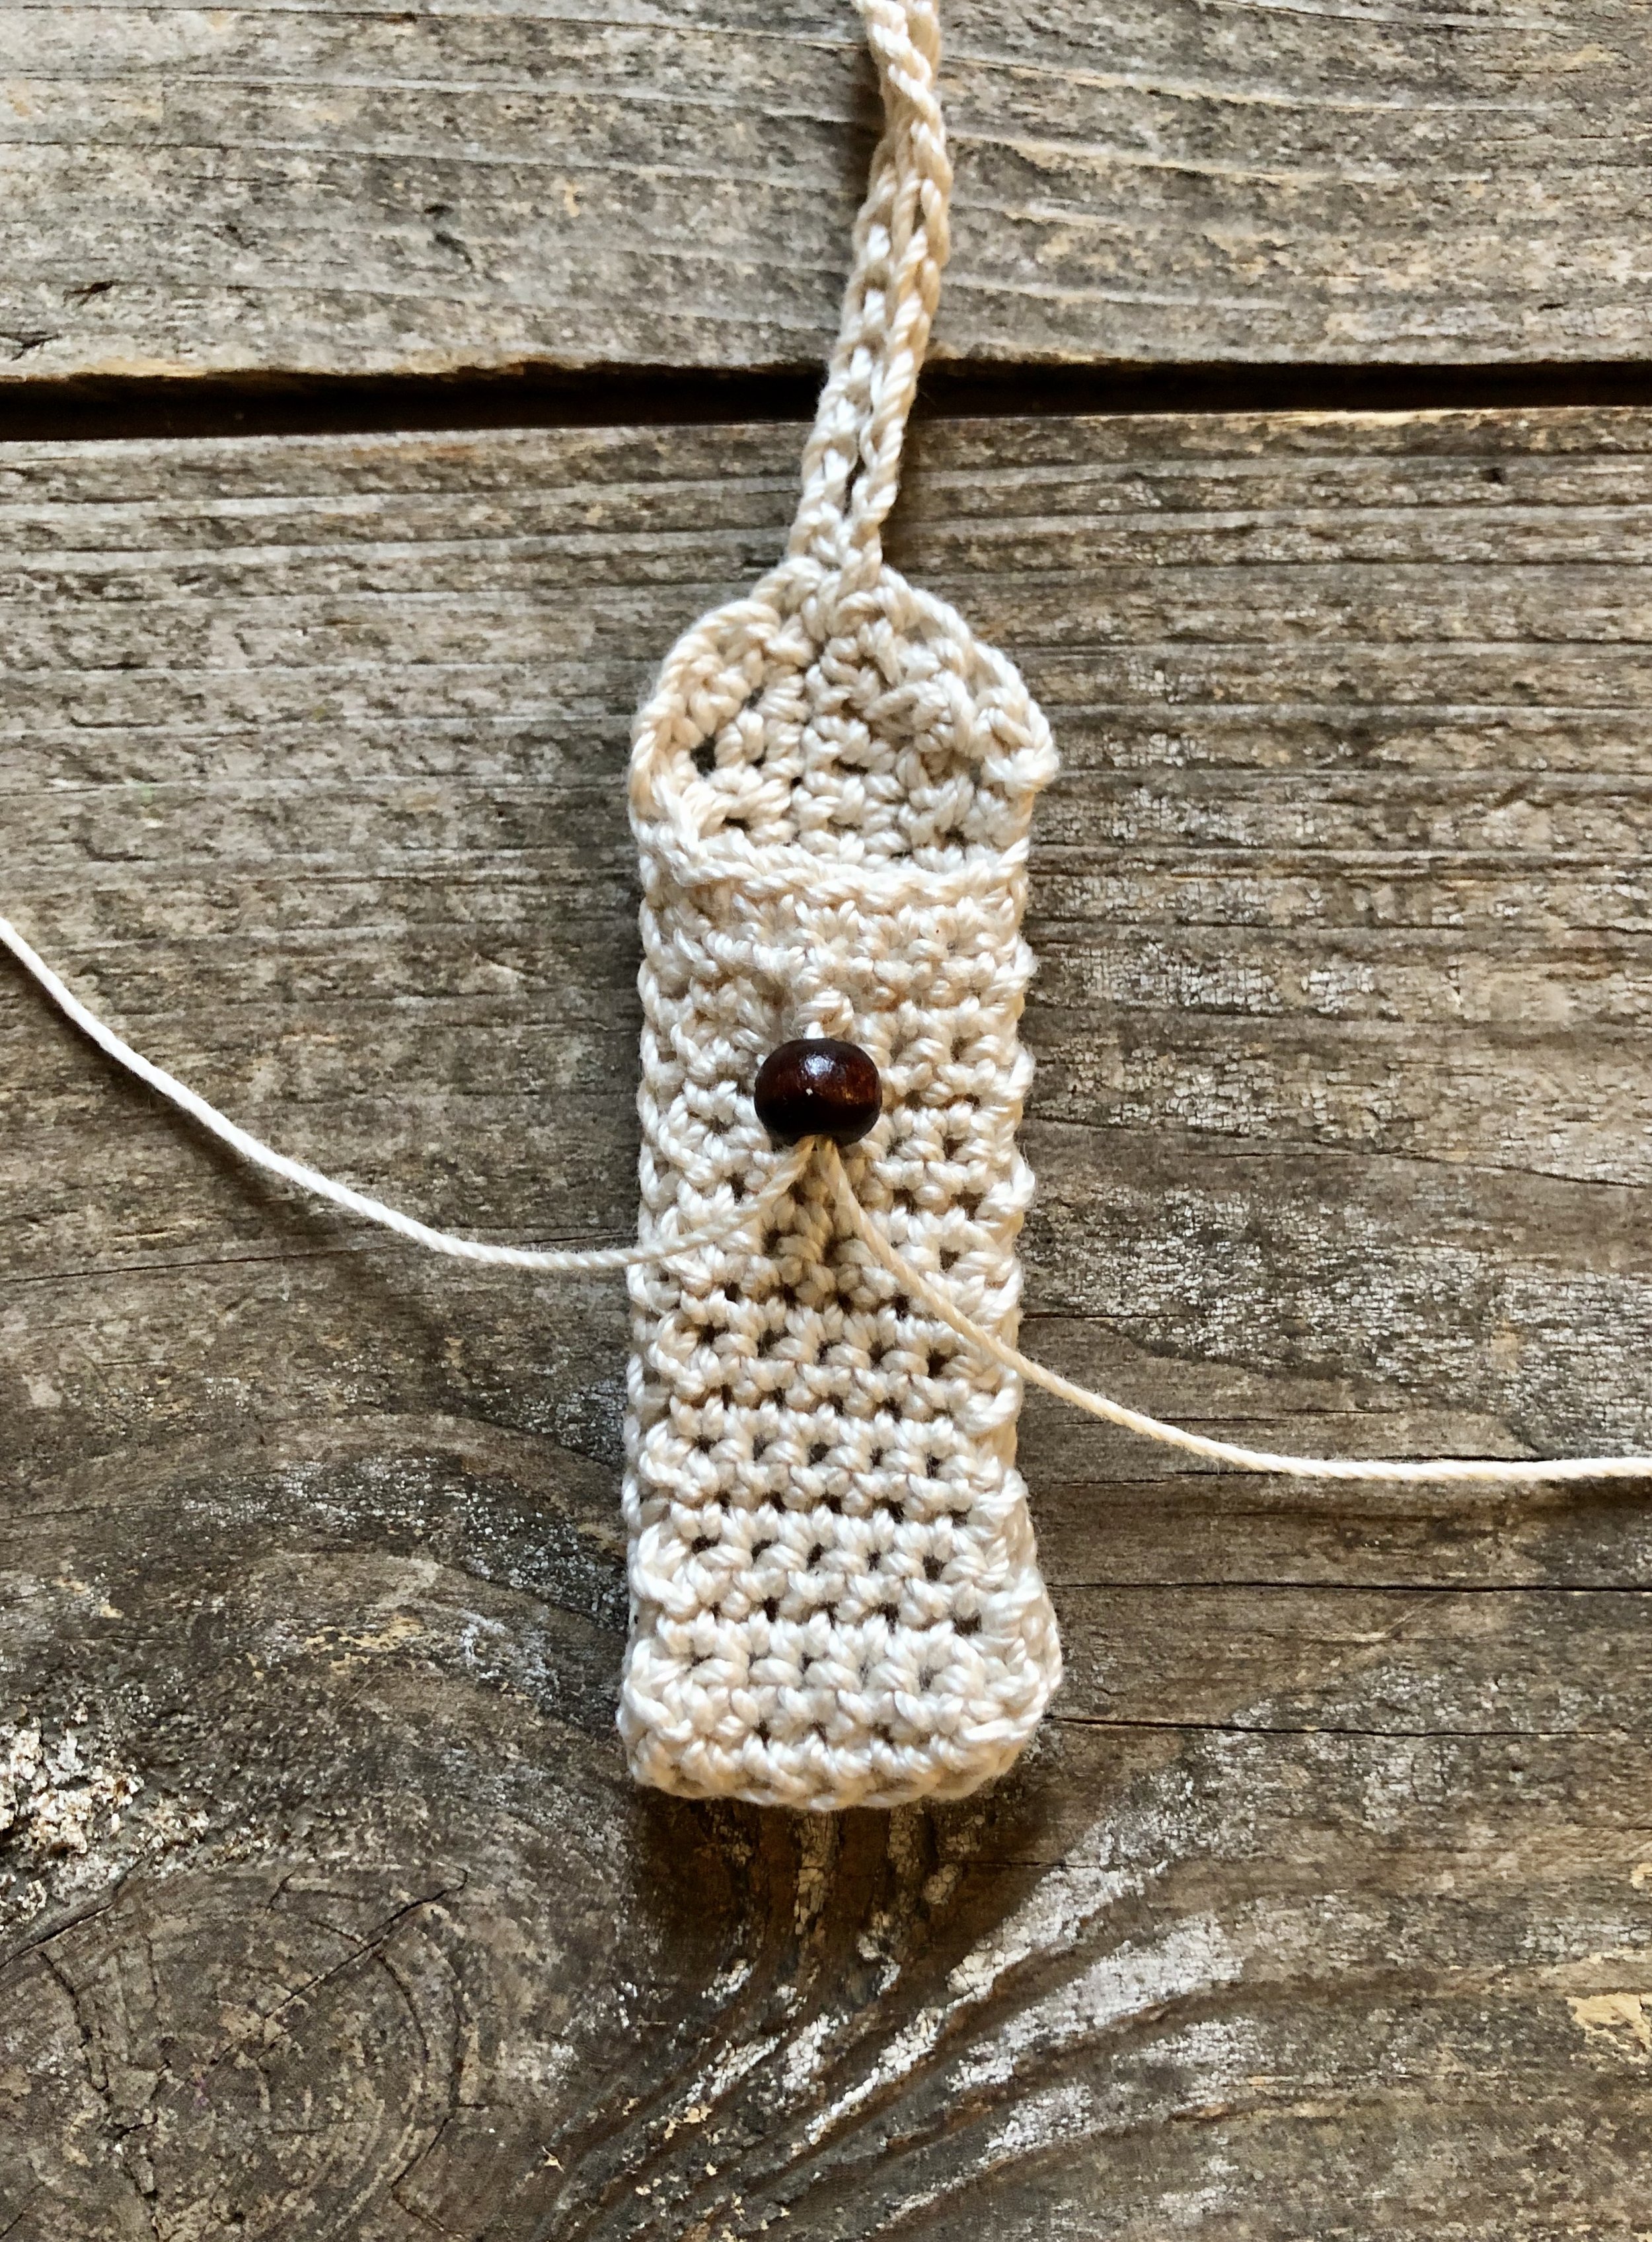
You can certainly leave your chapstick cozy just like it is, but you can also add embellishments to give your cozy a boho or macramé look.
For adding a bead to the hanging loop, see my video.
For adding a tassel to the bottom of the cozy, see my video.
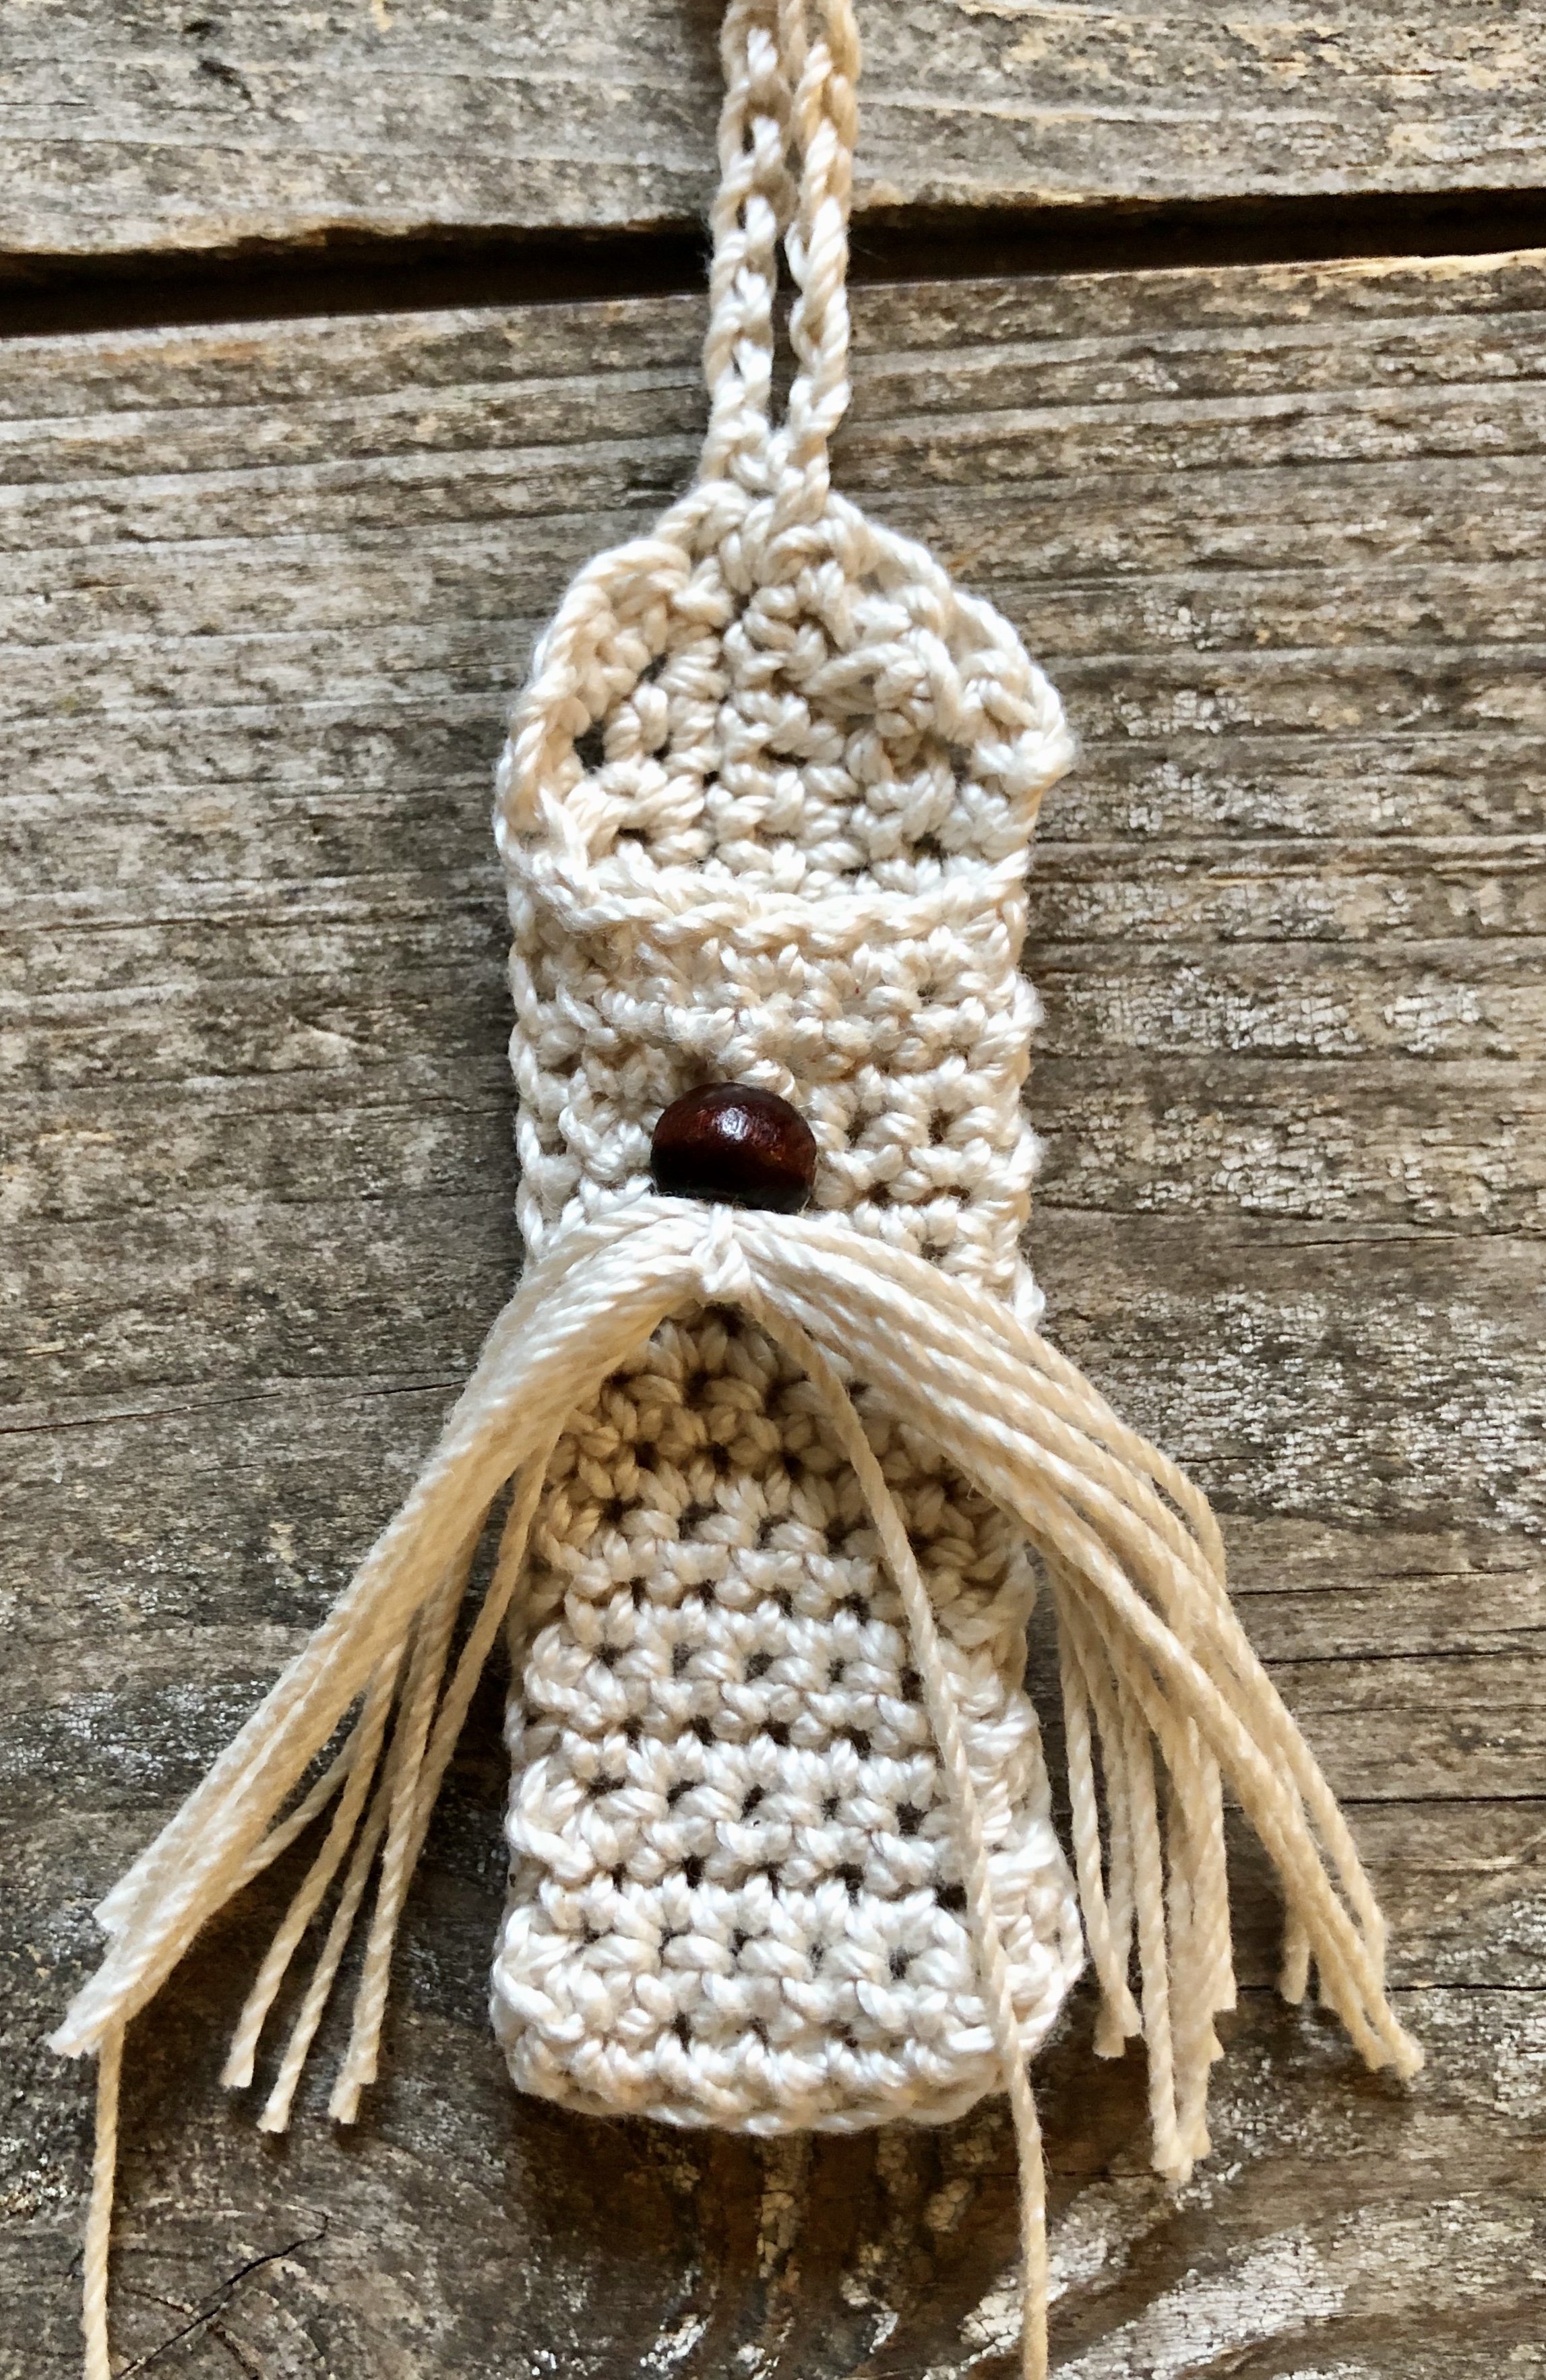
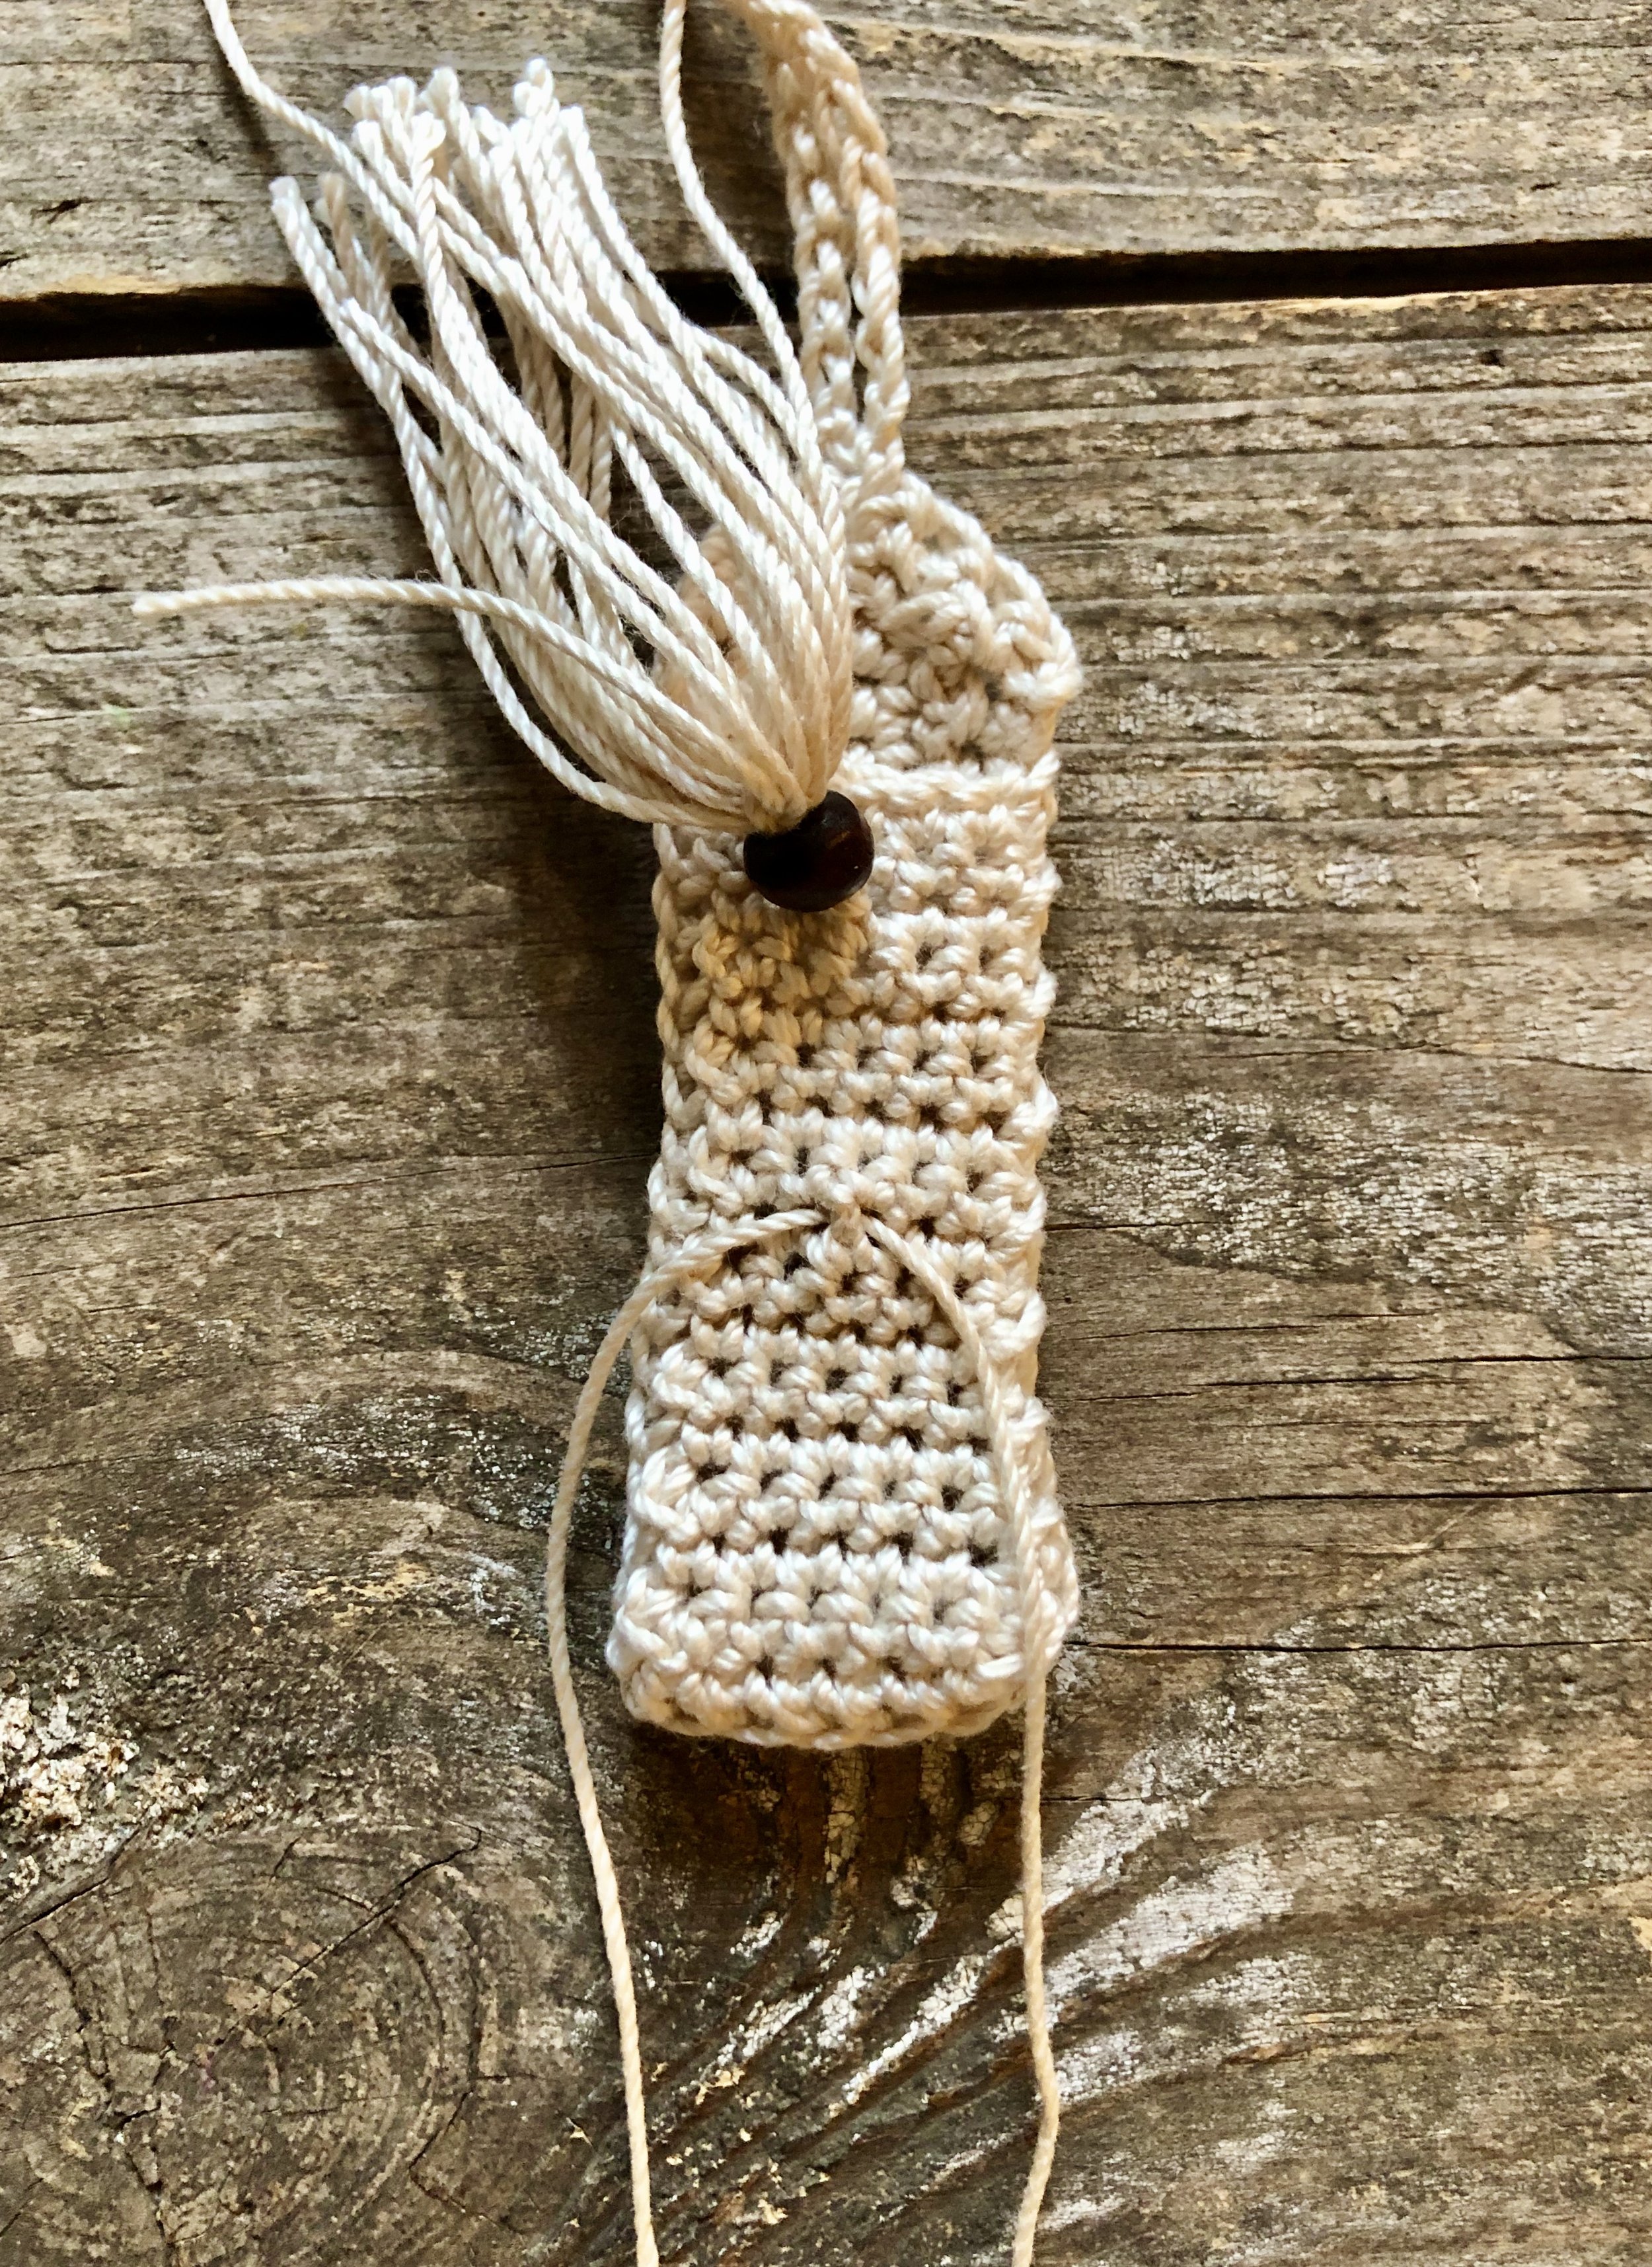
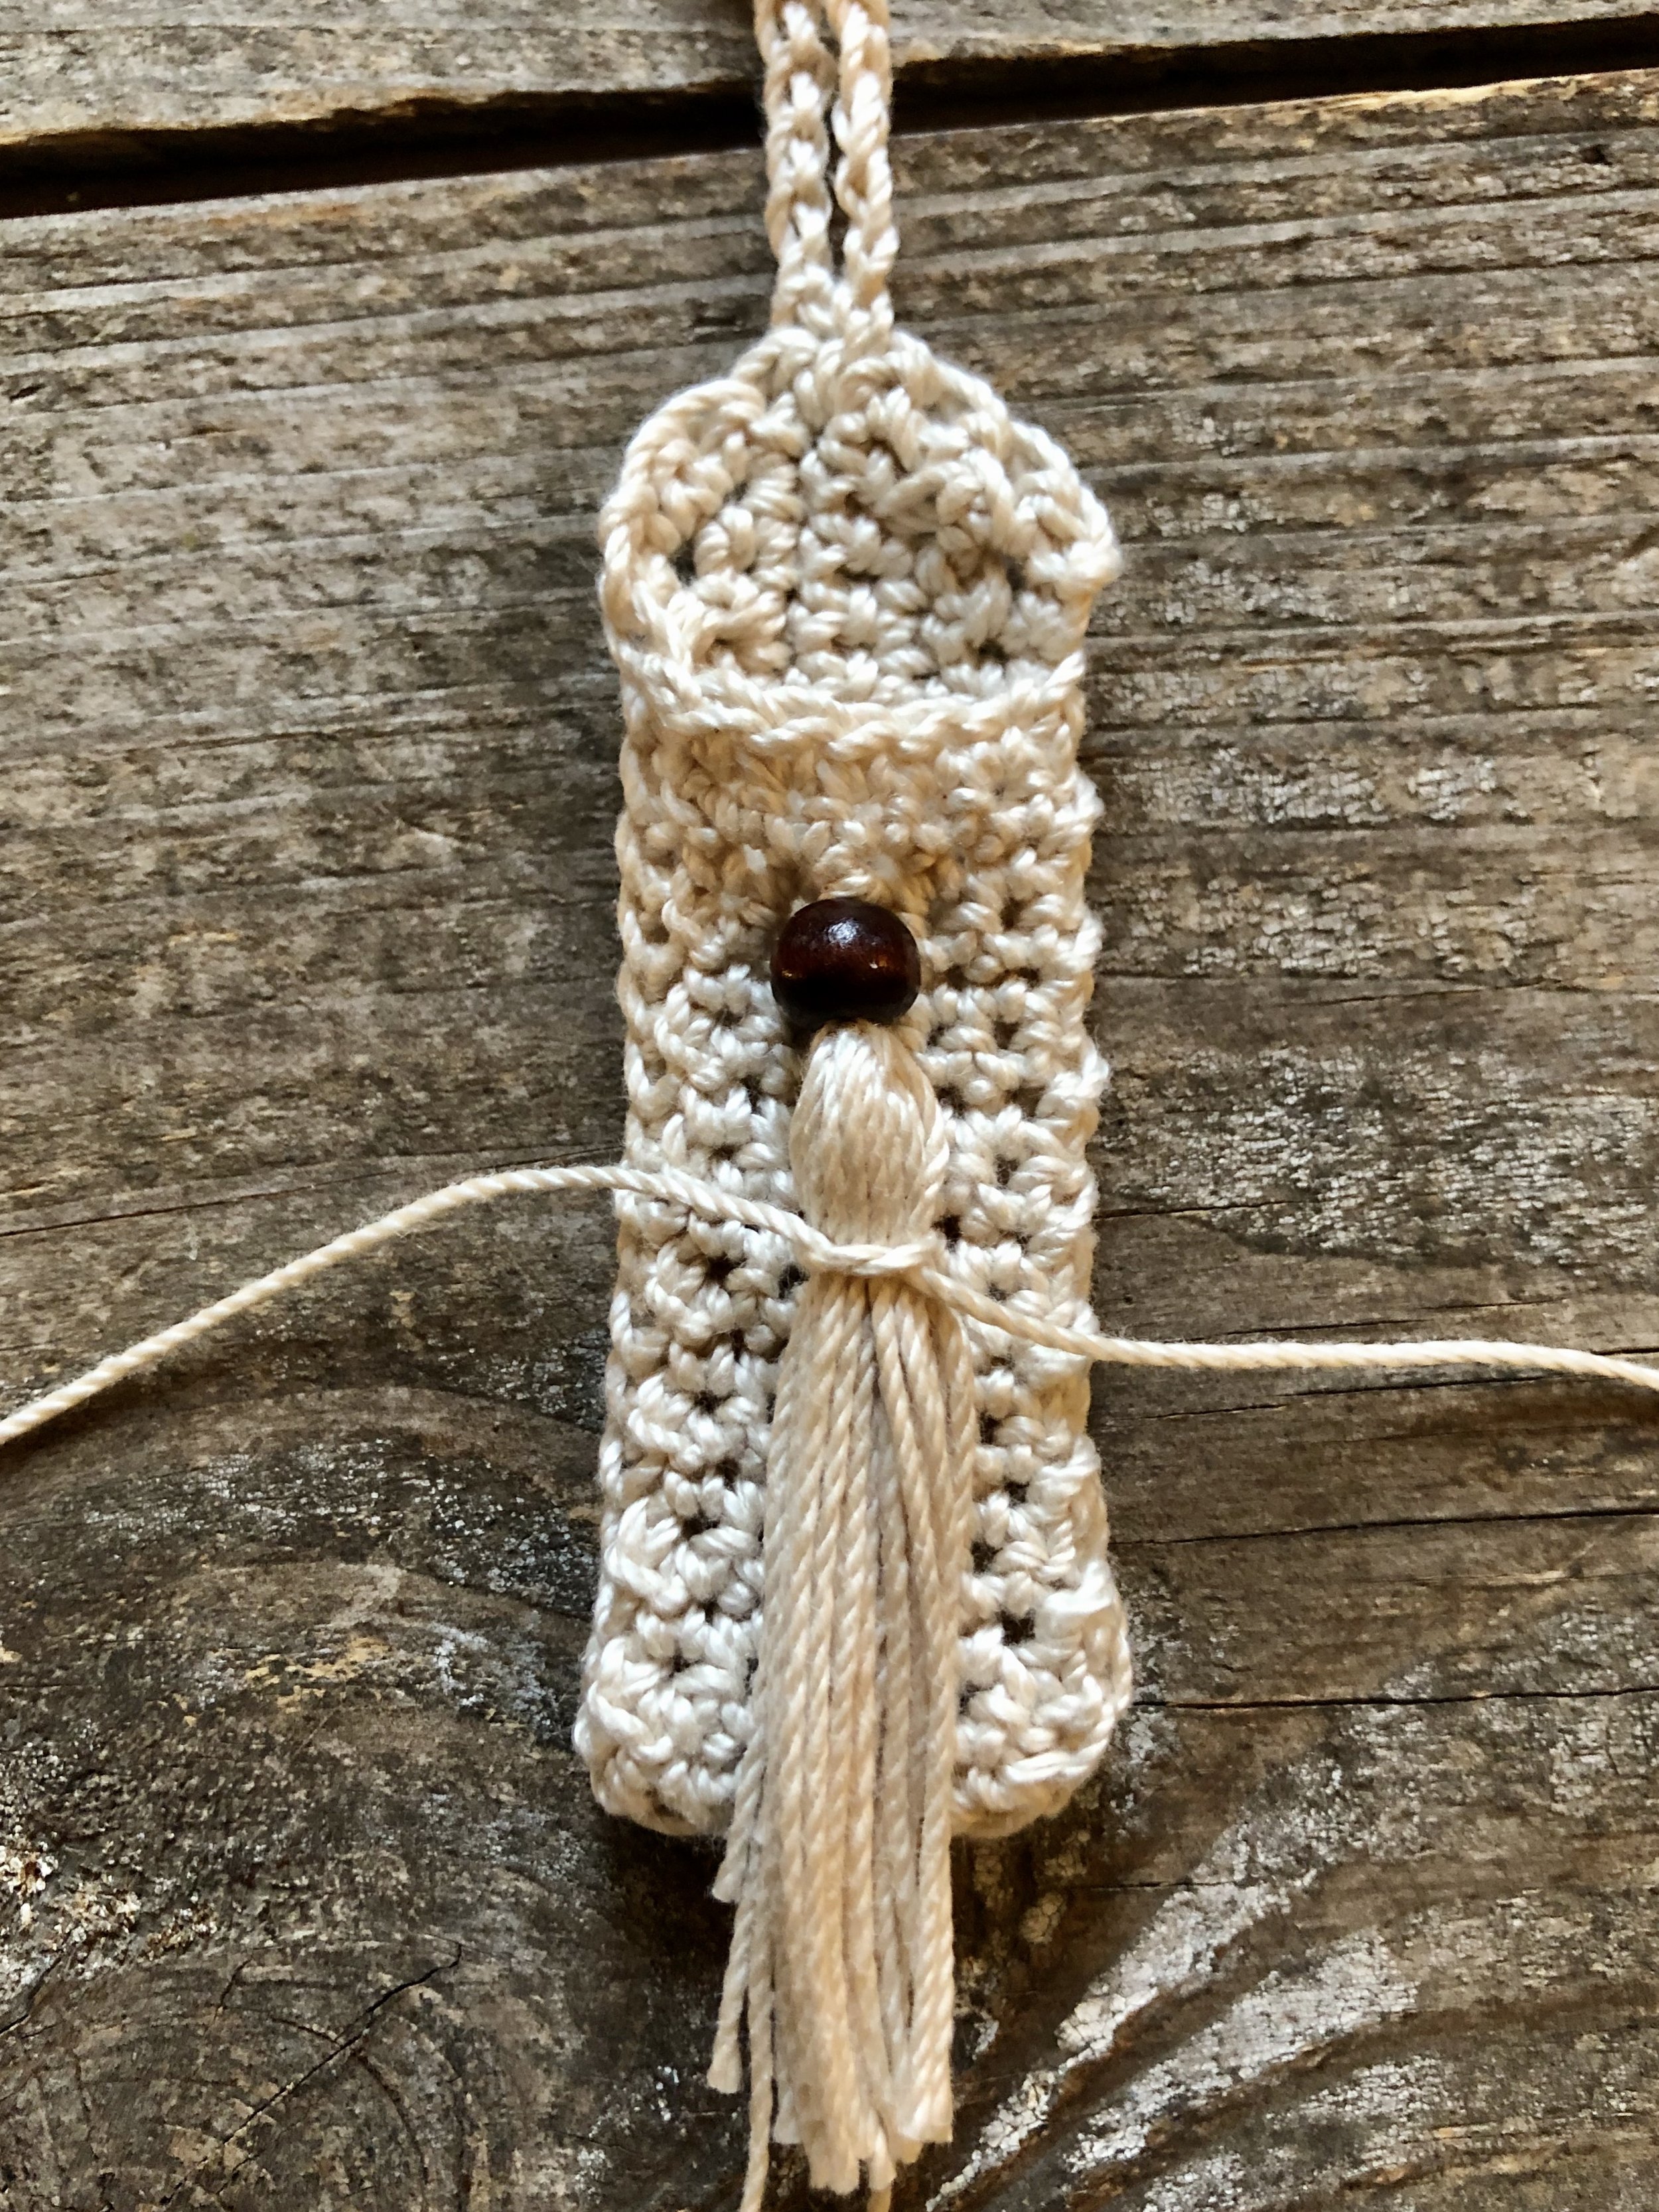
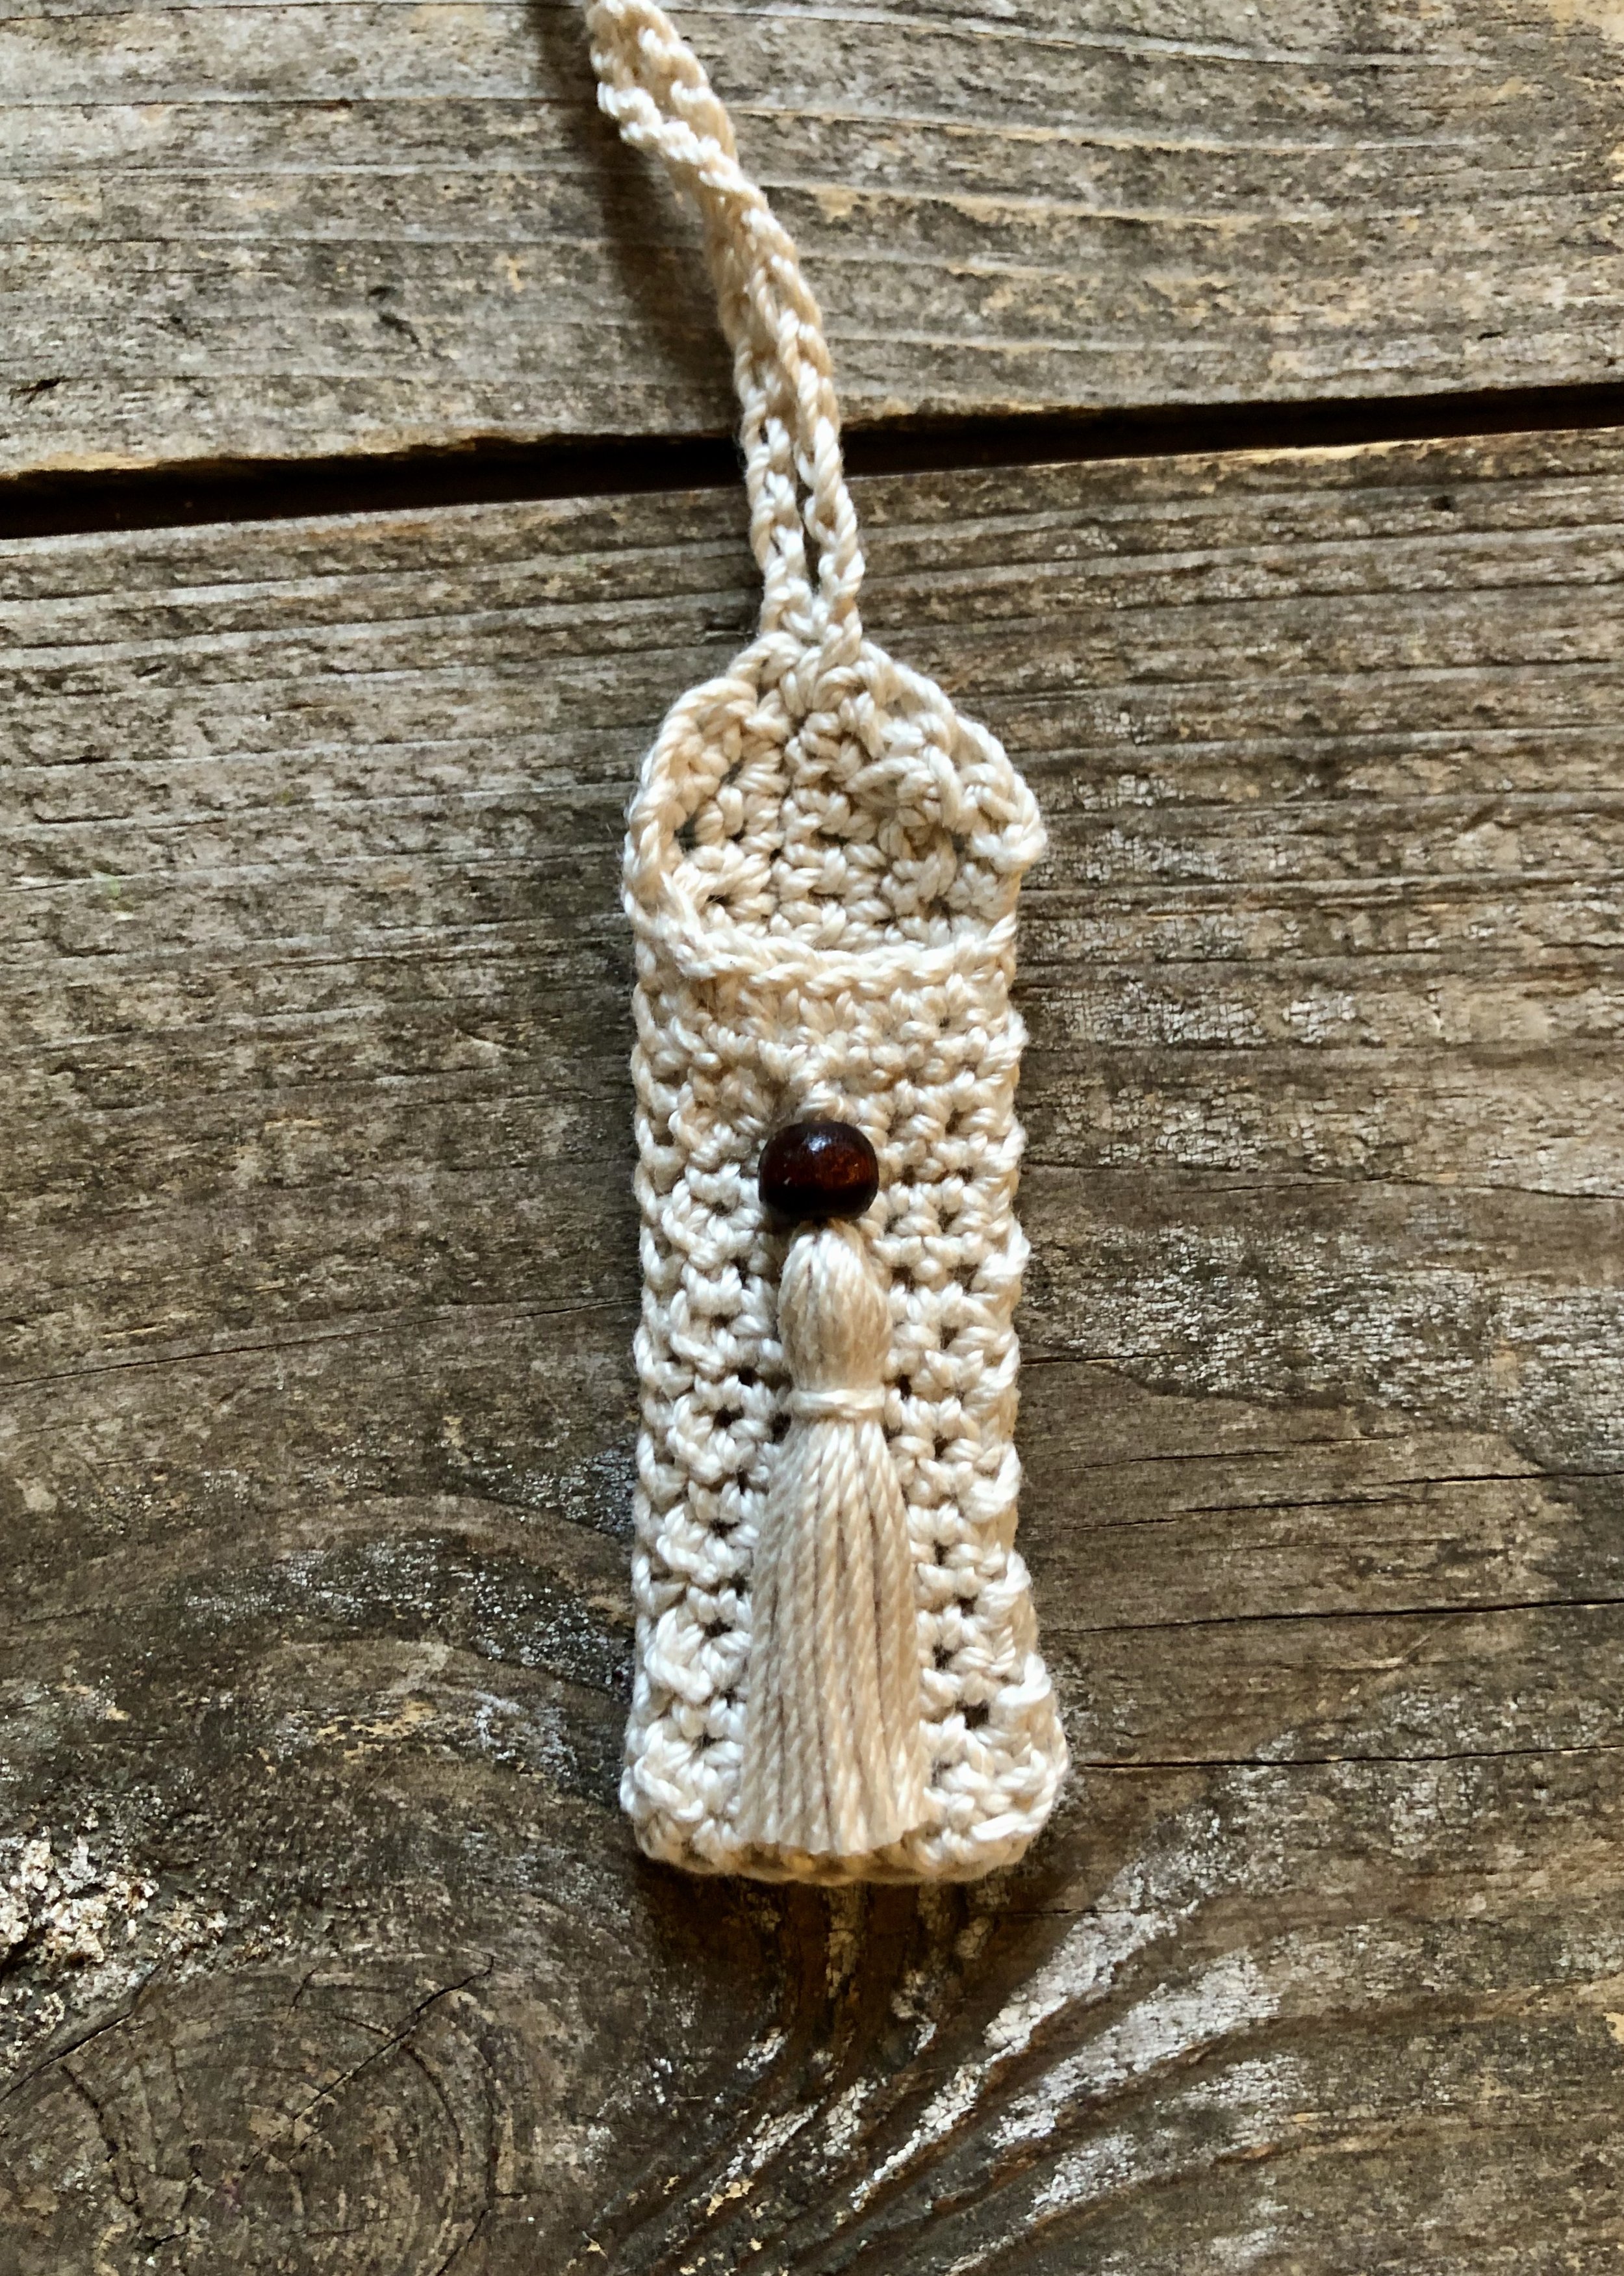
If you wish to add a tassel to the front of the cozy, you would make your tassel the same as I show you for the bottom, but you would attach your beginning strand to the area in the front of your project that gives the desired look. I would also attach the tassel to the body of the front of the cozy by wrapping your yarn around the tassel tails and into the cozy itself in order to stabilize the tassel (instead of using the gathering knot, like I show you for the bottom tassel.) I used this same method for adding a tassel on my Boho Balm Holder, so I am including the step-by-step photos for you from that project to help you visualize what I mean:
Make a necklace version
I decided to add instructions for a necklace version in case you know someone taking chemo or someone that needs to use lip balm very often. You will follow the cozy portion exactly the same, only you will begin your project by threading 9 8-10 mm wooden beads onto your working yarn prior to beginning. You will slide these beads down until you need them. See photo:
Once you have threaded all 9 of your beads onto your working yarn, make the cozy as instructed to above. After completing round 15, you will make your necklace instead of your hanging loop as follows:
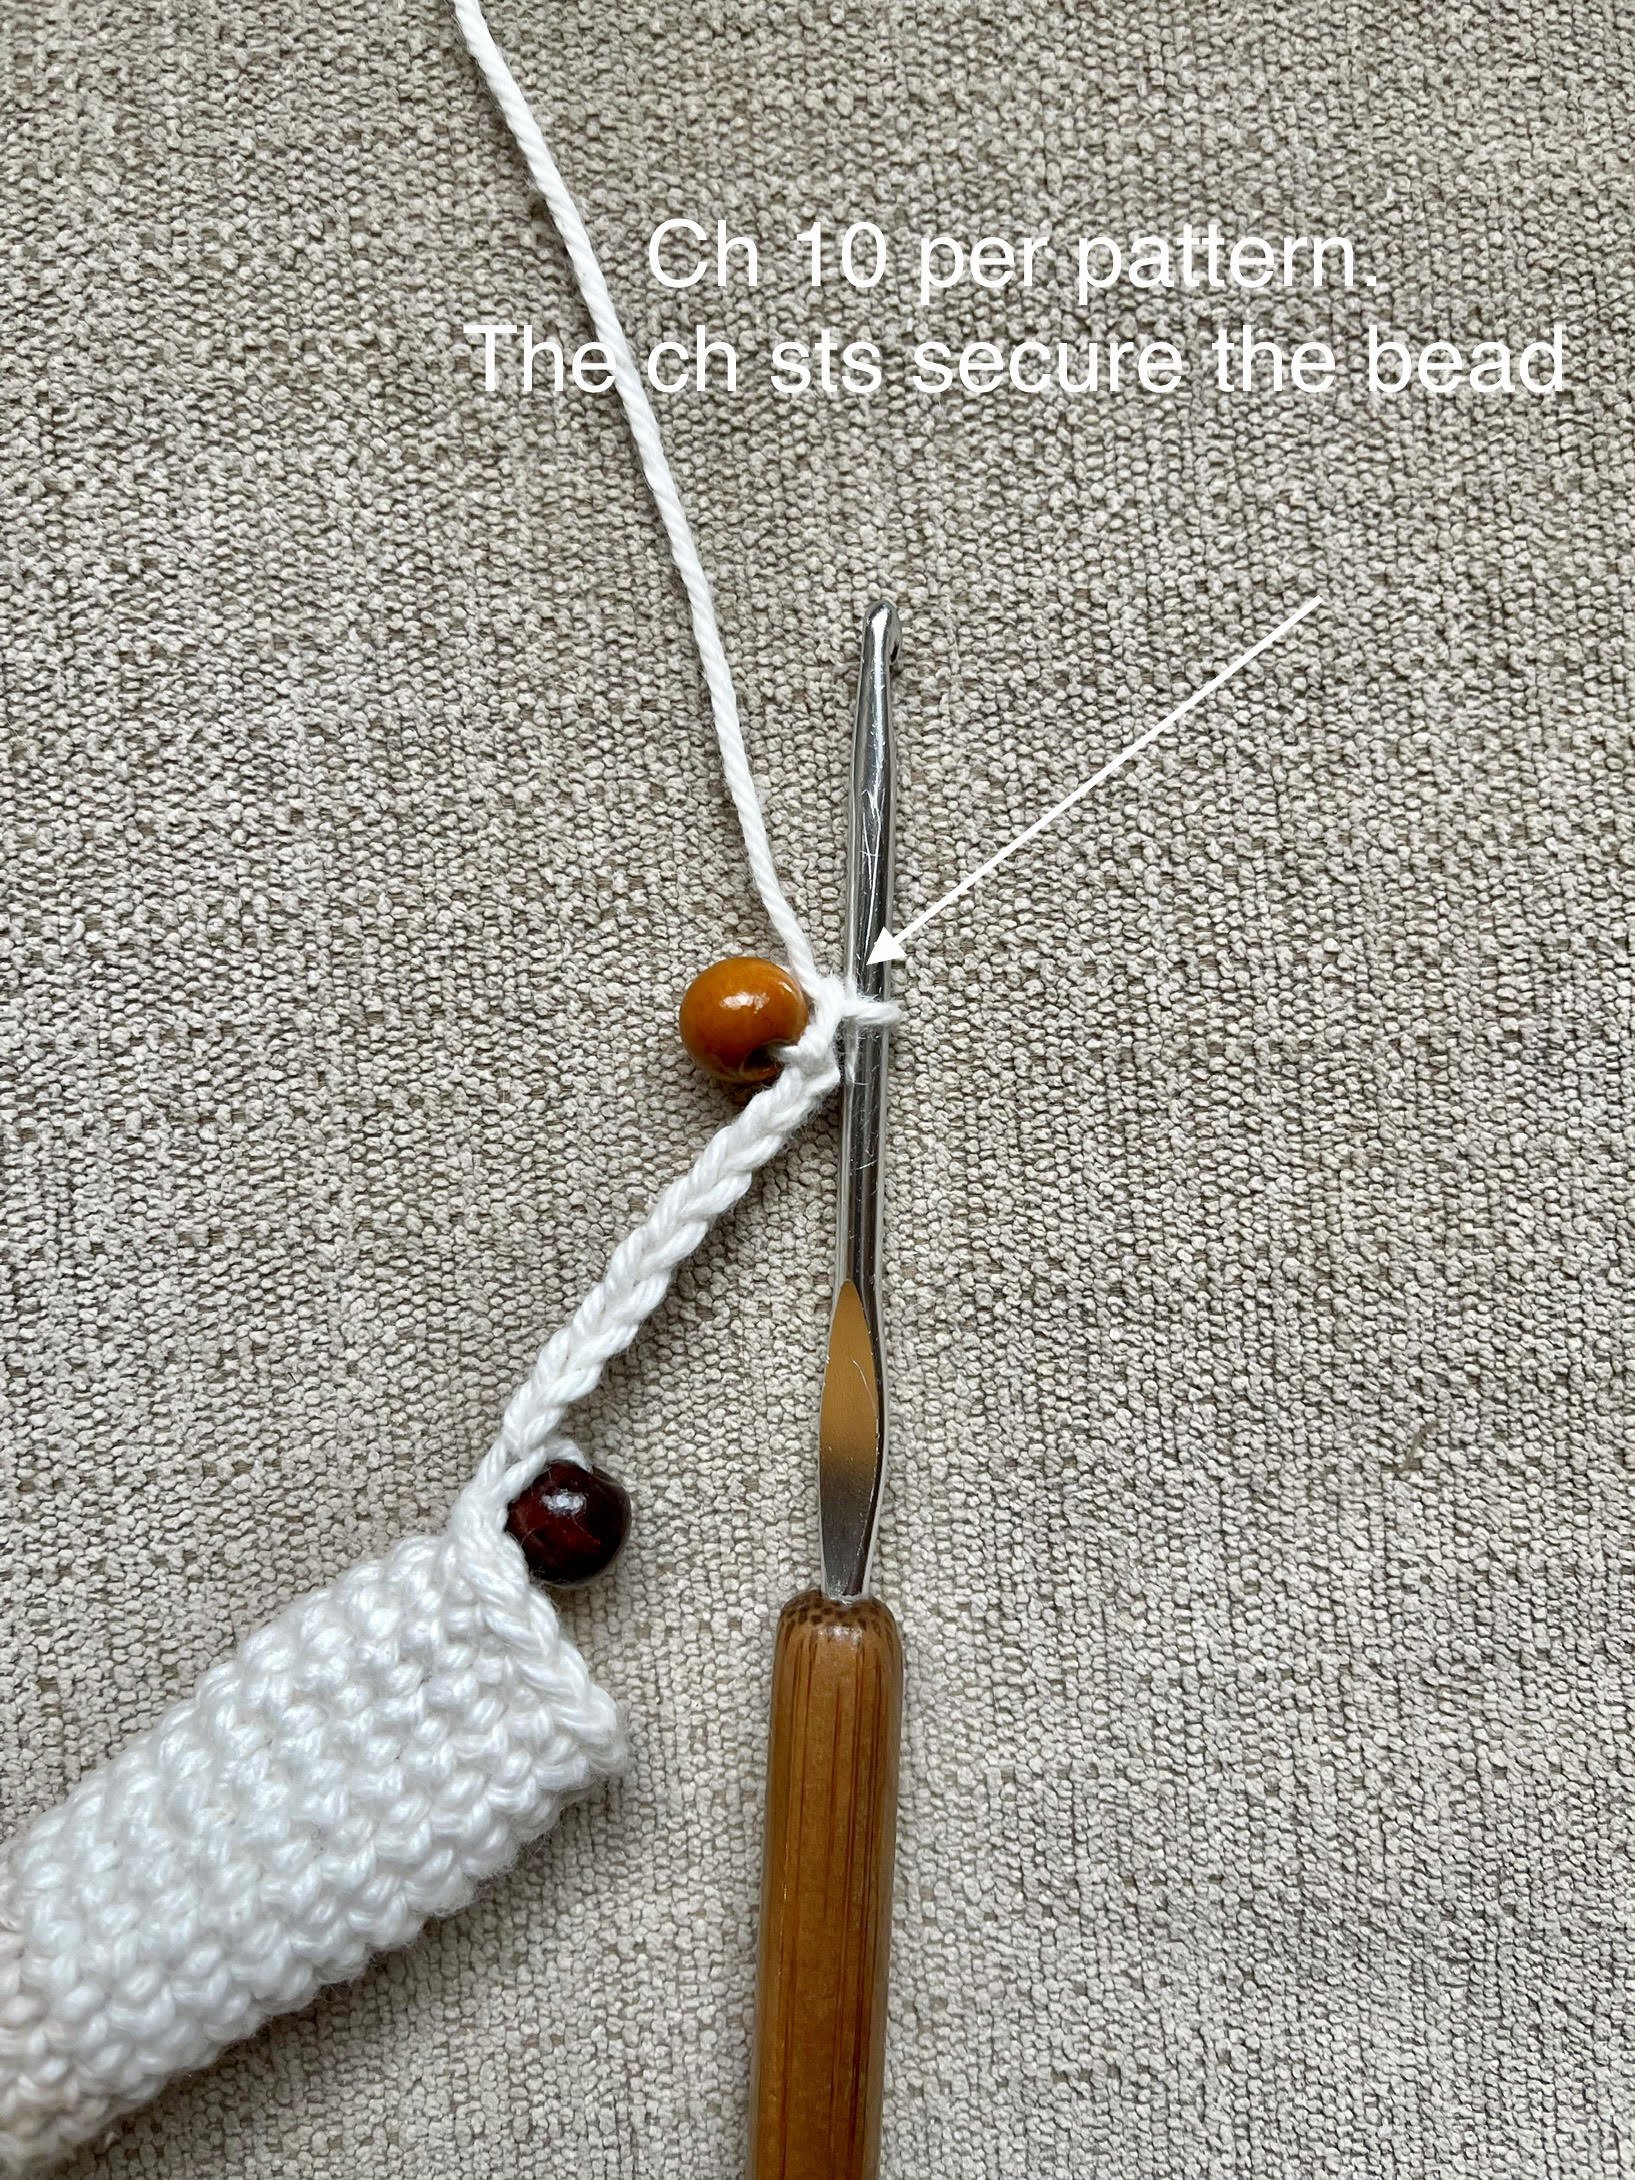
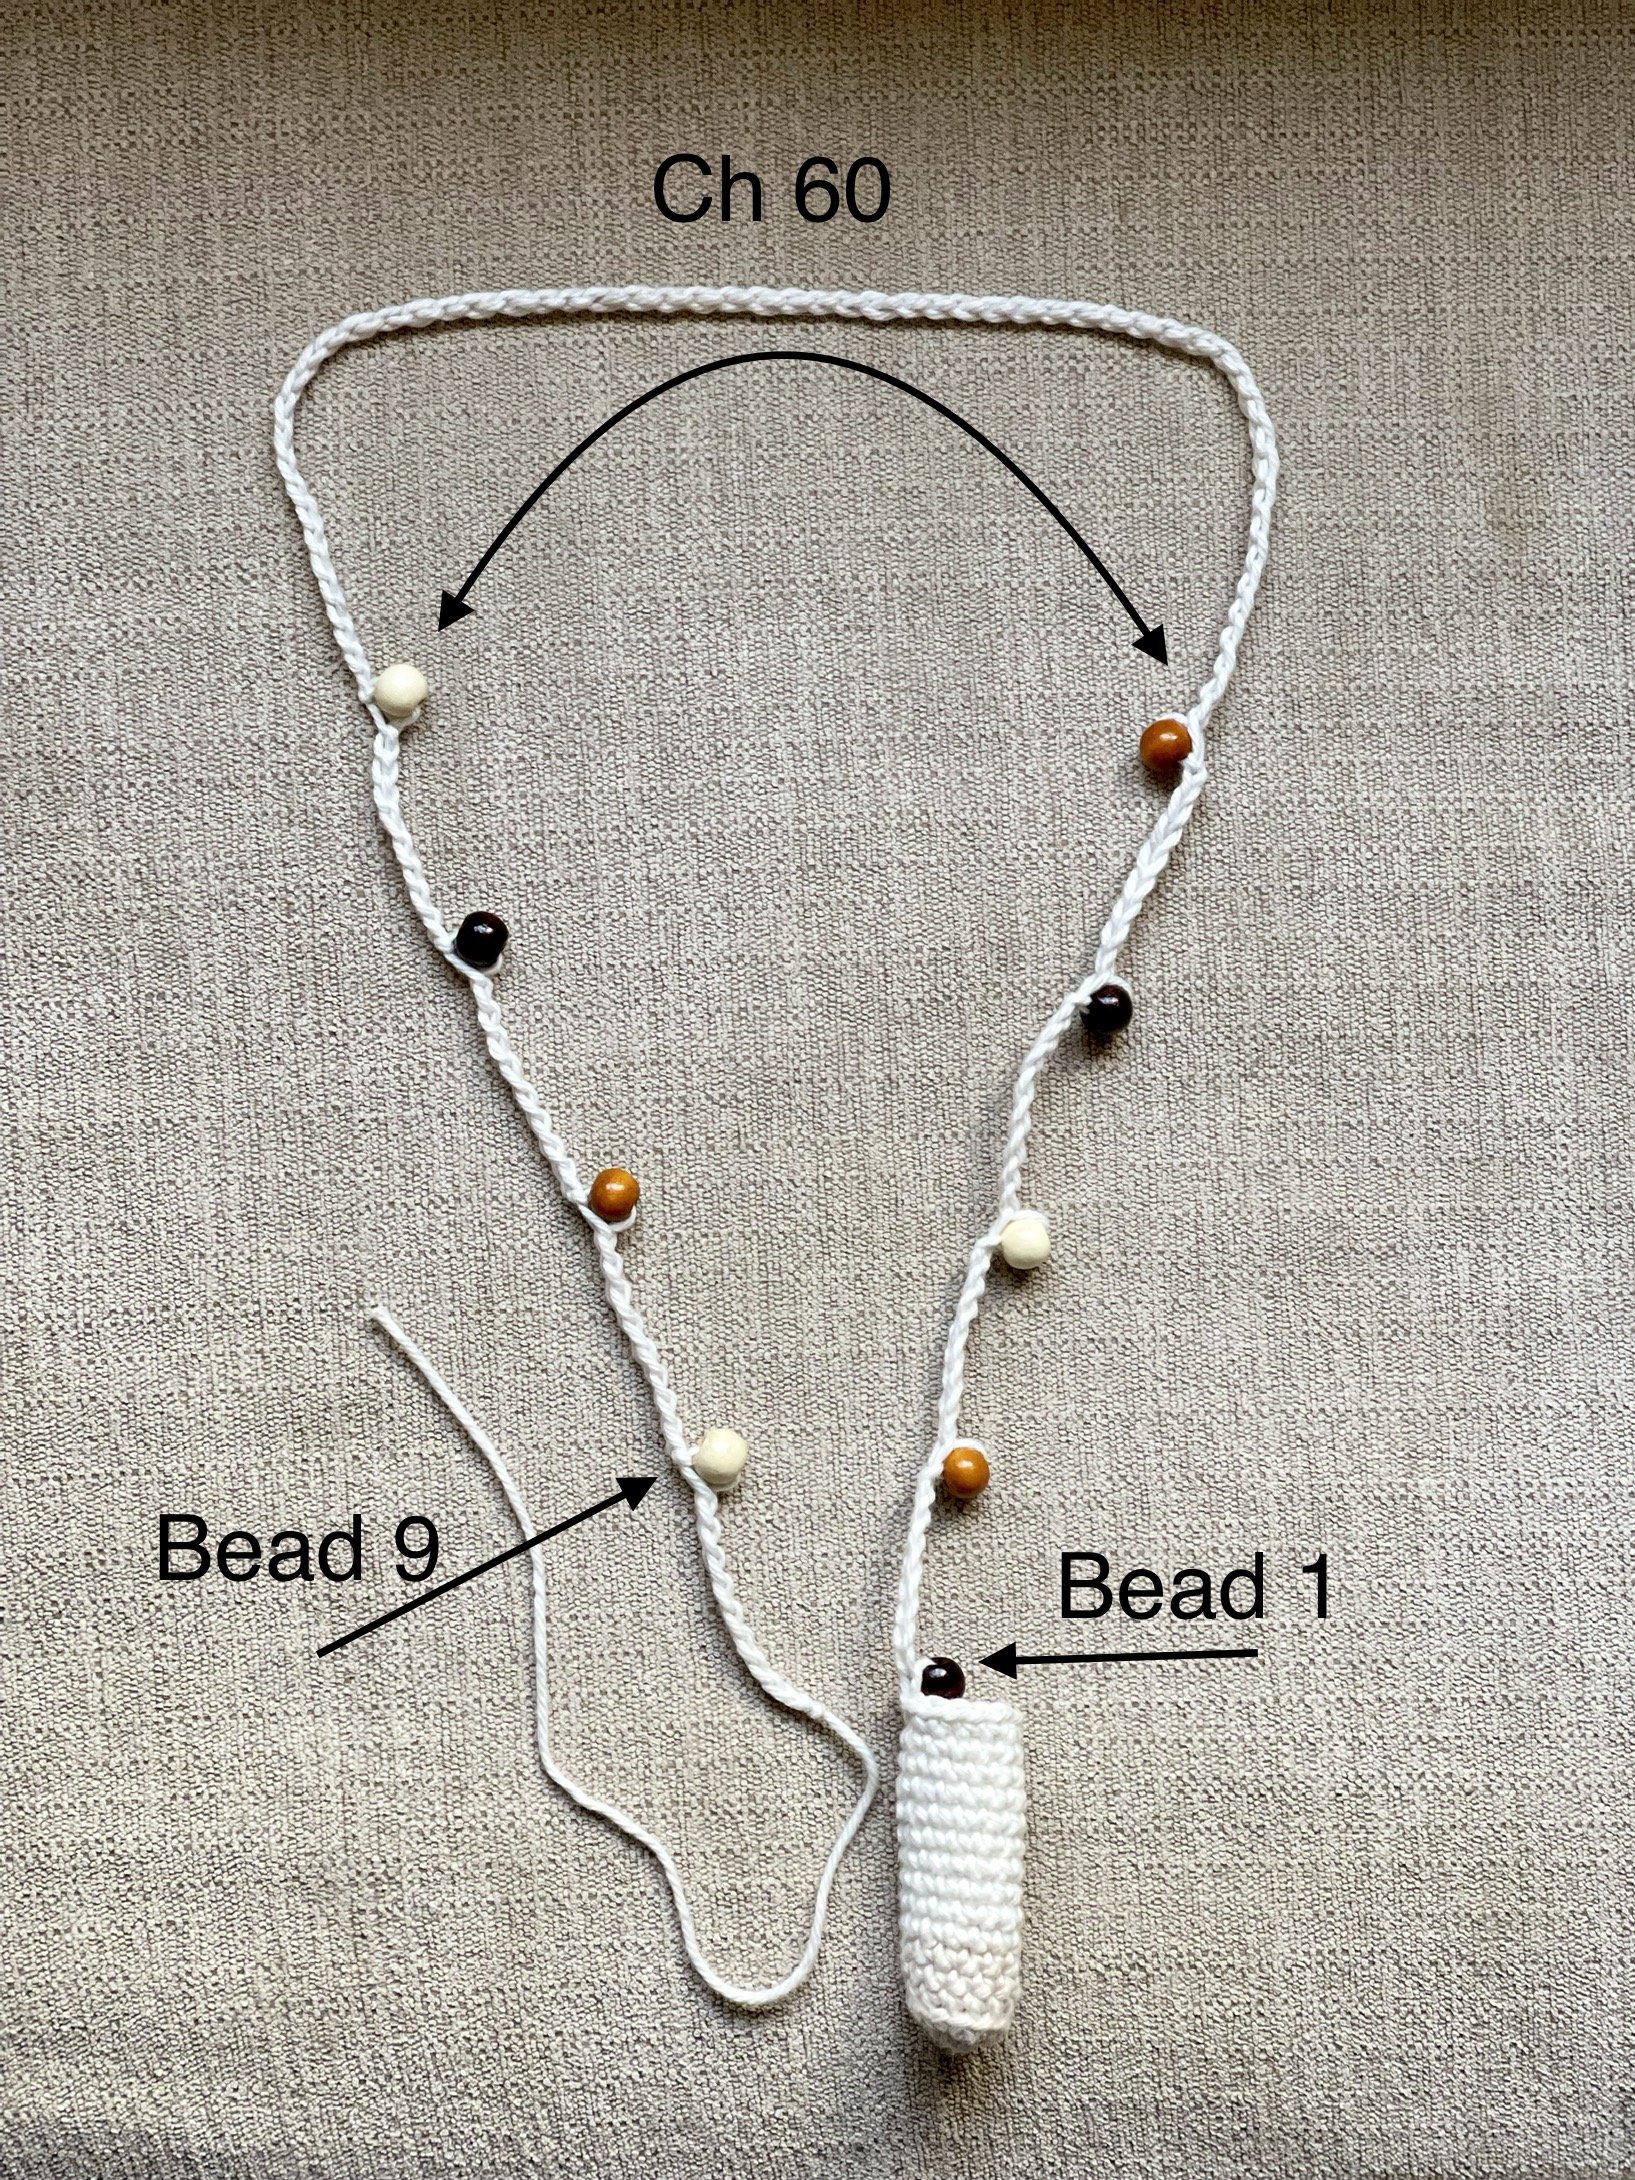
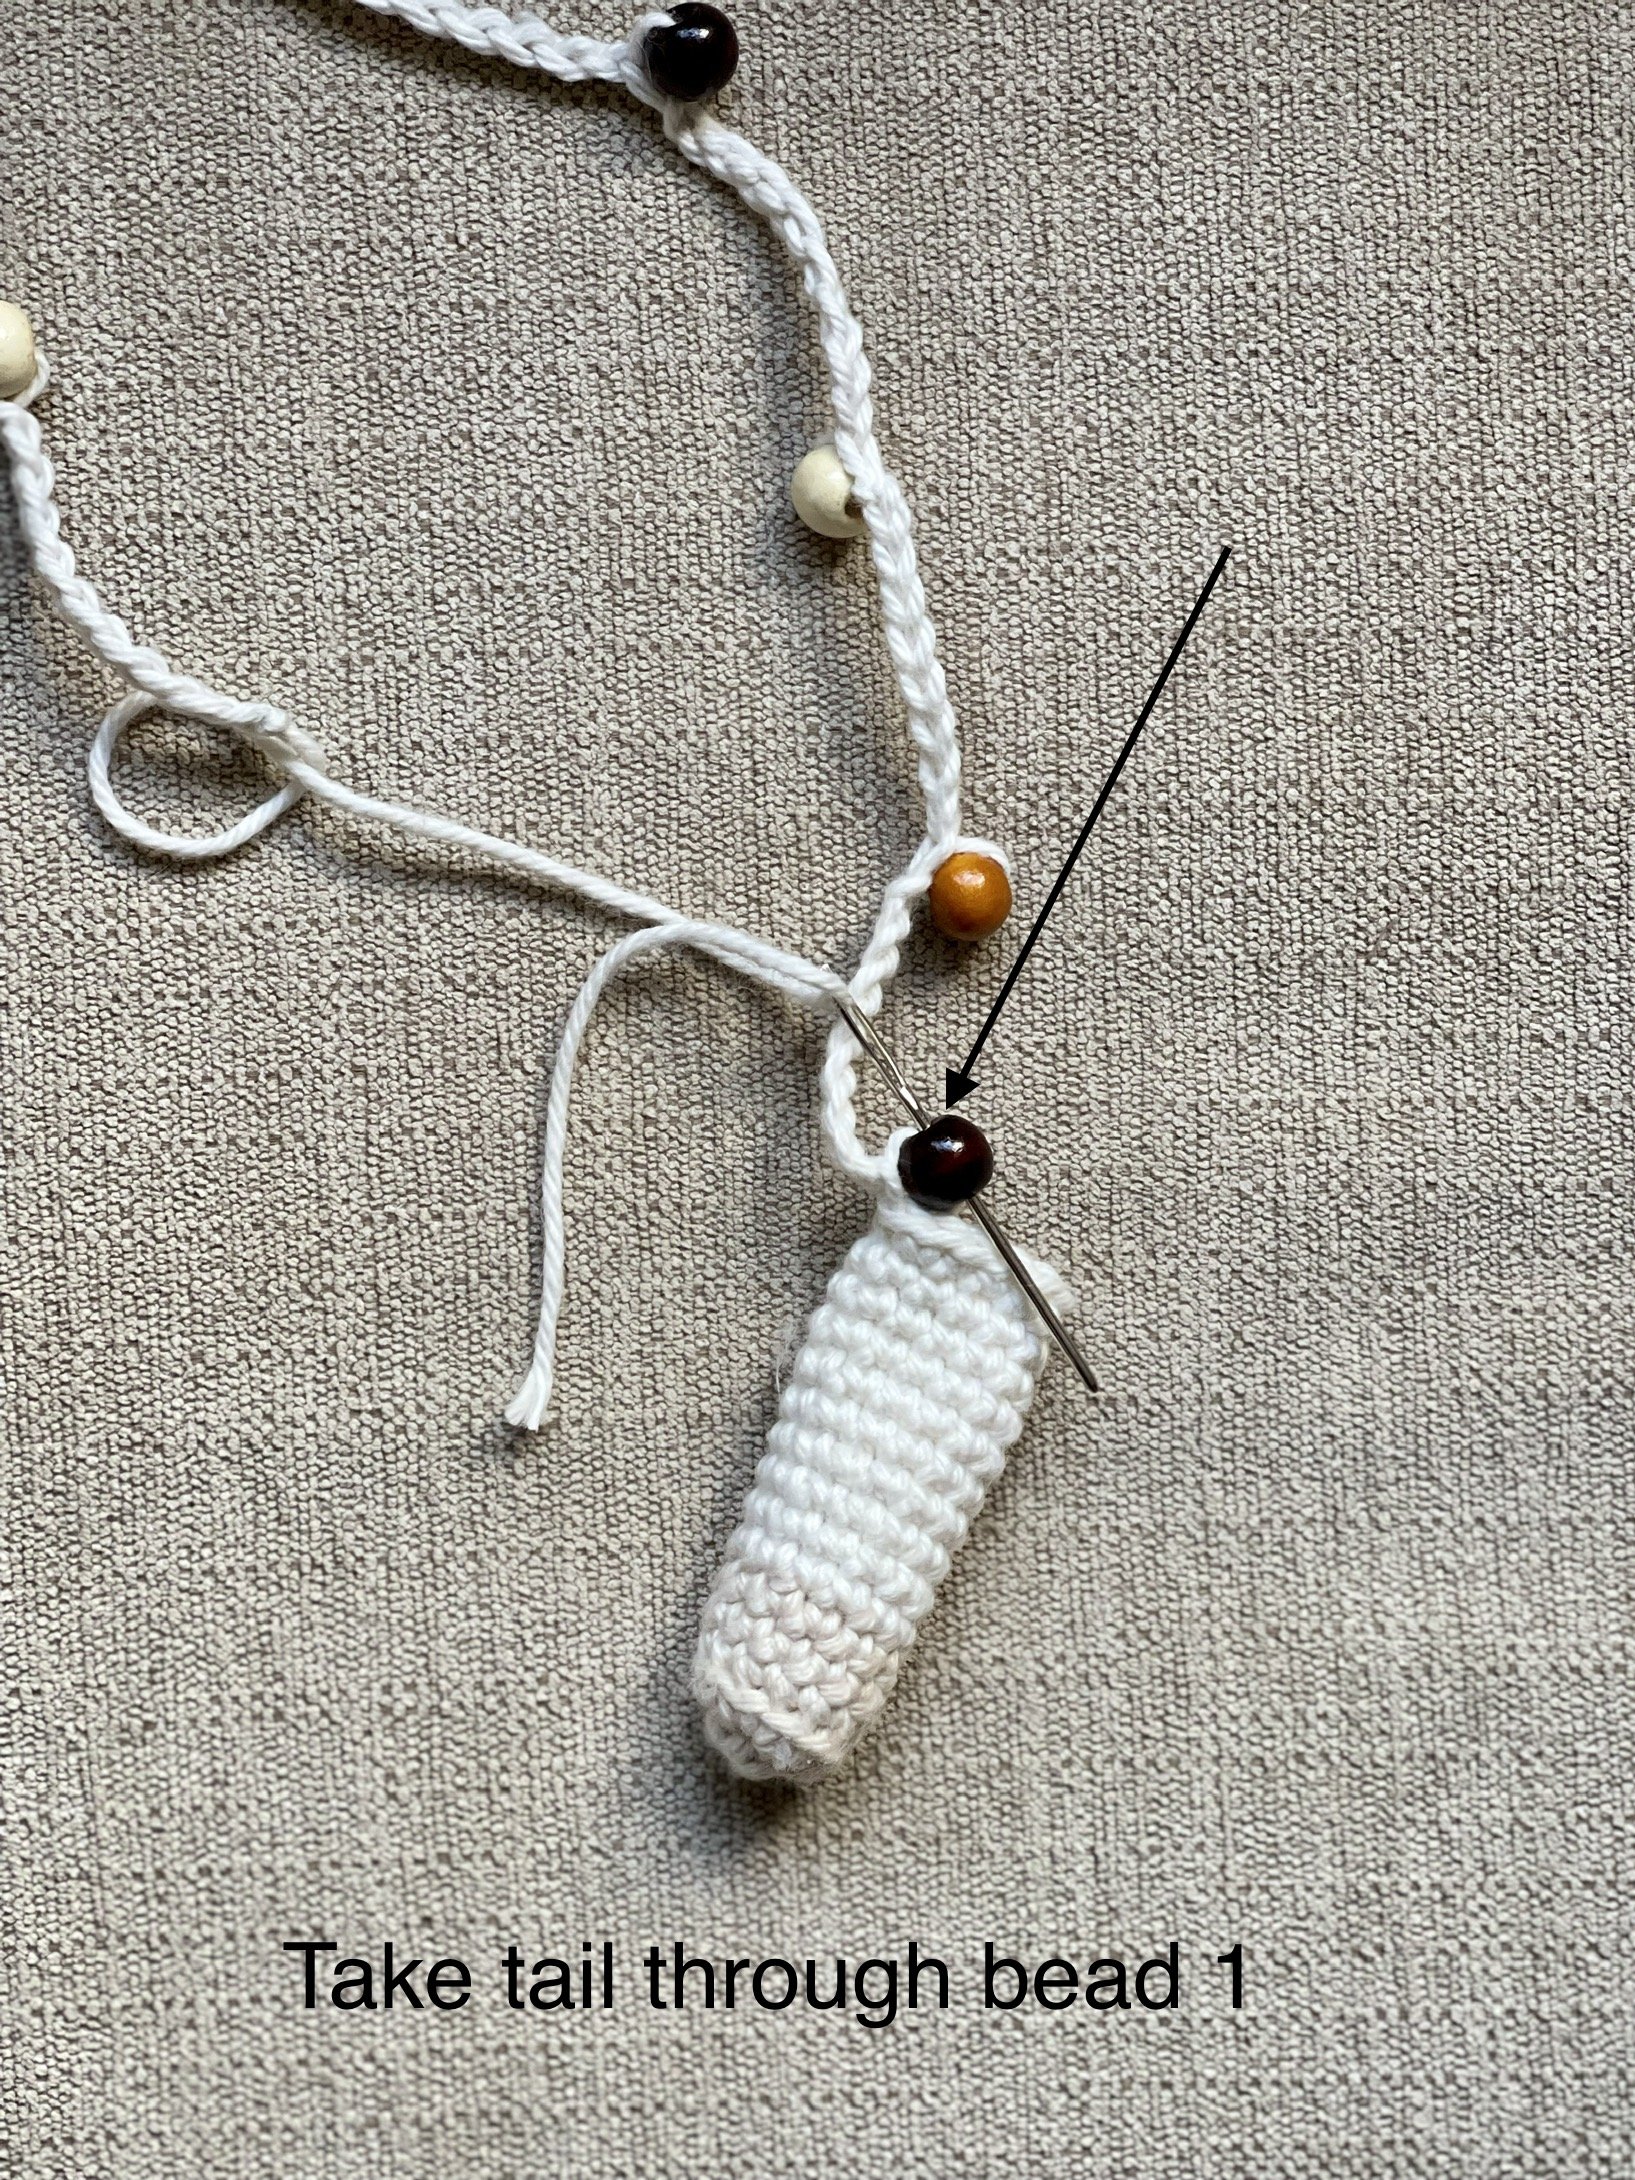
Sl st into first sc of round 15, ch 1, PB, {ch 10, PB} rep brackets until you have a total of 5 beads on your ch, ch 60, {PB, ch 10} rep brackets a total of 4 times. FO, leaving a long tail. Thread tail onto yarn needle and thread through first bead st made. Weave tail further into cozy body to secure and cut off excess. Add tassel to bottom of cozy as instructed above.
Your Lily Lip Balm Cozy is complete! I would love to see your finished work! If you want to tag me on IG, I’m @dayscrochetnc. You could also use the hashtag #Lilylipbalmcozy to follow what others are making. I can’t wait to see your projects! If you would like to see other versions that I will be making after this publication, be sure to check me out on IG!

Please note that you do not have my permission to sell, illegally share, copy, or duplicate this pattern or my photos in any way. Please do not use this pattern for a video, blog, or class tutorial. Thank you so much for following these simple rules! Please message me on Facebook or send me an email at dayscrochetnc@gmail.com with any questions.

Come join my Facebook group, Crochet for Days! We have a lot of fun and I often offer discounts and coupon codes to my members that I don’t offer anywhere else! Request to join and answer the questions by following this link.

Did you have fun making this project? Let me know in the comments!
Happy hooking!
~Dana