
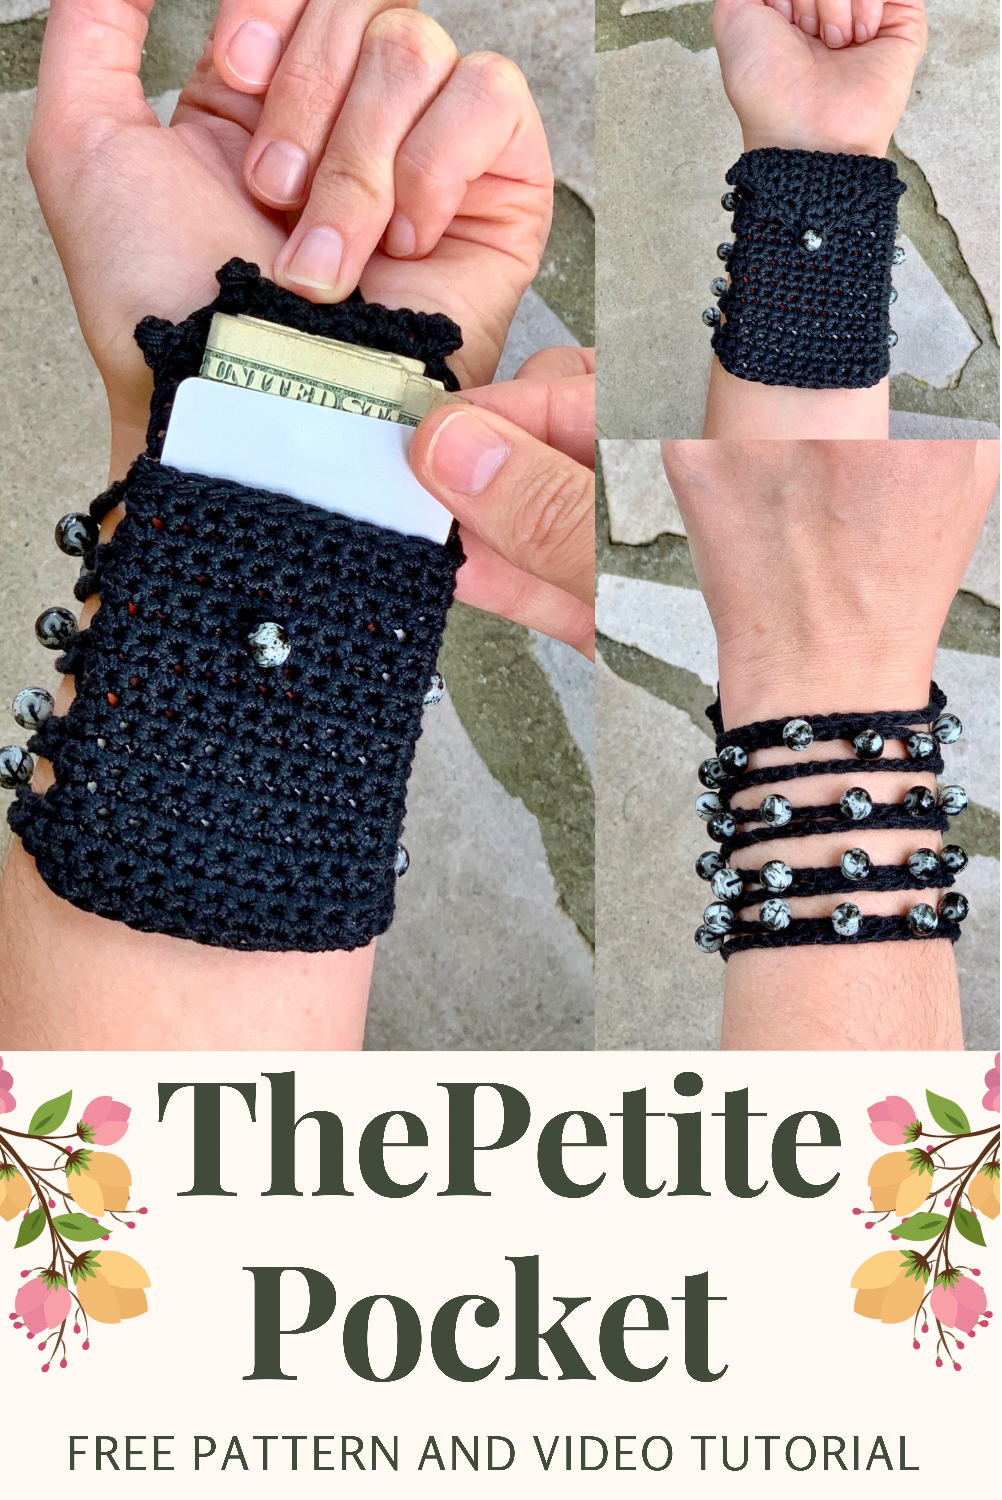
The Petite Pocket Wrist Wallet
If you are like me, you hate carrying a purse everywhere.
Not only does it kill my shoulders and neck, I just prefer to be as hands free as possible. When my son was an infant, I felt like a pack mule carrying all the different bags. This design was born out of desperation to eliminate my purse while running errands with my son.
This post may contain affiliate links that help me to continue to post free content. If you prefer to skip the ads and have a printable pdf, you can find this pattern for relatively little cost in both my Etsy and Ravelry shops.
The main thing I love about these crochet wrist wallets is that they are made seamlessly—which means NO sewing! There are only 2 ends to weave in (WOOT!) and they work up relatively quickly. They are also SO much fun to make because it’s so easy to add your own flair by simply changing up the yarn and the beads. I have found that I am now a yarn hoarder AND a bead hoarder LOL!
I personally love making these and they are seriously so addicting! And the best news is, they sell like hot cakes for me at my vendor markets. I usually wear one for demonstration and I keep my business cards inside so to show them how it works. My customers love how it looks like a beaded bracelet on one side and functions as a small wallet on the other. I have found $15 to be the “sweet spot” for a price point, but if your customers are willing to pay more, I say go for it!
I have had several customers talk about how they plan to wear them to the beach to hold their room key and some cash in so they can be hands free. Others have mentioned wearing it to a concert or a festival/fair. One of my testers also loved it because she has to wear braces and use canes to walk, and it helps her to be able to have her hands free while walking.
It’s also great to put on your kids to wear when going to theme parks like Disney or on field trips with the school so they aren’t as likely to lose their money. You could even put your child’s name and phone number using letter and number beads in case they get separated from you or the class!

You could add little flower beads or different colored beads to add more flair and keep the same number of rows of beads. You will just have to be mindful of which order you place them onto your working yarn so that they are in order. I recommend laying them out like this before threading them onto your yarn.
Not only do they sell extremely well, they make great gifts or stocking stuffers. You could put a gift card or money inside the pocket and throw it in a stocking or add it to a nice gift. I think people of all ages appreciate how cute and functional it is!
One thing that is important to note about this pattern is you need to be sure your beads have a center hole big enough to slide onto your yarn you are using since you will be threading it onto your working yarn and crocheting the beads into your work as you go. I have found the best way to do this is to get a sewing needle with a larger eye in order to thread your beads on. You could also use beading wire to thread through the beads, or painting the tip with fingernail polish and manually sliding the beads onto the strand once it dries.


Enough of my rambling! Let’s make it!!
Supplies Needed:
- 50-75 yds of cotton/cotton blend DK yarn (size 3), such as Lion Brand Comfy Cotton Blend or Lion Brand Coboo, or Knit Pick’s Cotlin. If you choose to use Coboo, you may need to go up a hook size or crochet more loosely. (Note: You could also use acrylic yarn, but it will stretch quite a bit.)
- Crochet hook size F 3.75 mm (or size needed to obtain gauge).
- 8-10 mm beads of your choice, 25 beads for the original design, 30 beads for the finger loop design. NOTE: The beads must have rather large holes to fit onto your strand of yarn.
- Scissors, measuring tape, and yarn needle.
Terminology and Abbreviations Used:
Pattern is written in US terminology.
Back Loop Only - BLO
Chain(s) - ch(s)
Fasten Off - FO
Front Loop Only - FLO
Place Bead - PB
Repeat - rep
Single Crochet - sc
Single Crochet 2 Together - sc2tog
Skip - sk
Slip Stitch - sl st
Stitch(es) - st(s)
Special Stitches:
Picot: Ch 3, sc in the 3rd ch from your hook.
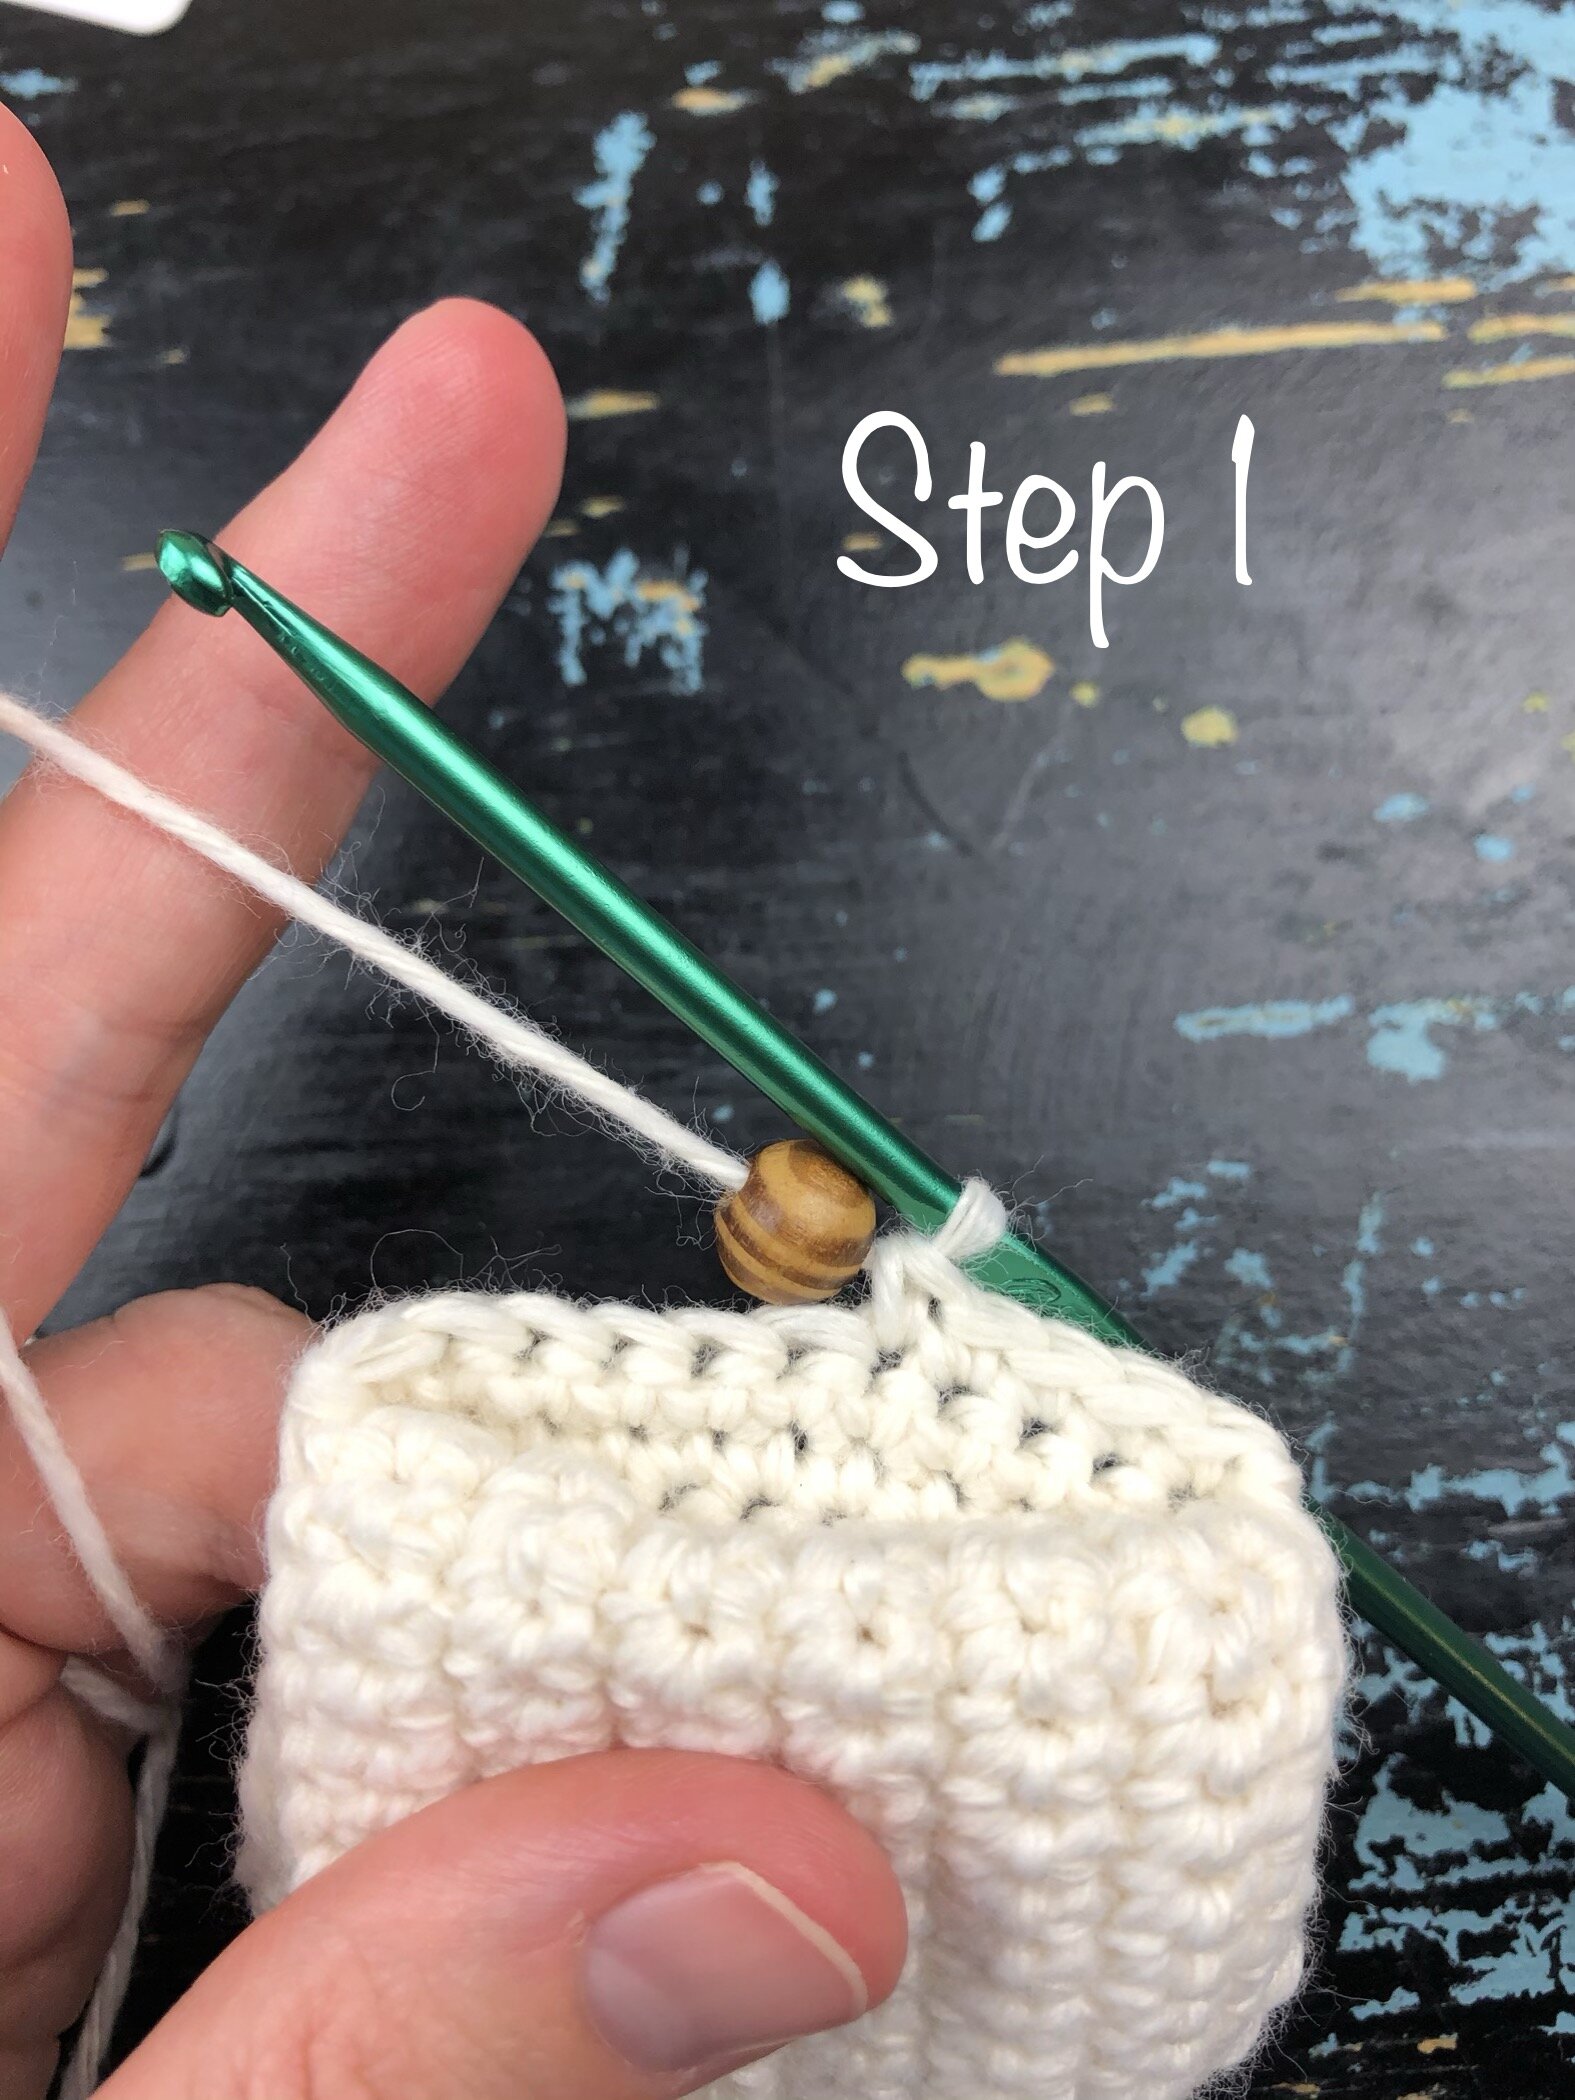
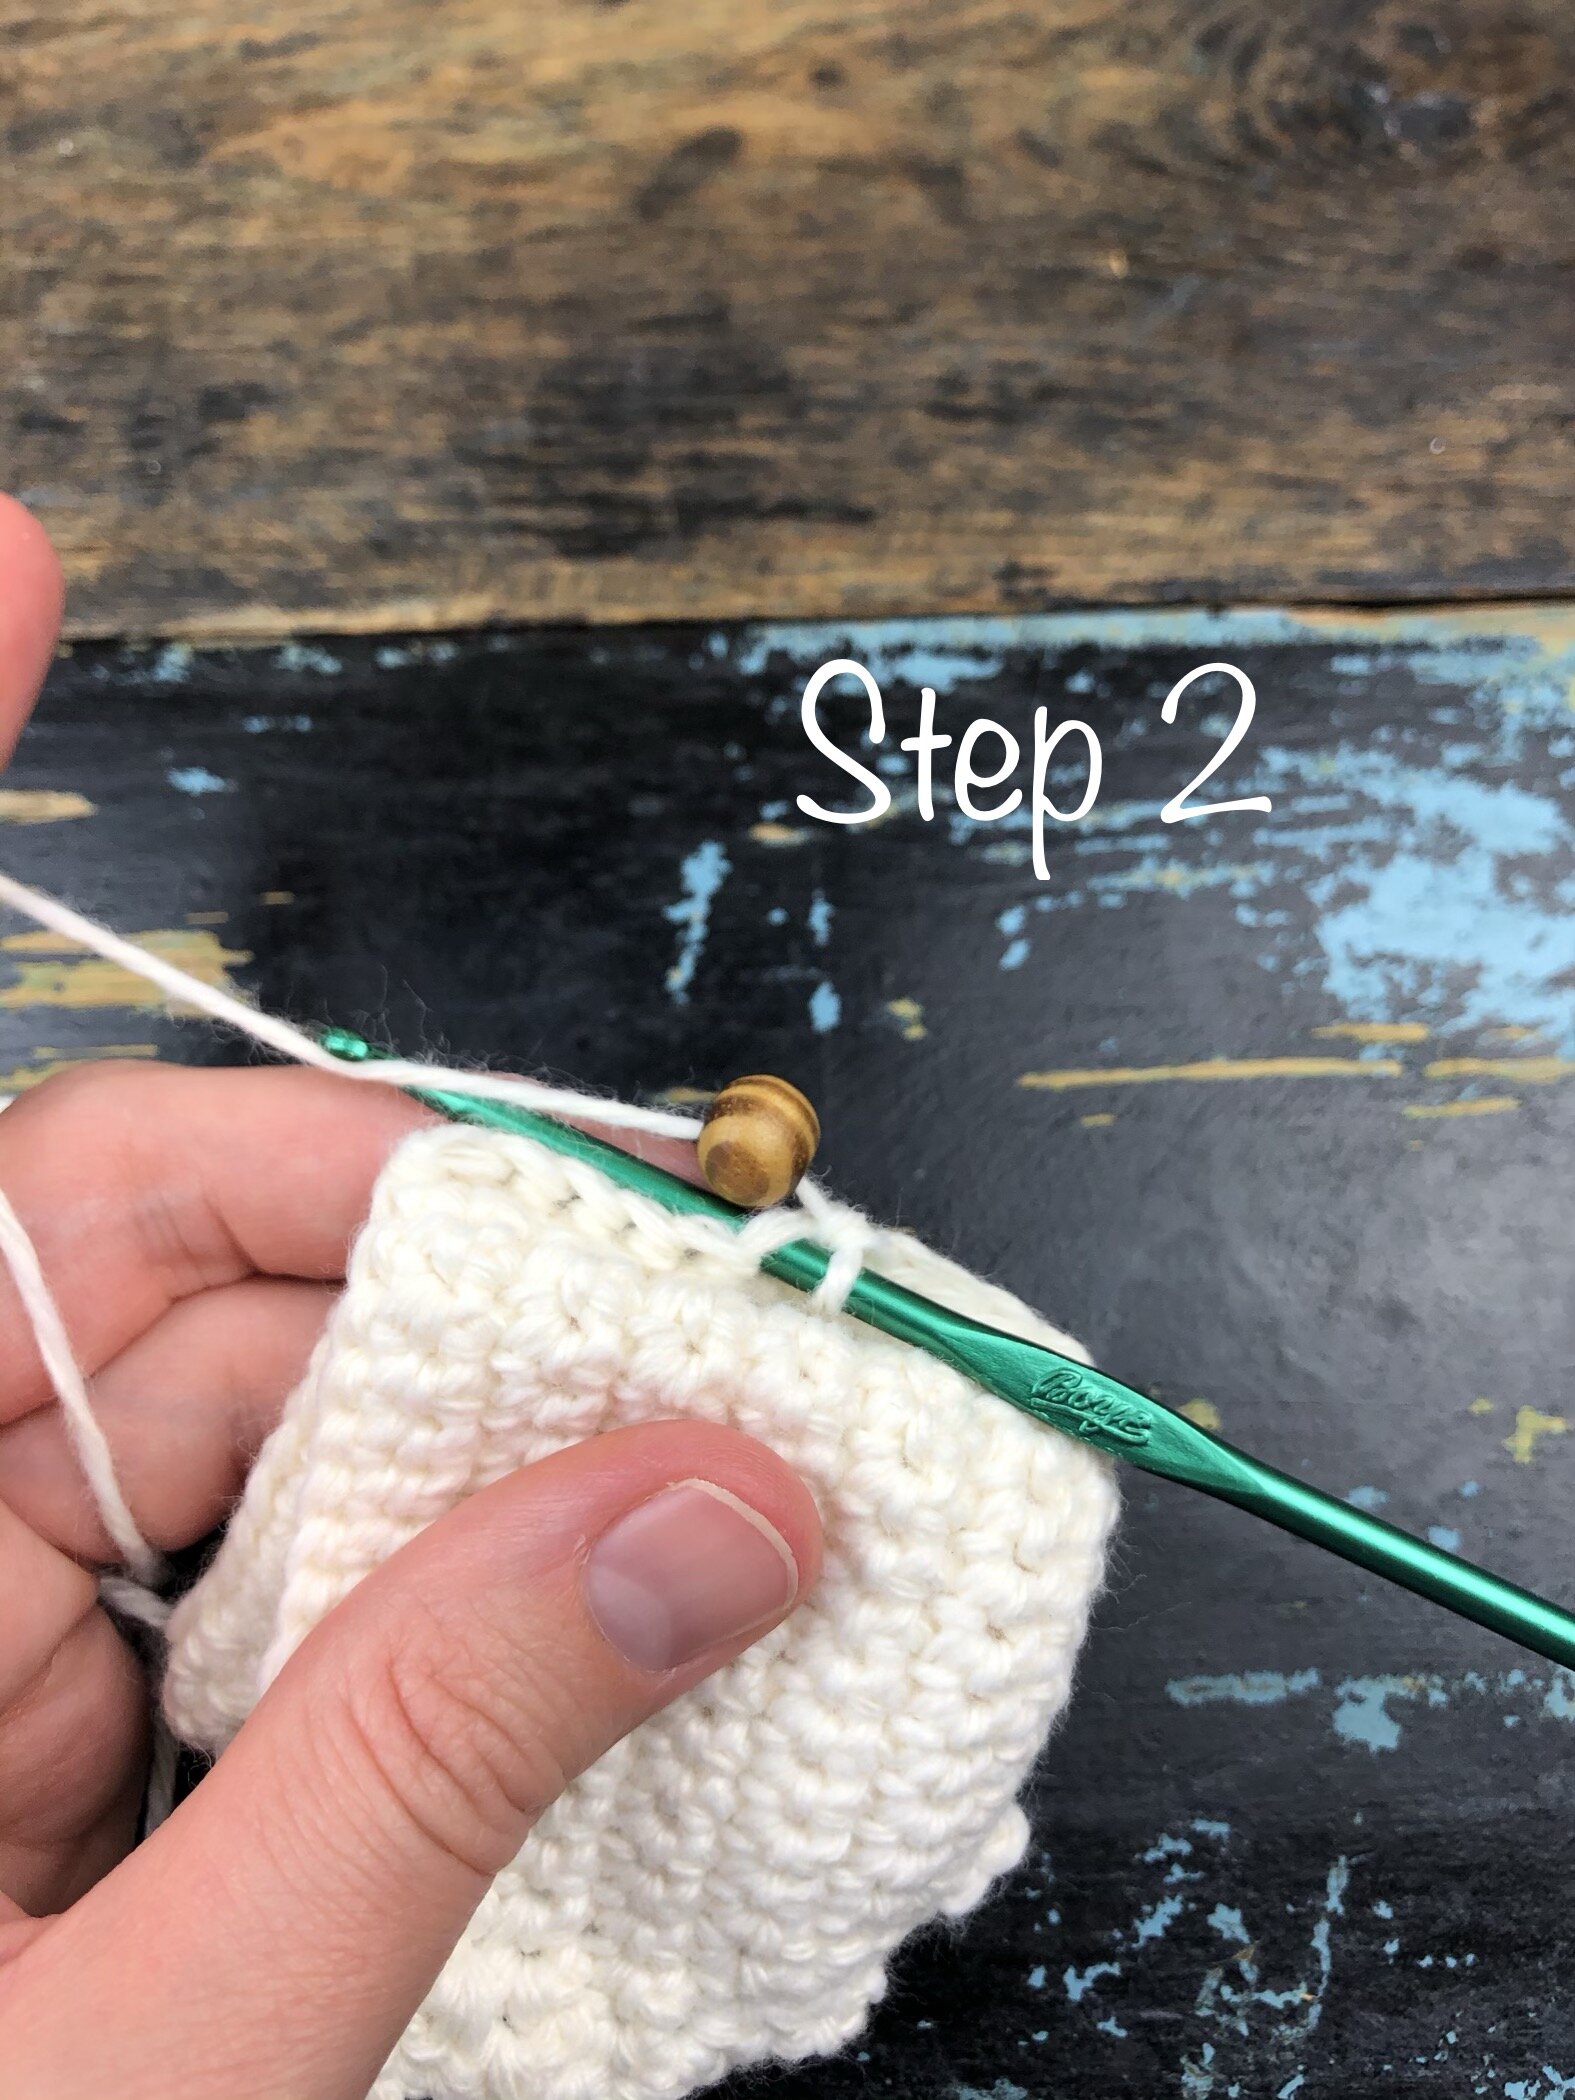
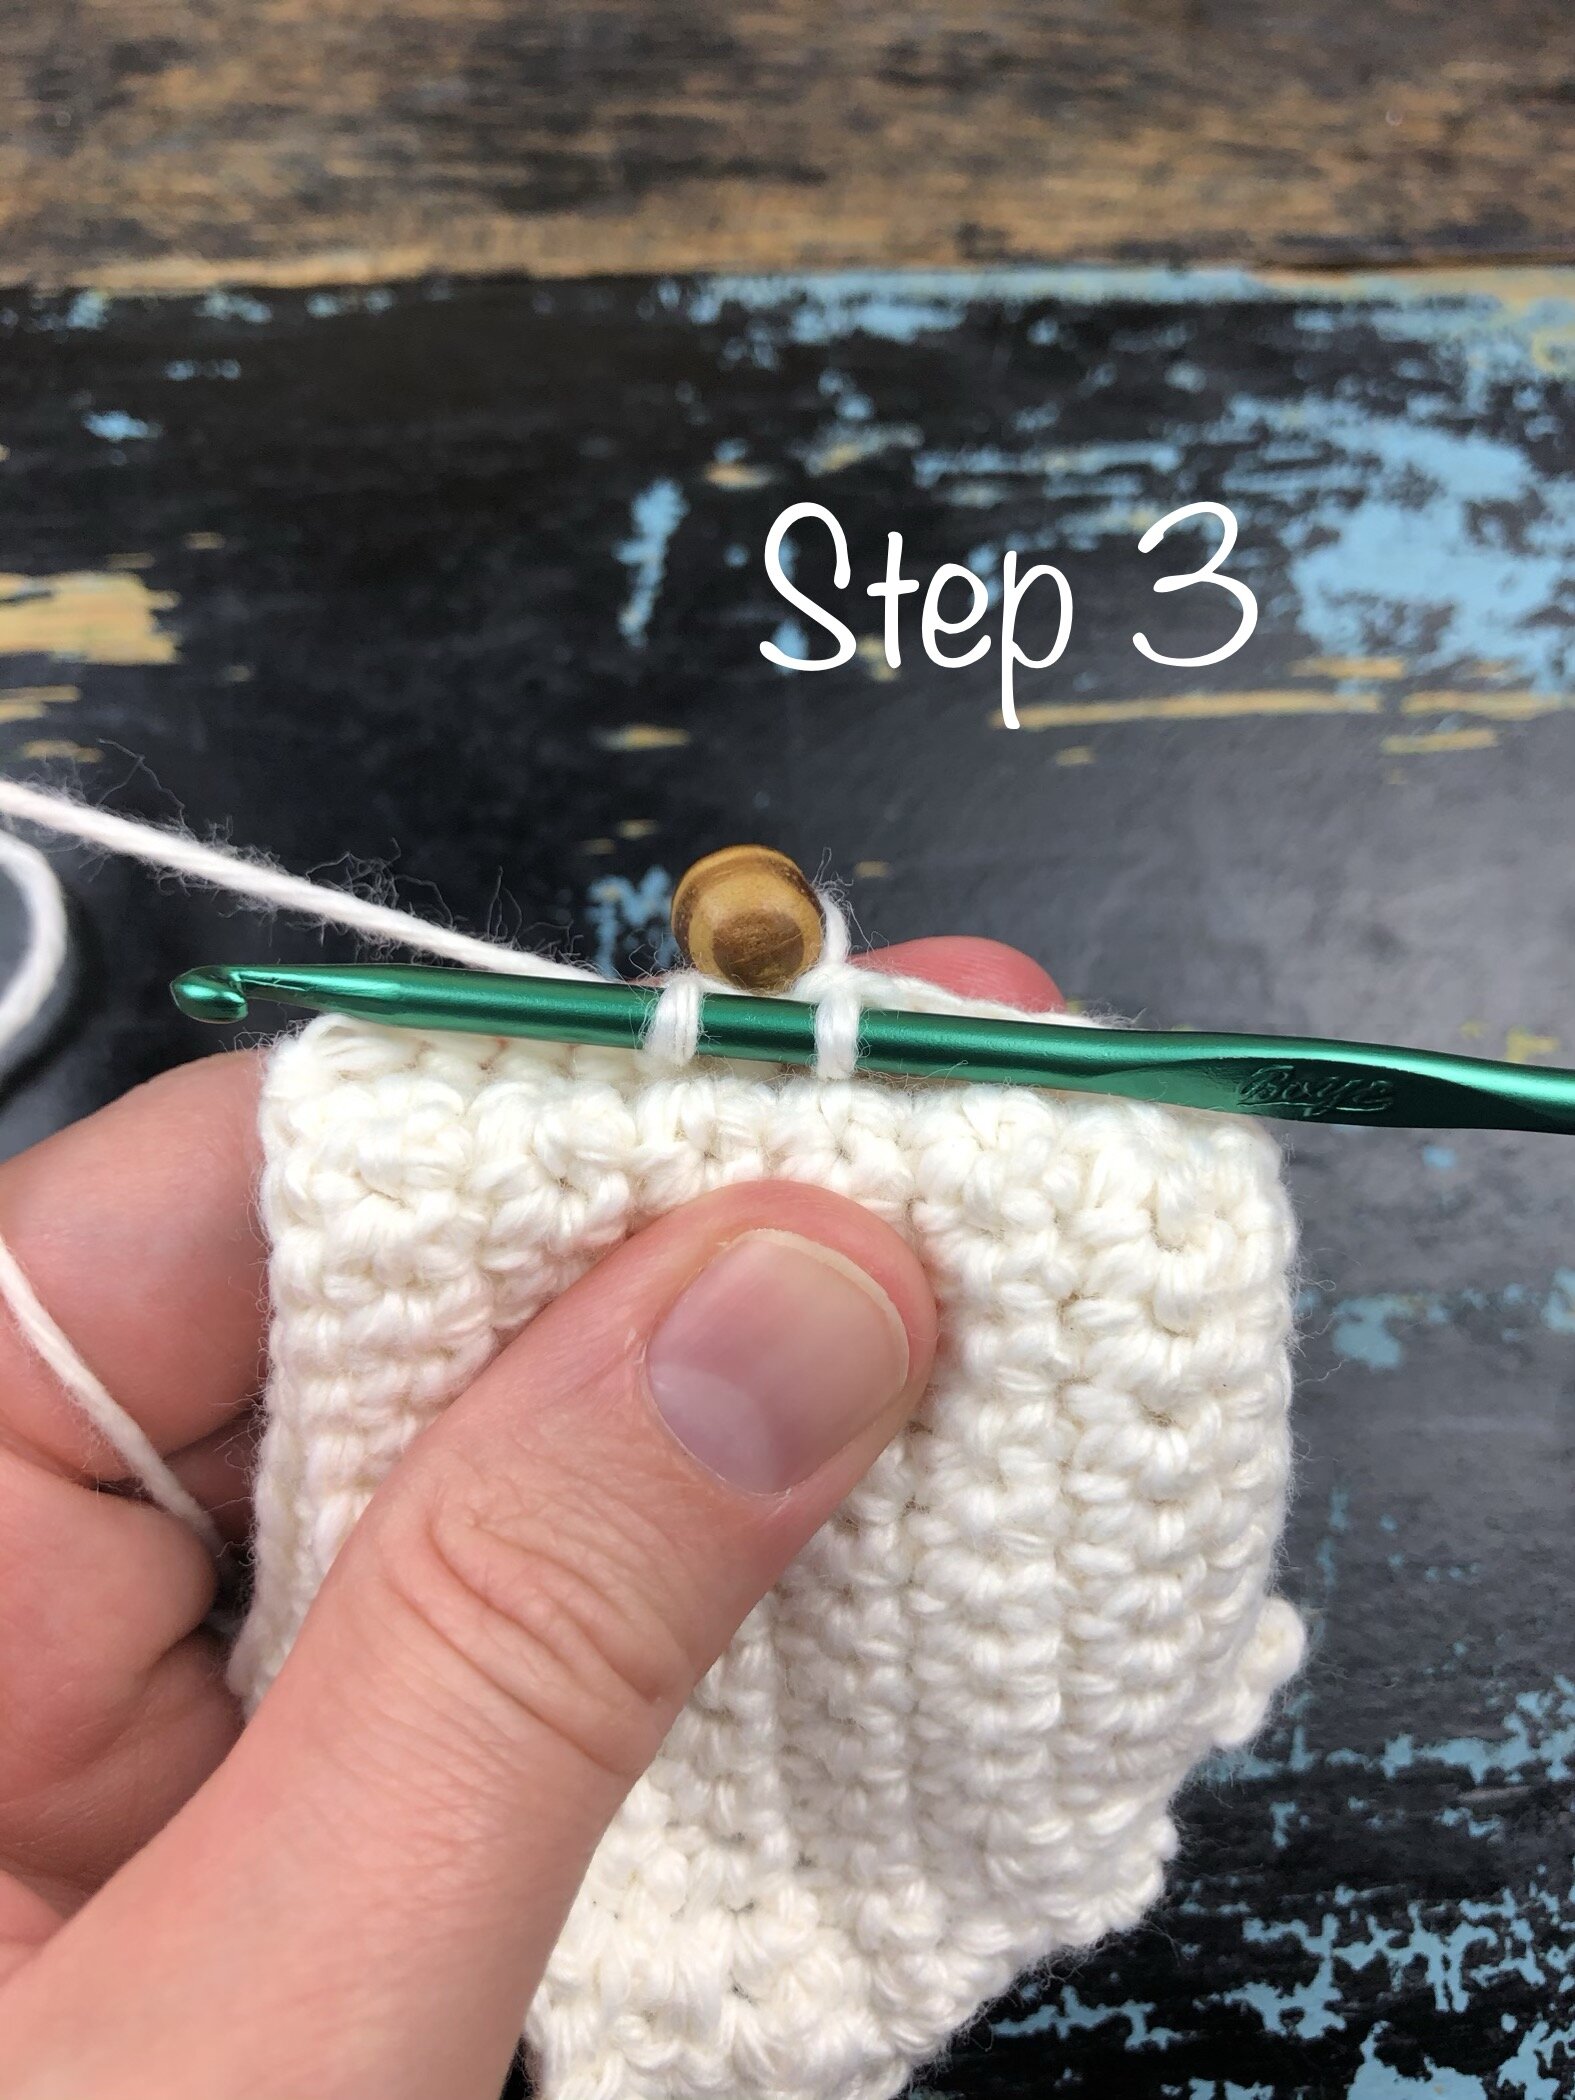
Place Bead: Bring bead until it is flush against your hook, ch 1 to secure.
Gauge:
Row 1: Ch 24, sc in 2nd ch from hook and in each st across. [23 sc]
Rows 2-22: Ch 1, turn, sc in each st across. [23 sc]
Finished swatch should measure 4" (10 cm).
Finished Measurements:
Open pocket should measure approximately 5.5" (14 cm) from tip of button hole to bottom of pocket in length. It is 2.25" (6 cm) in width.
Instructions for Original Version
Entire pocket is worked seamlessly with no sewing. Begin by threading all 25 (or 30 for finger loop version) beads onto your working yarn. NOTE: The last bead you place on your strand will be the bead that acts as a button on the pocket. If you are working the finger loop version, the next 5 beads will be the embellishment on your hand. The last 24 beads will be your bracelet portion.
Row 1: Ch 23, 2 sc in the 2nd ch from your hook, sc in each st to end. [23 sc]
Row 2: Ch 1, turn, sc in each st to last st, 2 sc in last st. [24 sc]
Row 3: Ch 1, turn, 2 sc in first st, sc in each st to end. [25 sc]
Row 4: Rep row 2. [26 sc]
Row 5: Rep row 3. [27 sc]
Row 6: Ch 1, turn, sc in each st to end. [27 sc]
Row 7: Ch 1, turn, sc2tog over first 2 sts, sc in each st to end. [26 sc]
Row 8: Ch 1, turn, sc in each st to last 2 sts, sc2tog over last 2 sts. [25 sc]
Row 9: Rep row 7. [24 sc]
Row 10: Rep row 8. [23 sc]
Row 11: Rep row 7. [22 sc]

Edging Round:
Turn so that you are working along the flat bottom edge. Ch 1, sc in each row to end. [11 sc]

Turn so that you are working up the side vertically. Ch 1, sc in same st as last st and in next 22 sts, picot, sc in same st as last st and in next 2 sts, picot, sc in next 3 sts, ch 3 (buttonhole made. If your beads are 10 mm, ch 4 instead of 3), sc in same st and in next 2 sts, picot, sc in next 3 sts, picot, sc in same st as last and in next 21 sts. Join with a sl st to first sc.


Begin Pocket
NOTE: You will notice I do not instruct you to make any beg chs in these following rows. That is because you will be making sl sts into the back panel sts as you go instead. This allows you to join your front rows to your panel as you go rather than making a separate piece to sew on later. Every time you end a row of the front pocket, you are going to sl st into the next st of the back panel to join that row. If you are going to continue on and make another row, you will need to sl st into the next st of the back panel instead of ch 1 to turn. The sl st you make prior to starting a new row will take the place of your beg ch 1. Be sure to slide a credit card in your pocket every few rows to make sure it will be big enough.
Since this part can be a bit challenging, you may need to watch my YouTube video to visualize this portion of the pattern:

Row 1: Ch 1, sc in the BLO of bottom 11 sts. Join with a sl st to the BLO of 1st side sc. [11 sc]
Row 2: Sl st into next side sc in the BLO, turn, sc in each of 11 sts below. Join with a sl st in the FLO of 1st side sc. Sl st into next side sc in FLO. [11 sc]
Row 3: Sl st into next side sc in the FLO, turn, sc in each of 11 sts below. Sl st into next side sc in the BLO. [11 sc]
Row 4: Sl st into next side sc in the BLO, turn, sc in each of 11 sts below. Join with a sl st in the FLO next side sc. [11 sc]

Rows 5-13: Alternate rep rows 3-4, ending on a row 3 rep.
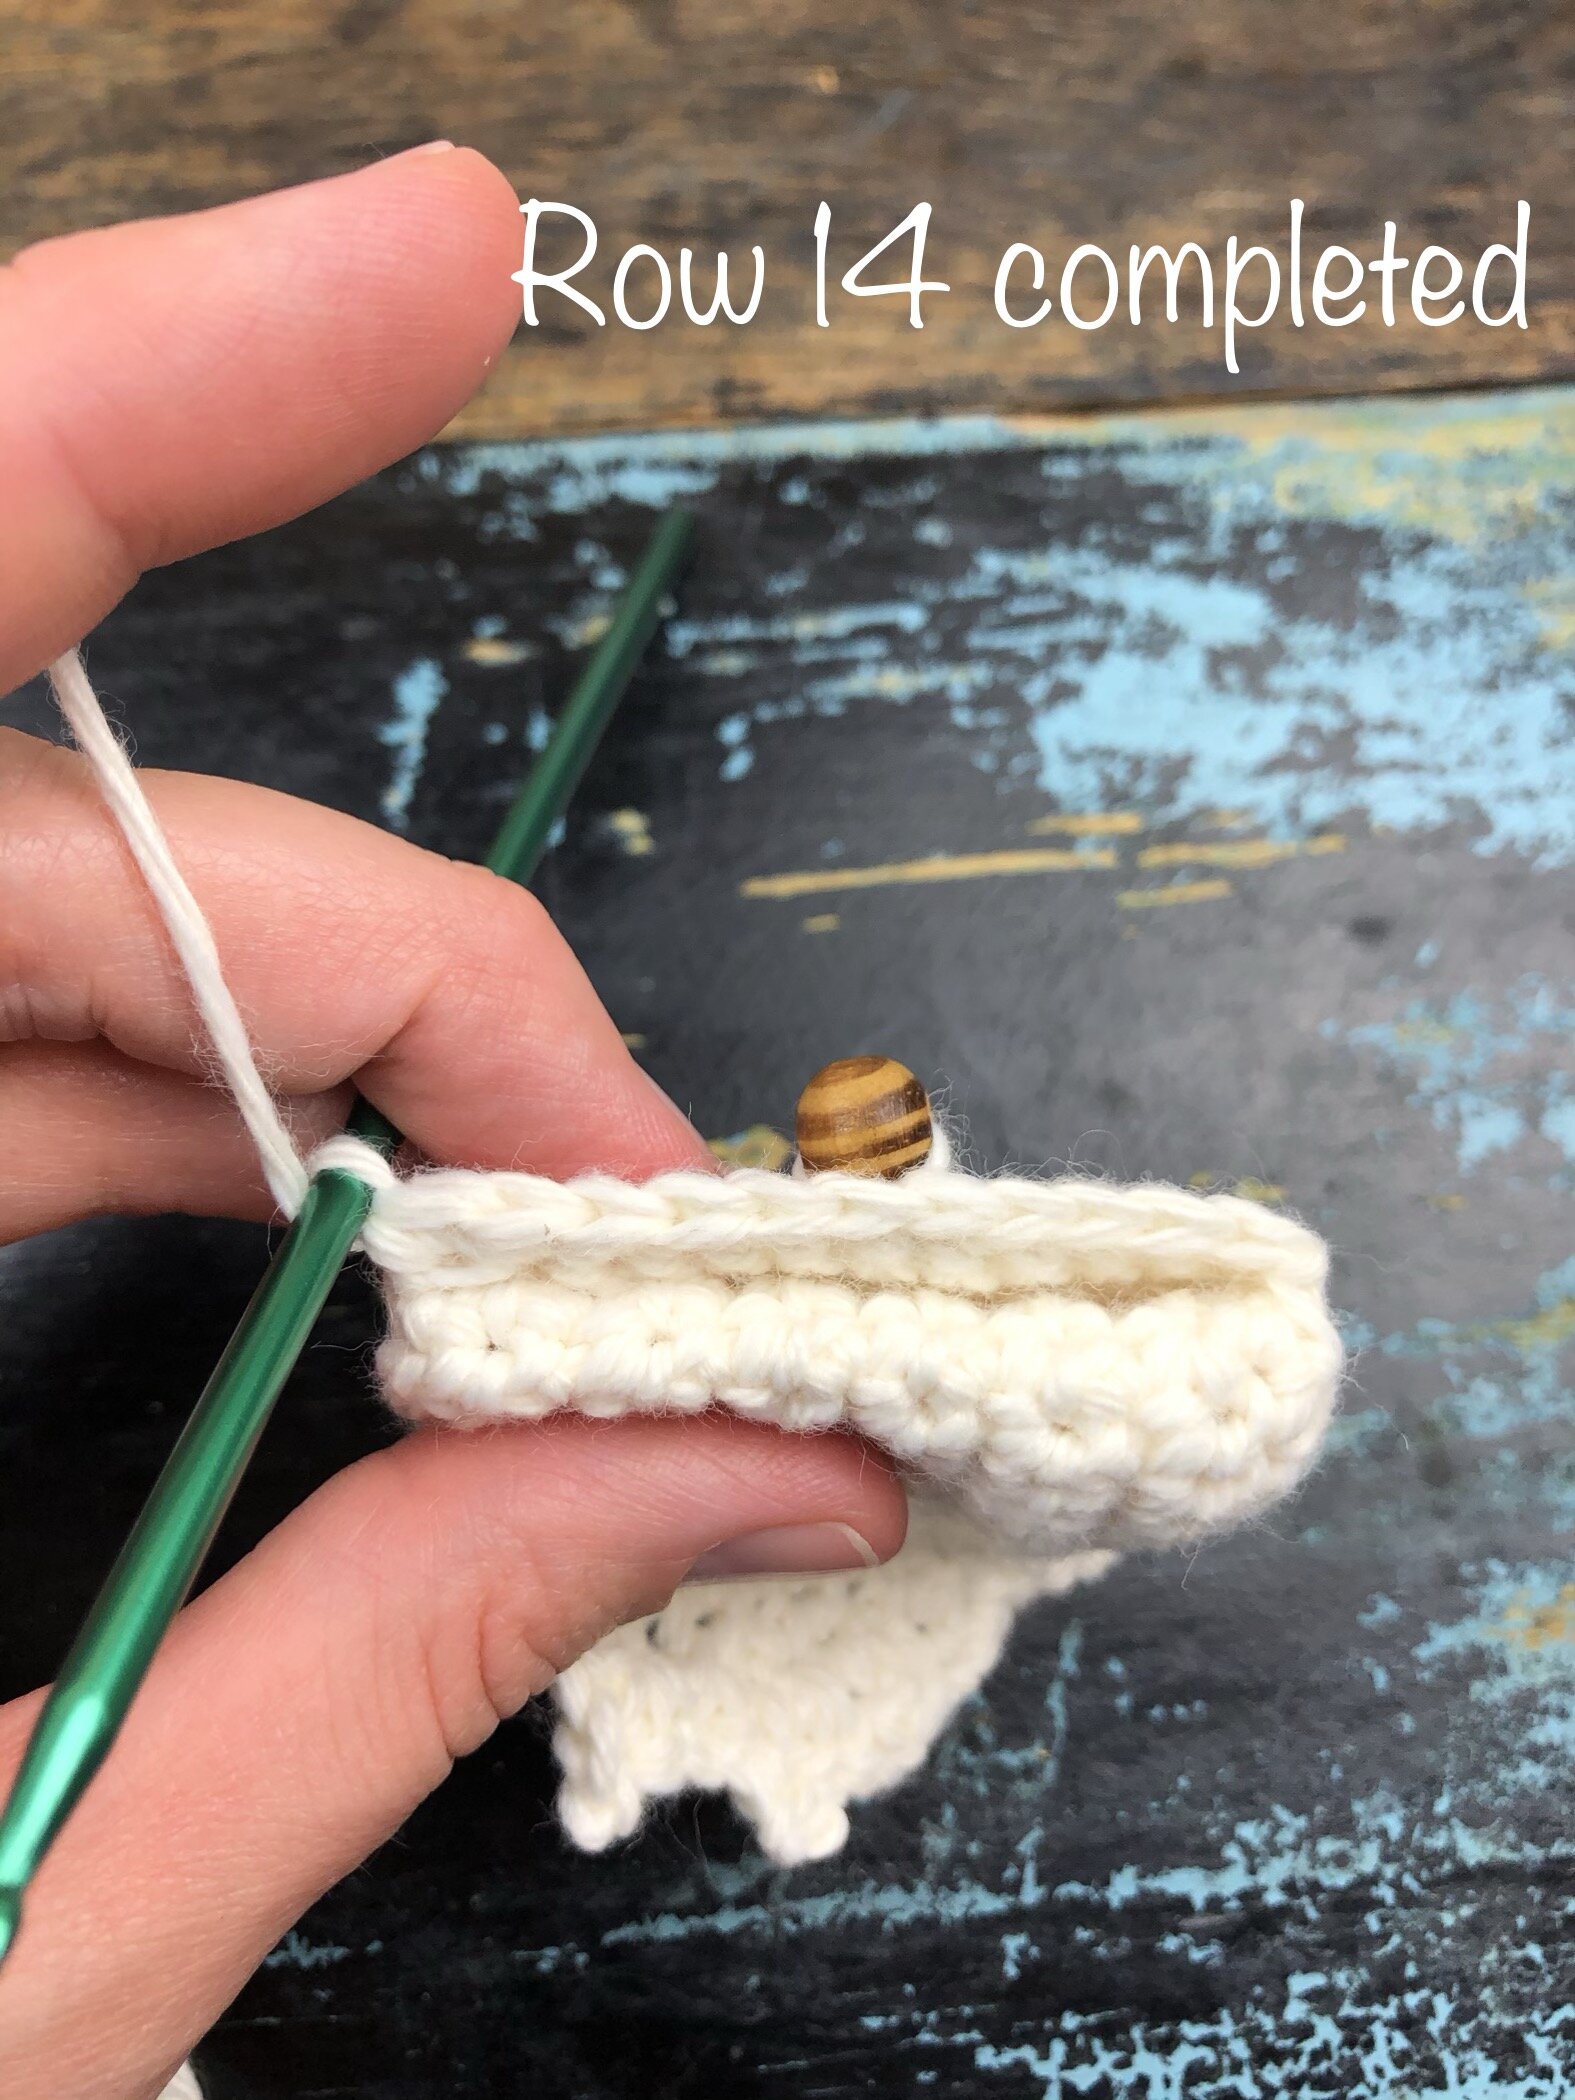
Row 14: Sl st into next side sc in the BLO, turn, sc in first 5 sts, PB, sc in last 6 sts. Join with a sl st in the FLO of next side sc. [11 sc]
Rows 15-19: Alternate rep rows 3-4, ending on a row 3 repeat. [11 sc]

Your petite pocket will need to be emptied prior to putting it on/taking it off. It is meant to fit very snugly on the wrist, so if you have arthritis in your hands, you may want to add chs to your bracelet rows.
Begin Bracelet (for finger loop version, see below)
Turn your work so that you are facing the backside of the pocket. The following will be worked from side to side in the BLO/FLO that remain from our edging round.
Row 1: Sl st into first 2 loops down side. Ch 24, sl st into same loop on opposite side. Sl st into next 2 loops. [24 ch sts] NOTE: The size of your ch may need to be customized to fit your arm. My ch measures 12 cm exactly, but I have very large hands. I recommend completing rows 1-3 of this portion, then trying it on to see if it fits you. If not, you may want to alter accordingly. Note that your alterations will also affect how many ch sts you place between each bead.


Row 2: Turn, ch 3, {PB, ch 3} rep brackets a total of 5 times, sl st into same remaining loop on opposite side. Sl st into next 2 remaining loops. [27 ch sts, 6 beads]
Row 3: Turn, ch 24, sl st into same remaining loop on opposite side. Sl st into next 2 remaining loops. [24 ch sts]
Rows 4-9: Alternate repeating rows 2-3
FO and weave in tails. You may want to further secure the bead that acts as a button.


Instructions for Finger Loop Version
Turn your work so that you are facing the backside of the pocket. The following will be worked from side to side in the BLO/FLO that remain from our edging round.
Row 1: Sl st into first 2 loops down side, ch 34. (St count breakdown: 12 sts for half of bracelet row, +10 sts for beaded embellishment, +12 sts for finger loop. If you have smaller hands, you may need to decrease the number of ch sts, but try to keep 10 reserved for beaded embellishment.) Sl st in 12th st from hook (finger loop made), {PB, ch 1, sk 1 st, sc in next st} rep brackets a total of 5 times, sc in next st, ch 12, sl st into corresponding loop on opposite side of pocket, sl st into next 2 loops.

Row 2: Turn, ch 3, {PB, ch 3} rep brackets a total of 5 times, sl st into corresponding loop on opposite side of pocket, sl st into next 2 loops. [27 ch sts, 6 beads]
Row 3: Turn, ch 24, sl st into same remaining loop on opposite side, sl st into next 2 loops. [24 ch sts]
Rows 4-9: Alternate repeating rows 2-3. FO and weave in tails.

Your Petite Pocket is complete! I would love to see your finished work! If you want to tag me on IG, I’m @dayscrochetnc. You could also use the tags #petitepocket, #wristwallet, #crochetwristwallet––you get the idea! I can’t wait to see your projects! If you would like to see other versions that I will be making after this publication, be sure to check me out on IG!
Please note that you do not have my permission to sell, share, copy, translate or duplicate this pattern or my photos in any way. Please do not use this pattern for a video, blog, or class tutorial. Thank you so much for following these simple rules! Please message me on Facebook or send me an email at dayscrochetnc@gmail.com with any questions.
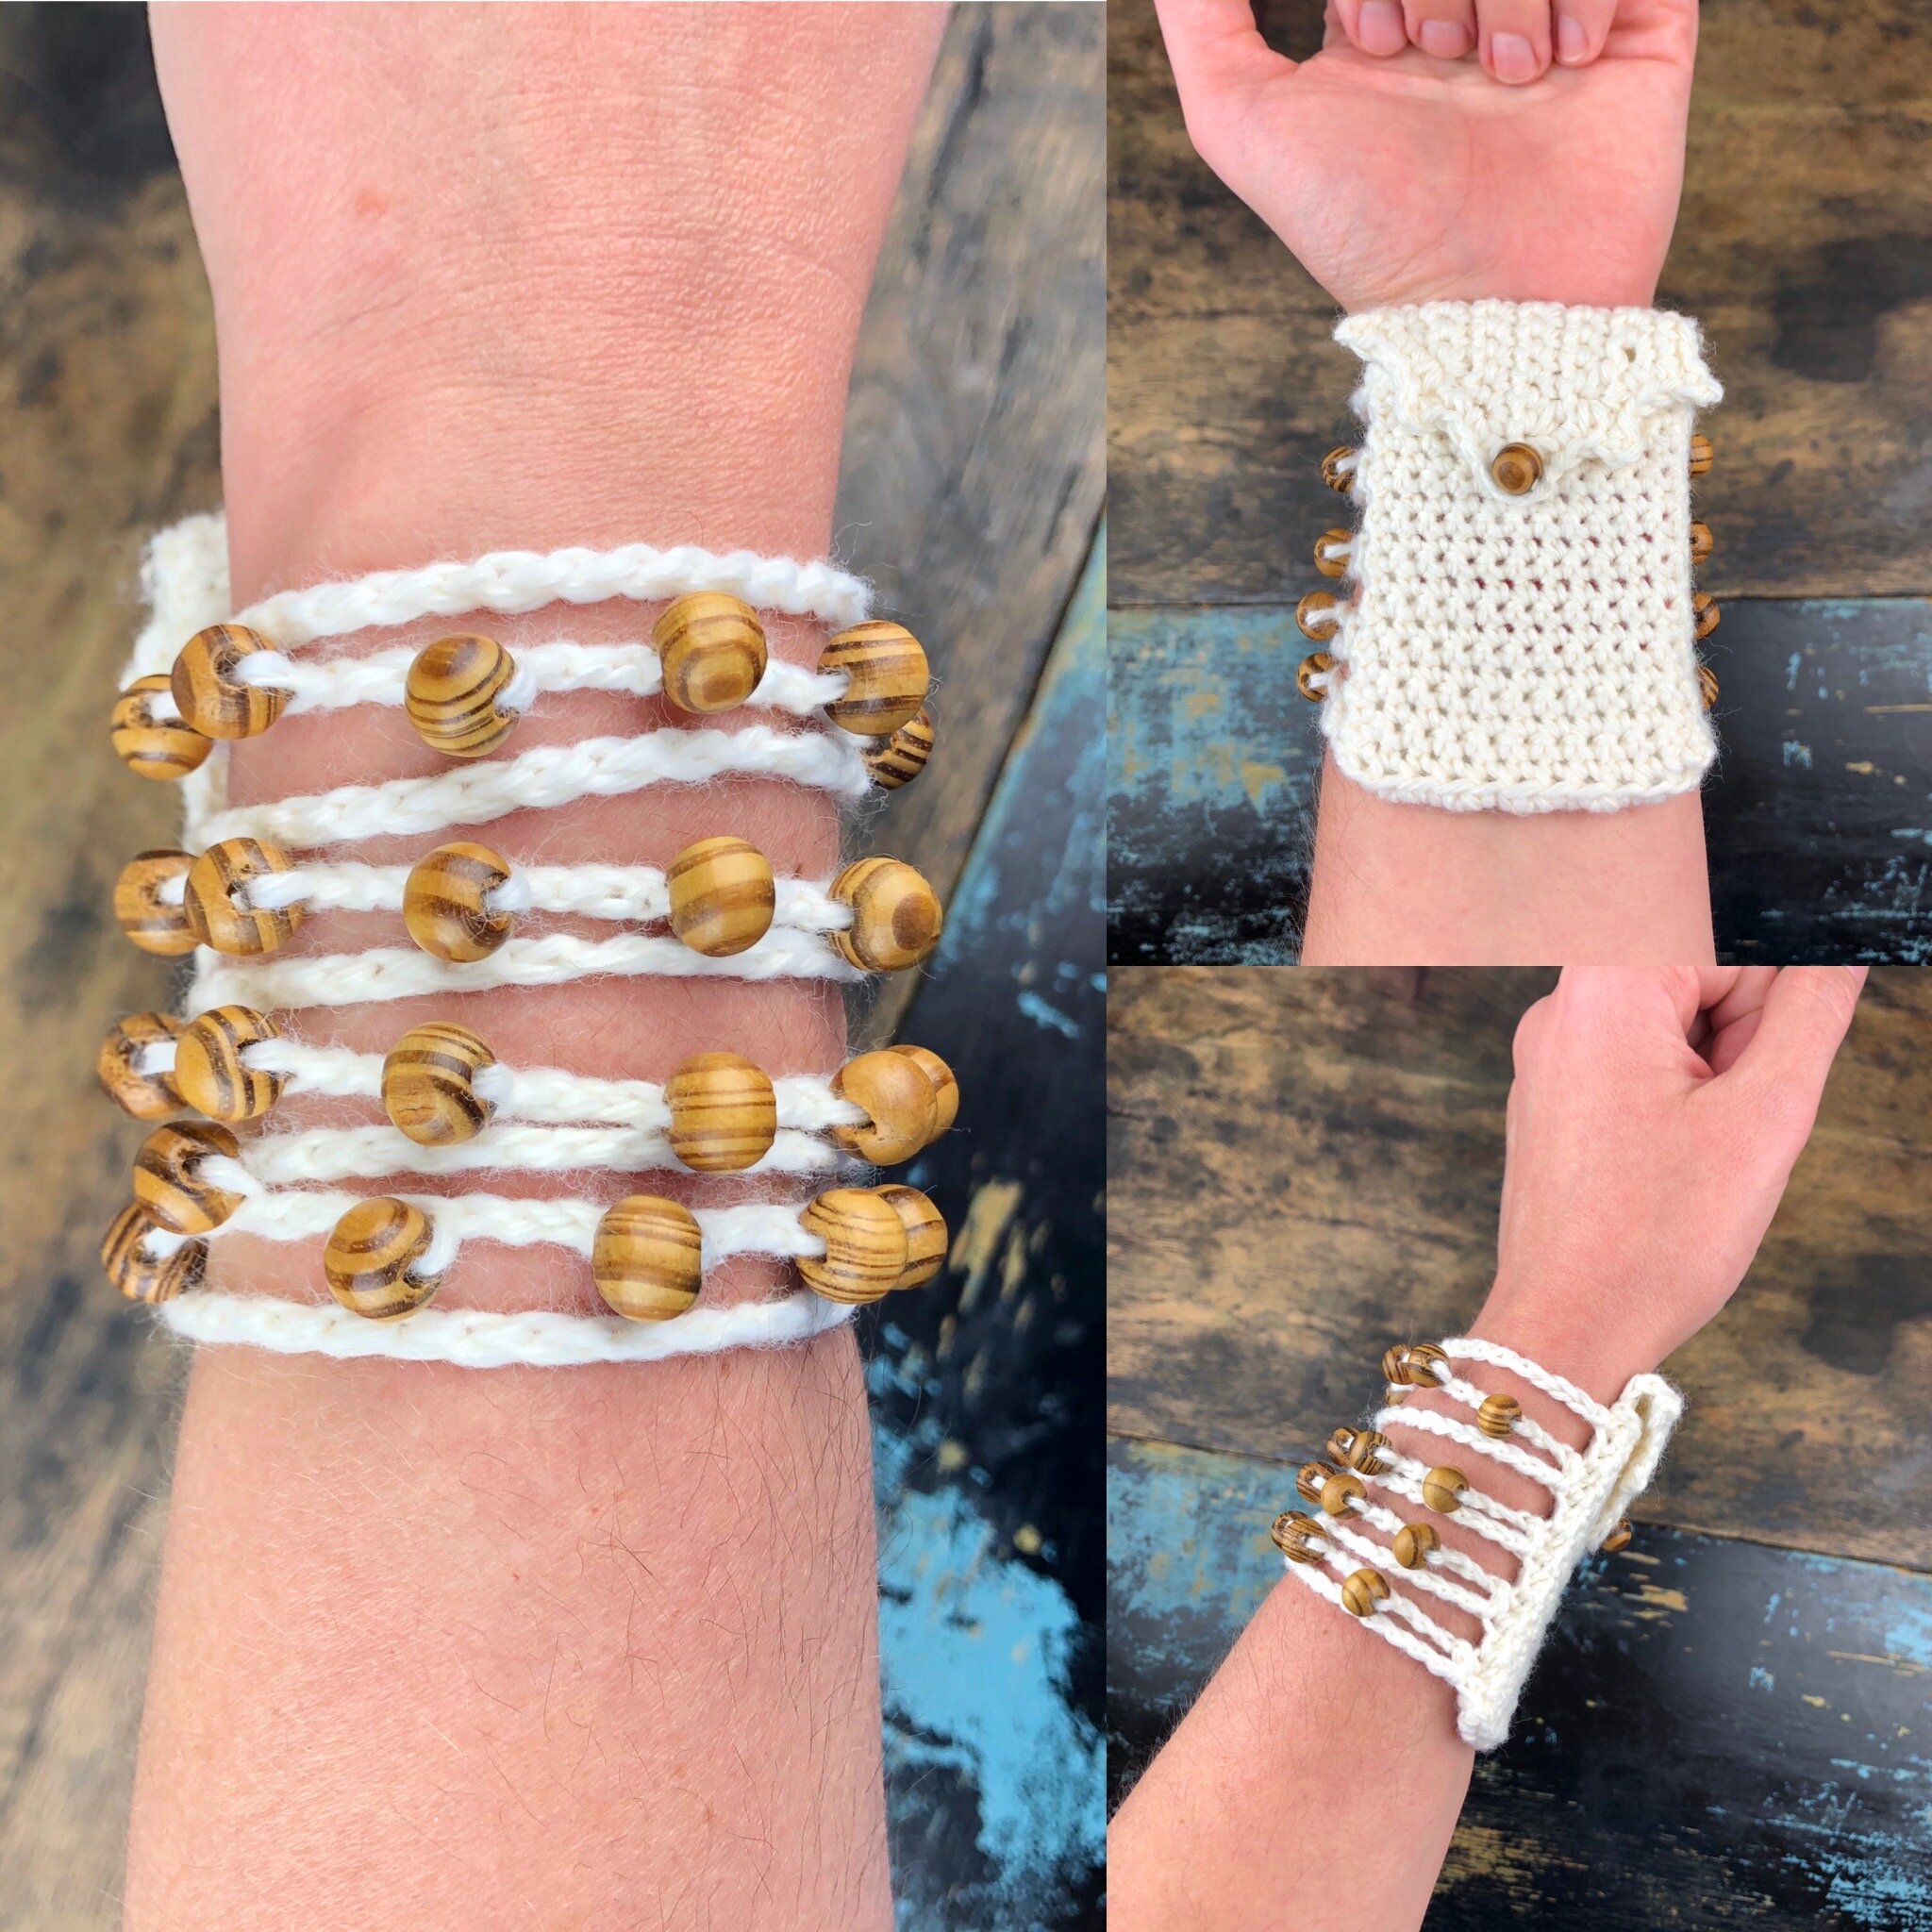
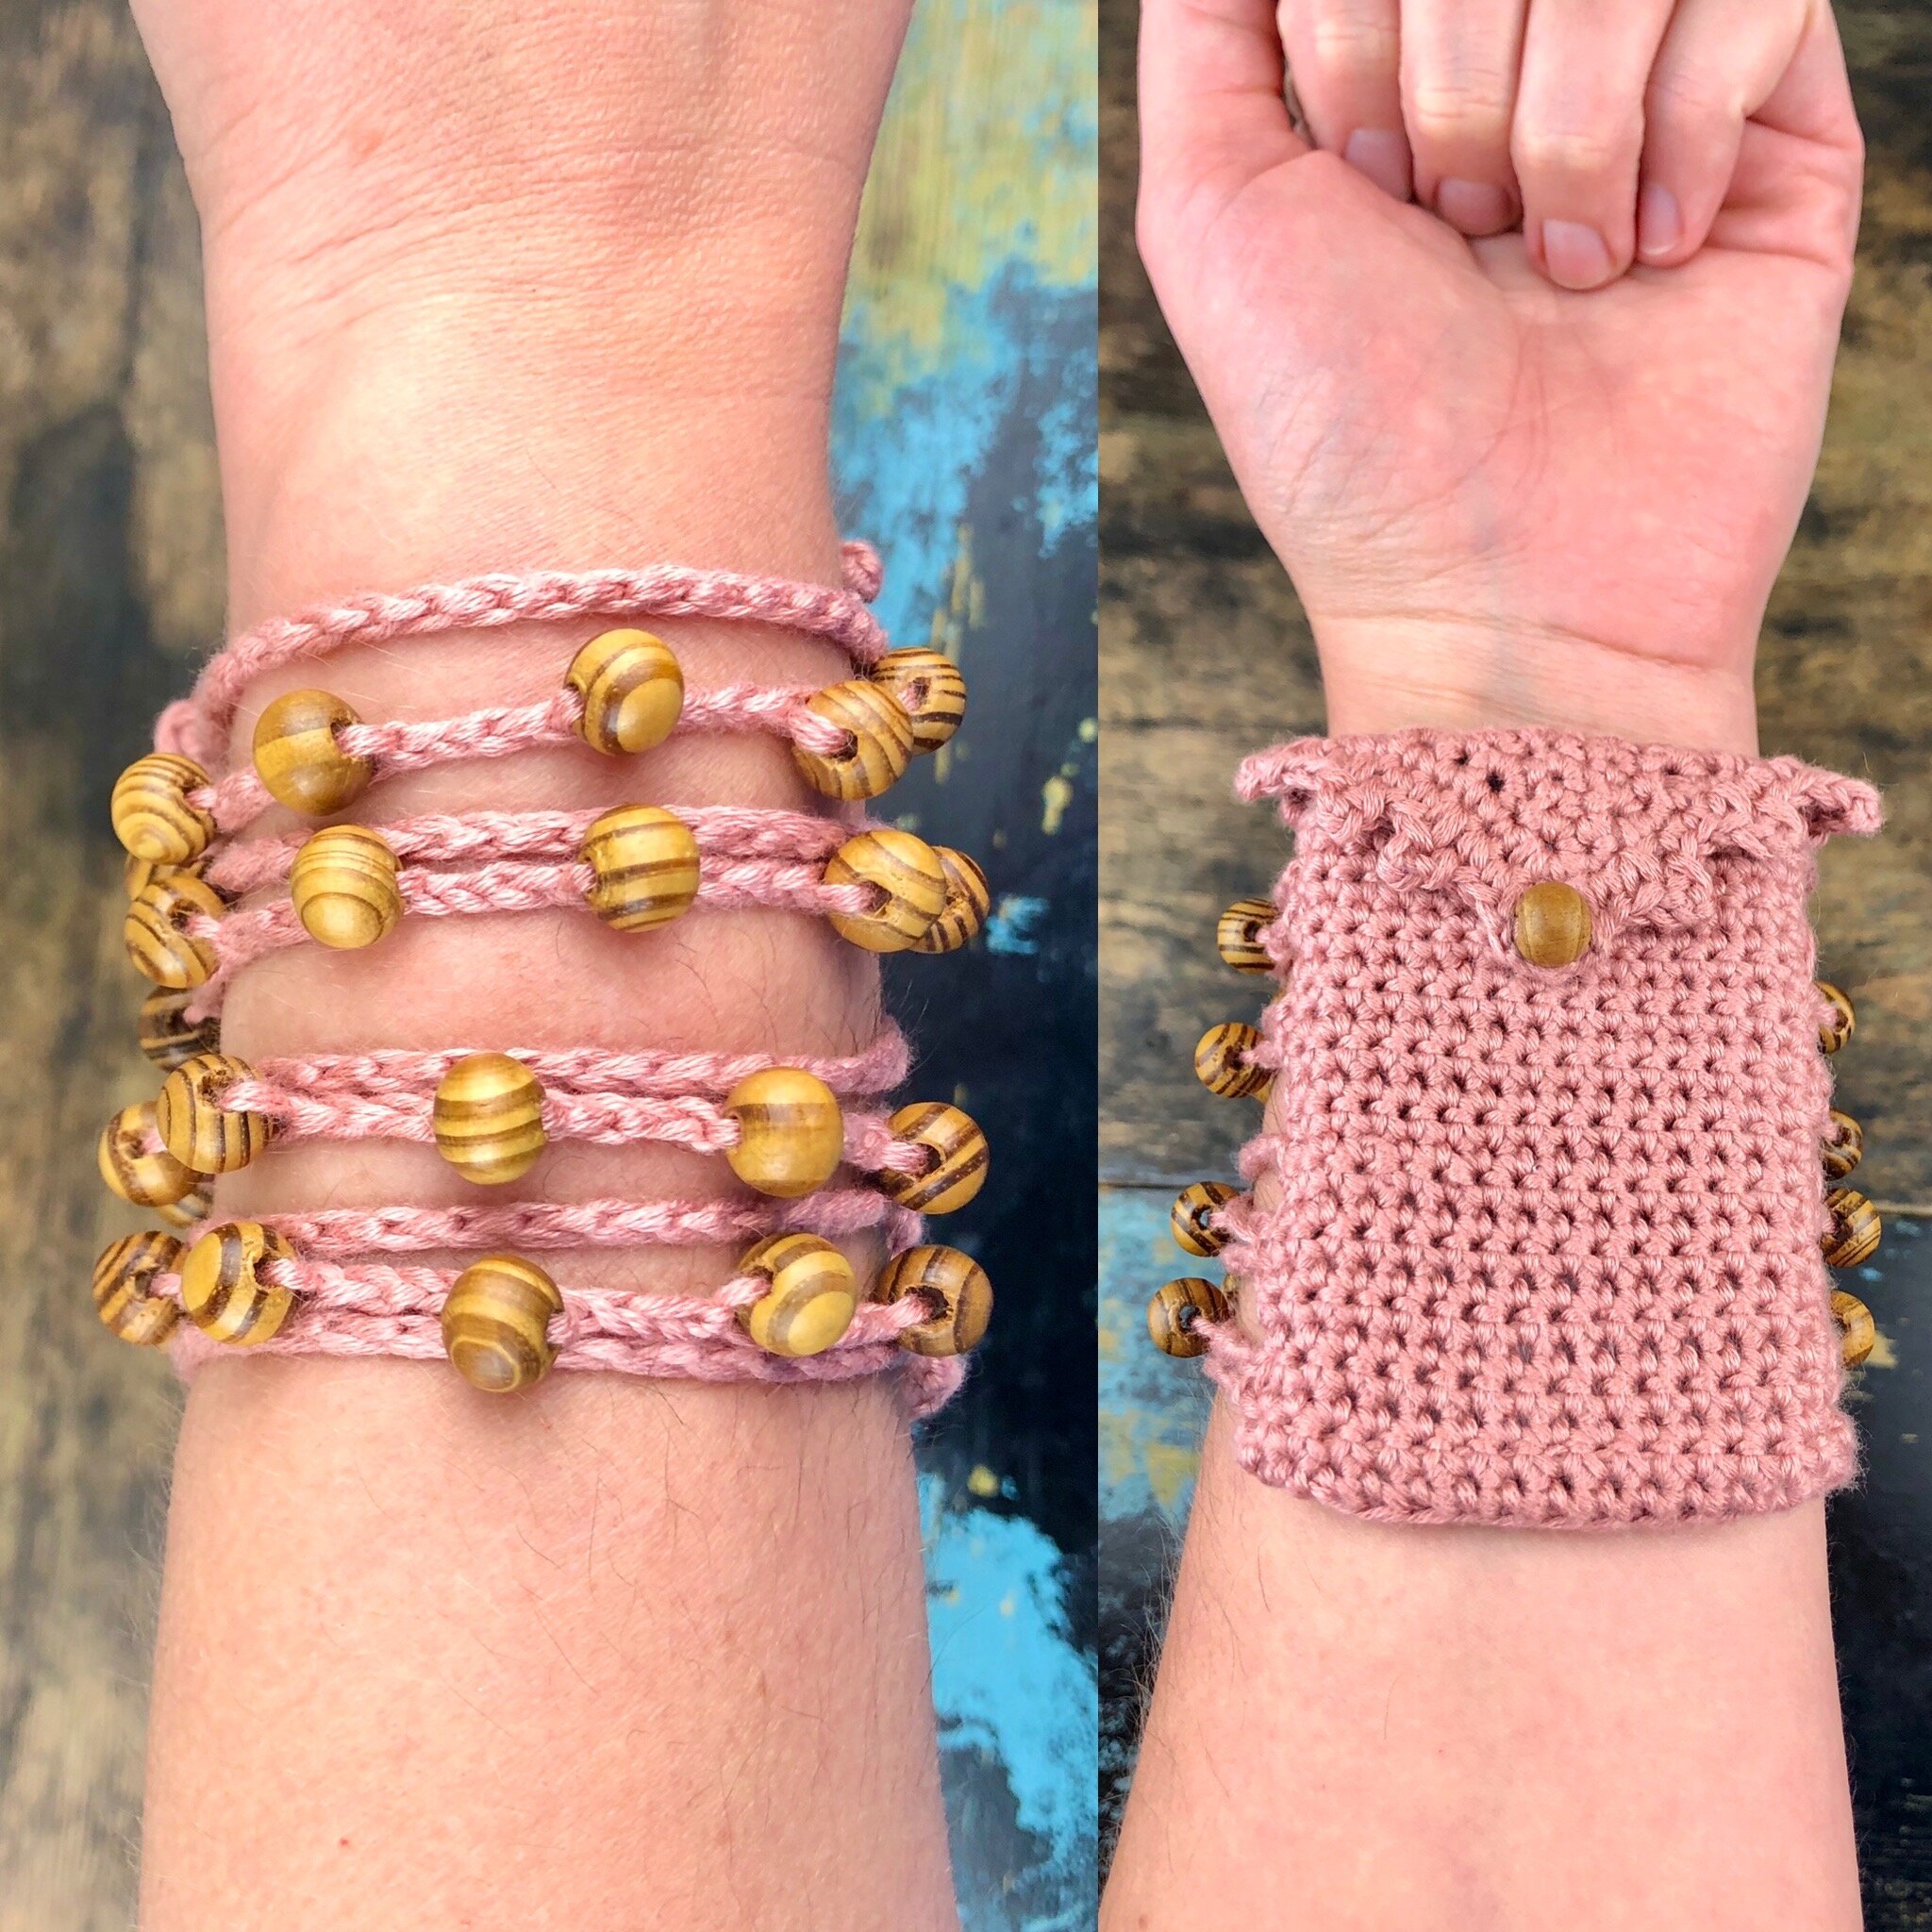

Pictured from left to right: Lion Brand Comfy Cotton Blend in Whipped Cream, Lion Brand Coboo in Mauve, and Red Heart Crochet thread size 3 in white. (Note that the size 3 thread worked up exactly the same, only it was less substantial than the others, or more “holey”.)
Come join my Facebook group, Crochet for Days! We have a lot of fun and I often offer discounts and coupon codes to my members that I don’t offer anywhere else! Request to join and answer the questions by following this link.
Do you like this project? Let me know in the comments!
Happy Hooking!
~Dana